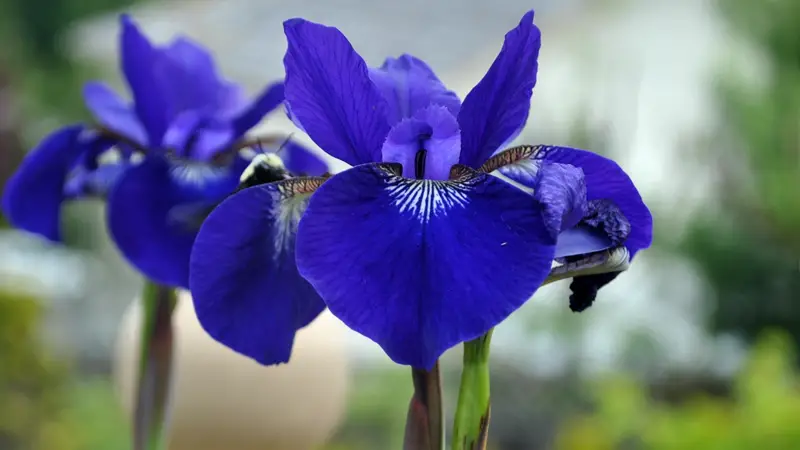
Iris plants are timeless symbols of beauty and elegance, known for their tall, graceful stems and intricate flowers that light up any garden. Their name, inspired by the Greek goddess of the rainbow, perfectly reflects the variety of stunning colors they bring to landscapes. From soft pastels to rich purples and vibrant blues, irises are among the most rewarding flowers to grow. However, to keep them blooming beautifully year after year, proper care is essential. Many gardeners plant irises expecting endless color, only to find their flowers fading or their plants weakening over time due to incorrect maintenance.
Caring for irises goes beyond simple watering or sunlight; it involves understanding their natural rhythm, soil preferences, and post-bloom habits. When given the right balance of light, nutrients, and attention, irises can flourish for decades, rewarding you with healthier leaves and bigger, longer-lasting blooms. This detailed guide will walk you through every step of iris care—from soil preparation to seasonal maintenance—so you can cultivate vibrant plants that return stronger each year. Whether you grow bearded, Siberian, or Japanese irises, these practical tips will help you create a garden bursting with color and vitality.
Understanding the Needs of Iris Plants
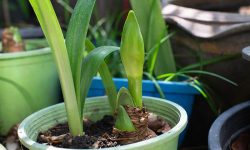
To grow irises successfully, it’s essential to understand their unique needs and how they interact with their environment. Irises are hardy, sun-loving perennials that thrive in open spaces with plenty of light and air circulation. They grow from rhizomes—thickened underground stems that store nutrients and energy for future growth. These rhizomes should always be planted close to the soil surface, with their tops slightly exposed. This allows sunlight and airflow to reach them, keeping them warm and dry. If buried too deeply, they remain damp, which leads to rot and weak growth. Proper planting depth can make the difference between a bed full of healthy blooms and one that fails to flower.
Sunlight is the single most important factor for iris health and flowering. Most varieties need at least six to eight hours of full sun each day to bloom properly. Insufficient sunlight causes the plants to focus on leaf growth instead of flower production, resulting in fewer and smaller blossoms. In very hot regions, a bit of afternoon shade can protect irises from heat stress, but too much shade will cause elongated leaves and dull foliage. Airflow is equally vital—it keeps the leaves dry after rain or watering and prevents fungal diseases from spreading. Planting irises about twelve inches apart provides enough space for both air movement and healthy root development.
Water and nutrients complete the essentials for thriving irises. These plants prefer evenly moist soil but cannot tolerate standing water. Deep, infrequent watering strengthens the roots, while well-drained soil prevents rot. A mix enriched with compost or organic matter balances moisture and improves fertility. Feed your irises in early spring with a low-nitrogen fertilizer to support stem and bud growth, then again after blooming to restore energy. Meeting these basic needs ensures your irises grow strong, bloom abundantly, and return even more vibrant each season.
Choosing the Right Location for Irises
Selecting the ideal location is one of the most important factors in growing healthy, long-lasting iris plants. These sun-loving perennials need abundant light to produce their signature blooms. A location that receives at least six hours of direct sunlight each day ensures strong stems and vivid flowers. Morning sunlight is especially valuable, as it dries dew quickly and reduces the risk of fungal diseases. In cool climates, irises thrive in full sun all day, while in warmer regions, a bit of afternoon shade helps prevent leaf scorch and fading petals. Finding a balance between sunlight and shade promotes consistent flowering and healthy foliage year after year.
Equally important is the soil in which irises grow. They prefer loose, well-drained soil that is slightly acidic to neutral in pH. Heavy clay or waterlogged conditions can suffocate rhizomes and cause rot. To improve drainage, mix compost, coarse sand, or organic matter into the planting bed before setting the rhizomes. Raised beds or sloped garden areas are excellent choices for preventing water accumulation, especially after rain. In dense or compacted soils, loosening the ground to a depth of twelve inches allows roots to spread and absorb nutrients efficiently. Healthy, aerated soil supports vigorous root growth and results in larger, more colorful blooms.
Good air circulation completes the requirements for an ideal planting spot. Irises should be placed in open areas where wind and sunlight can freely reach the foliage. This reduces humidity and keeps fungal diseases, such as leaf spot and rust, at bay. Avoid tight spaces near walls or dense shrubs that trap moisture and shade the plants. Spacing irises about a foot apart provides airflow and room for growth. With the right combination of sunlight, drainage, and space, your irises will flourish, rewarding you with radiant blooms season after season.
Planting and Transplanting Irises Correctly
Planting depth plays a critical role in the success of your irises. Rhizomes should sit just at or slightly above the soil surface to receive warmth and airflow. When buried too deep, they retain moisture, leading to rot—especially in wet climates. Space each rhizome twelve to eighteen inches apart to provide good circulation and prevent fungal disease. After planting, water thoroughly to settle the soil but avoid saturating it. Continue watering sparingly over the next few weeks until the roots anchor firmly. For older clumps being transplanted, discard any soft or diseased rhizomes and replant only the firm, healthy ones to prevent infection and promote vigorous regrowth.
Transplanting offers the perfect opportunity to revitalize aging iris beds. Overcrowded clumps often stop blooming due to competition for light and nutrients. Dividing and replanting them in fresh soil restores vitality and encourages abundant flowering in the next season. Avoid fertilizing newly transplanted rhizomes until they show new growth, then feed lightly with a balanced fertilizer in early spring. By mastering these simple but essential techniques, you’ll ensure your irises stay healthy, resilient, and full of radiant blooms for years to come.
Watering and Fertilizing Iris Plants
Watering Irises the Right Way
Proper moisture management is one of the most crucial aspects of iris care, yet it’s often misunderstood. Irises prefer consistent but moderate moisture. Their rhizomes are sensitive to excess water, and soggy soil can quickly lead to rot. The goal is to keep the soil slightly moist without allowing it to become waterlogged. Water deeply once or twice a week during active growth, ensuring that moisture reaches the root zone. Shallow watering promotes weak roots and shorter bloom duration. Morning watering is best, as it allows foliage to dry during the day, preventing fungal issues.
During the blooming season and hot, dry periods, increase watering frequency slightly, but always let the top inch of soil dry out before the next session. In cooler weather, reduce watering as the plants begin to go dormant. Irises grown in sandy soil need more frequent watering than those in heavier soil. Mulching lightly around the plants helps retain moisture and regulate temperature but avoid covering the rhizomes. Consistent watering encourages strong roots, healthy foliage, and long-lasting flowers that remain vibrant throughout the season.
Fertilizing for Bigger and Healthier Blooms
Proper fertilization gives irises the nutrients they need to produce abundant, vivid flowers. The best fertilizer for irises is one low in nitrogen but high in phosphorus and potassium, which support root and bloom development. Excess nitrogen causes lush leaf growth but reduces flowering. Apply fertilizer twice a year—first in early spring when new shoots emerge, and again about a month after flowering to replenish energy in the rhizomes. Always apply fertilizer around the base of the plant, keeping it away from direct contact with the rhizomes to avoid burning.
Organic compost or slow-release granular fertilizer works well for long-term nourishment. In poor or sandy soils, a light feeding every two months can sustain steady growth. Water immediately after fertilizing to help nutrients penetrate the soil. Avoid fertilizing late in the growing season, as this can encourage tender new growth before winter. Balanced nutrition ensures irises develop sturdy stems, deep-colored petals, and healthy roots. When combined with proper watering, fertilization transforms your irises into vigorous plants that bloom more profusely year after year.
Pruning and Deadheading for Continuous Growth
Deadheading Spent Blooms
Deadheading is a vital part of iris care that keeps plants looking neat and encourages stronger growth for the next blooming cycle. Once the flowers fade, the plant begins directing energy toward seed production, which weakens the rhizomes. By promptly removing spent blooms, you help redirect this energy back into root and leaf development. To deadhead properly, cut the flower stalk just above the first set of leaves, taking care not to damage the foliage. Use clean, sharp scissors or pruning shears to prevent disease from spreading between cuts.
During the blooming season, inspect your irises every few days and remove any wilted flowers or damaged stems. Regular deadheading also prevents fungal diseases that thrive on decaying plant material. If you grow reblooming irises, this process is even more important because it encourages a second flush of flowers later in the season. After the final bloom cycle ends, remove the entire stalk down to the base, allowing the leaves to remain for photosynthesis. Consistent deadheading improves the plant’s appearance, supports healthy rhizomes, and boosts flowering potential for the following year.
Pruning Foliage for Healthier Plants
Pruning iris foliage at the right time helps maintain plant vigor and prevent disease. After the blooming period, the long sword-like leaves continue to feed the rhizomes through photosynthesis. Never cut green foliage immediately after flowering, as doing so deprives the plant of essential nutrients. Instead, wait until the leaves begin to yellow naturally, usually in late summer or early fall. Once they start to fade, trim the foliage back to about six inches above the ground. This encourages air circulation and reduces the risk of fungal infections like leaf spot.
In cooler climates, pruning before winter also prevents pests from overwintering in the dense foliage. Always clean away the removed leaves to avoid harboring insects or disease. If your irises become overcrowded or tangled, thinning the foliage can help sunlight reach all parts of the plant. Be sure to disinfect your tools before and after pruning to protect against bacterial soft rot. Proper pruning keeps your iris bed tidy, reduces disease risk, and prepares the plants for strong regrowth in spring. Healthy, well-trimmed foliage leads to more vigorous, longer-lasting blooms in the coming seasons.
Protecting Irises from Pests and Diseases
Irises are hardy plants, but they are still vulnerable to a few common pests and diseases that can weaken their growth or reduce flowering. The most serious issue for many gardeners is iris borer infestation. These caterpillar-like pests tunnel into the rhizomes, leaving behind soft, rotten areas and foul odors. Infested plants often show yellowing leaves or holes near the base. The best way to control borers is through prevention—remove old leaves and debris in fall, since this is where adult moths lay their eggs. In spring, check for early signs of damage and remove affected rhizomes before the larvae spread. Maintaining clean garden beds and rotating planting areas every few years can significantly reduce infestations.
Fungal diseases such as leaf spot and rhizome rot also threaten iris health. Leaf spot appears as brown or yellow patches that spread quickly in humid weather, while rhizome rot causes mushy, discolored roots that emit a sour smell. Both issues thrive in poorly drained soil or overcrowded conditions. To prevent them, space plants properly to encourage air circulation and avoid watering from above, as wet leaves invite fungal growth. Treat early infections by trimming away affected foliage and applying a fungicide if necessary.
Aphids, slugs, and thrips may also attack iris leaves or flower buds, draining nutrients and disfiguring blooms. Natural predators like ladybugs help control aphids, while diatomaceous earth can deter slugs. Regularly inspecting plants ensures that any pest problem is caught early before it becomes severe. Keeping your irises clean, dry, and well-ventilated is the most effective defense. With preventive care and timely treatment, your iris plants can stay vibrant, pest-free, and bloom beautifully year after year.
Dividing and Rejuvenating Old Iris Clumps
When and Why to Divide Irises
Dividing irises is essential to maintain their vigor and encourage regular blooming. Over time, iris clumps become overcrowded, causing the rhizomes to compete for nutrients and sunlight. As a result, flowering decreases, and leaves may appear weak or yellowed. The ideal time to divide irises is every three to four years, typically in late summer after the blooming period has ended. At this stage, the plants have replenished their energy reserves but are not yet dormant, allowing them to recover quickly after replanting.
Signs that your irises need dividing include fewer blooms, smaller flowers, or rhizomes pushing above the soil surface. Gently dig up the entire clump, being careful not to damage the rhizomes. Shake off excess soil and separate the healthy, firm sections from the old or rotted ones. Dividing regularly rejuvenates the plants, improves airflow, and prevents disease buildup in dense beds. Healthy divisions reestablish faster and bloom more vigorously in the next growing season.ư
How to Replant Divided Rhizomes
Once divided, replanting irises correctly ensures they grow strong and bloom beautifully the following year. Choose a sunny, well-drained location and amend the soil with compost to restore nutrients. Plant each rhizome so that the top is just visible above the soil surface, allowing sunlight to warm it directly. This prevents moisture buildup, which can lead to rot. Position the roots carefully and press the soil gently around them to eliminate air pockets.
Space the plants about twelve to eighteen inches apart to allow room for expansion. Water thoroughly after planting, then reduce watering once new growth begins to prevent over-saturation. Avoid fertilizing immediately, as the roots need time to establish before absorbing nutrients. After two to three weeks, apply a light dose of balanced fertilizer to promote new root and leaf development. Dividing and replanting not only revitalizes your iris beds but also gives you the opportunity to expand your garden by sharing or transplanting extra rhizomes.
Preparing Irises for Winter and Next Year’s Growth
Preparing irises for winter is a vital step in ensuring their strength and bloom performance the following year. As autumn approaches, the plants begin storing nutrients in their rhizomes, which serve as energy reserves for spring growth. To help this process, gradually reduce watering as temperatures cool and rainfall increases. Overly wet soil in late fall can lead to rot, especially in heavy clay or poorly drained areas. Trim the foliage down to about six inches above the soil once it begins to yellow naturally. This helps the plant conserve energy while also improving air circulation and reducing the risk of overwintering pests and diseases. Removing all dead or decaying leaves keeps the bed clean and healthy throughout dormancy.
Mulching is essential for protecting irises in regions with harsh winters. Apply a thin, loose layer of straw, pine needles, or shredded bark over the soil after the first hard frost. The mulch helps regulate soil temperature, prevents freeze-thaw cycles from pushing rhizomes out of the ground, and protects developing buds from extreme cold. Avoid heavy mulches that trap moisture, as this can promote fungal growth. In milder climates, mulching is optional but still beneficial for moisture regulation and weed control. Checking your mulch layer occasionally during winter ensures it remains light and breathable.
In early spring, remove the mulch as soon as new shoots begin to appear. This allows sunlight and warmth to reach the rhizomes, stimulating fresh growth. Apply a slow-release, low-nitrogen fertilizer to encourage strong stems and large blooms. Inspect the plants for signs of frost damage and remove any soft or blackened sections before new growth spreads. With proper winter preparation, your irises will emerge healthy, rejuvenated, and ready to reward you with a spectacular display of flowers in the coming season.
Enhancing Bloom Size and Color Vibrancy
The true charm of irises lies in their bold, elegant flowers and their wide range of vivid hues. Achieving large, colorful blooms depends on meeting the plant’s basic needs with precision. Sunlight is one of the most influential factors—irises need at least six to eight hours of full sun daily to develop deep pigments and strong flower stalks. Without enough light, blooms may become pale, undersized, or fewer in number. Fertilization also plays a major role in enhancing bloom quality. Choose a fertilizer that’s rich in phosphorus and potassium but low in nitrogen to encourage flowering instead of excessive leaf growth. Proper feeding supports firm stalks, richer color, and blossoms that last longer through the growing season.
Healthy soil is equally crucial for vibrant, long-lasting flowers. Irises thrive in loose, well-drained soil enriched with organic material. Amending the ground with compost, aged manure, or bone meal before planting provides a steady supply of nutrients. Good drainage prevents water buildup, which can lead to root rot and dull-colored petals. During the blooming period, water deeply but moderately to maintain even moisture without saturating the soil. A thin layer of mulch helps regulate temperature and retain water, especially in hot or windy environments. However, keep mulch away from the rhizomes to prevent rot.
Consistent maintenance further enhances color intensity and bloom size. Deadheading spent flowers keeps the plant’s energy focused on new growth instead of seed production. Dividing crowded rhizomes every few years revitalizes growth, allowing better nutrient absorption and larger, more colorful blooms. Keeping the plants pest-free and removing diseased leaves ensures nutrients go directly to flower development. With regular care, rich soil, and ample sunlight, irises will reward you with spectacular, radiant blooms that elevate your garden’s beauty each season.
Propagating Irises for a Larger Garden
Propagating irises is one of the most effective and rewarding ways to expand your garden while keeping the plants healthy and vibrant. Unlike many other flowering perennials, irises are best propagated by dividing their rhizomes rather than planting seeds. Growing from seed can take several years and often results in plants that differ from the parent variety. The ideal time for division is in late summer or early fall, roughly four to six weeks after blooming. During this period, the rhizomes are full of stored energy but remain active enough to reestablish before winter. Dividing them at this stage ensures a strong start and abundant flowering the following season.
To begin, gently dig up the iris clump using a garden fork or spade, being careful not to damage the rhizomes. Shake off the excess soil and inspect each piece closely. Healthy rhizomes should be firm, smooth, and plump, while older or diseased ones appear shriveled or mushy. Remove damaged sections and trim the healthy rhizomes into divisions, each with at least one fan of leaves. Before replanting, shorten the foliage to about six inches to reduce water loss and allow the plant to focus its energy on root development.
When replanting, choose a sunny, well-drained location. Set each rhizome so the top remains slightly above the soil surface to prevent rot and allow warmth from the sun to reach it. Space divisions twelve to eighteen inches apart for good airflow and future growth. Water gently to settle the soil, keeping it slightly moist until new shoots appear. Within weeks, the divisions begin forming new roots and foliage. Regular propagation not only prevents overcrowding but also keeps your iris beds fresh, colorful, and blooming brilliantly year after year.
Common Mistakes in Iris Care and How to Avoid Them
Planting Rhizomes Too Deep
Planting rhizomes too deep is one of the most common and damaging mistakes gardeners make when growing irises. The rhizome, which is the thickened root structure that stores energy for future blooms, needs exposure to sunlight and air. When buried completely, it stays damp and lacks the warmth needed for proper development. This often leads to rot, especially in rainy or humid environments. Deep planting also suffocates the rhizome, preventing it from photosynthesizing and sending energy to new shoots. As a result, the plant may grow lush foliage but fail to produce any flowers. Over time, deep-planted rhizomes can decay and eventually die, weakening the entire clump.
To fix this problem, carefully lift and replant the rhizomes so their upper surfaces are slightly visible above the soil line. The roots should spread evenly beneath them for stability, while the exposed portion receives sunlight to stay dry and healthy. Avoid heavy mulching that traps moisture around the rhizomes. In clay soil, add sand or compost to improve drainage and aeration. The best time to correct planting depth is late summer, once the blooming season has ended. With proper planting and sunlight exposure, irises quickly recover and reward you with strong, healthy blooms in the following season.
Overwatering and Poor Drainage
Overwatering and poor drainage are leading causes of iris decline. Unlike many flowering plants, irises cannot tolerate soggy soil, as excess water quickly causes rhizome rot. When the soil remains wet for long periods, oxygen cannot reach the roots, and bacteria thrive, creating soft, mushy spots on the rhizomes. In severe cases, the entire plant collapses and releases a foul odor. Poorly drained soil or compacted ground worsens the issue by trapping moisture and limiting airflow. Even moderate overwatering can trigger problems during cool, damp weather when evaporation slows.
To prevent this, water irises only when the top inch of soil feels dry. Deep, occasional watering encourages strong roots without oversaturation. Raised beds, sloped gardens, or soil amended with sand, compost, or perlite improve drainage and prevent water stagnation. After heavy rain, check that water drains within a few hours. Avoid watering late in the evening, as overnight dampness promotes fungal growth. Once proper drainage is established, irises recover quickly, producing fresh leaves and strong, upright flower stalks. Maintaining balanced moisture helps rhizomes stay firm, ensuring healthy growth and colorful blooms each year.
Ignoring Division and Maintenance
Another common mistake is neglecting to divide and maintain iris clumps. Over several seasons, rhizomes multiply rapidly, forming dense clusters that compete for nutrients, light, and space. As the center becomes overcrowded, airflow decreases, inviting pests and fungal diseases. The oldest rhizomes in the middle often stop producing flowers altogether, leaving only small blooms on the outer edges. Without periodic division, the entire bed weakens, reducing both bloom size and plant vigor. Ignoring maintenance such as deadheading and leaf trimming can also lead to poor health and reduced flowering in future seasons.
To restore vitality, divide irises every three to four years, ideally in late summer or early fall after blooming. Carefully dig up the clump, remove the old woody centers, and replant only the firm, healthy rhizomes. Provide fresh soil enriched with compost and space each division about twelve inches apart for optimal airflow. After replanting, water lightly until new roots form. Ongoing maintenance—like removing spent flowers, trimming yellowing leaves, and controlling weeds—keeps the bed tidy and prevents competition for nutrients. Regular division and care ensure your irises remain strong, disease-free, and capable of producing large, radiant flowers season after season.
FAQs About Iris Care
How often should I water my iris plants?
Iris plants need deep but infrequent watering. Water once or twice a week during dry periods, allowing the top inch of soil to dry out between sessions. Overwatering can lead to rhizome rot, while underwatering may cause weak blooms. Consistent moisture during growth ensures healthy roots and vibrant flowers.
When is the best time to divide irises?
The best time to divide irises is in late summer to early fall, about four to six weeks after they finish blooming. During this period, rhizomes have stored enough nutrients and can reestablish before winter. Dividing every three to four years rejuvenates plants, prevents overcrowding, and encourages stronger blooms the following season.
What kind of fertilizer should I use for irises?
Use a balanced, low-nitrogen fertilizer rich in phosphorus and potassium. High nitrogen causes leafy growth instead of flowers. Apply fertilizer in early spring as new shoots appear and again after blooming ends. Always water after feeding to help nutrients absorb evenly and prevent root burn.
Why aren’t my irises blooming this year?
Lack of blooms can result from overcrowding, deep planting, insufficient sunlight, or excessive nitrogen. Ensure rhizomes are exposed to light, spaced properly, and receive at least six hours of direct sunlight daily. Dividing overgrown clumps and improving drainage often restore full, colorful flowering the next season.
How can I protect my irises from pests and rot?
Keep garden beds clean and free of debris, especially in fall, to prevent iris borers and fungal growth. Avoid overwatering, and ensure soil drains well. Inspect plants regularly for soft rhizomes or leaf damage, and treat early signs of pests or disease promptly to maintain healthy, vigorous irises.