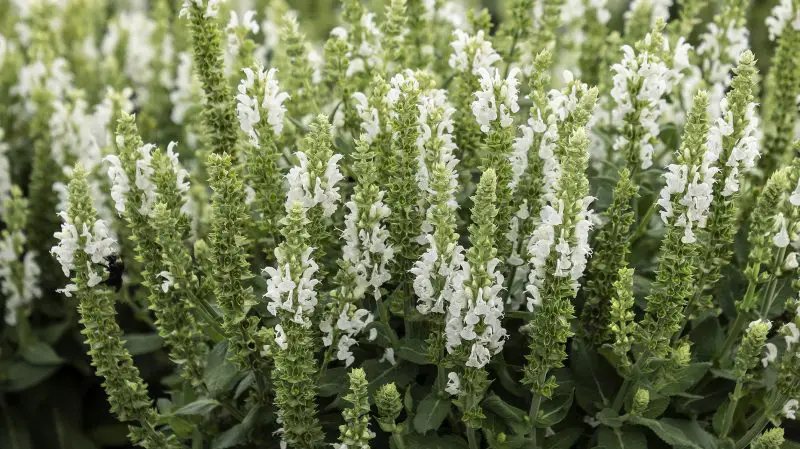
Salvias are among the most rewarding plants you can grow, bursting with color and energy from spring to fall. With their dazzling spikes of purple, red, blue, and pink, they bring gardens to life and draw in pollinators like butterflies and hummingbirds in droves. But to enjoy their vivid display year after year, salvia care must shift with the seasons—offering just the right attention at just the right time.
Whether you’re growing tender annual types or hardy perennial varieties, knowing how to care for salvias in every season is the key to lasting success. From pruning in spring to protecting roots in winter, this guide walks you through each phase of care so your salvias can thrive, bloom longer, and return stronger with every cycle.
Understanding Salvia Varieties and Their Needs

Salvias belong to a remarkably diverse genus that includes over 900 species, each with unique growth habits, flower colors, and climate preferences. To care for them effectively, it’s essential to first identify which type of salvia you’re growing—annual, tender perennial, or hardy perennial—as this influences everything from pruning schedules to overwintering techniques.
Annual salvias, such as Salvia splendens and Salvia coccinea, bloom profusely in one season and are often grown as bedding plants. These varieties thrive in full sun, appreciate regular deadheading, and generally don’t require overwintering care. Tender perennial types like Salvia guaranitica and Salvia ‘Amistad’ grow vigorously in warmer climates but need protection or lifting in colder zones to survive winter. Hardy perennials—such as Salvia nemorosa, Salvia x sylvestris, and Salvia officinalis (culinary sage)—are reliable year after year in temperate zones, often blooming in early summer and reblooming with proper deadheading.
Understanding your salvia’s native habitat can also help you tailor your care routine. Salvias from arid regions often prefer well-draining, slightly dry soil, while those from tropical climates appreciate more moisture and warmth. Growth habits also vary widely—from compact varieties that stay under 18 inches tall to towering selections that reach over 4 feet. This affects where they’re best placed in the garden, how much space they need, and how they should be pruned or staked.
By taking the time to learn each variety’s growth cycle, temperature tolerance, and blooming behavior, you’ll be better equipped to support healthy, vibrant plants through every season.
Spring Care for Salvias
Cleaning Up Winter Debris
As spring arrives and temperatures start to rise, salvias awaken from winter dormancy and begin to push out fresh shoots. Before new growth takes over, it’s important to remove any old stems, blackened leaves, or mushy material left from the previous season. These remnants not only harbor fungal spores and insect eggs but also restrict airflow and light to the emerging foliage. In colder climates, where salvias die back completely to the ground, cut last year’s stems down to just an inch or two above the soil. For evergreen varieties or those that remain partially alive over winter, remove only the dead tips and any stems damaged by frost. This early cleanup helps rejuvenate the plant, sets the stage for vigorous spring growth, and prevents the spread of pests or disease.
Pruning to Stimulate Growth
Once winter debris is cleared, it’s time for a thorough pruning to encourage a fuller, healthier plant. Most perennial salvias respond well to a hard cut in early to mid-spring, especially if they have become leggy or woody at the base. Use clean, sharp pruners to cut stems back by about one-third, ideally just above a node where new growth is visible. This stimulates multiple shoots to form, leading to a bushier shape and more flower spikes later in the season. Avoid waiting too long into spring, as pruning too late can remove developing flower buds. For shrubby or woody salvias, such as Salvia microphylla or Salvia greggii, prune in stages—first shaping the outline and then thinning the interior to improve air circulation. Pruning in spring also provides a chance to remove weak or crowded stems, helping the plant direct energy into its healthiest shoots.
Feeding for a Strong Start
After months of dormancy, salvias benefit from a nutritional boost to fuel spring growth. Feeding at the beginning of the season ensures they have the energy to produce lush foliage and abundant blooms later on. Apply a balanced, slow-release fertilizer—ideally one with a ratio like 10-10-10 or 5-5-5—around the base of the plant, following package instructions. Alternatively, work in compost or well-rotted manure to enrich the soil organically. In sandy or nutrient-poor soils, consider supplementing with a diluted liquid fertilizer every two to three weeks through spring. Avoid high-nitrogen formulas, as these may encourage too much leafy growth at the expense of flowers. The goal is to support healthy, sturdy plants that are primed for colorful displays as the days grow longer.
Mulching for Moisture Retention
With warmer weather and increased sun exposure, salvias need consistent moisture in the soil to establish strong roots. Spring is the ideal time to apply a fresh layer of mulch, which helps retain soil moisture, suppress early weed growth, and moderate temperature fluctuations. Spread two to three inches of organic mulch—such as shredded bark, composted leaves, or straw—around the base of the plant, taking care to leave a small gap around the crown to prevent rot or fungal issues. Mulch also adds valuable organic matter to the soil as it breaks down over time, enhancing soil structure and microbial activity. In addition to its practical benefits, mulch gives the garden a tidy, finished appearance and protects newly emerging salvia shoots from sudden cold snaps or drying winds common in early spring.
Summer Salvia Maintenance
Deadheading for Continued Blooms
Salvias are generous bloomers in summer, but to keep them flowering consistently, deadheading is essential. Once flowers begin to fade or turn brown, pinch or snip them off just above the next set of healthy leaves or budding stems. This redirects the plant’s energy into producing new blooms rather than developing seeds. In long-flowering varieties like Salvia guaranitica or Salvia nemorosa, weekly deadheading can result in waves of color lasting from early summer into fall. Be gentle when removing the flowers, and use clean scissors or pruners to avoid damaging nearby buds.
Watering Wisely
Although salvias are known for their drought tolerance, hot summer months with little rain can take a toll on their health and flowering. Water deeply once or twice a week, depending on your climate and soil type. Sandy soils may need more frequent watering, while clay holds moisture longer. Focus water at the base of the plant, allowing it to soak down to the root zone. This encourages deeper root growth, which improves resilience in heat. Avoid sprinklers or misting systems, which can wet the foliage and create humid conditions favorable for fungal diseases like powdery mildew or leaf spot.
Pest and Disease Management
Summer can bring increased pest pressure as insects become more active. Inspect your salvias every few days, especially on the undersides of leaves where pests like aphids, spider mites, and whiteflies often hide. Yellowing leaves or webbing can be early warning signs. Remove minor infestations by spraying plants with a strong stream of water. For persistent pests, apply insecticidal soap or neem oil in the early morning or evening to avoid sun damage. Good spacing between plants allows for better air circulation, which reduces humidity and prevents fungal diseases from spreading. Remove dead leaves and debris to eliminate hiding spots for pests.
Supporting Taller Varieties
Some salvias, especially taller hybrids and perennial types, can grow quite tall and top-heavy as summer progresses. Varieties like Salvia ‘Amistad’, ‘Indigo Spires’, or Salvia uliginosa may reach three to five feet in height, making them vulnerable to wind and heavy rains. To prevent leaning or flopping, stake your salvias early in the season using bamboo canes, garden hoops, or tomato cages. As the plants grow, loosely tie the stems using soft twine or fabric strips to avoid constriction. Supporting the plants not only keeps them upright and tidy but also helps flowers stay visible and makes maintenance easier throughout the season.
Fall Preparation for Winter Dormancy
Final Pruning Considerations
In late fall, once blooming has ended, evaluate your salvias before cutting back. In warmer USDA zones (8 and above), you can lightly prune the tips and remove dead flower stalks to neaten the plant. This improves airflow and keeps the plant looking tidy through winter. However, in colder zones, avoid cutting back to the base. Heavy pruning in late fall can encourage new growth that’s easily damaged by frost. Instead, wait until early spring to do a hard cutback when new shoots appear at the base.
Soil Amendments for Winter Health
Before the ground freezes, enrich the soil with a generous layer of compost or aged manure. Spread it around the base of the plant, keeping it a few inches away from the stems to prevent rot. These organic amendments improve soil texture, boost microbial life, and provide a slow-release source of nutrients. Healthy soil supports stronger roots and better winter survival, especially in clay or sandy soils that tend to lose nutrients over time.
Mulching for Winter Protection
In late fall, after the first frost, apply a 2- to 4-inch layer of mulch around the root zone. Use organic materials such as straw, bark chips, shredded leaves, or pine needles. This mulch acts as insulation, protecting roots from extreme temperature swings and retaining soil moisture during dry winter periods. Be careful not to pile mulch against the stems, as this can lead to rot. As spring arrives and temperatures warm, pull back the mulch gradually to allow sunlight and airflow to reach emerging shoots.
Winter Care and Protection
Identifying Hardy vs Tender Salvias
Salvias vary greatly in cold tolerance. Hardy types, such as Salvia nemorosa or Salvia officinalis, can handle frosts and even brief freezes without much trouble. These can usually overwinter in the ground with minimal care. On the other hand, tender salvias like Salvia splendens or Salvia guaranitica are highly sensitive to frost. In USDA zones below 8, treat them as annuals or dig them up and overwinter indoors. Labeling your salvias at planting time helps make the right decision each winter.
Container Plant Strategies
Potted salvias are more exposed to cold because their roots aren’t insulated like in-ground plants. Before the first hard frost, move containers to a more sheltered space. A sunny garage, enclosed porch, or unheated greenhouse works well. Stop fertilizing in fall and water sparingly—only when the soil is completely dry. This prevents root rot during dormancy. Check periodically for pests or mold, and prune dead growth lightly.
Covering Ground Plants
For in-ground salvias in cold regions, some protection can help them survive harsh winters. After the first frost, cover the base with mulch to insulate roots. When temperatures are expected to drop significantly, drape frost cloths or row covers over the entire plant. You can also use overturned plastic pots with holes for ventilation. Remember to uncover them during the day if temperatures rise, allowing airflow and sunlight to reduce the risk of mold or fungal diseases.
Encouraging Year-Round Color With Salvias
Succession Planting With Multiple Varieties
To achieve continuous visual interest, choose salvia cultivars with bloom cycles that span the entire growing season. Begin with early-flowering types like Salvia greggii, which bring color as soon as spring temperatures warm up. As summer approaches, introduce mid-season performers like Salvia nemorosa and Salvia farinacea to maintain vibrant hues. In fall, rely on long-lasting bloomers such as Salvia leucantha or Salvia elegans to extend the show until the first frost. This staggered approach ensures there’s never a dull moment in your salvia garden.
Companion Planting for Visual Appeal
Enhance the beauty of your salvia displays by surrounding them with complementary perennials and shrubs. Bold bloomers like rudbeckia and echinacea echo the vibrant tones of salvias, while soft ornamental grasses provide contrast and movement. Consider the overall structure of your garden as well—taller salvias can act as a colorful backdrop, while dwarf types fill in borders and pathways. By pairing salvias with plants that thrive in similar conditions, you create a cohesive and long-lasting landscape.
Maximizing Pollinator Visits
Salvias are among the best plants for attracting hummingbirds, bees, and butterflies. To encourage frequent visits, maintain a pesticide-free environment and plant several types of salvias with different flower colors and shapes. Red and purple tubular blooms are especially attractive to hummingbirds and long-tongued bees. Providing clean water sources, such as shallow birdbaths with pebbles, helps support pollinator health. Planting native salvia species or locally adapted varieties increases resilience and sustains beneficial insects throughout the year.
Troubleshooting Common Issues
Yellowing Leaves and What They Indicate
Yellowing foliage is one of the first signs that something is wrong with your salvia. It often indicates overwatering or poorly draining soil. When roots sit in soggy conditions, they become deprived of oxygen and begin to rot. Yellow leaves can also suggest a lack of essential nutrients like nitrogen or iron. If the soil is compacted or depleted, nutrients cannot reach the plant effectively. To address the issue, reduce watering frequency and ensure pots or beds have good drainage. A soil test can help determine if fertilization is needed. Use a balanced, slow-release fertilizer to correct deficiencies gradually.
Poor Flower Production
If your salvia has healthy green leaves but lacks flowers, the most common cause is insufficient sunlight. Salvias thrive in full sun, needing at least six hours per day to produce abundant blooms. Plants grown in partial shade may become leggy and underperform in terms of flowering. Overfertilization with high-nitrogen products can also cause the plant to focus on foliage at the expense of blooms. To encourage better flowering, relocate the plant to a sunnier spot if possible. Switch to a low-nitrogen, phosphorus-rich fertilizer to promote bud development.
Wilting Despite Adequate Watering
Wilting even when the soil is moist may be a sign of root problems or pests. Check for root rot by gently lifting the plant and inspecting the roots. Healthy roots should be white or tan and firm. Brown, mushy roots suggest rot, often due to overwatering or poor drainage. Pests like root weevils, grubs, or nematodes can also damage roots and cause wilting. Aboveground, look for signs of fungal disease such as stem blackening or leaf spotting. Remove affected plants or trim away damaged parts. Improve airflow around the plant, reduce watering temporarily, and consider applying organic fungicides or beneficial nematodes for pest control.
Propagation Techniques for Expanding Your Garden
Growing Salvias from Seeds
Salvias can be propagated successfully from seeds with a bit of planning and care. Start by sowing seeds indoors about six to eight weeks before your region’s last expected frost date. Use a sterile, lightweight seed-starting mix that promotes good aeration and drainage. Press the seeds gently into the surface of the soil, as some salvia species need light to germinate. Mist the soil surface regularly to keep it evenly moist but never waterlogged. Maintain a warm temperature of around 70°F (21°C) to encourage germination, which typically occurs within two to three weeks.
Once the seedlings develop a pair of true leaves, begin the hardening-off process by placing them outside in filtered sunlight for a few hours each day, gradually increasing their exposure over 7 to 10 days. Transplant the hardened seedlings into well-prepared garden soil or containers with excellent drainage. Choose a spot with full sun for best results.
Taking Cuttings for Fast Results
Propagation by cuttings is an efficient method for rapidly multiplying salvia plants. Select healthy, non-flowering stems in late spring or early summer. Cut a 3- to 5-inch section just below a leaf node, and remove the lower leaves. Dip the cut end into rooting hormone to increase the chances of success.
Insert the cutting into moist perlite, coarse sand, or a 50/50 mix of perlite and peat moss. Cover with a plastic dome or bag to retain humidity, ensuring it doesn’t touch the cutting. Keep the container in bright but indirect light and maintain consistent moisture. Roots typically develop in two to four weeks. Once the cuttings show signs of new growth, pot them up into individual containers. Allow them to grow stronger for a few more weeks before transplanting them into the garden.
Dividing Established Plants
Some perennial salvia species, especially clump-forming types, respond well to division. This method rejuvenates older plants and produces multiple new ones. The best time for division is either early spring, just as new growth appears, or fall, after the blooming season ends.
Begin by digging up the entire plant carefully, trying to preserve as much of the root system as possible. Gently shake off excess soil and inspect the root mass. Use a sharp, clean knife or garden spade to divide the plant into sections, ensuring each division has several healthy roots and shoots. Discard any woody or unhealthy portions.
Prepare the planting site with compost-enriched soil and good drainage. Replant the divisions at the same depth as the original plant and water thoroughly. Mulching around the base can help conserve moisture and suppress weeds during the plant’s re-establishment period. Dividing every three to five years keeps salvia plants vigorous and blooming prolifically.
Designing Your Garden With Salvias
Considering Plant Size and Form
Salvia varieties offer a wide range of sizes and growth habits, making them highly versatile for garden design. Dwarf cultivars, such as Salvia ‘Hot Lips’ or Salvia nemorosa, grow to about 12–18 inches tall and are perfect for edging pathways, filling containers, or creating tidy foreground plantings in mixed borders. On the other hand, larger species like Salvia guaranitica or Salvia ‘Amistad’ can grow 3 to 5 feet tall and develop into full, bushy mounds that act as striking focal points or effective background plantings. Understanding the mature size of each variety allows you to layer plants effectively, ensuring each one gets adequate light and airflow while contributing to the overall structure of the garden.
Creating a Color Palette
Salvias bloom in a diverse array of colors, including deep indigo blues, rich purples, fiery reds, soft pinks, and crisp whites. These vivid hues can set the tone for your garden, so consider your overall color scheme when selecting varieties. Blue and purple salvias such as Salvia farinacea or Salvia ‘Mystic Spires’ lend a sense of calm and harmony, making them excellent choices for serene spaces or cool-toned gardens. For more drama and vibrancy, red and magenta varieties like Salvia splendens or Salvia ‘Wendy’s Wish’ bring warmth and attract attention. Using analogous colors (those close to each other on the color wheel) creates a harmonious look, while complementary colors (opposites on the wheel) provide bold, eye-catching contrast. Integrating salvia blooms with the colors of neighboring plants, structures, or hardscaping features helps unify the space and elevate your design.
Repetition and Rhythm in Planting
In garden design, repetition is a powerful tool for creating unity and guiding the viewer’s eye through the landscape. By repeating groups of the same salvia variety at consistent intervals, you build rhythm and cohesion across beds and borders. This method works especially well in formal or structured gardens but can also be applied in informal settings to prevent visual chaos. Consider using clusters of three or five plants per grouping to form rhythmic waves of color and texture. Alternating tall and short varieties in a pattern can also establish a dynamic flow while maintaining balance. Repetition doesn’t mean monotony—instead, it provides a visual anchor that helps other diverse elements in the garden feel intentional and connected.
FAQ About Caring for Salvias
How often should I water my salvias?
Watering frequency depends on the salvia type and your local climate. Most salvias prefer well-drained soil and only need watering once the top inch of soil becomes dry. Overwatering can lead to root rot, especially in heavy soils. During the first few weeks after planting, water regularly to help establish strong roots.
Why are my salvias not blooming?
Lack of blooms is often caused by insufficient sunlight. Salvias need at least 6 hours of direct sunlight per day to flower well. Other causes include too much nitrogen in the soil, which promotes foliage over flowers, or failure to deadhead spent blooms, which encourages continued flowering in many varieties.
Can salvias survive winter in cold climates?
Hardy salvia species like Salvia nemorosa and Salvia officinalis can survive cold winters, especially with mulch protection. Tender salvias, such as Salvia guaranitica and Salvia splendens, may not survive frost and should be brought indoors or treated as annuals in colder USDA zones.
How do I prune salvias to keep them healthy?
Prune salvias after the first major bloom to encourage bushier growth and more flowers. Cut back by about one-third using sharp shears. In fall, wait until after the first frost to prune perennial varieties back to a few inches above the ground. Avoid heavy pruning in late fall for tender types, as it can stress the plant before winter.
When is the best time to propagate salvias?
Spring to early summer is the ideal time for taking cuttings, as the plant is actively growing and quick to root. Seed propagation should begin indoors 6 to 8 weeks before the last frost. Division of established plants is best done in early spring or fall when temperatures are cooler and moisture is more consistent.
Conclusion: A Season-by-Season Investment for a Stunning Garden
Caring for salvias in every season is a fulfilling way to enhance your landscape and support local wildlife. From spring pruning and fertilization to summer deadheading, fall mulching, and winter protection, each step contributes to a healthier, more vibrant garden. With thoughtful variety selection and consistent maintenance, your salvias will reward you with waves of color and pollinator activity all year long.
Whether you’re a beginner or a seasoned gardener, mastering the seasonal care of salvias is a practical and rewarding journey. The results are not only visually stunning but also environmentally enriching, creating a garden that buzzes with life in every season.


