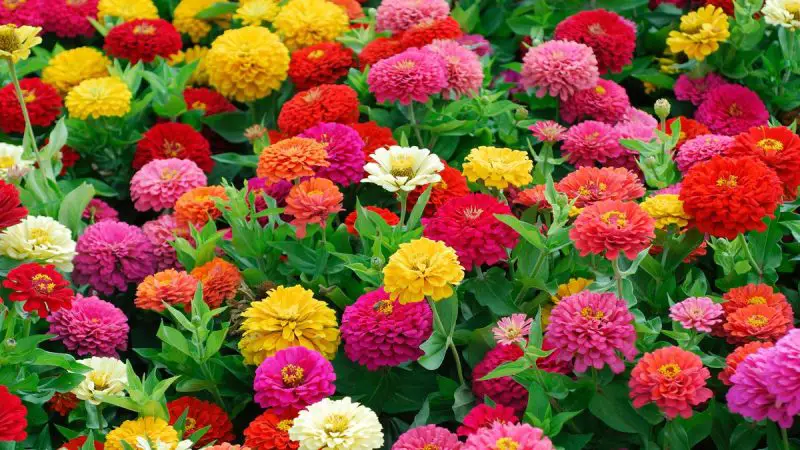
Zinnias are among the most cheerful and easy-to-grow annual flowers you can add to your garden. With their bold colors, fast growth, and long-lasting blooms, zinnias are a favorite for both beginner and experienced gardeners. These flowers come in many shapes and sizes, ranging from small pom-pom-like blooms to large, dahlia-style flowers. They thrive in sunny environments and are loved not only by humans but also by pollinators such as butterflies and bees.
To enjoy a season full of colorful blooms, proper care is essential. Zinnias might be low-maintenance, but a few key practices will ensure that your plants stay healthy and flower profusely from spring until the first frost.
Choosing the Right Location for Zinnias
Full Sun for Maximum Bloom
Zinnias are sun-loving plants. They require at least six to eight hours of direct sunlight per day. A location that receives consistent sun exposure throughout the day will lead to the best flowering. Without sufficient light, zinnias may become leggy and produce fewer blooms.
Sunlight also plays a vital role in strengthening the plant’s immune system, helping it resist pests and diseases. For maximum success, choose a south-facing or west-facing spot in your garden. Avoid planting near tall structures or trees that cast prolonged shade, as this can significantly reduce flower production. If you’re growing zinnias in containers, make sure to move the pots to follow the sun throughout the day.
Well-Draining Soil Conditions
While zinnias can tolerate a variety of soil types, they perform best in well-draining soil that is rich in organic matter. Waterlogged soil can lead to root rot, which can quickly destroy the plants. To improve drainage, you can amend your soil with compost or sand.
The ideal soil texture for zinnias is loamy, providing a balance of moisture retention and drainage. Avoid planting in heavy clay soils unless amended with compost or peat moss to improve aeration. The pH level should be slightly acidic to neutral, ideally between 5.5 and 7.5. Conducting a simple soil test before planting can help you determine if any adjustments are needed. Consistent soil quality ensures the roots grow deep and strong, supporting more prolific blooming throughout the season.
Starting Zinnias: Seeds vs. Transplants
Growing Zinnias from Seeds
Zinnias are one of the easiest flowers to start from seed. In warmer climates, you can direct sow the seeds into the garden after the last frost. In cooler areas, start seeds indoors four to six weeks before the last expected frost to get a head start on the growing season. The seeds typically germinate within five to ten days.
To sow directly outdoors, loosen the top few inches of soil and scatter the seeds lightly. Cover them with a thin layer of soil and water gently to settle them in. For indoor starting, use seed trays or small pots filled with a light seed-starting mix. Place them in a warm, bright location or under grow lights until they sprout.
Once the seedlings develop two or three sets of true leaves, thin them out or transplant them into larger containers. When transplanting outdoors, wait until temperatures stay consistently above 60°F (15°C) and there is no danger of frost. Harden off the young plants by gradually introducing them to outdoor conditions over seven to ten days.
Using Transplants for Faster Blooms
While growing from seed is simple, using nursery-grown zinnia seedlings can offer a head start, especially if you’re planting later in the season. Be sure to harden off the seedlings before transplanting them into the garden to prevent shock.
When purchasing transplants, choose healthy, compact plants with no signs of disease or yellowing. Avoid those that are root-bound or already flowering excessively, as these may struggle to adapt once planted in the ground. Transplant in the late afternoon or on a cloudy day to minimize stress, and water thoroughly after planting.
Space the transplants according to the variety’s mature size, usually 8 to 24 inches apart, to ensure good air circulation and reduce the risk of disease. Apply a layer of mulch around the base of the plants to retain soil moisture and keep weeds at bay. Using transplants can result in blooms weeks earlier than direct-seeded plants, making it a great option for gardeners eager for quick results.
Watering Zinnias for Optimal Health
How Often to Water
Zinnias prefer consistent moisture, especially during their active growing and blooming season. While mature plants can handle brief dry spells, young seedlings and newly transplanted zinnias require more regular watering to establish strong roots. In most climates, watering deeply two to three times per week is ideal, ensuring the top 6 to 8 inches of soil are moist. However, always adjust based on your local weather and soil drainage—sandy soil dries out faster, while clay retains moisture longer. In peak summer heat, check soil moisture daily and increase watering frequency if leaves begin to wilt or the soil feels dry one inch below the surface.
Best Time of Day to Water
The optimal time to water zinnias is early in the morning, preferably before 10 a.m. Morning watering allows excess moisture on the leaves to evaporate quickly as the sun rises, reducing the risk of fungal issues such as powdery mildew and leaf spot. Evening watering should be avoided because it leaves foliage damp overnight, creating ideal conditions for disease. For best results, use drip irrigation, a soaker hose, or a watering wand aimed at the base of the plant to keep the foliage dry. Delivering water directly to the root zone also ensures that moisture reaches where it’s needed most—deep in the soil, not just on the surface.
Feeding Zinnias: Fertilizer Tips
When and How to Fertilize
In the early stages of growth, zinnias appreciate a balanced fertilizer such as 10-10-10 or 5-5-5 to support root development and strong stems. You can apply this in granular form directly to the soil or use a liquid fertilizer mixed with water for faster absorption. Begin feeding about two to three weeks after transplanting or when seedlings have grown two to three sets of true leaves.
As the zinnias start to form buds, typically about a month into their growth, transition to a bloom-enhancing fertilizer with a higher phosphorus content, such as 10-30-20. Phosphorus supports prolific flowering and encourages long-lasting, vibrant blooms. Apply it every four to six weeks during the active blooming period to keep the plants energized and blooming without pause.
Always water the plants thoroughly before and after feeding to prevent fertilizer burn and to help nutrients absorb evenly. In sandy or fast-draining soils, you might need to feed slightly more frequently, while rich organic soil may require less intervention.
Avoid Over-Fertilization
Zinnias are not heavy feeders by nature and can thrive in moderately fertile soil. Overdoing the fertilizer—especially if it is high in nitrogen—can stimulate excessive leaf growth at the expense of flower production. This results in tall, leafy plants with very few blooms, which defeats the purpose of growing zinnias for their bright, colorful flowers.
Watch your plants for signs of over-fertilization, such as very dark green leaves, overly rapid growth, or reduced blooming. If these symptoms appear, flush the soil with water to help remove excess nutrients and withhold fertilizer for a few weeks to allow the plant to rebalance.
It’s also wise to skip fertilization altogether during periods of drought or extreme heat, as stressed plants are more vulnerable to damage from chemical inputs. Focus instead on consistent watering and mulching to support their recovery, and resume feeding once conditions stabilize.
Pruning and Deadheading for Continuous Blooms
Importance of Deadheading
Deadheading is crucial if you want your zinnias to bloom continuously throughout the growing season. Once a flower fades, the plant naturally shifts its energy toward seed production. While this is beneficial for propagation, it also signals the plant to slow down or stop blooming. By removing spent flowers promptly, you redirect the plant’s resources back into producing new buds. This not only increases the number of blooms but also extends the plant’s flowering period well into late summer or even fall. Regular deadheading is especially important for zinnias because they are fast growers and heavy bloomers that respond quickly to pruning.
How to Deadhead Correctly
To deadhead zinnias properly, use clean scissors or garden snips to remove the faded flower head. Make the cut just above the first healthy set of leaves or side shoot below the bloom. This encourages the plant to branch out and produce new flowering stems. You can also pinch off spent blooms by hand if the stems are soft enough. Aim to deadhead every few days to prevent the plant from putting energy into seed development. During peak bloom periods, this simple practice can double the number of flowers and keep the plant looking vibrant and well-shaped. Be sure to discard the spent flowers rather than leaving them on the ground, as they could attract pests or promote disease.
Controlling Common Zinnia Pests and Diseases
Watch for Aphids and Spider Mites
Aphids and spider mites are among the most persistent pests that target zinnias, especially in warm, dry weather. Aphids cluster on new growth and the undersides of leaves, excreting sticky honeydew that can attract ants and encourage sooty mold. Spider mites, though harder to spot, create fine webbing and cause leaves to become speckled or bronze. Left unchecked, both pests can distort growth, cause leaf drop, and reduce flower production.
Regular monitoring is key. Examine your plants weekly—especially the undersides of leaves—using a hand lens if necessary. At the first sign of infestation, spray plants with a strong jet of water to knock the pests off. For more persistent infestations, insecticidal soap or neem oil can be applied every 5–7 days until control is achieved. Introducing beneficial insects such as ladybugs or lacewings can also help keep pest populations in check naturally.
Managing Powdery Mildew
Powdery mildew is a fungal disease that thrives in crowded plantings and damp, poorly ventilated areas. It typically appears as a soft, powdery coating on the upper surfaces of leaves and can spread rapidly in humid conditions. As the infection progresses, leaves may yellow, curl, and drop prematurely, weakening the plant and diminishing flower quality.
To reduce the risk of powdery mildew, plant zinnias in full sun and ensure good air circulation by spacing them according to their mature size. Water early in the day and aim for the base of the plant to keep foliage dry. Remove infected leaves immediately and dispose of them away from the garden. If necessary, apply a sulfur-based fungicide or a biofungicide labeled for powdery mildew. Begin treatment at the first signs of infection and reapply as directed during periods of high humidity or frequent rainfall.
Preventing Other Diseases
In addition to powdery mildew, zinnias can be affected by several other diseases, including bacterial leaf spot, alternaria leaf blight, and botrytis blight. These issues often result from excess moisture, poor air circulation, or contaminated soil and tools. Symptoms include brown or black spots, irregular lesions on leaves, and rotting stems or flowers.
To minimize disease risk, always start with high-quality seeds or healthy nursery plants. Practice crop rotation by avoiding planting zinnias or other members of the Asteraceae family in the same location year after year. Remove and destroy plant debris at the end of the season, as many pathogens overwinter in old leaves and stems. Avoid overhead watering, and use mulch to reduce soil splashing onto the lower foliage.
Sanitize pruning shears and tools between uses to prevent the spread of pathogens. If disease pressure is high, consider planting disease-resistant zinnia varieties and applying preventive fungicidal sprays according to label instructions. Maintaining healthy soil with adequate drainage and balanced fertilization also strengthens zinnia plants against potential infections.
Supporting Tall Zinnia Varieties
Why Support Is Necessary
Tall zinnias, especially cultivars like Benary’s Giant, California Giant, or State Fair Mix, can easily reach heights of 3 to 5 feet when grown in fertile soil with full sun. While their sturdy appearance may seem self-supporting at first, their hollow stems are highly susceptible to damage under stress. Heavy blooms, combined with wind, rain, or even overhead watering, can cause stems to flop, bend, or break. This not only ruins the plant’s appearance but can also reduce airflow around the base, increasing the risk of fungal diseases like powdery mildew. Providing early support helps maintain a tidy structure, keeps the plants upright, and encourages vertical growth, resulting in more evenly spaced blooms and easier access for deadheading and harvesting.
Staking Techniques
Start staking when zinnias are about 10 to 12 inches tall, ideally before they begin to branch heavily or form large flower buds. Use slender but sturdy materials like bamboo stakes, wooden dowels, or metal rods placed a few inches from the main stem. For a neater appearance in larger flower beds, consider using tomato cages or a grid made of horizontal twine stretched between upright stakes around the planting area.
Tie stems loosely to supports with soft garden twine, elastic plant ties, or strips of old T-shirts to avoid constricting growth. Always allow some give in the ties so the stem can sway naturally in the wind, which helps strengthen it over time. As the plant grows, add additional ties every 10 to 12 inches up the stem to provide ongoing support.
For mass plantings or cutting gardens, another effective method is the corral system. Insert tall stakes around the perimeter of the bed and weave garden twine in horizontal layers at different heights, creating a flexible fence-like structure that holds multiple plants upright without needing individual stakes.
Regularly check the ties and supports throughout the season, especially after storms or strong winds, and adjust as needed to prevent damage and ensure continued healthy growth.
Seasonal Care Tips for Better Blooming
Spring Preparation
As soon as the soil is workable in early spring, loosen it thoroughly and enrich it with compost or well-rotted manure to improve drainage and fertility. Choose a sunny spot, as zinnias thrive with at least 6 to 8 hours of direct sunlight. Sow seeds directly into the ground after the danger of frost has passed and the soil has warmed to around 21°C (70°F), or transplant seedlings started indoors. Space plants properly—typically 6 to 18 inches apart depending on the variety—to ensure good air circulation. Keep the soil evenly moist during germination and early growth, watering at the base to avoid wetting the leaves and minimizing fungal risk.
Summer Maintenance
During summer, zinnias reach their full blooming potential and need consistent care to stay healthy and vibrant. Water deeply once or twice a week depending on rainfall, aiming to keep the top 1–2 inches of soil moist but not soggy. Fertilize every 3 to 4 weeks with a balanced flower fertilizer (such as 10-10-10 or a bloom-boosting 5-10-5) to support continuous flowering. Regularly remove spent flowers (deadheading) to encourage new blooms. Check the undersides of leaves for aphids or spider mites and use neem oil or insecticidal soap if infestations occur. Apply a 2–3 inch layer of mulch to keep the soil cool, retain moisture, and prevent weed competition.
Fall Clean-Up
As temperatures drop in late summer to early fall, zinnias may slow their blooming. Continue to deadhead faded blooms to extend the flowering season as long as possible. Before the first hard frost, inspect the plants for any signs of disease—such as powdery mildew—and remove affected leaves or entire plants if necessary. Once the first frost kills the foliage, pull up all plant material and discard or compost if disease-free. For seed saving, allow select flower heads to dry completely on the plant. Harvest seeds by removing the dried petals and collecting the small, arrowhead-shaped seeds found at the base. Store them in a cool, dry place in labeled envelopes for next spring. This final cleanup helps reduce the risk of fungal spores and insect eggs overwintering in the soil.
Growing Zinnias in Containers
Choosing the Right Container
Select a container that is at least 12 inches deep and equally wide to provide ample space for root growth and stability. Containers made of clay, ceramic, or wood are excellent choices because they help regulate soil temperature and allow for better air circulation. Ensure that the container has multiple drainage holes at the bottom to prevent waterlogging, which can cause root rot. Avoid using shallow or non-porous containers, as these can retain too much moisture or restrict root development. For larger zinnia varieties, consider using pots that are 16 to 18 inches across to accommodate taller stems and broader root systems.
Soil and Watering Tips
Use a loose, well-draining potting mix that contains ingredients like perlite, peat moss, or coconut coir. Avoid using garden soil, as it compacts easily in containers and hinders drainage. If your mix doesn’t already contain slow-release fertilizer, consider mixing some in before planting. Zinnias in containers dry out faster than those in garden beds, especially during hot or windy days. Check the soil daily by sticking your finger about an inch deep—if it feels dry, it’s time to water. Water thoroughly until it runs out the drainage holes, but avoid letting the pot sit in standing water. During peak summer heat, daily watering may be necessary, especially for small or lightweight pots.
Fertilizing Container Zinnias
Since container soil can lose nutrients quickly through frequent watering, it’s important to fertilize zinnias regularly to support lush foliage and continual blooming. Use a balanced liquid fertilizer, such as 10-10-10 or 20-20-20, every two to three weeks during the active growing season. Alternatively, you can use a bloom booster with higher phosphorus content (like 10-20-10) to encourage more flower production. Always follow label instructions to avoid overfeeding, which can cause excessive foliage growth at the expense of blooms. If using organic options, compost tea or fish emulsion applied every 10–14 days can provide gentle, steady nourishment without risk of chemical buildup.
Companion Planting with Zinnias
Companion planting with zinnias is a practical and beautiful way to boost the health and productivity of your garden. Zinnias attract a wide range of beneficial insects, including bees, butterflies, and hoverflies, which help pollinate fruits and vegetables nearby. Their bright, nectar-rich blooms are particularly effective at drawing in pollinators throughout the growing season, making them valuable allies in vegetable gardens.
Beyond pollination, zinnias also serve as a trap crop for pests such as aphids and Japanese beetles. By luring these insects away from more vulnerable crops like tomatoes, beans, or squash, zinnias can act as a natural line of defense. This allows you to manage pest populations without relying heavily on pesticides.
Zinnias also pair well with crops that benefit from a burst of color and pest protection. Planting them alongside basil, peppers, or cucumbers can create a visually appealing and ecologically balanced garden space. Additionally, their upright growth habit and dense foliage can provide light shading to nearby heat-sensitive herbs or greens, reducing soil moisture loss and heat stress.
Whether planted in rows along the garden edge, tucked between vegetable beds, or interspersed with herbs and other annuals, zinnias are versatile companions that enhance both the aesthetics and functionality of any planting scheme.
Harvesting Zinnias for Cut Flowers
Zinnias are one of the most rewarding flowers to grow for cut arrangements. Their long, sturdy stems and vibrant colors make them a favorite for floral displays. To get the best quality blooms, timing and technique are key. The ideal time to harvest zinnias is early in the morning, when temperatures are cool and the plants are well-hydrated. Avoid cutting flowers during the heat of the day, as they are more prone to wilting.
Choose blooms that are fully open, as zinnias do not continue to open once cut. A helpful test is the “wiggle test”: hold the stem about six inches below the bloom and gently shake it. If the flower head stays upright and firm, it’s ready for harvest. If it flops or wobbles, give it more time to mature.
Use clean, sharp garden shears or scissors to cut the stem at an angle, ideally just above a set of healthy leaves or branching point to encourage regrowth. Immediately place the cut stems in a clean bucket of cool water to prevent wilting. Strip off any leaves that would sit below the water line in a vase to prevent bacterial growth and extend vase life.
To condition the blooms for arrangements, let the stems sit in water for several hours in a cool, shady location. With proper care, cut zinnias can last 7 to 10 days in a vase, sometimes longer. Regular harvesting also encourages the plant to produce more blooms, making it a win-win for both your garden and your floral displays.
Saving Zinnia Seeds for Next Season
Saving zinnia seeds is a rewarding and cost-effective way to ensure a vibrant garden year after year. Begin by identifying healthy, disease-free plants that produced the most beautiful or resilient blooms. Let several flower heads mature fully on the plant until the petals are dry and the centers turn brown and papery. This is a sign the seeds inside are fully developed.
Gently snip the seed heads and allow them to dry further in a warm, well-ventilated area for about a week. Once completely dry, pull apart the heads to collect the arrowhead-shaped seeds, separating them from the chaff. Label and store the seeds in a paper envelope or breathable container, then place it in a cool, dry, and dark location. Properly stored zinnia seeds can remain viable for 3 to 5 years, making them a valuable resource for future plantings.
When you’re saving zinnia seeds, it’s also helpful to keep track of the flower colors or varieties if you’ve planted multiple types. Hybrid zinnias may not grow true to the parent plant, but open-pollinated or heirloom varieties usually do. To ensure purity, save seeds from plants that were spaced well apart from others or were grown in isolation. This minimizes the chance of cross-pollination and increases the likelihood of getting consistent results next season. If you’re collecting seeds from different colors, store them separately and label each batch clearly. This extra step makes planning your next garden easier and more intentional.
Frequently Asked Questions About Zinnia Care
How do I know when zinnia seeds are ready to harvest?
Zinnia seeds are ready when the flower heads are completely dry and brown on the plant. The petals will be brittle or gone, and the base of the flower will feel hard and papery. If harvested too early, the seeds may not be mature enough to germinate successfully.
What do zinnia seeds look like and where can I find them?
Zinnia seeds are arrow-shaped and gray to dark brown. You’ll find them inside the dried flower head, attached at the base of each withered petal. Gently pull apart the center of the flower head to reveal and collect the seeds.
Can I save seeds from hybrid zinnias?
Yes, but keep in mind that seeds from hybrid zinnias may not produce plants identical to the parent. They can yield unpredictable flower colors, shapes, or sizes. If you want consistent results, opt for heirloom or open-pollinated zinnia varieties.
How should I store zinnia seeds to keep them viable?
After harvesting, allow seeds to air-dry thoroughly for several days. Then store them in a labeled paper envelope or glass jar in a cool, dark, and dry place. Avoid plastic bags unless seeds are completely dry, as moisture can cause mold or rot.
How long do saved zinnia seeds remain good for planting?
With proper storage, zinnia seeds remain viable for 3 to 5 years. However, germination rates may gradually decline over time. For best results, use seeds within 1–2 years and test older seeds by doing a simple germination test on a damp paper towel.
Conclusion: Growing Healthy Zinnias for a Season of Color
Caring for zinnias doesn’t require a green thumb, but consistent attention to sunlight, watering, feeding, and pruning can make all the difference. With the right location, a good start from seed or transplant, and regular maintenance, your zinnias will reward you with an explosion of vibrant blooms from early summer through fall. Whether in garden beds or containers, these flowers bring color, pollinators, and joy to any space. Follow these care tips, and enjoy nonstop zinnia beauty all season long.

