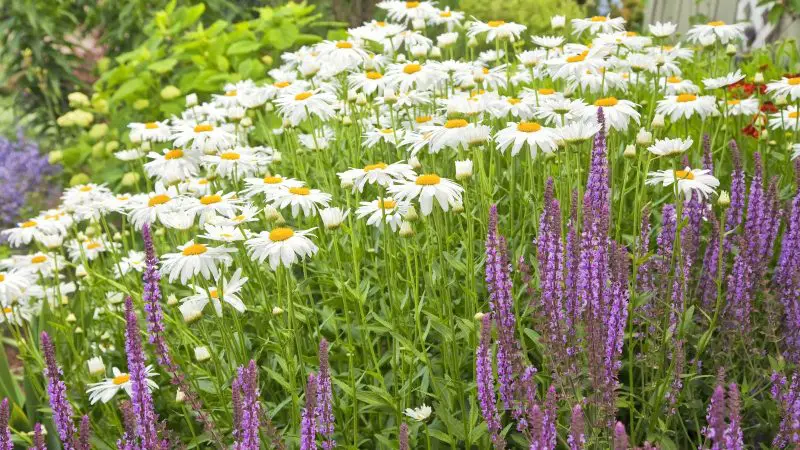
Shasta daisies are a favorite choice for adding charm to cottage-style gardens and bright, sun-filled landscapes. With their cheerful white petals and bright yellow centers, they bring a classic charm to any outdoor space. However, to keep these perennial favorites blooming continuously through summer, gardeners must learn a key maintenance skill: deadheading. Understanding how to deadhead Shasta daisies correctly can make the difference between a short-lived burst of flowers and a full season of radiant, healthy blooms.
Deadheading is the process of removing spent or faded flowers from a plant. This practice helps redirect energy from seed production to new growth and budding. For Shasta daisies, deadheading encourages the plant to produce more flowers instead of going to seed. This not only extends the bloom time but also improves the plant’s overall appearance and health. By following proper deadheading techniques, you can enjoy an abundant floral display well into the late summer months.
In this comprehensive guide, we will explore the ideal timing for deadheading Shasta daisies, the most effective techniques, the tools you need, and common mistakes to avoid. Whether you’re a novice gardener or a seasoned green thumb, this article will provide you with the essential information to keep your daisies thriving.
Understanding the Life Cycle of Shasta Daisies
To effectively deadhead Shasta daisies, it’s important to understand their growth and blooming cycle. These hardy perennials typically bloom from early summer into late fall, depending on the climate and growing conditions. Each flower has a life span of several days to a week. Once a bloom begins to fade, it signals to the plant that it’s time to shift energy toward seed formation.
As seeds develop, the plant’s resources are diverted away from new bloom production. This is a natural process, but it can be counterproductive for gardeners who want continuous color throughout the season. By intervening through deadheading, you remove the signal to produce seeds and instead encourage additional buds to form. The result is a more prolonged and vibrant blooming season.
Shasta daisies typically produce flowers on upright stems that rise above the foliage. These flowers open progressively, starting from the lower stems and moving upward. As you deadhead, you’ll notice new buds forming just below the faded ones, ready to take their place and continue the blooming cycle. Knowing this progression will help you deadhead with confidence and efficiency.
When to Deadhead Shasta Daisies
Timing plays a crucial role in successful deadheading. Ideally, you should begin deadheading as soon as the flowers start to fade. Look for blooms that are wilting, turning brown, or losing their petals. These are the best candidates for removal, as they are no longer serving the aesthetic or reproductive function of the plant.
Regular monitoring of your Shasta daisies will allow you to catch fading blooms early. This not only keeps the plant looking tidy but also encourages rapid reblooming. During peak flowering season, it’s not uncommon to need to deadhead every few days. This consistent attention helps maintain a high rate of flower production.
In addition to timing, weather conditions can influence your deadheading schedule. It’s best to perform this task during dry weather, as wet conditions can increase the risk of disease entry through fresh cuts. Morning is generally the best time to deadhead, as the plant is well-hydrated and the heat of the day has not yet set in.
Choosing the Right Tools for the Job
Having the proper tools can make deadheading both efficient and enjoyable. For Shasta daisies, sharp pruning shears or garden scissors are the most effective instruments. These tools allow for clean cuts without crushing the stems, which is important for preventing damage and disease.
It’s important to keep your tools clean and sharp. Dull blades can tear plant tissue, while dirty tools can spread pathogens from one plant to another. Before beginning, take a moment to wipe your blades with rubbing alcohol or a diluted bleach solution. This simple step helps ensure the health and longevity of your plants.
For gardeners who prefer a hands-on approach, pinching off faded blooms with your fingers is also an option, especially for smaller plants or minor touch-ups. However, for larger plants or when dealing with woody stems, tools are generally the more effective and hygienic choice.
How to Deadhead Shasta Daisies Properly
The key to successful deadheading lies in making cuts at the correct location on the stem. When removing a spent flower, trace the stem downward until you find a new leaf node or bud. Make your cut just above this point. This encourages the plant to produce new shoots from that node, leading to more blooms.
Avoid cutting too far down the stem, as this can remove potential budding points and reduce flower production. Conversely, cutting too high can leave unsightly stubs that detract from the plant’s appearance. A clean, angled cut just above the node is ideal.
In cases where the entire stem appears to be spent, especially late in the season, it’s best to remove the whole stem back to the base. This not only tidies up the plant but also promotes better air circulation and reduces the risk of fungal diseases.
As you deadhead, take the opportunity to observe the plant’s overall condition. Look for signs of pests, disease, or nutrient deficiency. Addressing these issues early can help maintain plant health and maximize bloom potential.
Benefits of Deadheading Beyond More Blooms
While the primary goal of deadheading Shasta daisies is to encourage more flowers, the benefits extend beyond simple aesthetics. Regular deadheading helps maintain the shape and size of the plant, preventing it from becoming leggy or overgrown.
Deadheading also contributes to plant health by reducing the opportunity for fungal diseases to take hold in decaying flowers. By keeping the plant clean and open, you promote better air circulation, which is especially important in humid or rainy climates.
Furthermore, deadheading can help control the spread of the plant. If you allow Shasta daisies to go to seed, they may self-sow and spread throughout your garden, sometimes in unwanted locations. By removing spent flowers before they set seed, you maintain greater control over the growth and expansion of your daisies.
Common Mistakes to Avoid When Deadheading
Even experienced gardeners can make mistakes when deadheading Shasta daisies. One common error is waiting too long to remove spent blooms. Once seed production begins, the plant has already shifted energy away from new flower development, which can delay or reduce reblooming.
Another mistake is making cuts at the wrong point on the stem. Cutting too close to the flower head or too far down can result in stubby growth or missed opportunities for new buds. Always look for the next healthy set of leaves or budding point before making your cut.
Neglecting tool maintenance is another frequent oversight. Using dirty or rusty shears can introduce disease into the plant. Make it a habit to clean and sharpen your tools regularly, especially before working on multiple plants.
Finally, some gardeners over-deadhead by removing flowers that are still viable. A flower may look slightly faded in the midday sun but perk up by evening. When in doubt, wait a day before cutting. Observing the plant closely ensures you only remove flowers that have truly finished their cycle.
Supporting Continued Blooming with Proper Care
In addition to deadheading, several other cultural practices can help your Shasta daisies bloom continuously. These include proper watering, fertilization, and soil management. While deadheading redirects energy to new flowers, the plant still needs adequate nutrients and hydration to sustain growth.
Shasta daisies prefer well-drained soil and full sun. They thrive with consistent watering but dislike soggy roots. Mulching around the base can help retain moisture and suppress weeds without waterlogging the soil. During hot summer months, deep watering once or twice a week is often sufficient.
Fertilization plays a role in bloom production as well. A balanced, slow-release fertilizer applied in early spring and again in mid-summer can support healthy growth and continuous flowering. Avoid high-nitrogen fertilizers, which may promote excessive foliage at the expense of flowers.
Dividing clumps every two to three years can also rejuvenate plants and improve flowering. Over time, older clumps may become woody and less productive. Division encourages vigorous new growth and increases the number of flowering stems.
Preparing for the End of the Season
As summer winds down, Shasta daisies will begin to slow their blooming. At this point, you can ease off on deadheading and allow some flowers to go to seed if desired. This provides food for birds and adds winter interest to the garden. However, if you prefer a tidy look or want to avoid self-seeding, continue deadheading until the first frost.
In late fall, once the foliage begins to die back, you can cut the entire plant down to a few inches above the ground. This helps prepare it for winter dormancy and reduces the risk of pests and diseases overwintering in the stems. Apply a light layer of mulch for insulation in colder zones.
If you’ve followed proper care and deadheading throughout the season, your Shasta daisies will reward you with a spectacular show and return stronger the next year. Their reliability and long bloom time make them a favorite in perennial gardens across many climates.
FAQs About Deadheading Shasta Daisies
What is deadheading and why is it important for Shasta daisies?
Deadheading is the process of removing faded or spent flowers from a plant. For Shasta daisies, it helps redirect energy from seed production to new bloom development, ensuring continuous flowering throughout the summer.
How often should I deadhead Shasta daisies?
You should deadhead Shasta daisies regularly—every few days during peak bloom. This keeps the plant tidy and encourages new buds to form quickly.
Can I deadhead Shasta daisies by hand or do I need tools?
You can deadhead by hand if the stems are soft and the flower heads come off easily. However, using clean, sharp pruning shears or scissors is generally more precise and reduces the risk of damaging the plant.
Will deadheading make Shasta daisies bloom more?
Yes, deadheading encourages Shasta daisies to produce more flowers instead of forming seeds. This can result in weeks or even months of extended blooming.
Should I stop deadheading at the end of the season?
Toward the end of the growing season, you can allow some flowers to go to seed for wildlife or reseeding purposes. Otherwise, continue deadheading until the first frost for the tidiest appearance.
Conclusion: Achieving Endless Summer Blooms
Deadheading Shasta daisies is a simple but powerful technique that significantly enhances their performance. By removing spent blooms at the right time and in the correct manner, you extend the blooming season and encourage more abundant flowering. Coupled with proper care, this method transforms your garden into a vibrant, long-lasting display of summer color.
The satisfaction of seeing fresh white blooms reappear week after week is one of the many joys of gardening. With consistent deadheading, attention to plant health, and a bit of patience, you can enjoy your Shasta daisies in full glory from early summer well into the fall. Whether you’re cultivating a flower-filled border or a sun-drenched container garden, mastering the art of deadheading will ensure your blooms never cease to amaze.