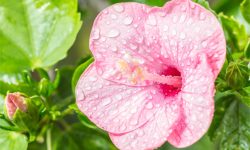
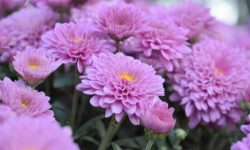
Hibiscus plants bring color, life, and tropical charm to any garden or home. Their bold flowers and lush green leaves create an exotic atmosphere that brightens every space. Growing hibiscus from seeds may seem difficult at first, but it’s easier than most people think. With the right steps and care, you can turn tiny seeds into strong plants that bloom beautifully. Watching a hibiscus grow from seed gives a special kind of satisfaction, as each stage shows nature’s slow, graceful work.
Learning how to germinate hibiscus seeds fast and successfully at home starts with preparation. Healthy seeds, warmth, and proper moisture all play key roles in early growth. Each seed holds the potential for a vibrant plant, but timing and technique make all the difference. This guide will walk you through every step clearly and simply. Once you understand the process, you can grow stunning hibiscus flowers right from your windowsill.
Understanding Hibiscus Seeds
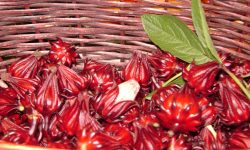
Hibiscus seeds may look small and simple, but each one hides incredible potential. They form inside dry, brown seed pods that appear after the flowers fade. Once the pods mature, they split open, revealing round, dark seeds with a fuzzy coating. Each seed contains all the information needed to grow a full hibiscus plant. When collected and stored properly, these seeds can remain viable for months. Growing hibiscus from seeds allows you to create new hybrids with unique colors, shapes, and flower patterns. Every plant that grows from a seed feels truly one of a kind.
Each seed has a tough, protective shell that shields the embryo from damage, dryness, and cold. This hard layer helps survival in nature but slows germination at home. In their natural environment, rain, warmth, and time gradually soften the coating. At home, you can help the process by gently nicking the shell or soaking the seeds. The right temperature and moisture levels trigger the embryo to awaken and begin growing. Warmth between 75°F and 85°F works best for most tropical varieties. Once the outer layer softens, the seed starts absorbing water and energy for sprouting.
Different hibiscus species produce slightly different seeds. Tropical varieties prefer warm, humid conditions, while hardy ones tolerate cooler climates. Knowing which type you have helps you provide the right germination environment. Fresh seeds always germinate faster and produce stronger seedlings than older ones. Understanding these details helps you plan properly, giving each seed the best chance to thrive. When you know how hibiscus seeds work, you can control every stage of growth and enjoy faster, healthier germination at home.
Preparing Seeds for Germination
Proper preparation determines how fast and successfully hibiscus seeds germinate. Begin by selecting mature, dark seeds from healthy plants. Ripe seeds form inside dry, brown pods and rattle when shaken. Always collect them after the pod splits naturally. Remove leftover husks or debris to prevent mold growth. Store clean seeds in a cool, dry, airtight container until planting. Fresh seeds give the highest germination rate, so use them within a few months. Avoid cracked or dull seeds, as they often fail to sprout. Careful selection and handling create the best foundation for healthy seedlings.
Before planting, focus on softening the seed coat to help moisture penetrate. Soak the seeds in warm water for eight to twelve hours at around 85°F. This process wakes the embryo and promotes faster germination. If the outer shell feels thick or tough, gently nick it with a nail file or sandpaper. Be gentle so you don’t harm the inner part. Once soaked, plant the seeds while they remain moist. Moisture loss after soaking delays germination and weakens the seed. Seeds treated this way sprout evenly and show visible growth within two to three weeks.
You can also disinfect the seeds using a mild hydrogen peroxide or chamomile tea solution to reduce bacterial risk. This simple step prevents fungal growth in warm, humid conditions. Always use clean containers, tools, and fresh water for soaking. Label different hibiscus varieties if you’re growing more than one type. Keep your workspace organized, warm, and sanitary. When you prepare seeds carefully, you give them a powerful start. This early attention rewards you later with strong, fast-growing hibiscus plants ready to thrive and bloom beautifully.
Creating the Perfect Environment for Germination
Creating the right environment ensures hibiscus seeds germinate quickly and grow into strong, healthy plants. Warmth, humidity, and light all work together to start the growth process. Hibiscus seeds germinate best between 75°F and 85°F. Temperatures below 70°F slow down growth, while heat above 90°F dries the soil. Place seed trays near a sunny window, or use fluorescent grow lights for steady warmth. Cover the trays with clear plastic wrap or a humidity dome to trap moisture. This controlled environment mimics tropical conditions, keeping seeds active and promoting faster germination.
Humidity and moisture are equally important for success. The soil should stay consistently damp but never soaked. Too much water deprives the seeds of oxygen and encourages mold. Use a lightweight seed-starting mix with good drainage and aeration. Spray the surface gently with a fine mist each day to maintain moisture levels. Avoid pouring water directly onto the soil, as it may displace the seeds. A small tray of water nearby can help maintain humidity naturally. Consistent moisture and warmth allow the seeds to stay active and sprout evenly within a few weeks.
Good airflow completes the ideal setup for germination. Air circulation prevents fungus, strengthens seedlings, and balances humidity. Open the plastic cover for a few minutes daily to allow fresh air exchange. Check soil temperature and moisture every day to ensure conditions stay stable. Place a small fan nearby on a low setting once the seedlings emerge to toughen their stems. When warmth, moisture, and airflow remain in balance, hibiscus seeds germinate quickly and grow vigorously. This careful setup gives your plants the best start possible at home.
Planting Hibiscus Seeds Step by Step
Once your hibiscus seeds are ready, planting them carefully ensures strong germination and healthy early growth. Use small pots or trays with a light, fertile seed-starting mix that drains well. The soil should feel damp but never soaked. Press each seed gently about a quarter inch into the surface and cover it lightly with soil. Mist the top using warm water to create even moisture. Label each pot with the date and seed type for tracking. Place the trays in a warm, bright area but away from direct sunlight, which can dry the soil. Maintain a temperature around 80°F for ideal sprouting conditions.
Moisture and warmth are crucial during the first few weeks. Keep the soil evenly moist and check daily to prevent drying. Cover the pots with clear plastic or a humidity dome to trap moisture and maintain warmth. Lift the cover once or twice each day to allow airflow and prevent mold. If you use a heating mat, set it to maintain consistent warmth beneath the pots. Germination usually begins within two or three weeks, though tropical varieties may sprout faster. Once tiny shoots emerge, remove the cover gradually so seedlings can adjust to open air.
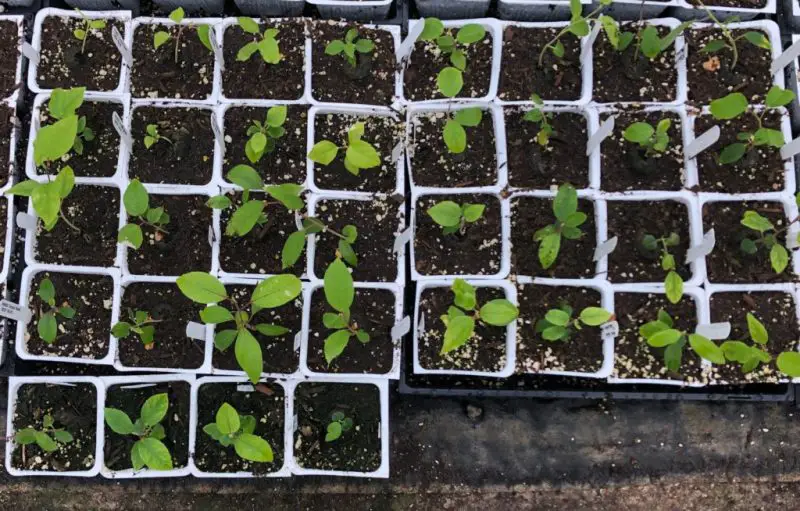
As seedlings grow, they need light and space. Move them closer to a bright window or place them under grow lights for at least 12 hours each day. Keep watering gentle to avoid washing away the soil. When seedlings produce three or four true leaves, thin out weaker ones to make room for stronger plants. Handle each seedling carefully, supporting its delicate stem. Early planting success builds the foundation for healthy hibiscus plants that thrive and bloom with tropical beauty in the months.
Caring for Hibiscus Seedlings After Germination
Providing Light and Water for Young Seedlings
After germination, hibiscus seedlings need plenty of light and balanced moisture to grow strong. Place the young plants near a sunny window that gets bright, indirect light. If natural light is limited, use grow lights for 12 to 14 hours each day. Gradually increase exposure so the seedlings adapt without burning. Keep the lights about six inches above the plants to prevent stretching. Light encourages compact, sturdy growth and vibrant green leaves. Warmth around 75°F keeps the seedlings comfortable and active. Avoid sudden temperature changes that can slow development or stress young plants.
Watering also plays a key role in this stage. Check the soil daily and water gently when the top inch feels dry. Use a fine spray bottle or watering can with a narrow spout to avoid damaging roots. Consistent moisture helps seedlings form deep, healthy roots. Too much water, however, can suffocate them and cause rot. Drain excess water from trays and never let the pots sit in puddles. A thin layer of organic mulch helps retain moisture and regulate temperature. Balanced light, warmth, and moisture keep hibiscus seedlings growing evenly and ready for transplanting.
Strengthening and Transplanting the Seedlings
As hibiscus seedlings mature, they need space and nutrients to continue developing. Once they reach about four inches tall, transplant them into slightly larger pots with fertile, well-draining soil. Use a mix containing compost, peat moss, and perlite to promote healthy root growth. Water the seedlings before transplanting to minimize shock. Handle them carefully by holding the leaves, not the stems. Keep the soil moist after moving them and place the pots in bright, indirect light. This gentle transition allows the plants to adjust easily to their new environment.
To strengthen the seedlings, start hardening them off before planting outdoors. Move them outside for a few hours daily in mild conditions, gradually increasing exposure over a week. This process prepares the plants for natural sunlight and changing temperatures. Once the seedlings show steady growth and strong stems, transplant them permanently into garden soil or larger containers. Provide consistent care for the first few weeks after transplanting to ensure healthy establishment. Proper strengthening and transplanting give your hibiscus the foundation it needs to thrive and bloom for years.
Transplanting and Growing Hibiscus Plants Indoors or Outdoors
Growing Hibiscus Indoors Successfully
Growing hibiscus indoors keeps the plant safe from weather changes and pests. Once seedlings grow at least six inches tall, move them into larger pots with rich, well-draining soil. Choose containers with drainage holes to prevent water buildup. Place your hibiscus near a window that gets bright, indirect sunlight for at least six hours daily. Indoor temperatures between 70°F and 85°F create the best environment for growth. Rotate the pots occasionally so each side receives equal light and grows evenly. Prune lightly to encourage bushy growth and remove weak or damaged leaves.
Water indoor hibiscus plants when the top inch of soil feels dry. Use lukewarm water to avoid shocking the roots. Regular feeding with a diluted liquid fertilizer every two weeks helps promote leaf and flower development. Avoid overfertilizing since too many nutrients can reduce blooming. Maintain moderate humidity by misting the leaves or placing a tray of water nearby. Clean the leaves gently to remove dust and help the plant breathe. With proper care, indoor hibiscus plants produce lush foliage and bright blooms that bring tropical color into your home year-round.
Moving Hibiscus Outdoors for Stronger Growth
When the weather warms, hibiscus thrives outdoors with sunlight and fresh air. Wait until the temperature stays above 60°F before moving the plants outside. Begin by placing them in partial shade for a few hours daily to help them adjust. Gradually increase exposure to direct sunlight over a week. Full sun encourages vigorous growth and larger flowers. Use garden soil enriched with compost for planting. Space each plant about three feet apart to allow air circulation and prevent overcrowding. Water regularly, keeping the soil evenly moist but not muddy.
Once settled outdoors, feed your hibiscus every two weeks with a balanced fertilizer to encourage flowering. Trim faded blooms and old leaves to promote continuous blooming throughout summer. In hot regions, add mulch around the base to keep the roots cool and moist. Check often for pests like aphids and whiteflies and treat them quickly with natural insect sprays. Outdoor hibiscus grows faster and stronger when given space, sunlight, and consistent care. These conditions lead to vibrant plants with abundant, long-lasting blossoms.
Encouraging Faster and Healthier Growth
Strong hibiscus growth begins with consistent sunlight, balanced nutrition, and good airflow. Hibiscus needs at least six hours of bright light each day to thrive. In shaded conditions, the plant grows tall but produces fewer flowers. Place indoor plants near a south-facing window or use grow lights during cloudy days. Outdoor hibiscus benefits from full sun exposure and protection from strong winds. Light pruning also encourages bushier growth by stimulating new branches. Remove weak or crossing stems to keep energy focused on healthy parts of the plant. Proper light and trimming help the plant stay compact, vibrant, and full of life.
Feeding plays a big role in boosting growth speed and flower production. Hibiscus enjoys a steady supply of nutrients, especially nitrogen, potassium, and phosphorus. Use a balanced liquid fertilizer every two weeks during active growth. Organic options such as compost tea or seaweed extract support strong roots and brighter blooms. Always water the plant before applying fertilizer to prevent root burn. Keep the soil moist but not soggy, as waterlogged roots can slow development. Consistent feeding and hydration give the plant the strength to grow faster and bloom more often.
Healthy hibiscus also depends on airflow and environmental stability. Good ventilation reduces disease and helps leaves dry quickly after watering. Keep the area around the plant clean and free of fallen debris. Monitor humidity and temperature regularly, as sudden changes can slow growth. In dry climates, mist the leaves or use a humidifier to maintain moisture in the air. When light, nutrients, and airflow remain balanced, hibiscus plants develop thick stems, deep green leaves, and frequent, colorful blossoms that brighten any space.
Hardening and Transplanting Hibiscus Outdoors Permanently
Moving hibiscus outdoors permanently marks a major step in its growth journey. This process, called hardening, helps the plant adjust to natural sunlight, wind, and temperature changes. Begin the transition when night temperatures stay above 60°F. Place the plants outside in partial shade for a few hours each day. Gradually extend the time outdoors and increase sunlight exposure over one to two weeks. This slow adjustment strengthens the stems and prevents sunburn or shock. Keep the soil moist during this stage, as sunlight and wind can dry it quickly. Healthy seedlings adapt smoothly when introduced to outdoor conditions gradually.
Once the plants harden properly, prepare the garden bed for transplanting. Choose a sunny spot with fertile, well-draining soil. Dig holes twice as wide as the root balls but no deeper. Gently remove the plants from their pots, keeping the root systems intact. Place each plant in its hole and fill around it with loose soil. Press lightly to eliminate air pockets, then water thoroughly. Space each hibiscus at least three feet apart to give room for future growth and airflow. Mulching helps retain moisture and regulate soil temperature during the early weeks.
After transplanting, monitor the plants closely as they establish themselves. Provide consistent watering, especially in the first few weeks. Check for signs of stress, such as drooping leaves or pale color, and adjust sunlight or moisture accordingly. Add compost every month to boost soil fertility and root strength. Prune lightly to shape the plant and promote branching. Within a few months, the hibiscus will anchor deeply into the soil and start producing strong, colorful blooms. With careful hardening and transplanting, your hibiscus will flourish outdoors for years.
Common Mistakes When Germinating Hibiscus Seeds
Using Old or Unviable Seeds
Using old or unviable seeds is one of the biggest reasons hibiscus germination fails. As seeds age, their protective coating hardens and moisture levels drop. The inner embryo loses vitality and struggles to grow even in perfect conditions. Always collect seeds from healthy, mature pods and let them dry naturally before storing. Keep them in airtight containers placed in cool, dry environments to prevent humidity damage. Avoid direct sunlight, which can overheat and kill the embryo inside. Fresh seeds germinate quickly, sprout evenly, and grow into strong, disease-resistant plants.
Before planting, always test seed viability to save time and effort. Place several seeds in warm water for twelve hours. The viable ones sink to the bottom, while floating ones are likely hollow or lifeless. Discard weak seeds and plant the healthy ones immediately after soaking. If seeds have been stored for months, pre-soaking becomes even more important. Using high-quality, fresh seeds ensures a fast, uniform start and leads to strong plants that develop deep roots and lush foliage later. Starting with good seeds means success begins before planting even starts.
Skipping the Soaking or Scarification Step
Skipping the soaking step slows or completely stops hibiscus germination. The outer shell of each seed is dense and waterproof, preventing moisture from reaching the embryo. Soaking breaks this barrier naturally, allowing water to soften the coat and activate the seed’s inner growth. For the best results, soak seeds in warm water between 80°F and 90°F for at least eight hours. Avoid using cold water, which delays the process. For older or harder seeds, lightly scarify the surface with fine sandpaper or a nail file. This gentle abrasion helps the seed absorb moisture faster and sprout evenly.
Proper soaking also prevents uneven germination among seeds. When all seeds hydrate fully, they sprout at a similar pace, simplifying care and transplanting. Avoid soaking them for longer than 24 hours because prolonged exposure can cause swelling or decay. Always plant seeds immediately while they remain moist and active. Neglecting this step often results in dry, dormant seeds that stay buried without growing. Taking the time to soak and prepare seeds ensures faster sprouting, stronger seedlings, and an overall higher germination success rate at home.
Overwatering and Poor Drainage
Overwatering and poor drainage quickly destroy hibiscus seeds. Many gardeners mistakenly believe that more water accelerates germination, but it often suffocates the seeds. Excess water removes oxygen from the soil, leading to fungal growth and seed rot. Always use a well-draining, light mix to encourage airflow and prevent stagnation. Containers should include holes at the bottom so excess water escapes easily. Avoid compacting the soil, as this traps moisture and limits air movement. The goal is to keep the soil evenly moist, never soaked.
Water gently using a misting spray or fine spout to avoid displacing the seeds. Check moisture daily by feeling the top layer; water only when it starts to dry. During germination, avoid covering the trays too tightly, as trapped moisture encourages mold. Remove plastic covers for a few minutes daily to allow airflow. If the soil ever smells sour, reduce watering immediately and let it dry slightly. Consistent, moderate watering helps the roots breathe and keeps seedlings vibrant. Learning moisture balance early guarantees healthier hibiscus growth throughout its life.
Not Providing Enough Warmth and Light
Lack of warmth and light can completely halt hibiscus germination. These tropical seeds depend on steady warmth to activate internal enzymes. Ideal temperatures range between 75°F and 85°F for most varieties. If the environment stays below 70°F, seeds may remain dormant. Place trays near bright windows or use seed-heating mats to maintain consistent warmth. Avoid drafty areas where cold air disrupts the temperature. Warm soil stimulates rapid root development and increases sprouting rates dramatically.
Light becomes crucial once seedlings emerge. Without sufficient light, young hibiscus plants stretch toward weak illumination, producing thin, fragile stems. Place seedlings near a sunny window or use grow lights for at least 14 hours daily. Keep lights about six inches above the leaves to prevent scorching. Rotate trays often to ensure even growth and balanced color. In cloudy or winter months, artificial lighting provides consistent brightness. Adequate warmth and light create ideal conditions for healthy germination and strong early growth, giving your hibiscus a powerful start toward full maturity.
FAQs About Germinating Hibiscus Seeds
How long does it take hibiscus seeds to germinate?
Hibiscus seeds usually germinate within two to three weeks under warm and moist conditions. Tropical varieties sprout faster than hardy ones. Keep the temperature between 75°F and 85°F for best results. Stable warmth, humidity, and gentle watering help seeds sprout evenly and grow into strong, healthy seedlings.
Should I soak hibiscus seeds before planting?
Yes, soaking hibiscus seeds helps speed up germination. Soak them in warm water for eight to twelve hours to soften their hard shells. This allows water and oxygen to reach the embryo easily. For tougher seeds, gently scarify the surface with sandpaper before soaking to improve success rates.
What kind of soil works best for hibiscus seeds?
Hibiscus seeds grow best in light, well-draining soil. Use a mix of peat moss, perlite, and compost for moisture retention and airflow. Avoid heavy clay soils that trap water and cause rot. The ideal soil feels soft, slightly moist, and loose enough for roots to expand freely.
How much sunlight do hibiscus seedlings need?
Young hibiscus plants need at least six hours of bright, indirect sunlight every day. Too little light causes weak, leggy stems. If sunlight is limited, use grow lights placed six inches above the seedlings. Gradually increase light exposure to strengthen stems and promote deep green leaves.
Can I grow hibiscus from seeds indoors all year round?
Yes, you can grow hibiscus from seeds indoors throughout the year. Provide consistent warmth, humidity, and plenty of light to replace natural sunlight. Maintain room temperatures above 70°F and use grow lights during short winter days. With proper care, indoor hibiscus can bloom beautifully even in colder seasons.
Conclusion
Germinating hibiscus seeds at home combines patience, care, and simple techniques that bring rewarding results. With the right warmth, moisture, and light, each tiny seed transforms into a vibrant plant. Consistent attention during soaking, planting, and early growth builds strong, healthy roots. Whether grown indoors or outdoors, hibiscus rewards your effort with lush foliage and dazzling blooms. Once mastered, the process feels effortless and deeply satisfying, turning every seed into a living burst of color that brightens your home and garden for years.