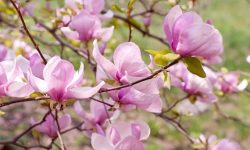
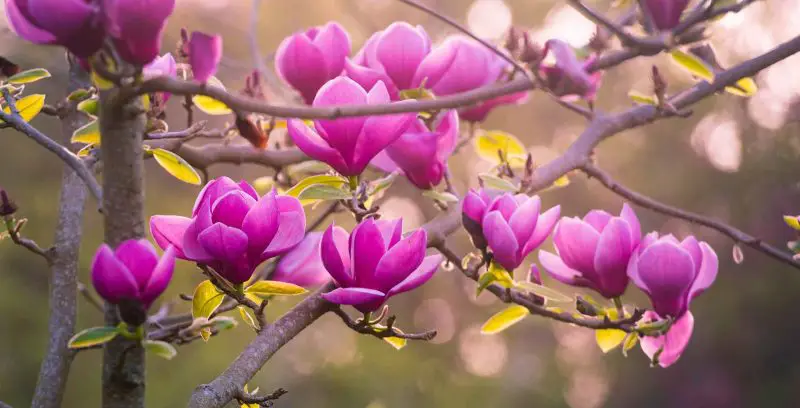
Magnolia trees captivate gardeners with their stunning, fragrant blooms that symbolize grace and renewal. Growing these elegant trees from seeds is one of the most rewarding experiences for plant enthusiasts. Though magnolia seed germination requires patience and the right technique, the process allows you to witness the miracle of life unfolding from a single seed into a majestic, flowering tree.
Understanding how to germinate magnolia seeds properly ensures strong, healthy seedlings and long-lasting beauty in your garden. From collecting and cleaning the seeds to providing ideal growing conditions, every step plays a crucial role in success. Whether you dream of creating a lush magnolia hedge or simply wish to nurture one elegant specimen, mastering the germination process will help you enjoy these timeless blooms all year long.
Understanding Magnolia Seed Characteristics
Magnolia seeds are remarkable for their structure and the patience they demand from gardeners. Each seed is encased in a bright red, fleshy coating called an aril, which naturally attracts birds to spread the seeds in the wild. Beneath that vivid layer lies a thick, dark, and hard shell designed to protect the embryo from damage and environmental stress. This natural armor ensures that the seeds remain viable until they find ideal growing conditions. However, this same protective feature makes germination more challenging, requiring special preparation before planting.
Another important characteristic is dormancy. Fresh magnolia seeds rarely germinate right away, no matter how favorable the conditions may seem. They need a cold stratification period, which simulates winter conditions and activates the enzymes responsible for breaking dormancy. During this stage, seeds slowly adapt to temperature changes, signaling them that spring is approaching. Without this chilling process, seeds may remain inactive for months or even years, delaying growth and reducing germination success. Understanding this biological mechanism allows gardeners to align their growing schedule with nature’s rhythm.
Seed viability and storage conditions also play a vital role in the germination process. Magnolia seeds are sensitive to drying out; if exposed to air and heat, they quickly lose their ability to sprout. To maintain viability, seeds should be stored in moist peat moss or vermiculite at a cool temperature until ready for stratification. This careful preservation helps maintain moisture and internal nutrients. Recognizing these characteristics gives you the foundation to handle magnolia seeds properly and nurture them into thriving trees that reward you with timeless beauty and stunning blooms.
Collecting and Preparing Magnolia Seeds
When and How to Harvest Seeds
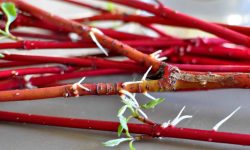
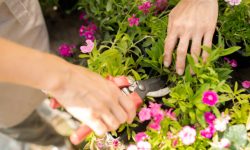
Magnolia seeds reach maturity in late summer or early fall when the cone-like seed pods begin to split open, revealing bright red seeds inside. This is the ideal time to collect them, as the seeds are fully developed but have not yet been carried away by birds or dropped to the ground. To harvest, gently pick the seed pods directly from the tree and place them in a breathable container, such as a paper bag, to allow them to finish drying naturally. Avoid using plastic bags, as they trap moisture and may lead to mold or decay. Once dry, the seeds can be separated easily from the pod and cleaned for storage or immediate processing.
After harvesting, the next step is to remove the fleshy red coating, which can inhibit germination if left in place. Soak the seeds in warm water for a few hours to soften the coating, then rub them gently between your fingers or a soft cloth to clean them thoroughly. Once cleaned, rinse them well to remove any remaining residue. This process prevents fungal growth during storage and ensures that the seed surface is ready for the next stage of preparation. Clean, healthy seeds have a much higher success rate when it comes time to germinate.
Cleaning and Storing for Best Results
Proper storage is essential to protect magnolia seeds and preserve their germination potential. After cleaning, allow the seeds to dry just enough to remove surface moisture, but never let them become completely dry. Magnolia seeds are classified as recalcitrant, meaning they cannot withstand drying like other seeds can. Once desiccated, they quickly lose viability and fail to sprout even under the best conditions. To maintain their vitality, place the seeds in a plastic or glass container filled with slightly moist peat moss, vermiculite, or sphagnum moss. The goal is to keep them damp but not soggy, preventing mold and decay while maintaining internal moisture.
For long-term preservation, store the container in the refrigerator at a temperature between 35°F and 40°F (1.5°C to 4°C). Avoid freezing, as the cold can damage the delicate embryo inside. Check the seeds every few weeks to ensure the medium remains moist but not overly wet. If necessary, lightly mist the storage mix to maintain the right humidity level. Properly stored magnolia seeds can remain viable for up to six months, giving you flexibility in timing your germination. This careful balance of moisture, temperature, and air circulation ensures your magnolia seeds stay alive, healthy, and ready for the next crucial step—stratification.
Stratifying Magnolia Seeds for Successful Germination
The Importance of Cold Stratification
Cold stratification is the key process that awakens magnolia seeds from dormancy and prepares them for germination. In their natural environment, seeds fall to the ground in autumn and spend the winter buried under layers of moist soil and leaf litter. This exposure to cold and moisture triggers internal biochemical changes, signaling to the embryo that winter has passed and spring is near. Without this chilling period, most magnolia seeds remain dormant, even when planted in ideal soil and light conditions. Stratification mimics this natural winter cycle, ensuring a higher germination rate and stronger seedlings once planted.
To begin stratification, place cleaned and moist seeds into a sealed container with damp peat moss, sand, or vermiculite. Store the container in a refrigerator set between 35°F and 40°F (1.5°C to 4°C). Maintain this condition for at least three to six months, depending on the magnolia species. Throughout this time, check the seeds every few weeks to make sure the storage medium remains consistently moist but never waterlogged. This balance allows the seed coat to soften gradually and the embryo to mature internally, preparing it for sprouting once exposed to warmth and light.
Tips for Monitoring During Stratification
During stratification, close and regular monitoring is vital to prevent issues that could damage the seeds. Check the container every two to three weeks to ensure the medium remains evenly moist. If it begins to dry out, lightly mist it with water rather than soaking it, as excessive moisture can cause seeds to rot. Look carefully for any signs of mold or fungus, which can spread quickly in a closed environment. If mold appears, remove affected seeds immediately, wipe the remaining ones gently with a paper towel, and replace the medium with a clean, slightly moist mixture. Keeping the seeds clean and well-aerated throughout this process ensures they stay healthy during the cold dormancy phase.
As the stratification period progresses, you may notice some seeds starting to swell or develop small cracks in their shells. This is a good indication that the chilling treatment is working. In some cases, early root tips may even begin to emerge before planting. When this happens, handle the seeds gently to avoid damaging the tender roots. Continue storing them in the refrigerator until the stratification period is complete, as full chilling helps synchronize germination. This patient, careful attention during stratification leads to higher success rates and produces stronger, more resilient magnolia seedlings ready for growth.
Planting Magnolia Seeds After Stratification
After completing the stratification period, magnolia seeds are ready for planting. This stage is critical, as proper soil conditions and planting depth determine whether the seeds will successfully sprout. Choose small pots or seed trays with good drainage and fill them with a mixture of equal parts peat moss, perlite, and garden soil. This blend creates a light, well-aerated environment that retains moisture without becoming soggy. Before planting, let the soil warm to room temperature, as cold soil can slow germination. Gently press each seed about half an inch deep into the soil and cover it lightly. Avoid burying the seeds too deeply, as magnolia embryos need both moisture and light to initiate growth.
Once planted, keep the containers in a bright area with indirect sunlight. Ideal temperatures for germination range between 70°F and 75°F (21°C to 24°C). Maintaining consistent warmth is essential, as sudden drops in temperature can delay or prevent sprouting. Water the soil regularly to keep it moist but never soaked. Magnolia seeds are sensitive to waterlogging, which can cause the young roots to rot. To retain humidity, you can cover the pots with a plastic dome or clear bag, but make sure to open it occasionally for ventilation. This setup creates a mini-greenhouse effect that encourages steady germination.
Under optimal conditions, germination typically occurs within four to eight weeks, though some seeds may take longer depending on the species. During this period, patience is key—magnolia seeds often sprout irregularly. Once seedlings appear, remove the cover and allow them to grow in bright, indirect light. Keep watering consistently to support healthy root development. Strong seedlings can later be transplanted to larger pots or directly into the garden when they reach several inches tall and the risk of frost has passed, marking the beginning of their transformation into graceful magnolia trees.
Caring for Magnolia Seedlings
Providing the Right Light and Temperature
Once your magnolia seedlings emerge, maintaining proper light and temperature becomes essential for healthy growth. These young plants thrive in bright but indirect sunlight, which encourages strong stem development without scorching delicate leaves. Place the seedlings near a window with filtered light or under grow lights set for about 12 to 14 hours a day. Direct sunlight at this stage can cause leaf burn and dehydration. Maintaining a stable temperature between 68°F and 75°F (20°C to 24°C) helps seedlings grow evenly. Avoid placing them near drafts or heat vents, as sudden fluctuations can stress the plants and stunt their growth. Consistency in both light and warmth encourages balanced development during these early weeks.
As seedlings mature, you can gradually expose them to more sunlight to strengthen their tolerance. Start by moving them outdoors for a few hours each day in mild conditions, then increase the duration over a week or two. This hardening process prepares them for life outside and reduces transplant shock later. If temperatures drop below 55°F (13°C), bring the seedlings indoors to protect them. A steady growing environment during this early stage will ensure your magnolia plants develop sturdy stems and lush green foliage.
Watering and Feeding for Strong Growth
Proper watering and nutrition are equally important for nurturing magnolia seedlings. Keep the soil consistently moist but not waterlogged, as young roots are highly sensitive to excess moisture. Use room-temperature water to avoid shocking the plants. Overwatering can lead to root rot, while dry soil can halt growth completely. A good rule is to water when the top inch of soil begins to dry out. As the seedlings establish stronger roots, you can slightly reduce watering frequency but maintain even moisture levels throughout the growing period.
Feeding should begin once the seedlings have developed two or three sets of true leaves. Use a balanced, diluted liquid fertilizer—preferably one with equal ratios of nitrogen, phosphorus, and potassium—to promote healthy foliage and root growth. Apply the fertilizer every two weeks during active growth, avoiding overfeeding, which may cause leggy, weak stems. With consistent watering, gentle feeding, and proper light, your magnolia seedlings will steadily mature into resilient young plants ready for transplanting in the months ahead.
Transplanting Young Magnolia Plants
Transplanting magnolia seedlings is a crucial step that determines their long-term health and growth. The ideal time to transplant is when the seedlings reach six to eight inches tall and have several sets of true leaves. At this stage, their root systems are strong enough to withstand relocation without major shock. Choose a cool, cloudy day to reduce stress from direct sunlight. Prepare planting holes twice as wide as the root ball and just as deep, ensuring the soil is slightly acidic and well-draining. Mixing compost or peat moss into the soil improves aeration and nutrient content. When transferring the seedlings, handle them carefully to keep the roots intact. Position each one upright in its new hole, fill in with soil, and press gently to remove air pockets. Water thoroughly right after planting to help the roots establish quickly.
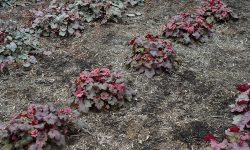
Selecting the right location is equally important for successful transplantation. Magnolias grow best in areas that receive full sun to partial shade, depending on the species. They also need protection from strong winds, which can damage young branches. Space the seedlings adequately to allow future growth, as mature magnolias can spread widely both above and below ground. For those growing in containers, choose deep pots with drainage holes and nutrient-rich loam. Container-grown magnolias should be repotted every few years to prevent root binding and nutrient depletion. Ensuring proper spacing and soil structure during this phase helps promote strong root development and long-term vigor.
After transplanting, focus on providing steady aftercare to help seedlings adapt to their new environment. Keep the soil evenly moist during the first few weeks, as young roots need consistent hydration to anchor themselves firmly. A layer of organic mulch, such as bark or straw, helps retain moisture and stabilize soil temperature, but avoid placing it directly against the stem to prevent rot. Limit fertilization during the first month, as overfeeding can stress new roots. Instead, wait until new growth appears before applying a mild, balanced fertilizer. With consistent watering, gentle sunlight exposure, and careful observation, your young magnolia plants will quickly establish themselves and begin developing the strength and beauty that define mature magnolia trees.
Encouraging Healthy Growth and Early Blooms
Promoting strong growth in young magnolia plants requires balanced care, patience, and attention to environmental factors. Magnolias are naturally slow-growing trees, but with proper nurturing, they can develop lush foliage and bloom earlier than expected. The foundation of healthy growth lies in consistent watering, well-draining soil, and sufficient sunlight. These trees prefer soil that stays evenly moist but never soggy, as excessive water can suffocate the roots. Deep watering once or twice a week encourages the roots to grow downward, improving drought resistance over time. Sunlight is another key factor—magnolias thrive in full sun to partial shade, though young plants may benefit from filtered light during intense afternoon heat. A stable environment with moderate humidity helps maintain strong leaf structure and supports early bud formation.
Fertilization plays an equally important role in encouraging robust growth. Begin feeding magnolias in their second growing season using a slow-release, balanced fertilizer with equal parts nitrogen, phosphorus, and potassium. Apply it in early spring before new growth begins and again in mid-summer to sustain development. Avoid high-nitrogen fertilizers, which promote excessive leaf growth at the expense of blooms. Incorporating organic matter such as compost or leaf mold around the base also improves soil texture and gradually releases nutrients. Maintaining this feeding routine enhances both the vigor and flowering potential of the plant.
Pruning is another effective way to promote healthy structure and blooming. Perform light pruning after flowering or in late winter while the tree is dormant. Remove any weak, crossing, or damaged branches to improve airflow and allow more sunlight to reach the inner canopy. Avoid heavy pruning, as magnolias bloom on old wood, and excessive cutting can reduce next season’s flowers. Regularly inspecting the tree for signs of pests or disease ensures early intervention and keeps growth steady. With careful attention to watering, feeding, and pruning, your magnolia will reward you with radiant foliage and blossoms that symbolize grace and strength year after year.
Protecting Magnolia Seedlings from Pests and Diseases
Managing Common Insect Pests
Magnolia seedlings often attract pests such as scale insects, aphids, and spider mites, which feed on sap and weaken the plant’s tender tissues. Scale insects appear as small, immobile bumps on stems and leaves, while aphids cluster on new shoots, leaving behind a sticky substance that encourages mold growth. Spider mites, on the other hand, cause fine webbing and yellow stippling on the undersides of leaves. Regular inspection is the best preventive measure—examine leaves and stems weekly, especially during warm months. When pests are found early, simple washing with a strong stream of water can dislodge them. For more serious infestations, use insecticidal soap or horticultural oil, which control pests without damaging the plant. Applying horticultural oil in late winter is especially effective against overwintering eggs and larvae, helping reduce pest populations before spring growth begins.
Consistency in pest management is essential for healthy magnolia seedlings. Avoid using harsh chemical pesticides, as they can harm beneficial insects and disrupt the natural balance of your garden. Instead, encourage helpful predators like ladybugs and lacewings, which naturally control aphid and mite populations. Maintaining proper air circulation and avoiding overfertilization also help prevent outbreaks, as pests thrive on dense, nitrogen-rich foliage. With steady observation and gentle treatments, magnolia seedlings can stay vigorous and pest-free throughout the growing season.
Preventing and Treating Plant Diseases
Diseases such as leaf spot, powdery mildew, and root rot can seriously affect magnolia seedlings if left unchecked. Leaf spot typically presents as small brown or black patches that spread across leaves, while powdery mildew appears as a fine white coating. These fungal problems thrive in damp, poorly ventilated conditions. To prevent them, water at the base of the plant instead of overhead, allowing foliage to remain dry. Ensure good air circulation by spacing plants adequately and pruning dense or crossing branches. If an infection occurs, promptly remove affected leaves and dispose of them away from the garden to stop the spread. Fungicidal sprays can be used in severe cases, but good cultural practices are often the most effective defense.
Root rot, caused by excess moisture and poor drainage, poses one of the greatest dangers to magnolia seedlings. Early symptoms include yellowing leaves, wilting, and stunted growth. When roots become dark and mushy, the damage is often irreversible. To prevent this, always plant in loose, well-draining soil and avoid overwatering. If rot develops, remove the plant, trim away the affected roots, and replant in fresh, dry soil. Regular monitoring, balanced watering, and proper airflow will keep diseases under control, allowing your magnolia seedlings to grow strong and vibrant.