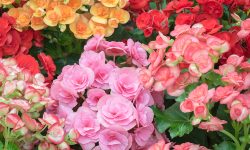
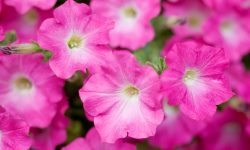
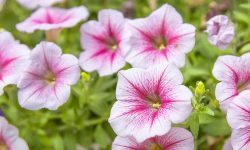
Petunias are among the most loved flowering plants for gardeners who crave vibrant colors and lush blooms throughout the summer. Their trumpet-shaped flowers appear in shades of pink, purple, white, and red, creating a dazzling display in gardens, containers, and hanging baskets. However, one of the most rewarding yet challenging parts of growing petunias is germinating their tiny seeds. Because petunia seeds are small and sensitive, the germination process requires patience, precision, and the right growing environment.
Learning how to germinate petunia seeds fast can make all the difference in achieving healthy, early-blooming plants. With the proper methods, you can significantly shorten the time it takes for seeds to sprout while ensuring high germination success. This guide will walk you through every step — from seed preparation and soil selection to light management and transplanting — so you can enjoy robust petunia growth and stunning garden results in record time.
Understanding Petunia Seeds and Their Germination Process
Petunia seeds are among the smallest in the plant world, often resembling grains of fine dust. Because of their delicate size, they require special care during sowing and germination. Each seed carries the potential to grow into a vibrant, full-blooming plant, but success depends on how you manage the early stages of their growth. Petunia seeds need the right balance of light, warmth, and moisture to trigger germination. Even slight variations in these factors can affect how quickly and successfully the seeds sprout. Gardeners who understand the unique requirements of petunia seeds can achieve faster and more consistent results compared to random sowing.
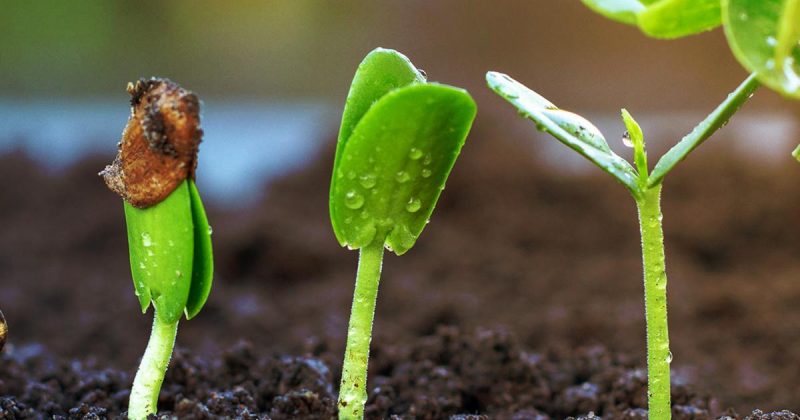
Germination typically occurs within seven to fourteen days when conditions are optimal. The process begins when the seed absorbs moisture from the soil, activating the embryo inside. Light exposure then signals the seed to begin photosynthesis once the first tiny shoots appear. Petunia seeds are “light-dependent germinators,” meaning they need light to sprout, so they should never be buried deep in the soil. A thin layer of fine soil or vermiculite is enough to protect them while still allowing light penetration. Maintaining humidity through a transparent cover or plastic dome helps create a mini-greenhouse effect, ideal for seed sprouting.
Understanding this delicate biological process helps gardeners create an ideal environment for rapid growth. The early stage of germination sets the foundation for plant strength, root development, and future flowering. If seeds are exposed to excessive dryness or inconsistent temperature, they may remain dormant or fail to germinate at all. By focusing on the conditions that petunia seeds need most — warmth, moisture, and gentle light — you can significantly increase both germination speed and success rate, setting the stage for vigorous, long-lasting petunia blooms.
Preparing Petunia Seeds for Germination
Before you begin the germination process, proper preparation of your petunia seeds is essential. Because these seeds are incredibly tiny, handling them with care prevents loss and ensures even distribution during planting. Start by purchasing fresh, high-quality seeds from a reputable source. Old or improperly stored seeds often have lower germination rates. It’s best to check the expiration date and store them in a cool, dry place before use. Some gardeners prefer using pelleted petunia seeds, which are coated to make them easier to handle and sow evenly across the soil surface. This coating also helps retain moisture during the early stages of germination.
Once you have your seeds ready, focus on selecting the right growing medium. Petunia seeds need a light, well-draining mix that retains moisture without becoming soggy. A sterile seed-starting mix is ideal because it minimizes the risk of fungal infections that can harm delicate seedlings. Avoid heavy garden soil since it compacts easily and limits air circulation around the seeds. Before sowing, moisten the soil lightly — it should be damp but not soaked. Using a spray bottle is the best way to achieve uniform moisture without disturbing the soil surface.
Temperature and humidity play crucial roles in preparing the environment for germination. Petunia seeds germinate fastest when kept between 70°F and 75°F (21°C–24°C). You can use a seedling heat mat to maintain a steady temperature. To prevent moisture loss, cover the seed tray with clear plastic wrap or a humidity dome, creating a warm, humid environment that encourages faster sprouting. Proper seed preparation and environmental control give your petunia seeds the best possible start for healthy, vigorous growth.
Best Soil and Container Setup for Petunia Seed Germination
The success of petunia seed germination heavily depends on the soil and container setup you choose. Because petunia seeds are very small, they require a fine-textured and sterile seed-starting mix rather than regular potting soil. The ideal mix should retain moisture without becoming waterlogged. A blend of peat moss, perlite, and vermiculite provides excellent drainage and aeration, helping the seeds absorb water evenly while preventing fungal growth. Avoid using garden soil or compost that may contain pathogens or large particles, as these can hinder seedling development and reduce germination success.
The container you choose also influences the outcome. Shallow seed trays or small starter pots with drainage holes work best because they allow proper airflow and moisture control. Before filling the container, make sure it’s clean and disinfected to eliminate any lingering bacteria or mold. Fill it with the seed-starting mix and lightly pat down the surface to create a smooth, even layer. Moisten the soil gently using a spray bottle until it feels damp but not wet. Petunia seeds need to sit on top of the soil surface, so avoid burying them. Press the seeds lightly to ensure contact with the soil while keeping them exposed to light, which is vital for germination.
Covering the tray with a transparent plastic lid or film creates a greenhouse-like effect that helps retain humidity and warmth. Place the tray in a bright location but away from direct sunlight to avoid overheating. If you live in a cooler climate, using a heating mat under the container helps maintain an ideal soil temperature. This careful balance of soil quality, moisture, and temperature creates a perfect foundation for fast germination and vigorous seedling growth.
Light and Temperature Requirements for Fast Germination
Ideal Light Conditions for Petunia Seed Germination
Light is one of the most important factors influencing how fast petunia seeds germinate. These seeds are photoblastic, meaning they require light exposure to trigger sprouting. Without sufficient light, the seeds may remain dormant or germinate weakly. After sowing, place the seed trays in a bright spot that receives indirect sunlight. Direct sun can cause overheating and dry out the soil surface, which can harm the delicate seeds. If you’re starting seeds indoors, grow lights are an excellent choice to maintain consistent illumination. Keep the lights on for about 14 to 16 hours daily to simulate natural daylight and encourage stronger, faster germination.
Maintaining the correct distance between the grow light and the soil surface is equally vital. The light source should be positioned around 6 inches (15 cm) above the tray to prevent seedlings from stretching or burning. As the seedlings begin to emerge, you can gradually adjust the light’s intensity and height to promote healthy leaf development. Consistent, gentle light helps the young plants grow compact and sturdy rather than weak and leggy. Balanced lighting conditions also ensure that all seedlings receive equal exposure, leading to uniform growth across the tray.
Optimal Temperature for Rapid Germination
Temperature plays an equally crucial role in determining how quickly petunia seeds sprout. The ideal soil temperature for germination ranges between 70°F and 75°F (21°C–24°C). At this range, the enzymes within the seed become active, allowing the embryo to develop efficiently. Temperatures below 65°F (18°C) slow down metabolism and can delay germination, while excessive heat above 80°F (27°C) may dry out the seeds or cause them to fail entirely. Maintaining a stable temperature is key, as fluctuations can disrupt the seed’s natural rhythm and reduce overall success.
To achieve these consistent conditions, many gardeners use a seedling heat mat placed under the tray. This tool provides gentle bottom heat that keeps the soil evenly warm, especially in cooler indoor environments. Covering the tray with a clear plastic lid or dome also helps retain warmth and moisture, creating a greenhouse-like microclimate. Once the seedlings have sprouted, you can remove the cover to improve air circulation and prevent fungal growth. Controlled warmth combined with steady lighting ensures petunia seeds germinate faster and develop into healthy, resilient seedlings ready for transplanting.
How to Sow Petunia Seeds Correctly
Sowing petunia seeds requires precision and patience, as their minute size makes them easy to lose or overcrowd. Begin by preparing your seed trays or small pots filled with moist, fine-textured seed-starting mix. The surface should be even and lightly firmed down to ensure good contact between the soil and seeds. Gently sprinkle the seeds over the surface — avoid clustering them together, as overcrowded seedlings will compete for light and nutrients. Many gardeners prefer mixing the seeds with a small amount of fine sand before sowing. This technique allows for more even distribution and helps prevent too many seeds from landing in one spot. Because petunia seeds need light to germinate, they should never be covered with soil. Instead, press them gently onto the moist surface to secure them in place.
Once the seeds are spread, mist them lightly with water using a spray bottle to avoid displacing them. Cover the tray with a transparent plastic film or humidity dome to retain moisture and warmth. This cover creates a mini greenhouse effect that helps maintain ideal germination conditions. Place the tray in a bright, warm area where the temperature stays between 70°F and 75°F (21°C–24°C). Avoid direct sunlight at this stage, as excessive heat can cause the soil to dry out quickly. Keep the growing medium consistently moist but never soggy. Within seven to fourteen days, tiny green shoots should begin to emerge. At that point, remove the cover to allow better air circulation and prevent mold.
For best results, monitor the trays daily to ensure the soil remains evenly damp. If the top layer begins to dry, mist it again with water rather than pouring directly, which could wash away seeds. Good air circulation around the trays also helps reduce fungal problems and encourages healthy growth. Once the seedlings develop their first set of true leaves, you can start thinning them out to prevent overcrowding. Proper spacing allows each young plant to access enough nutrients and light, setting the foundation for robust growth. With patience and gentle handling, this careful sowing process ensures faster germination and healthier, more uniform petunia seedlings.
Moisture and Watering Techniques During Germination
Maintaining Proper Moisture Levels
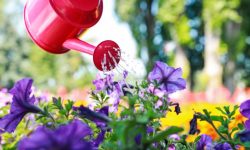
Moisture is one of the most critical elements for successful and fast petunia seed germination. Because the seeds are tiny and rest on the soil surface, they dry out easily if humidity drops. To maintain proper moisture, keep the growing medium consistently damp but never soaked. Excess water can lead to fungal issues or seed rot, while dryness can stop germination entirely. The best approach is to mist the soil surface regularly with a fine spray bottle. This keeps the moisture even without disturbing the seeds. You should check the trays twice a day, especially in warm or dry environments, as evaporation happens quickly under these conditions.
Covering the trays with a clear plastic lid or humidity dome helps maintain a stable level of humidity. This creates a mini greenhouse effect, trapping moisture and warmth that petunia seeds love. However, once condensation forms heavily on the lid, lift it slightly to allow air exchange and prevent mold. Maintaining 60–70% humidity during the first two weeks gives the best results. The goal is to provide gentle, consistent dampness — not waterlogging — so the seeds remain hydrated enough to activate and grow quickly.
Correct Watering Methods for Healthy Seedlings
When seedlings start emerging, your watering method should change slightly to prevent damage. At this delicate stage, petunia seedlings have very fine roots that can easily break if water pressure is too strong. Bottom watering is one of the most effective techniques to keep the soil moist without disturbing the roots. Simply fill the tray’s base with a small amount of water and allow it to soak upward through the drainage holes for 15–20 minutes. Once the surface appears moist, remove any excess water from the bottom to avoid oversaturation.
Alternatively, continue using a misting bottle if the seedlings are still fragile. Always use room-temperature water, as cold water can shock young roots and slow growth. Observe the soil daily — if it feels dry to the touch, reapply moisture right away. As the seedlings mature, gradually reduce watering frequency to encourage deeper root development. Proper watering discipline ensures your petunia seedlings grow strong, balanced, and ready to handle transplanting stress later.
Providing Air Circulation and Preventing Mold Growth
Good air circulation is essential for creating a healthy germination environment for petunia seeds. Without proper airflow, excess humidity can accumulate, leading to mold, mildew, and fungal diseases such as damping-off — a condition that can destroy young seedlings overnight. To ensure steady airflow, place your seed trays in a well-ventilated area where air can move freely. If you’re growing indoors, a small oscillating fan set on low speed can help keep air gently circulating around the trays. This circulation prevents stagnant air pockets, reduces excess moisture, and encourages stronger stem growth. Position the fan a few feet away from the seedlings to avoid direct drafts that can dry out the soil or damage delicate sprouts.
Humidity management works hand in hand with air circulation. While petunia seeds require consistent moisture for fast germination, too much humidity can create a breeding ground for harmful fungi. To maintain balance, uncover your trays for a few hours each day once condensation begins forming on the plastic dome. This step allows excess moisture to escape and replenishes the air with oxygen. If you notice white or gray mold developing on the soil surface, gently scrape it away and let the tray air out before misting again. Sprinkling a light dusting of cinnamon — a natural antifungal agent — on the soil surface can also help prevent mold growth naturally without harming the seeds.
Cleanliness is equally important in preventing mold problems. Always start with sterilized containers, clean tools, and fresh seed-starting mix. Avoid reusing soil from previous plantings, as it may harbor fungal spores. Keeping the growing environment tidy and well-ventilated not only stops disease but also encourages seedlings to develop thicker stems and more resilient root systems. When air, humidity, and hygiene are properly balanced, your petunia seedlings will thrive in a clean, stable environment — growing faster and healthier as they prepare for transplanting outdoors.
Caring for Petunia Seedlings After Germination
Light and Temperature for Young Seedlings
Once your petunia seeds have successfully germinated, providing proper light and temperature becomes essential for their continued development. Young seedlings need at least 14 to 16 hours of bright, indirect light each day to build strong stems and vibrant green leaves. If natural light is insufficient, use fluorescent or LED grow lights positioned about 6 inches (15 cm) above the seedlings. This steady light source prevents the plants from stretching and becoming weak. As the seedlings mature, you can gradually expose them to short periods of direct sunlight, which helps harden them for outdoor conditions. Maintain temperatures between 65°F and 70°F (18°C–21°C) during the day and slightly cooler at night to encourage sturdy growth.
Stable warmth and adequate lighting also promote photosynthesis, allowing the young plants to develop healthy roots and leaf structure. Avoid sudden temperature fluctuations, which can shock the seedlings or slow their progress. If you notice leggy or pale growth, it often indicates insufficient light exposure. Adjusting the distance of your grow lights or increasing the light duration usually corrects the issue. Consistent warmth and balanced lighting at this stage prepare your petunia seedlings for robust transplanting later.
Watering and Feeding Petunia Seedlings
Watering newly sprouted petunia seedlings requires a delicate balance. Their tiny roots can rot easily if the soil is too wet, yet they are sensitive to even brief periods of dryness. Keep the soil evenly moist by misting the surface or using bottom watering techniques. When bottom watering, let the tray absorb moisture for about 15 minutes, then drain any excess to avoid saturation. Always use room-temperature water to prevent shocking the roots. Once the seedlings develop their second set of true leaves, you can begin feeding them with a diluted liquid fertilizer at one-quarter strength. This provides the nutrients necessary for steady growth without overwhelming the young plants.
Fertilizing too early or too heavily can burn tender roots, so start gently and increase gradually as the seedlings mature. Feed every two weeks to maintain healthy, balanced growth. Observe the seedlings for signs of nutrient deficiency such as yellowing leaves or stunted growth, adjusting the feeding schedule if needed. Proper hydration combined with light feeding encourages compact, leafy growth and prepares the seedlings for strong performance once transplanted into outdoor beds or containers.
Transplanting Petunia Seedlings for Maximum Growth
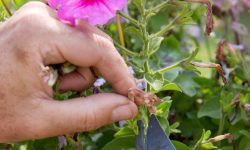
Transplanting petunia seedlings is one of the most delicate yet rewarding stages of growing these vibrant flowers. Timing plays a crucial role in ensuring a successful transition from trays to pots or garden beds. Wait until the seedlings have at least two to three sets of true leaves before transplanting. At this stage, their root systems are strong enough to handle movement without severe shock. Begin by preparing your transplanting containers or outdoor soil ahead of time. The soil should be light, well-draining, and enriched with organic matter to encourage strong root expansion. Water the seedlings a few hours before transplanting to reduce stress and make the roots easier to remove from the tray.
When transplanting, handle each seedling carefully by holding the leaves rather than the fragile stem. Use a small tool or spoon to lift the seedlings with as much soil attached to their roots as possible. Plant them in small holes deep enough to cover the roots but not the leaves. Firm the soil gently around each plant to eliminate air pockets and ensure stability. Once all seedlings are in place, water them thoroughly to help settle the soil and establish contact between roots and moisture. If transplanting outdoors, choose an overcast day or late afternoon to avoid heat stress and sunburn on young plants.
After transplanting, it’s essential to protect the seedlings as they adjust to their new environment. Keep them in partial shade for the first few days before gradually introducing them to full sunlight. Continue watering regularly, keeping the soil moist but never soggy. Within a week or two, you’ll notice new growth, indicating the roots have successfully adapted. Transplanted petunias grow rapidly when given adequate light, moderate temperatures, and occasional feeding. With careful attention during this stage, you’ll set the foundation for lush blooms and vigorous plants that thrive throughout the growing season.
Common Germination Problems and How to Fix Them
Seeds Failing to Sprout
When petunia seeds fail to sprout, the cause is often environmental imbalance rather than seed quality alone. Even though petunia seeds are light-dependent, excessive brightness or direct sunlight can dry out the soil surface too quickly, preventing the seeds from absorbing enough moisture to activate germination. To fix this, place the seed trays in bright but indirect light where the temperature remains stable. Another common issue is uneven watering — alternating between overly dry and soggy conditions disrupts seed metabolism and can lead to dormancy. A humidity dome can help retain steady moisture without drowning the seeds, but it should be opened daily to release excess condensation.
In addition, petunia seeds require oxygen exchange during germination, so avoid compacting the soil or overwatering, which reduces airflow. You can also try pre-chilling seeds in the refrigerator for two days before planting to simulate natural conditions that improve sprouting. Always use fresh, sterile seed-starting mix and clean containers to avoid contamination. Once you’ve corrected temperature, light, and moisture conditions, most viable petunia seeds will germinate within 7–14 days. Patience and stable conditions remain the key to success.
Mold or Fungal Growth on the Soil
Mold thrives in warm, stagnant air combined with high humidity — conditions that are also ideal for germination. To maintain balance, it’s important to ventilate regularly. Slightly lifting the dome or removing plastic covers for an hour each day allows air to circulate and prevents excess condensation. Positioning a small fan on low speed near the tray can further improve airflow without drying the seedlings. Mold can also appear when organic materials in the soil decompose due to overwatering. Always use a sterile, soilless mix to minimize organic debris that feeds mold spores.
If you notice mold beginning to form, act quickly. Sprinkle a light layer of ground cinnamon or chamomile tea on the soil surface to neutralize the fungus naturally. These mild antifungal agents are safe for seedlings and help stop mold from spreading. Reduce watering frequency temporarily and allow the soil’s top layer to dry slightly before misting again. Proper cleanliness, ventilation, and moderate humidity work together to create a mold-free environment, allowing your petunia seedlings to continue developing strong and healthy.
Weak or Leggy Seedlings
Leggy seedlings result from insufficient light or excessive warmth during germination. When petunia sprouts don’t receive enough light intensity, they stretch upward in search of illumination, resulting in thin, weak stems. To correct this, position grow lights close to the seedlings — about 6 inches above — and maintain them on for 14–16 hours daily. If natural sunlight is your primary source, use reflective surfaces like aluminum foil or white panels around the trays to maximize light distribution. Cooler air temperatures between 60°F and 65°F (15°C–18°C) also help the seedlings grow sturdier instead of elongated.
Another factor behind weak seedlings is overcrowding, which restricts airflow and light penetration. Thin the seedlings gently as soon as they form their first true leaves, keeping only the strongest individuals. Water sparingly, as overwatering can make the stems soft and more vulnerable to collapse. Feeding a diluted liquid fertilizer once seedlings strengthen helps them recover quickly. With consistent lighting, moderate moisture, and gradual exposure to outdoor conditions, even leggy petunia seedlings can develop into robust, compact plants ready to thrive in your garden.
Tips to Speed Up Petunia Seed Germination Naturally
Speeding up petunia seed germination requires a balance of preparation, temperature control, and consistent environmental care. One of the most effective ways to encourage faster sprouting is by pre-soaking the seeds in lukewarm water for two to three hours before sowing. This softens the thin seed coat and helps moisture reach the embryo more quickly. For even better results, you can combine pre-soaking with pre-chilling — placing the seeds in a sealed bag inside the refrigerator for 24 to 48 hours. This cold treatment mimics the natural winter cycle, stimulating the seeds to awaken faster once exposed to warmth and light. Both methods are simple yet powerful tools to shorten the germination period naturally.
Temperature is another crucial factor that directly affects germination speed. Petunia seeds germinate best in soil maintained between 70°F and 75°F (21°C–24°C). Using a seedling heat mat is one of the easiest ways to ensure consistent warmth. Bottom heat speeds up metabolic activity inside the seeds, helping them sprout several days earlier than normal. However, it’s important to avoid overheating, which can dry out the soil or damage the embryo. Pairing steady warmth with proper humidity control keeps the growing medium moist but not soggy — a balance essential for rapid and healthy germination.
Finally, maintaining the right balance of light and air circulation supports quick, strong growth. Petunia seeds need light to germinate, so place the trays in a bright location with indirect sunlight or under grow lights for 14 to 16 hours a day. Covering the trays with clear plastic helps retain humidity, but remember to ventilate daily to prevent mold. Gentle airflow and even moisture levels create the perfect microclimate for your seeds to sprout vigorously. By following these natural techniques, you can enjoy faster germination and healthier seedlings ready for transplanting.
Hardening Off and Outdoor Transplanting Tips
Hardening off is one of the most important steps in ensuring your petunia seedlings thrive once moved outdoors. After spending weeks in a controlled indoor environment, seedlings must gradually adjust to the natural elements — sunlight, wind, and fluctuating temperatures. Begin this process 7 to 10 days before transplanting. On the first day, place your seedlings outside for two to three hours in a shaded, wind-protected area. Each subsequent day, increase their outdoor time by one to two hours and gradually introduce them to brighter light. By the end of the week, they should be able to withstand full sunlight and light breezes. Avoid exposing them to sudden cold or harsh weather during this stage, as stress can weaken growth or stunt development.
Monitoring moisture is equally crucial while hardening off. Outdoor exposure causes the soil to dry faster, especially under sunlight and wind. Check the soil regularly and water whenever it starts to dry out, but avoid overwatering, which can make the stems fragile. During this period, you’ll notice the seedlings developing thicker stems and deeper green leaves — signs that they are adapting well. If nighttime temperatures dip below 55°F (13°C), bring the trays indoors or cover them with protective fabric. This gentle acclimation strengthens the seedlings’ resistance and prepares them for transplanting.
When the seedlings are fully acclimated, select a bright location with fertile, well-draining soil for permanent planting. Petunias love sunlight and require at least six hours of direct exposure each day for maximum blooming. Loosen the soil and mix in compost or organic matter before planting. Space each plant 10 to 12 inches apart to ensure good airflow and reduce fungal risk. Water thoroughly after transplanting to help roots establish contact with the soil. Within days, the seedlings will begin to grow steadily, setting the stage for abundant, colorful blooms throughout the season.
FAQs About Germinating Petunia Seeds
How long do petunia seeds take to germinate?
Petunia seeds generally germinate within 7 to 14 days when kept warm and moist at 70°F to 75°F (21°C–24°C). Consistent humidity, indirect light, and gentle misting speed up the process. Cooler temperatures or dry conditions often slow germination or prevent it entirely.
Do petunia seeds need light to germinate?
Yes, petunia seeds require light for germination because they are photoblastic. After sowing, press them lightly onto the soil surface without covering. Provide 14–16 hours of bright, indirect light daily to activate germination and promote strong, even seedling development.
Why are my petunia seeds not germinating?
Seeds may fail to germinate due to irregular moisture, insufficient light, or incorrect temperature. Keep soil consistently damp but never soaked, maintain warmth around 70–75°F, and ensure light exposure. Avoid covering the seeds, as darkness prevents germination from starting.
How can I prevent mold during germination?
To avoid mold, provide adequate ventilation and avoid overwatering. Remove humidity domes for a few hours daily, use sterile soil, and keep trays clean. If mold appears, scrape off the affected area and sprinkle cinnamon powder, a natural antifungal that keeps seedlings safe.
When should I transplant petunia seedlings outdoors?
Transplant when seedlings have two or more true leaves and temperatures stay above 55°F (13°C). Harden them off for about a week before moving outdoors. Choose a sunny, well-draining site and space plants 10–12 inches apart for strong, healthy petunia growth.
Conclusion
Germinating petunia seeds fast requires patience, precision, and the right growing conditions. By controlling light, temperature, and moisture, you can turn delicate seeds into strong, vibrant seedlings ready to bloom. With careful preparation, consistent care, and gradual acclimation outdoors, your petunias will reward you with lush, colorful flowers all season long. Following these proven techniques ensures not only quicker germination but also healthier, longer-lasting plants that brighten any garden or balcony. With the right approach, growing petunias from seed becomes both simple and deeply rewarding.