Germinating rose seeds is an exciting and rewarding process for gardeners who want to grow roses from scratch. Unlike cuttings or grafted plants, seeds offer the opportunity to explore unique rose varieties and develop healthy, resilient plants. Understanding proper seed preparation, stratification, and care techniques is essential for successful germination. With the right approach, even beginners can nurture rose seeds into strong seedlings that will bloom beautifully over time.
Successful rose seed germination requires patience, attention to detail, and suitable environmental conditions. Factors such as soil quality, temperature, moisture, and light play a crucial role in seed sprouting. By following expert guidance and avoiding common mistakes, gardeners can maximize germination rates and enjoy the satisfaction of growing roses from seed. This comprehensive guide provides step-by-step instructions and practical tips for achieving thriving, long-lasting rose plants.
Selecting and Preparing Rose Seeds
Choosing the right rose seeds is the first step toward successful germination. Select fresh, healthy seeds from reputable sources to ensure high viability. Avoid seeds that appear shriveled, discolored, or damaged, as they are unlikely to sprout. Different rose varieties may have varying germination rates, so research the type you want to grow and choose seeds suited to your climate and gardening conditions. Considering the bloom time and flower characteristics can also help you achieve your desired garden aesthetic.
Before planting, proper seed preparation is crucial for encouraging strong sprouting. Many rose seeds require stratification, a process that mimics winter conditions to break dormancy. To stratify, place seeds in a damp medium such as sand, peat moss, or a mixture of both, and refrigerate them for six to ten weeks. This period allows the seeds to develop the necessary biological changes to germinate successfully. Skipping this step often results in poor germination or delayed growth. Some gardeners also soak seeds briefly in water before stratification to soften the seed coat and improve moisture absorption.
Handling seeds carefully ensures they remain viable throughout preparation. Rinse them gently to remove any remaining pulp if collected from rose hips, and keep them moist but not wet during stratification. Labeling seeds with the variety and stratification start date helps track progress and prevents confusion. Additionally, storing seeds in a cool, dark place before stratification maintains viability. By selecting high-quality seeds and preparing them meticulously, gardeners maximize germination success and set a strong foundation for healthy, thriving rose seedlings ready for long-term growth.
Choosing the Right Soil and Containers
Selecting the proper soil is essential for successful rose seed germination. Rose seeds require a well-draining, nutrient-rich medium that supports root development while preventing waterlogging. A mix of seed-starting soil combined with perlite, vermiculite, or coarse sand provides excellent drainage and aeration. Avoid heavy garden soil or overly dense compost, which can retain too much moisture and cause seeds to rot. Proper soil choice ensures seedlings grow strong and healthy from the very beginning, giving them the best start in life.
The type and size of the container also play a crucial role in germination success. Shallow trays, pots, or seedling flats with drainage holes allow excess water to escape, reducing the risk of fungal growth or root disease. Using clean, sterilized containers prevents contamination from pathogens and protects delicate seedlings. Gardeners should also consider ease of transplanting; individual pots make it simpler to separate seedlings once they develop true leaves, reducing root disturbance and transplant shock. Containers made of plastic, ceramic, or biodegradable materials can all be effective, depending on personal preference and availability.
Maintaining the right balance of soil moisture and environment is equally important. Soil should be consistently damp but not soaked, as overly wet conditions encourage mold or rot. Lightly misting the surface and covering containers with a clear lid or plastic wrap can help retain humidity while allowing airflow. Adding a thin layer of vermiculite or fine sand on top prevents crusting and protects seeds from shifting. By carefully choosing suitable soil and containers and monitoring moisture, gardeners create an ideal environment for rose seeds to sprout, develop strong roots, and thrive into healthy seedlings ready for long-term growth.
Providing Optimal Light and Temperature
Light Requirements for Rose Seedlings
Rose seeds need adequate light to sprout and grow strong seedlings. Natural sunlight is ideal, but if indoor conditions lack sufficient brightness, a grow light can provide the necessary energy. Position seeds near a south-facing window or maintain artificial lights about 12–15 inches above the seedlings for 12–16 hours daily. Proper light exposure prevents leggy growth, promotes strong stems, and ensures healthy leaves. Using a timer for artificial lights helps maintain a consistent schedule, which supports steady growth and reduces stress. Reflective surfaces around the seedlings, such as white walls or aluminum foil, can enhance light distribution and maximize energy absorption.
It’s important to gradually acclimate seedlings to stronger light if moving them outdoors later. Sudden exposure to direct sunlight can scorch delicate leaves and stunt development. Monitoring seedling response to light intensity and adjusting distance or duration helps maintain optimal growth conditions. Observing leaf color and stem thickness indicates whether light levels are sufficient. Consistent light supports photosynthesis and prepares seedlings for the challenges of outdoor planting, giving them a robust start in life. Proper light management ensures seedlings develop evenly, with vibrant leaves and sturdy stems ready for transplanting into the garden.
Temperature Control for Successful Germination
Maintaining the correct temperature is crucial for rose seed germination. Most rose seeds sprout best in a consistent range of 65–75°F (18–24°C). Soil that is too cold slows or prevents germination, while excessive heat can dry out the seeds or damage delicate roots. Using a seedling heat mat under trays helps maintain consistent warmth, especially in cooler climates or during early spring planting. Avoid placing seedlings near drafty windows or heaters, which can cause temperature fluctuations that stress the developing plants.
Consistent temperature encourages faster sprouting and improves overall germination rates. It is also important to monitor both soil and air temperatures regularly, as seedlings respond differently to heat depending on their growth stage. Gradually acclimating young seedlings to slightly cooler or outdoor temperatures before transplanting prevents shock and promotes healthy root and leaf development. By providing a stable thermal environment, gardeners give rose seeds the optimal conditions for strong, resilient seedlings that are ready to thrive once planted in the garden.
Watering and Moisture Management
Proper Watering Techniques for Rose Seedlings
Watering is a critical factor in rose seed germination and early seedling development. Seeds and young seedlings require consistent moisture, but overwatering can lead to root rot, fungal growth, and damping-off disease. Use a fine mist spray or a gentle watering can to moisten the soil evenly without washing seeds away or disturbing their position. The soil should remain damp to the touch but not soggy, ensuring roots can breathe while absorbing necessary nutrients and water.
Daily monitoring is essential, particularly in warm, dry indoor conditions or areas with low humidity. Covering trays with a clear plastic lid or plastic wrap helps retain humidity while still allowing air circulation, which prevents mold. Gradually removing the cover as seedlings grow allows them to adjust to slightly lower humidity, strengthening stems and leaves. Additionally, avoid letting soil dry completely between waterings, as this can stress seedlings and slow growth. Proper watering techniques support steady germination, healthy root development, and vigorous seedlings ready for transplanting into outdoor beds or larger pots, ensuring long-term success for your rose plants.
Maintaining Optimal Soil Moisture
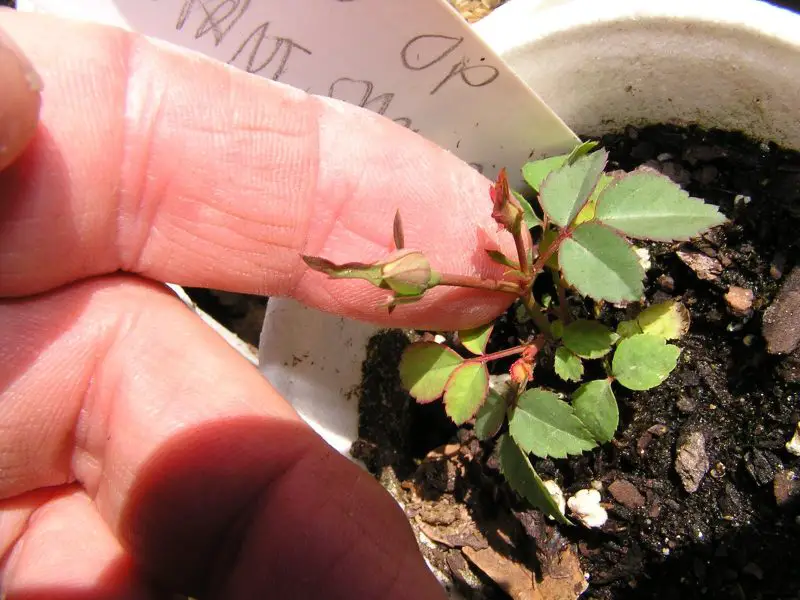
Transplanting rose seedlings to outdoor beds is a crucial step in their development. Before moving them outdoors, harden off the seedlings by gradually exposing them to outdoor conditions over 7–10 days. Start by placing them in a shaded, sheltered area for a few hours daily, gradually increasing sunlight and wind exposure. This process helps seedlings adjust to temperature fluctuations, sunlight intensity, and wind, reducing transplant shock and promoting stronger growth once planted in permanent beds.
Select a well-draining, nutrient-rich garden bed with full sun exposure for transplanting. Dig holes slightly larger than the seedling root balls and gently remove seedlings from their containers, taking care not to disturb the roots. Place each seedling at the same soil depth it grew in the container and fill the hole with prepared soil, lightly pressing to eliminate air pockets. Water thoroughly after planting and apply a layer of mulch to retain moisture and regulate soil temperature. Proper transplanting ensures seedlings continue vigorous growth, establish strong root systems, and eventually produce healthy, blooming roses for years to come.
Caring for Young Rose Seedlings After Transplanting
After transplanting rose seedlings to outdoor beds or larger containers, proper care is essential to ensure healthy growth. Newly planted seedlings are vulnerable to transplant shock, which can slow growth or even cause death. Water seedlings consistently, keeping the soil moist but not waterlogged, to support root establishment. Applying a thin layer of mulch around the base helps retain moisture, regulate temperature, and prevent weeds from competing for nutrients.
Monitoring seedlings for signs of stress is equally important. Yellowing leaves, drooping stems, or slowed growth may indicate insufficient water, nutrient deficiency, or pest pressure. Early intervention, such as adjusting watering schedules, lightly fertilizing with a balanced solution, or protecting from extreme weather, can prevent long-term damage. Regular observation allows gardeners to address problems promptly, ensuring seedlings recover quickly and continue developing strong roots and stems.
Providing additional support for young seedlings can further improve survival rates. Stakes or small protective cages help prevent wind damage and maintain upright growth, while temporary shade can protect delicate plants from intense sunlight during peak summer hours. By combining consistent watering, careful monitoring, and gentle physical support, gardeners can nurture young rose seedlings into robust plants ready to bloom in the coming seasons. Proper post-transplant care establishes a foundation for long-term success, resulting in thriving, vibrant roses.
Fertilizing and Nutrient Management for Young Roses
Timing Fertilization for Young Roses
Proper fertilization timing is crucial for young rose seedlings. Newly transplanted seedlings have sensitive roots that can be easily damaged by excessive nutrients. It’s recommended to wait at least 2–4 weeks after transplanting before applying any balanced or slow-release fertilizer. This waiting period allows the seedlings to focus on root establishment, reducing the risk of transplant shock and promoting stronger, healthier growth. Applying fertilizer too early can burn delicate roots, weaken stems, or slow overall development, so patience is key during this critical stage.
During this initial period, gardeners can support seedlings with light applications of organic matter, such as well-aged compost, worm castings, or diluted liquid fertilizers like fish emulsion. These provide gentle nutrients that encourage root and leaf development without overwhelming the plants. Observing leaf color, new growth, and overall plant vigor helps determine when additional fertilization is necessary. Consistent monitoring and careful application ensure that young roses develop a solid foundation, resulting in vigorous seedlings ready to produce abundant, healthy blooms as they mature into fully established plants. Proper timing and thoughtful nutrient management are essential for long-term success in rose cultivation.
Choosing the Right Fertilizer and Application Methods
Selecting the appropriate fertilizer is essential for young roses’ healthy development. Balanced fertilizers containing equal parts nitrogen, phosphorus, and potassium support overall growth, strong roots, and future flower formation. Organic fertilizers, such as compost tea, fish emulsion, or well-aged manure, provide nutrients gradually while improving soil structure and stimulating beneficial microbial activity. These organic options are gentle on sensitive seedlings and reduce the risk of nutrient burn, ensuring a steady supply of essential elements.
Application methods should minimize stress on young seedlings. When using granular fertilizers, sprinkle evenly around the base of the plant without letting the granules touch stems or leaves, and water thoroughly to help nutrients penetrate the soil. For liquid fertilizers, dilute according to instructions and apply directly to the soil, avoiding the foliage. Repeated, light applications are often more effective than a single heavy dose, supporting continuous growth. Regular monitoring of plant health, leaf color, and new growth ensures seedlings receive adequate nutrition, leading to robust root systems, vigorous foliage, and strong, healthy blooms as they mature into well-established rose plants ready to thrive season after season.
Pruning and Training Young Roses
Pruning young roses is an essential practice for promoting healthy growth and shaping plants for future flowering. Even at an early stage, removing weak, damaged, or crossing stems encourages strong, upright growth and improves air circulation around the plant. Proper pruning helps prevent disease, reduces the risk of fungal infections, and directs the plant’s energy toward developing robust roots and shoots rather than struggling with unnecessary growth.
Training young roses involves guiding stems to grow in desired directions using stakes, ties, or small cages. This support prevents breakage from wind or heavy rainfall and encourages upright growth, which is particularly important for climbing or rambling varieties. Regularly inspecting and adjusting supports ensures stems are not constricted, which can damage the plant and slow development. Training also allows sunlight to reach all parts of the plant, promoting even leaf and bud formation.
In addition to structural pruning, deadheading spent blooms, even in young plants, can stimulate new growth and prepare the plant for more abundant flowering in future seasons. Combining careful pruning, structured training, and selective deadheading helps young roses establish a strong framework. These practices ensure that seedlings mature into well-formed, resilient plants capable of producing vibrant, long-lasting blooms, providing a foundation for a beautiful rose garden year after year.
Protecting Young Roses from Pests and Diseases
Identifying Common Pests in Young Roses
Young rose seedlings are particularly vulnerable to pests such as aphids, spider mites, thrips, and whiteflies. Early detection is crucial for preventing significant damage that can stunt growth or deform leaves. Gardeners should inspect leaves, stems, and buds regularly, looking for curled, discolored, or distorted foliage, sticky honeydew residue, or the insects themselves. Even small infestations can multiply quickly under warm conditions, so prompt identification allows for targeted interventions before pests spread and compromise plant health.
Preventive measures are essential to reduce pest pressure and maintain vigorous growth. Introducing beneficial insects like ladybugs, lacewings, or predatory mites helps naturally control pest populations without chemicals. Organic treatments, such as insecticidal soaps or neem oil, can provide an extra layer of protection, but should be used carefully to avoid damaging delicate seedlings. Maintaining a clean growing environment, removing fallen leaves and plant debris, and spacing seedlings properly to improve air circulation also discourages infestations. Consistent monitoring, early detection, and integrated pest management ensure young roses remain healthy, resilient, and ready to develop into strong, flourishing plants capable of producing abundant blooms.
Preventing and Managing Diseases
Young roses are susceptible to fungal and bacterial diseases such as black spot, powdery mildew, rust, and botrytis. Maintaining proper spacing between seedlings ensures good air circulation, which reduces humidity around leaves and limits fungal growth. Watering at the soil level rather than overhead prevents wet foliage, a common trigger for disease. Choosing disease-resistant rose varieties and using sterilized soil or containers also help minimize risks, creating a healthier environment for seedlings to thrive.
Regular monitoring is crucial to catch early symptoms like black spots, white powdery coatings, rust-colored patches, or leaf discoloration. Promptly removing affected leaves and disposing of them away from healthy plants prevents further spread. Organic fungicides, such as copper-based sprays or neem oil, can control early outbreaks without harming seedlings or beneficial insects. Consistent hygiene, including cleaning tools, sanitizing containers, and maintaining optimal soil moisture, reinforces disease prevention. Combining these preventive measures with timely intervention ensures young rose seedlings remain vigorous, resilient, and ready for robust growth and abundant flowering in the coming seasons.
Seasonal Care for Young Roses
Spring Care for Young Roses
Spring marks the start of active growth for young roses. As temperatures rise, seedlings emerge from dormancy and begin producing new shoots, leaves, and flower buds. Gardeners should inspect plants for winter damage, prune any dead or weak stems, and remove fallen leaves or debris around the base to reduce the risk of disease. Applying a balanced, slow-release fertilizer at this stage supports vigorous root and shoot development and prepares plants for healthy flowering later in the season. Incorporating organic matter, such as compost or aged manure, improves soil structure and adds gentle nutrients to sustain growth.
Consistent watering is crucial, particularly during dry spells, to maintain evenly moist soil without causing waterlogging. Mulching around seedlings helps conserve moisture, regulate soil temperature, and suppress weed competition, which can otherwise rob young roses of nutrients. Monitoring for early pest activity, including aphids, spider mites, or thrips, allows gardeners to intervene promptly with organic or gentle treatments. Gradually acclimating seedlings to outdoor conditions and providing support for tender stems ensures robust growth. Proper spring care establishes a strong foundation, ensuring young roses develop into healthy, resilient plants capable of producing abundant blooms throughout the year.
Summer Care for Young Roses
Summer is a period of rapid growth and flowering for young roses. During this season, consistent watering becomes even more critical, as high temperatures and intense sunlight can quickly stress seedlings. Water deeply and regularly, ensuring the soil remains evenly moist but not waterlogged. Applying a light layer of mulch helps retain soil moisture, moderate soil temperature, and reduce competition from weeds, which can otherwise deprive young roses of essential nutrients.
Summer also requires vigilant monitoring for pests and diseases, as warm, humid conditions favor their development. Aphids, spider mites, and fungal infections like powdery mildew are common challenges during this period. Regular deadheading of spent flowers encourages continuous blooming and prevents the plant from diverting energy into seed production. Providing temporary shade during peak afternoon sun in extremely hot climates can protect delicate seedlings from leaf scorch. By combining proper watering, pest management, and strategic care, young roses can thrive throughout summer, developing strong stems, abundant foliage, and a robust foundation for fall growth.
Autumn Care for Young Roses
Autumn is a transitional season where young roses prepare for winter dormancy. As temperatures cool and daylight shortens, gardeners should adjust their care routines. Heavy fertilization and pruning should be minimized to allow plants to harden off naturally. Focus on cleaning the garden bed by removing fallen leaves and debris, which can harbor pests or fungal spores. Inspecting seedlings for late-season pest activity or disease ensures that problems are addressed before the dormant period begins.
Watering should be modified according to cooler conditions, maintaining soil moisture without overwatering, which can cause root rot. Adding a layer of mulch around the base of the plants helps regulate soil temperature and conserve moisture, protecting roots from early frosts. In colder regions, additional protection such as straw or frost cloth may be necessary. Proper autumn care strengthens seedlings, allowing them to survive winter and emerge vigorous and healthy in spring, ready for robust growth and abundant flowering in the next season.
Winter Care for Young Roses
In winter, young roses enter dormancy and require minimal but careful maintenance to survive cold conditions. Protect seedlings from freezing temperatures by applying a thick layer of mulch around the root zone. This insulation helps regulate soil temperature and prevents frost damage to delicate roots. For container-grown roses, moving plants to a sheltered location, such as a garage or unheated greenhouse, protects them from harsh winds and freezing temperatures that can harm stems and roots.
Watering should be limited during dormancy, as roots are less active and excess moisture can lead to root rot. Periodically check seedlings for signs of stress, such as mold, desiccation, or damage from rodents, and remove any affected stems or debris to prevent disease. Maintaining clean surroundings and minimal disturbance ensures that the plants remain healthy through the cold months. Proper winter care strengthens young roses, enabling them to emerge vigorous, resilient, and ready for active growth and abundant blooms in spring. Consistency in these practices lays the foundation for long-term success in rose cultivation.
Common Mistakes to Avoid When Germinating Rose Seeds
Overwatering or Underwatering Seeds
One of the most common mistakes when germinating rose seeds is improper watering. Overwatering can lead to seed rot, fungal growth, or mold formation, while underwatering may cause seeds to dry out and fail to germinate. Maintaining consistent soil moisture is essential for successful sprouting. Use a spray bottle to gently mist the soil surface, keeping it damp but not saturated. Avoid pouring water directly, which can displace seeds or compact the soil, making it harder for roots to emerge.
Seedlings are highly sensitive to water stress, so frequent monitoring of soil moisture is crucial. Using a well-draining seed-starting mix prevents waterlogging and encourages healthy root development. Providing proper humidity, through a plastic dome, clear cover, or gentle misting, helps maintain a stable environment without causing excessive wetness that promotes mold or fungal infections. Additionally, gradually acclimating seedlings to lower humidity as they grow strengthens stems and leaves. By carefully balancing moisture levels, gardeners give rose seeds the best chance to germinate successfully and develop strong, healthy roots, setting a solid foundation for vigorous growth and long-term plant health.
Neglecting Light and Temperature Requirements
A frequent mistake when germinating rose seeds is neglecting their specific light and temperature needs. Insufficient light causes weak, elongated seedlings that struggle to develop strong stems and leaves. Conversely, excessive direct sunlight can scorch delicate young leaves. For optimal growth, seeds should receive bright, indirect sunlight or be placed under artificial grow lights for 12–16 hours daily. Adjusting light intensity gradually as seedlings develop prevents stress and promotes robust, compact growth.
Temperature is equally crucial for successful germination. Most rose seeds sprout best between 65–75°F (18–24°C). Using a seedling heat mat or maintaining a consistently warm environment ensures seeds break dormancy efficiently. Sudden temperature fluctuations can delay germination or reduce sprouting rates, while prolonged cold can weaken seedlings. Monitoring environmental conditions closely, and gradually acclimating seedlings to cooler outdoor temperatures before transplanting, helps prevent shock and supports healthy development. By providing consistent light and warmth, gardeners can avoid common pitfalls and encourage strong, resilient seedlings ready for long-term growth and abundant blooms.
How to Transplant Rose Seedlings Successfully
Transplanting rose seedlings is a critical step in their development and requires careful handling to avoid stress or root damage. Begin by preparing the new planting site or containers with well-draining soil enriched with organic matter such as compost or aged manure. Ensure the site receives adequate sunlight—at least six hours daily—for optimal growth. Water the seedlings thoroughly a few hours before transplanting to keep roots moist and reduce shock during the move.
Gently remove seedlings from their original containers or seed trays, taking care not to disturb the delicate root systems. If seedlings are grown in trays, loosen the soil slightly around the roots and hold the base of the stem while lifting. Plant each seedling at the same soil depth as it was previously growing, firming the soil gently around the roots to eliminate air pockets. Water immediately after transplanting to settle the soil and provide hydration, which helps the plant establish in its new environment.
After transplanting, monitor seedlings closely for signs of stress such as wilting, yellowing, or drooping leaves. Provide partial shade for a few days if temperatures are high, and maintain consistent soil moisture without overwatering. Mulching around the base helps conserve water and regulates soil temperature. By carefully preparing the site, handling seedlings gently, and providing proper post-transplant care, gardeners can ensure young roses establish strong roots, grow vigorously, and develop into healthy, flowering plants ready for long-term success.
Hardening Off Rose Seedlings Before Outdoor Planting
Hardening off is an essential process to prepare rose seedlings for outdoor conditions. Seedlings grown indoors or in controlled environments are not accustomed to fluctuating temperatures, wind, or direct sunlight. Sudden exposure can cause stress, leaf burn, or stunted growth. Begin by gradually introducing seedlings to outdoor conditions over a period of 7–14 days, allowing them to adjust slowly and strengthen their stems and root systems.
Start the process by placing seedlings in a shaded, protected area for a few hours each day, gradually increasing the duration and exposure to morning sun. Avoid harsh midday sunlight initially, which can scorch tender leaves. Reduce watering slightly during this period to encourage the development of stronger roots and reduce transplant shock. Covering seedlings with a light fabric during particularly windy or cool days can provide temporary protection while still allowing them to acclimate.
Observe seedlings closely for signs of stress during hardening off. Wilting, leaf curling, or yellowing indicates that exposure should be reduced temporarily. Adjust the schedule according to weather conditions and plant responses. By the end of the hardening-off period, seedlings will be resilient, with thicker stems, tougher leaves, and roots adapted to outdoor soil and temperature variations. This careful preparation ensures successful transplantation, promotes vigorous growth, and maximizes the potential for healthy, abundant blooms in the upcoming growing season.
FAQ About How to Germinate Rose Seeds
How long does it take for rose seeds to germinate?
Rose seeds typically take between 2 to 12 weeks to germinate, depending on the variety, temperature, and growing conditions. Some seeds may require stratification or cold treatment to break dormancy. Consistent moisture, warmth, and light help speed up the germination process. Patience is key, as some seeds naturally germinate more slowly than others.
Do rose seeds need to be stratified before planting?
Yes, most rose seeds benefit from cold stratification, which mimics winter conditions and improves germination rates. Place seeds in a moist paper towel or sand within a sealed bag in the refrigerator for 4 to 12 weeks. This process helps break dormancy and prepares the seeds to sprout successfully when planted in a warm growing medium.
Can I germinate rose seeds indoors without sunlight?
Rose seeds require adequate light to grow strong seedlings. If natural sunlight is insufficient, use a grow light positioned 12–15 inches above the seedlings for 12–16 hours daily. Proper light prevents leggy growth, encourages strong stems, and ensures healthy leaves for successful outdoor transplantation.
How often should I water rose seedlings?
Seedlings need consistently moist soil without being waterlogged. Lightly mist the soil daily or as needed to keep it damp. Overwatering can cause root rot, while underwatering may lead to drying out and failed germination. Using well-draining seed-starting mix helps maintain the right moisture balance.
When can I transplant rose seedlings outdoors?
Transplant seedlings outdoors only after they have developed strong roots, several sets of true leaves, and have been hardened off gradually. Typically, this occurs 6–10 weeks after germination. Gradually exposing seedlings to outdoor conditions reduces stress and ensures they thrive in their new environment.
Conclusion
Germinating rose seeds is a rewarding yet delicate process that requires patience, attention, and proper techniques. From selecting high-quality seeds and preparing them through stratification to providing optimal light, temperature, and moisture, every step plays a crucial role in successful germination. Proper care during seedling growth, including fertilization, pest management, and seasonal adjustments, ensures strong, healthy plants. Gradual hardening off and careful transplantation prepare seedlings for long-term outdoor success. By avoiding common mistakes and following expert practices, gardeners can cultivate robust roses that bloom beautifully year after year, creating a thriving and vibrant garden.