Bee balm, also known as Monarda, is a vibrant perennial cherished in gardens for its brilliant colors and ability to attract bees, butterflies, and hummingbirds. Beyond its striking beauty, the plant carries a delightful herbal fragrance that brings life and energy to any outdoor space. Many gardeners grow bee balm not only for its flowers but also to support biodiversity and create a pollinator-friendly environment.
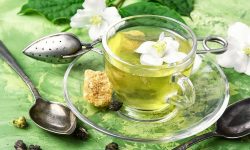
In addition to its ornamental value, bee balm offers many practical benefits. Its leaves and flowers can be used to make herbal teas, known for their soothing and health-supporting properties. With its easy-to-grow nature and adaptability to different soils and climates, bee balm is an excellent choice for both beginner and experienced gardeners. Adding this plant to your garden ensures year-round enjoyment and lasting rewards.
Understanding About Bee Balm
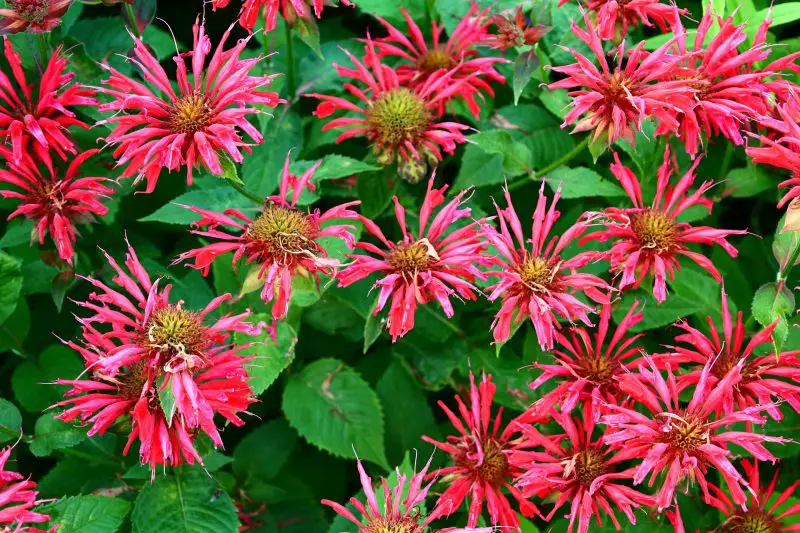
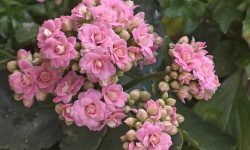
Bee balm, scientifically known as Monarda, is a native North American perennial that has become a favorite in many gardens. With its striking clusters of red, pink, purple, or white flowers, bee balm adds vibrant color and attracts a wide variety of pollinators. Gardeners prize this plant not only for its beauty but also for its ability to support local ecosystems by drawing in bees, butterflies, and hummingbirds during the summer months. Its long blooming season makes it a reliable addition to perennial borders, cottage gardens, and pollinator-friendly landscapes.
Beyond its ornamental appeal, bee balm has a long history of practical uses. Indigenous peoples once valued the plant for its medicinal properties, especially as a natural remedy for digestive and respiratory issues. Today, many gardeners still use bee balm leaves for herbal teas, enjoying their mint-like flavor and soothing qualities. The plant belongs to the mint family, which explains its aromatic foliage and vigorous growth habit. These traits make it both an attractive and functional plant for diverse garden settings.
Understanding the growth patterns of bee balm is essential before planting. This perennial thrives in sunny locations with moderately rich soil and adequate moisture. It grows in clumps that spread through underground rhizomes, often forming colonies if left unchecked. With proper care, bee balm can last for years, providing seasonal beauty and ecological benefits. Knowing its needs and characteristics helps gardeners create conditions where the plant not only survives but thrives, ensuring healthy growth and an abundance of flowers year after year.
Choosing the Right Variety of Bee Balm
Selecting the right variety of bee balm is essential for achieving a vibrant summer garden filled with color and pollinators. Bee balm comes in several species and cultivars, each offering different flower colors, growth habits, and levels of resistance to disease. Some varieties grow taller and make a bold statement in borders, while others stay more compact, making them perfect for small gardens or container planting. Choosing the right type ensures that your garden design and growing conditions are in harmony.
Red, pink, purple, and white are the most common colors found in bee balm varieties, and each attracts pollinators differently. For example, red cultivars like Monarda didyma are especially loved by hummingbirds, while lavender or purple varieties such as Monarda fistulosa draw in bees and butterflies. Gardeners who want long-lasting blooms often choose hybrids bred for extended flowering and improved mildew resistance. Considering these factors helps you select a plant that thrives in your space while supporting local pollinators.
Another important aspect of choosing the right bee balm variety is disease resistance. Powdery mildew is one of the most common issues with this plant, and newer cultivars have been developed to minimize the problem. Compact and mildew-resistant varieties are especially good for humid climates where disease pressure is high. If you prefer a wilder look, native species like wild bergamot are more adaptable to naturalized gardens. By aligning your variety choice with your garden goals and climate conditions, you ensure healthy growth and a brilliant display of flowers throughout the season.
Preparing the Soil for Bee Balm
Bee balm thrives best when planted in soil that balances fertility, drainage, and organic richness. This perennial loves moisture, but soggy or compacted ground can cause roots to rot quickly. Before planting, it is essential to assess your garden soil to ensure it provides the right growing environment. Loamy soil enriched with organic matter such as compost or well-rotted manure helps create the perfect structure. This type of soil not only holds enough moisture but also drains excess water efficiently.
Another important aspect of soil preparation is adjusting the pH level. Bee balm grows well in slightly acidic to neutral soil, ideally within the range of 6.0 to 7.0. Testing the soil with a simple pH kit can guide you in making necessary adjustments. If the soil is too acidic, adding lime can raise the pH, while sulfur or organic amendments like peat moss can lower it. A balanced pH allows bee balm to absorb nutrients more effectively, leading to healthier growth and more vibrant blooms.
In addition to structure and pH, improving soil fertility before planting will benefit bee balm’s long-term health. Mixing compost into the top six inches of soil boosts nutrient availability and enhances microbial activity. This creates a living, supportive foundation that strengthens root development. By preparing soil carefully before planting, you give bee balm the best start possible, ensuring strong stems, abundant foliage, and radiant summer flowers that brighten your garden throughout the season.
Planting Bee Balm Step by Step
Choosing the Right Planting Time
The best time to plant bee balm is in spring after the danger of frost has passed or in early fall when temperatures are mild. During these periods, the soil remains warm enough to encourage root growth while the air is cool enough to reduce stress on the plant. Planting in the heat of summer often leads to wilting and transplant shock, making establishment much harder. By planting at the right time, you give bee balm a strong start and better chances for vibrant blooms in the following season.
Spring planting allows bee balm to establish before summer growth, while fall planting gives roots time to develop before winter dormancy. Both options are effective, but your choice depends on local climate conditions and growing zones. Gardeners in cooler regions may find spring more suitable, while those in milder climates can take advantage of fall planting. With proper timing, your bee balm will adapt quickly, leading to a healthier and longer-lasting plant.
Spacing and Depth
Proper spacing is essential when planting bee balm because it is a vigorous grower that spreads easily. Place each plant about 18 to 24 inches apart to allow air circulation, which prevents fungal problems like powdery mildew. Crowding the plants may cause poor airflow, leading to disease and weaker growth. When planting in borders or flower beds, consider bee balm’s tendency to spread through underground rhizomes, leaving extra space for expansion. Adequate spacing ensures that each plant has enough room to thrive without competing for light and nutrients.
Depth is equally important in establishing bee balm successfully. Dig a hole slightly larger than the root ball and plant it at the same depth as it was in the container. Planting too deep can suffocate the roots, while planting too shallow may cause instability. After setting the plant in place, backfill with loose soil and press gently to remove air pockets. Proper spacing and depth provide a strong foundation for healthy and robust growth throughout the season.
Watering After Planting
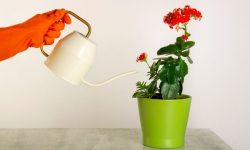
Watering is one of the most crucial steps immediately after planting bee balm. The soil should be kept consistently moist but never waterlogged, as too much water can lead to root rot. Right after planting, give the soil a deep soak to encourage the roots to establish in their new environment. Over the first few weeks, monitor moisture carefully since young plants need steady hydration to adapt and grow strong.
As the plants mature, you can reduce the frequency of watering but continue to provide deep irrigation during dry spells. Mulching around the base of the plant helps conserve soil moisture while keeping roots cool. A layer of organic mulch such as shredded bark or straw also suppresses weeds that compete for water and nutrients. Proper watering practices after planting ensure bee balm develops a resilient root system, setting the stage for lush foliage and abundant blooms in the growing season.
Caring for Bee Balm Throughout the Seasons
Spring Care for Bee Balm
Spring marks the beginning of bee balm’s growing cycle, and this is the time to prepare plants for a healthy season ahead. As temperatures warm, remove any dead stems or debris around the base of the plant to reduce the risk of fungal diseases. Applying a layer of compost or organic matter enriches the soil and provides essential nutrients that support vigorous growth. Spring is also the best time to divide older clumps if they have become too crowded, which encourages better air circulation and more abundant blooms later in the season.
In addition, watering should be adjusted based on weather conditions. While bee balm enjoys moist soil, it should never remain waterlogged. Early spring rainfall often provides sufficient moisture, but during dry spells, consistent watering ensures strong root development. Applying mulch helps retain soil moisture and suppresses weed competition. By giving bee balm proper attention in spring, you set the foundation for a thriving plant that will reward you with lush foliage and colorful flowers throughout summer.
Summer Care for Bee Balm
Summer is the season when bee balm reaches its peak bloom, filling gardens with vibrant colors and attracting pollinators like bees, butterflies, and hummingbirds. During this time, consistent watering is crucial, especially in hot and dry climates. Bee balm thrives in evenly moist soil, so avoid allowing the soil to completely dry out. Deadheading, or removing faded blooms, encourages the plant to produce more flowers and extends the blooming season, keeping your garden colorful for weeks.
Another important task during summer is monitoring for powdery mildew, a common issue with bee balm. This fungal disease thrives in hot, humid conditions and often appears as a white coating on the leaves. To prevent it, ensure good air circulation by spacing plants properly and avoid overhead watering. If mildew does appear, trim affected leaves and apply an organic fungicide if necessary. With proper summer care, your bee balm remains vibrant, resilient, and a magnet for garden wildlife throughout the season.
Fall Care for Bee Balm
As autumn approaches, bee balm begins to slow down its growth and prepare for dormancy. This is the ideal time to cut back stems to about four to six inches above the ground once blooming has finished. Trimming back not only keeps your garden tidy but also helps prevent disease from overwintering in dead plant material. Adding a layer of compost or well-rotted manure in fall replenishes nutrients in the soil, giving your plants a head start for the following spring.
In regions with cold winters, mulching around the base provides insulation for the roots, protecting them from frost damage. Some gardeners prefer to leave seed heads on the plant during fall, as they provide food for birds and add visual interest to the garden. Fall is also an excellent time to divide and replant bee balm clumps if they have become overcrowded, ensuring healthier growth in the coming year. With thoughtful fall care, bee balm will return stronger and more abundant the next growing season.
Common Problems and How to Solve Them
Powdery Mildew
Powdery mildew is one of the most frequent issues with bee balm. It appears as a white or gray powdery coating on the leaves, often starting in mid to late summer. This condition thrives in hot, humid weather with poor air circulation. While it rarely kills the plant, it weakens its vigor and reduces blooming potential. Preventing overcrowding, pruning for airflow, and watering the base of the plant rather than the leaves can minimize the risk of infection.
If powdery mildew does appear, it can be controlled by removing affected leaves and applying organic fungicides like neem oil or sulfur sprays. Ensuring consistent watering without waterlogging the soil also helps the plant resist fungal stress. Choosing mildew-resistant varieties of bee balm is a long-term strategy that many gardeners adopt. With these measures, bee balm can stay vibrant and produce abundant flowers despite this common issue.
Root Rot
Root rot typically develops in poorly draining soil or when plants are overwatered. The roots suffocate and begin to decay, leading to stunted growth, wilting, and eventual death if not treated. Bee balm prefers moist but not soggy soil, making good drainage an essential factor for healthy root development. Amending heavy clay soils with compost or sand before planting can prevent standing water around the roots.
If root rot has already set in, the best approach is to remove and discard the affected plant to prevent the disease from spreading. Future plantings should be located in well-draining soil and monitored closely for early signs of stress. Watering only when the topsoil begins to dry helps reduce the chance of infection. By maintaining the right soil conditions, gardeners can keep bee balm vigorous and blooming year after year without the threat of root decay.
Pest Infestations
Bee balm is attractive not only to pollinators but also to some common garden pests. Aphids, spider mites, and leafhoppers often feed on the plant’s leaves and stems, causing curling, yellowing, or stippling damage. Although pests are rarely fatal, large infestations can weaken the plant and reduce its ability to flower. Monitoring the plants regularly helps you spot problems early before they get out of control. Beneficial insects like ladybugs and lacewings can naturally keep pest populations in check, making them great allies in your garden.
If pests become too numerous, try a gentle approach first by spraying the plants with water to dislodge them. In more severe cases, insecticidal soap or neem oil sprays can effectively control infestations without harming bees and butterflies. Avoid using harsh chemical pesticides, as these can harm pollinators and beneficial insects. Keeping your plants healthy with proper watering, mulching, and fertilizing also reduces the likelihood of pest outbreaks, since strong plants are naturally more resilient against insects.
Nutrient Deficiencies and Poor Growth
Sometimes, bee balm may struggle to thrive due to poor soil nutrition or imbalanced fertilization. Symptoms of nutrient deficiency include yellowing leaves, stunted growth, or fewer flowers than expected. Bee balm prefers rich, well-draining soil with a steady supply of organic matter, which provides a balance of nutrients for steady growth. If the soil is too sandy or compacted, the plant may struggle to absorb nutrients effectively, resulting in poor health over time. Regular soil testing is a reliable way to identify which nutrients may be lacking.
To solve this issue, apply compost or well-rotted manure to enrich the soil naturally. Balanced, slow-release fertilizers can also help replenish nutrients without overwhelming the plant. Avoid over-fertilizing with nitrogen-heavy products, as this encourages leafy growth at the expense of flowers. A layer of mulch around the base of the plant helps retain moisture and gradually adds organic material as it decomposes. By maintaining fertile, well-balanced soil, you can ensure that your bee balm produces strong stems, vibrant foliage, and abundant blooms year after year.
Companion Planting and Landscaping Ideas
Pairing Bee Balm with Pollinator-Friendly Flowers
Bee balm shines brightest when paired with other plants that attract pollinators. Placing it near coneflowers, black-eyed Susans, or lavender creates a buzzing haven for bees and butterflies. These combinations not only enhance the garden’s ecological balance but also extend the blooming season. While bee balm thrives in midsummer, companion flowers help bridge color throughout spring and fall. This results in a vibrant garden that remains lively for months.
Another benefit of pairing bee balm with such flowers is the diversity of nectar sources. Bees and hummingbirds are drawn to the varying flower shapes and bloom times, making your garden a reliable feeding ground. In addition, the bright mix of colors provides visual appeal that elevates your landscape. Planting in clusters rather than scattering improves pollinator attraction and supports healthier, more consistent growth in bee balm.
Combining with Ornamental Grasses for Texture
Ornamental grasses complement bee balm by adding movement and texture to garden beds. The upright blades of grasses like switchgrass or fountain grass create a soft backdrop for bee balm’s vibrant blossoms. This contrast between airy foliage and bold blooms offers a layered, natural look. Such combinations are ideal for creating meadow-inspired borders or informal garden designs.
Grasses also improve airflow around bee balm, reducing the risk of powdery mildew, one of its most common issues. They serve as structural elements that help frame the bold colors of bee balm without competing for attention. Choosing grasses with subtle tones ensures bee balm remains the focal point. Over time, this combination provides both resilience and year-round interest, even when bee balm is dormant in winter.
Designing Borders and Wildlife Habitats
Bee balm excels in borders where its bold flowers can serve as a striking focal point. Planting it in the middle or back of mixed borders allows smaller perennials to shine in the front. Its upright habit and clustered blooms work well alongside daisies, phlox, or daylilies, bringing harmony and depth to the planting scheme. Seasonal pruning ensures neatness and encourages repeat blooms.
In addition to aesthetics, bee balm plays a vital role in supporting wildlife habitats. Its nectar-rich flowers sustain hummingbirds and pollinators, while its dense foliage offers shelter for small beneficial insects. By mixing bee balm with native shrubs and flowering perennials, you can design an ecologically rich landscape. This approach not only promotes biodiversity but also reduces the need for chemical interventions, leading to a healthier, sustainable garden.
Seasonal Care Tips
Spring Care for Bee Balm
Spring marks the beginning of bee balm’s growth cycle, and it is the best time to set the foundation for a thriving season. As temperatures rise and new shoots appear, gardeners should remove any dead stems or debris left from winter. This cleanup reduces the risk of pests and diseases while allowing new growth to develop freely. Adding a layer of compost or balanced fertilizer at this stage ensures the plant receives the nutrients needed for vigorous development. Adequate spacing between plants also helps maintain airflow, preventing powdery mildew, a common issue for bee balm.
Regular watering in spring is essential, especially during dry spells, but soil should be kept moist rather than soggy. Mulching around the base helps retain moisture and regulate soil temperature. Pinching back early growth can encourage a bushier plant with more blooms later in summer. By addressing these early-season needs, you give bee balm the strength to develop healthy foliage and prepare for its colorful display in the warmer months.
Summer Care for Bee Balm
Summer is the peak blooming season for bee balm, making it the most rewarding time for gardeners. To keep the flowers vibrant, regular deadheading is recommended. Removing spent blooms not only keeps the plant looking tidy but also encourages continuous flowering. Bee balm thrives with consistent watering during summer, as higher temperatures can cause the soil to dry out quickly. Deep watering helps promote strong root systems, but always avoid overwatering, as soggy soil may lead to root problems.
During summer, powdery mildew can be more prevalent due to humidity and warmth. To combat this, ensure good air circulation by maintaining proper spacing and pruning crowded stems. Applying an organic fungicide may also help if mildew becomes persistent. Fertilizer use should be light during summer since overfeeding can result in lush leaves at the expense of flowers. Supporting the plant with stakes might be necessary for taller varieties, especially after heavy rain. With attentive summer care, bee balm will deliver stunning color and attract pollinators throughout the season.
Fall Care for Bee Balm
In fall, bee balm begins to slow down as it prepares for dormancy. This season is the ideal time to tidy up the plant and get it ready for winter. Gardeners should begin by cutting back the stems to about four to six inches above the soil. This helps prevent pests and diseases from overwintering in the dead foliage. Dividing overcrowded clumps in fall is also beneficial, as it rejuvenates the plant and improves growth for the following year. Replanting divisions in well-prepared soil ensures a fresh start for younger plants.
Applying a layer of compost or organic mulch around the base in fall protects the roots from fluctuating temperatures and adds nutrients for spring growth. It is also a good opportunity to inspect the soil’s drainage and make improvements if necessary. While bee balm will not bloom in fall, this season’s care sets the stage for vigorous regrowth the next year. By completing these essential tasks, you help maintain the health and longevity of your bee balm, ensuring it remains a reliable centerpiece in your garden.
Winter Care for Bee Balm
Winter is the resting phase for bee balm, but this does not mean the plant should be neglected. After the fall cutback, leaving a light layer of mulch helps insulate the crown of the plant against freezing temperatures. In colder regions, adding extra mulch or straw provides further protection from frost damage. Avoid overwatering during this season, as dormant roots are more vulnerable to rot. Well-drained soil is particularly crucial in winter months.
For gardeners in milder climates, bee balm may retain some green foliage through winter. In these cases, occasional light pruning of damaged leaves can keep the plant neat. Winter is also a time to plan ahead, checking for garden design adjustments or companion planting ideas for the next year. While bee balm remains quiet in winter, the protective measures taken now will ensure that once spring arrives, the plant can emerge strong, healthy, and ready to delight both gardeners and pollinators with its vibrant blooms.
Propagation Methods
Division of Established Clumps
Dividing bee balm is the most reliable and widely used method of propagation. Mature plants naturally form dense clumps that can become overcrowded after several years. Early spring or fall is the best time to divide them when the soil is workable and temperatures are mild. To begin, carefully dig up the clump, shake off excess soil, and gently pull or cut the roots into smaller sections, each containing healthy shoots and roots. These divisions should be replanted immediately at the same depth to encourage quick establishment.
Division not only multiplies your plants but also rejuvenates older bee balm, helping to control size and promote healthier growth. After replanting, water thoroughly to reduce transplant shock and keep the soil evenly moist until new growth appears. Adding compost at planting time ensures stronger root development and encourages early blooming. This method provides gardeners with multiple healthy plants that thrive quickly in the right conditions, making it ideal for expanding flower beds or sharing with friends.
Growing from Seeds
Starting bee balm from seeds is a slower but rewarding method for gardeners who enjoy nurturing plants from the very beginning. Seeds can be sown indoors six to eight weeks before the last frost date, using a well-draining seed-starting mix. Cover seeds lightly, as they need light to germinate, and keep the soil consistently moist. Germination usually takes 10 to 30 days, depending on conditions. Once seedlings have developed several sets of true leaves, they can be hardened off and transplanted outdoors.
When growing from seeds, keep in mind that not all bee balm cultivars grow true to type, especially hybrids. This means the new plants may differ slightly in color or size from the parent plant. However, this method allows for larger plantings at a lower cost, making it perfect for creating pollinator-friendly meadows or large garden borders. Patience is key, as seed-grown bee balm typically takes a full season before producing significant blooms, but the long-term reward is worth the effort.
Propagation by Cuttings
Taking stem cuttings is another effective way to propagate bee balm, especially if you want clones of specific varieties. The best time to take cuttings is in late spring or early summer when stems are actively growing but not yet flowering. Select a healthy, non-flowering stem and cut a 4–6 inch section just below a leaf node. Remove the lower leaves and dip the cut end in rooting hormone to encourage strong root development. Place the cutting in a small pot filled with moist, well-draining soil or perlite.
To increase success, cover the cutting with a plastic dome or clear bag to maintain humidity until roots form. Keep the pot in a bright but indirect light location, and ensure the soil remains consistently moist but not soggy. In a few weeks, new roots will develop, and the cutting can be transplanted into the garden. Propagating through cuttings is especially valuable for maintaining the unique qualities of a hybrid cultivar, ensuring your new plants match the original in color, size, and blooming habit.
Harvesting and Using Bee Balm
Bee balm is not only a beautiful garden plant but also highly valued for its culinary and medicinal uses. Harvesting the leaves and flowers at the right time ensures the best flavor and aroma. The ideal period for harvest is just before the flowers fully open, when the essential oils are most concentrated. Cut stems in the morning after the dew has dried but before the heat of the day, which helps preserve their natural oils and fragrance. Use clean, sharp scissors or pruning shears to avoid damaging the plant and encourage regrowth throughout the season.
Once harvested, bee balm can be used fresh or dried for later use. Fresh leaves and flowers are often added to teas, salads, and desserts for a citrusy, minty flavor. To preserve them, tie small bundles of stems together and hang them upside down in a cool, dry, well-ventilated area until fully dried. The dried petals can be stored in airtight containers and used for herbal teas or potpourri. Bee balm is also a favorite in natural medicine, as it is known for soothing digestive discomforts and easing respiratory issues. With thoughtful harvesting, you can enjoy the benefits of bee balm in your kitchen and home remedies all year long.
Overwintering Bee Balm
Preparing bee balm for winter is essential to keep the plant strong and ensure a healthy return in the following growing season. In colder climates, the plant naturally dies back to the ground after frost, but its roots remain alive beneath the soil. To help it survive harsh conditions, cut back stems to a few inches above the soil after the first hard frost. This not only tidies the garden but also prevents pests and diseases from overwintering in the dead foliage. Adding a layer of mulch around the base helps insulate the roots and maintain soil moisture during winter dormancy.
For gardeners in regions with severe winters, extra protection can make a difference. A thick mulch layer of straw, shredded bark, or leaves shields the crown from freezing temperatures. In milder climates, minimal care is required, but mulching is still recommended to suppress weeds and retain moisture. Bee balm typically returns vigorously in spring, producing fresh shoots that benefit from thinning to improve airflow and reduce overcrowding. With proper overwintering care, your bee balm will remain healthy and vibrant, ready to attract pollinators and enrich your garden for another season.
FAQ
How often should bee balm be watered?
Bee balm prefers consistently moist soil but should not sit in waterlogged conditions. Water deeply once or twice per week, depending on rainfall and temperature. During hot summers, increase frequency to prevent wilting. Always aim to keep the soil evenly moist rather than dry or soggy.
Can bee balm grow in partial shade?
Yes, bee balm can tolerate partial shade, but it thrives best in full sun. At least six hours of sunlight daily encourages stronger stems, abundant blooms, and resistance to mildew. In shaded areas, flowering may be reduced, and plants may grow leggy.
How do I control powdery mildew on bee balm?
Powdery mildew is a common issue for bee balm. To prevent it, provide good air circulation, avoid overhead watering, and space plants properly. If mildew appears, remove affected leaves and treat with a fungicide or organic solution like diluted milk spray.
Is bee balm safe to use in cooking?
Yes, bee balm leaves and flowers are edible and often used to flavor teas, salads, and desserts. Its taste is similar to oregano and mint. Always harvest from healthy, pesticide-free plants to ensure safe consumption.
How long does bee balm live?
Bee balm is a perennial that can live for many years if divided and maintained regularly. Over time, the center of the plant may die out, so dividing every two to three years helps rejuvenate growth and extend the plant’s lifespan.
Conclusion
Bee balm is a versatile and rewarding perennial that combines ornamental beauty with ecological value. Its colorful flowers brighten summer gardens while attracting pollinators such as bees, butterflies, and hummingbirds. Beyond its aesthetic appeal, bee balm offers culinary and medicinal uses, making it a multi-purpose plant worth cultivating. With proper care—adequate sunlight, good soil, seasonal maintenance, and protection from pests—bee balm will thrive for many years. By learning how to propagate, harvest, and overwinter your plants, you can ensure a continuous supply of blooms and healthy growth across seasons. Whether you are a beginner or an experienced gardener, bee balm is a plant that provides endless benefits and joy in the garden.

