Dreaming of a vibrant groundcover that bursts into color each spring? Creeping phlox is a low-maintenance perennial that transforms garden beds, slopes, and rock walls into carpets of pink, purple, blue, and white blooms. But to enjoy its full beauty, planting it correctly is key.
In this guide on How to Plant Creeping Phlox, you’ll learn the best techniques for planting from pots, bare roots, or divisions. With the right preparation and care, your phlox will spread effortlessly and return year after year with even more color.
Understanding Creeping Phlox
What Is Creeping Phlox?
Creeping phlox (Phlox subulata) is a tough, low-growing perennial native to the rocky hillsides and woodlands of eastern and central North America. This plant is known for its dense, spreading habit, forming a vibrant, flower-covered carpet in early to mid-spring. It reaches only about 4 to 6 inches in height but can spread up to 2 feet wide, making it an ideal groundcover.
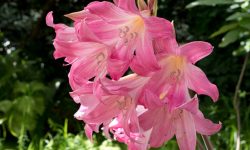
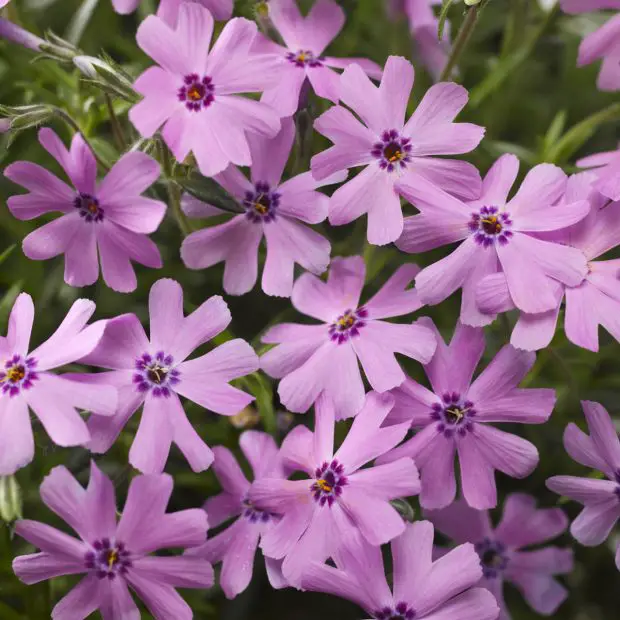
Its narrow, needle-like foliage stays green year-round in many climates, offering texture even when it’s not in bloom. During its flowering season, creeping phlox produces masses of five-petaled, star-shaped flowers in a range of brilliant colors—including soft pinks, deep purples, icy blues, and pure whites—that create an eye-catching, springtime display in any garden.
This species thrives in full sun and well-drained soil, especially on slopes, rocky outcrops, and raised beds. It’s a staple in cottage gardens, borders, retaining walls, and rock gardens, where its cascading growth softens hard edges with natural beauty.
Benefits of Growing Creeping Phlox
Creeping phlox brings both beauty and utility to your landscape. Its spreading, mat-forming habit makes it a natural solution for erosion control on slopes or banks, as its dense roots help hold soil in place. At the same time, its thick foliage suppresses weeds, reducing garden maintenance.
Beyond its practical advantages, creeping phlox adds incredible spring color and attracts pollinators like bees and butterflies to your garden. It’s deer-resistant, making it a great option for areas with wildlife pressure, and once established, it’s highly drought-tolerant and easy to care for.
Whether you’re looking to fill gaps in a stone pathway, brighten a rocky hillside, or create a low-maintenance border, creeping phlox is a reliable and rewarding choice. Its evergreen nature ensures year-round interest, while its stunning spring bloom delivers a burst of seasonal joy.
Choosing the Right Time to Plant
Best Planting Season
Creeping phlox grows best when planted during periods of mild weather, giving its roots time to establish before facing environmental stress. The two optimal windows for planting are early spring—once the danger of frost has passed—and early fall, roughly 6 to 8 weeks before the first expected frost.
Spring planting gives your creeping phlox a full growing season to develop strong roots, while fall planting allows it to settle in and prepare for a burst of growth the following spring. Both seasons offer cooler temperatures and more predictable moisture levels, making them ideal for minimizing transplant shock and encouraging healthy root formation.
Avoid planting during the peak of summer, especially in hot or dry regions, as extreme heat can stress young plants and hinder establishment.
Considering Local Climate
Your local growing zone plays a key role in timing. In colder regions (USDA Zones 3–5), wait until all danger of frost has passed in spring before planting. Soil should be workable and not overly wet from snowmelt. In warmer regions (Zones 7–10), fall planting is often more successful, as it avoids the intense summer heat that can quickly dry out shallow-rooted plants like creeping phlox.
If planting in early spring, check your extended forecast to ensure a frost-free window of at least a few weeks. For fall planting, aim for early enough in the season that your plants have time to root before the soil cools.
By aligning your planting schedule with your regional climate, you’ll give your creeping phlox the best possible start for a long-lasting and vibrant display.
Selecting the Right Location
Sunlight Requirements
Creeping phlox is a sun-loving ground cover that performs best when planted in areas receiving at least 6 hours of direct sunlight each day. Full sun exposure encourages the plant to produce dense carpets of vibrant flowers in spring, creating a show-stopping display across garden beds, slopes, or rock walls. When grown in partial shade, especially in the afternoon, creeping phlox may still survive but will likely have fewer blooms and less compact foliage, which can reduce its visual impact.
If your garden receives morning sun and afternoon shade, creeping phlox may still grow, but choose a brighter spot if possible to maximize flowering potential. In shaded locations, plants often become leggy and spread more slowly.
Soil Conditions
Creeping phlox prefers soil that is well-drained and moderately fertile. This plant is particularly sensitive to soggy conditions, which can lead to root rot and fungal diseases, especially during winter or rainy seasons. The ideal soil is sandy or loamy, providing the drainage it needs while retaining enough moisture for healthy root development.
Soil pH should be slightly acidic to neutral, typically in the range of 6.0 to 7.0. If you’re unsure about your soil’s composition or pH, consider conducting a simple test before planting. For heavy clay soils or poorly draining sites, amend the soil with compost, coarse sand, or fine gravel to improve aeration and drainage.
When planted in the right location with the right soil, creeping phlox will establish quickly, spread vigorously, and reward you with a lush, colorful groundcover for years to come.
Preparing the Planting Site
Clearing and Amending the Soil
A healthy planting site begins with clearing out weeds, grass, rocks, and any plant debris that might compete with your creeping phlox for nutrients, water, or space. Removing invasive roots or stubborn perennial weeds is especially important, as these can interfere with the early growth of your new plants.
Once the area is clear, use a garden fork or shovel to loosen the top 8 to 10 inches of soil. This improves root penetration and drainage, allowing creeping phlox to establish itself more quickly. Incorporate well-rotted compost, leaf mold, or aged manure into the soil to increase fertility, improve texture, and encourage beneficial microbial activity. These amendments are especially helpful in clay-heavy or sandy soils that either hold too much water or drain too quickly.
If your native soil has poor drainage, consider creating slightly raised beds or planting on slopes or rock walls, where creeping phlox thrives naturally.
Spacing for Optimal Spread
Proper spacing is essential for encouraging creeping phlox to form a lush, seamless carpet over time. Space each plant 12 to 18 inches apart, depending on the variety and your desired rate of coverage. This gives the plants enough room to spread horizontally without overcrowding, which helps maintain airflow and reduces the risk of fungal diseases such as powdery mildew.
While it may look sparse at first, phlox will fill in the gaps within one or two growing seasons. Avoid the temptation to plant too closely together, as this can lead to competition for nutrients, increased humidity between plants, and stunted growth.
Taking the time to prepare your planting site thoroughly sets the foundation for a healthy, low-maintenance, and visually stunning groundcover that will return year after year.
How to Plant Creeping Phlox
From Nursery Pots
Begin by selecting healthy nursery plants with vibrant foliage and well-developed roots. Dig a hole about twice as wide as the root ball and just a bit shallower than its height. This allows the crown of the plant to sit slightly above the soil surface, which helps prevent rot.
Gently remove the plant from the pot. If the roots are tightly bound, loosen them with your fingers to encourage outward growth. Place the plant in the hole and rotate it slightly to ensure the best visual orientation.
Backfill the hole with soil, firming it gently around the roots to eliminate air pockets. Once planted, water thoroughly to settle the soil. Add a 1–2 inch layer of mulch around the base, keeping it away from the stems, to retain moisture and reduce weed growth.
From Bare Root or Division
Bare-root or divided creeping phlox should be planted as soon as possible after purchase or splitting. First, soak the bare roots in lukewarm water for 1 to 2 hours to rehydrate them and reduce transplant shock.
Prepare a shallow planting hole or trench that’s wide enough to spread out the roots. Place the plant so that the crown—the point where roots meet stems—is level with or slightly above the soil surface.
Spread out the roots in the hole, then gently cover them with soil. Press down lightly to secure the plant, and water thoroughly to help the soil settle around the roots. Do not fertilize right away; give the plant time to establish first. Keep the soil evenly moist during the first few weeks.
Watering Requirements
Creeping phlox prefers consistently moist soil during its establishment period. After planting, water thoroughly to help settle the roots. For the first few weeks, keep the soil evenly moist but not soggy, watering 2 to 3 times per week depending on rainfall and temperature.
Once established, creeping phlox becomes relatively drought-tolerant. At that stage, reduce watering to once a week or only during prolonged dry spells. Always water at the base of the plant to avoid wetting the foliage, which can help prevent fungal diseases. Early morning is the best time to water, allowing the plant to absorb moisture before the heat of the day. Mulching around the base can also help retain moisture and reduce the need for frequent watering.
Feeding for Healthy Growth
To support lush foliage and vibrant blooms, apply a balanced, slow-release fertilizer in early spring as new growth emerges. A formula like 10-10-10 or 14-14-14 provides the essential nutrients—nitrogen, phosphorus, and potassium—needed for both root development and flowering.
For an extra boost, you can also apply a diluted liquid fertilizer every 4 to 6 weeks during the active growing season, especially if your soil is poor or sandy. Avoid over-fertilizing, as too much nitrogen can lead to excessive leaf growth at the expense of blooms.
Always water well after fertilizing to help the nutrients reach the root zone. If you’ve amended the soil with compost during planting, additional feeding may be minimal in the first year. Regular feeding in subsequent seasons encourages dense, spreading plants and longer-lasting floral displays.
Mulching and Weed Control
Benefits of Mulching
Mulching offers multiple benefits for creeping phlox, particularly in its early growth stages. By maintaining consistent soil moisture, mulch reduces the frequency of watering and helps protect the roots from sudden temperature fluctuations. It also acts as a natural barrier, preventing weed seeds from germinating by blocking sunlight. Use organic materials such as shredded bark, straw, or pine needles, and spread a 2-inch layer around the plants. Be sure to keep the mulch a few inches away from the plant stems to prevent excess moisture buildup and potential rot.
Weed Management
Weeds compete with creeping phlox for water, nutrients, and space—especially when plants are young and their root systems are still shallow. In the first growing season, it’s crucial to maintain a clean planting bed. Hand-pulling is the safest method, as it avoids damaging the delicate roots. For larger areas, consider installing landscape fabric beneath the mulch to create an additional weed barrier. Once creeping phlox becomes established and starts spreading, its dense foliage will naturally help shade out weeds, making maintenance easier in the long term.
Pruning and Maintenance
Post-Bloom Trimming
Once creeping phlox finishes its spring bloom, usually in late spring to early summer, trimming away the faded flowers and any leggy stems keeps the plant looking fresh and encourages compact growth. Use clean, sharp shears to cut back the top third of the foliage, especially areas that appear overgrown or sparse. This light pruning not only improves aesthetics but may stimulate a secondary flush of blooms in summer, particularly in cooler climates. Regular trimming also helps prevent the plant from becoming woody at the center over time.
Annual Maintenance
Each year, as winter fades and before new growth begins—typically in late winter or early spring—inspect the plant for any dead, diseased, or frost-damaged stems. Use sanitized pruners to remove these sections, cutting back to healthy tissue. This seasonal cleanup promotes better airflow, reduces the risk of disease, and encourages more vigorous spring growth. If the plant has spread too widely or grown into unwanted areas, this is also a good time to shape its edges and thin out older sections to rejuvenate the mat and maintain its tidy, ground-hugging form.
Propagation Techniques
Creeping phlox can be easily propagated to expand your garden or rejuvenate older plants. The two most effective methods are division and stem cuttings, both of which ensure genetic consistency and healthy new growth.
Division
The best time to divide creeping phlox is in early spring or immediately after the blooming period. Choose mature, healthy clumps that are at least 2–3 years old. Carefully dig up the entire plant, taking care not to damage the shallow root system. Gently separate the clump into smaller sections, ensuring each has a good amount of roots and foliage. Replant divisions at the same depth they were growing before, and water thoroughly. Division not only propagates new plants but also reinvigorates older patches that have become woody or sparse in the center.
Stem Cuttings
For gardeners looking to multiply creeping phlox without disturbing established plants, softwood cuttings are a reliable method. In late spring or early summer, snip 4–6 inch non-flowering shoots from a healthy plant. Remove the lower leaves, dip the cut end in rooting hormone if desired, and insert it into a pot filled with moist, well-draining soil. Keep the cuttings in a bright, indirect light location and maintain even moisture. Roots typically develop within 4–6 weeks, after which the new plants can be hardened off and transplanted into the garden.
By using these techniques, you can spread creeping phlox throughout your landscape, fill in bare spots, or share with fellow gardeners—ensuring vibrant carpets of blooms year after year.
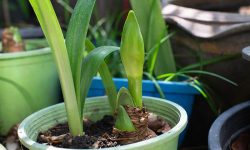
Growing in Containers
Creeping phlox grows well in containers, offering a charming option for patios, balconies, and small gardens. Choose a wide, shallow pot with drainage holes to accommodate the plant’s spreading habit and shallow root system. Use a light, well-draining potting mix, ideally with added sand or perlite to prevent soggy conditions. Place the container in full sun, as at least six hours of direct light are essential for healthy growth and abundant blooms. Water regularly when the top inch of soil dries out, and feed every few weeks during the growing season with a balanced liquid fertilizer. In colder regions, protect the container over winter by moving it to a sheltered spot or insulating it with mulch and burlap. Container-grown phlox not only adds color to vertical spaces but also allows for easy relocation and creative garden design.
Seasonal Care Tips
Spring Care
Spring marks a crucial time for creeping phlox as it emerges from dormancy and prepares to bloom. Begin by applying a balanced, slow-release fertilizer to provide essential nutrients that support strong stems, lush foliage, and abundant flowers. Carefully prune away any dead, damaged, or diseased stems left from winter to encourage healthy new growth and improve airflow. Refresh or add a 2-3 inch layer of organic mulch around the plants to conserve soil moisture and suppress weed growth. During this period, closely inspect plants for early signs of pests like aphids, spider mites, or fungal infections. Early detection and treatment prevent minor problems from escalating and affecting flowering.
Summer Care
In summer, creeping phlox requires attentive watering, especially during hot, dry spells, to keep the soil consistently moist but never waterlogged. Deep watering encourages roots to grow downward and enhances drought tolerance. After the spring bloom fades, deadhead spent flowers and lightly trim any unruly or leggy growth to maintain a tidy appearance and encourage potential reblooming later in the season. Monitor the plant for heat stress symptoms such as leaf yellowing or wilting, and provide some afternoon shade in extremely hot climates if necessary. Additionally, watch for fungal diseases like powdery mildew, which thrive in humid conditions; improving spacing and pruning to increase air circulation helps reduce these risks.
Fall Care
Fall is an important time to prepare creeping phlox for winter dormancy. Begin by clearing away fallen leaves, dead stems, and any garden debris that could harbor pests or disease over winter. Trim back any overgrown or straggly sections to maintain a neat, manageable plant shape. This season also provides an excellent opportunity for propagation—divide mature clumps or take stem cuttings so new plants can root before cold weather arrives. Keep watering as needed until the soil freezes to ensure plants enter winter healthy and hydrated.
Winter Care
In colder USDA zones, protect creeping phlox by applying a thick, insulating layer of mulch—such as straw, shredded bark, or leaf mold—over the root zone to guard against frost heaving and temperature extremes. Mulching helps stabilize soil temperature and moisture, crucial for root survival during freezing conditions. In milder climates where creeping phlox remains evergreen, protect plants from harsh winter winds by erecting windbreaks or placing them near sheltered spots. Avoid walking on dormant plants to prevent crushing fragile foliage and damaging roots. Proper winter care ensures your creeping phlox returns healthy and vigorous in spring.
Dealing with Common Problems
Poor Flowering
Poor or sparse flowering in creeping phlox is often a sign of insufficient sunlight or improper fertilization. Since creeping phlox thrives in full sun, plants grown in shady spots may produce fewer blooms and leggy growth. Additionally, overfeeding with high-nitrogen fertilizers can promote lush foliage at the expense of flowers. To encourage vibrant blooms, ensure your phlox receives at least six hours of direct sunlight daily and use a balanced fertilizer formulated for flowering plants. Pruning after the initial bloom can also stimulate a secondary flowering.
Root Rot
Root rot is a common issue caused by waterlogged or poorly drained soil, which suffocates roots and allows harmful fungi to proliferate. Symptoms include yellowing foliage, wilting despite moist soil, and a foul smell from the roots. To prevent root rot, plant creeping phlox in well-draining soil amended with sand, grit, or organic matter like compost. Avoid excessive watering and allow the soil surface to dry slightly between watering sessions. If root rot is detected, remove affected plants and improve drainage before replanting.
Powdery Mildew
Powdery mildew is a fungal disease that appears as a white or grayish powdery coating on leaves, often during warm, dry days followed by cool, humid nights. This can weaken the plant and reduce flowering. To minimize powdery mildew, improve air circulation by spacing plants properly and pruning crowded growth. Avoid overhead watering which keeps foliage wet, and water early in the day to allow leaves to dry quickly. Organic fungicides such as neem oil or sulfur sprays can be effective treatments if applied at the first sign of infection.
Pest Issues
Although generally resilient, creeping phlox can occasionally attract pests like aphids and spider mites. Aphids cluster on new growth and flower buds, sucking sap and causing distortion, while spider mites cause fine webbing and stippled leaves. To manage infestations, spray plants with insecticidal soap or neem oil, repeating treatments as needed. Introducing beneficial insects like ladybugs can also help keep pest populations under control naturally. Regular monitoring and early intervention are key to preventing damage.
Encouraging a Blooming Carpet
To create a vibrant, colorful carpet of creeping phlox, several key practices help maximize bloom production and plant health. First and foremost, ensure your phlox receives full sun, ideally at least six hours daily, as insufficient light leads to sparse flowering and weak growth. Regular pruning after the initial bloom removes spent flowers and encourages the plant to produce a second flush of blossoms, extending the blooming season.
Proper soil preparation and maintenance are also vital. Well-drained soil enriched with organic matter promotes healthy root development and nutrient uptake, both critical for prolific flowering. Avoid excessive nitrogen fertilization, which can encourage lush foliage but reduce flower production. Instead, choose a balanced or bloom-boosting fertilizer, applied in early spring and again after the first bloom.
Maintaining adequate moisture without overwatering keeps the plant vigorous but prevents root diseases that can inhibit blooming. Mulching helps retain soil moisture and regulate temperature, further supporting consistent growth.
Over time, creeping phlox spreads by runners and forming dense mats. To maintain a lush, even carpet, divide and replant crowded or thinning areas every two to three years. This rejuvenation prevents woody centers and promotes continuous flowering.
By combining these strategies—ample sunlight, timely pruning, balanced feeding, proper watering, and periodic division—you’ll enjoy a thriving, colorful carpet of creeping phlox that delights the garden every spring.
Using Creeping Phlox in Landscape Design
Slopes and Erosion Control
Creeping phlox is an excellent solution for stabilizing slopes and embankments, where soil erosion is a common challenge. Its dense, spreading habit forms a thick mat that anchors soil effectively, even during heavy rains or runoff. As it grows, the roots bind soil particles together, while the foliage provides ground coverage that reduces water impact. In addition to its functional role, creeping phlox transforms steep or uneven terrain into a striking tapestry of spring color. It’s especially valuable in areas where mowing is difficult or unsafe, offering low-maintenance beauty in problem spots.
Rock Gardens and Borders
In rock gardens, creeping phlox thrives in the shallow, well-drained soil between stones. Its low-growing habit makes it an ideal filler plant, softening harsh lines and weaving around rocks to create a natural, cohesive look. It complements other alpine and drought-tolerant species, adding texture and seasonal interest. Along pathways, garden borders, or edging beds, creeping phlox provides definition without overpowering nearby plants. Its evergreen foliage maintains structure year-round, while its spring blooms create a dramatic seasonal burst of color at the garden’s edge.
Color Combinations
Creeping phlox comes in a wide array of hues—lavender, pink, white, magenta, and even bicolor varieties—allowing gardeners to create vibrant mosaics across large areas. Mixing cultivars with different bloom colors adds depth and movement to ground-level plantings. For even greater impact, combine creeping phlox with early-blooming bulbs such as tulips, crocuses, or daffodils. These taller flowers emerge through the phlox mat, creating dynamic layers of color and height. As the bulbs fade, the phlox continues to provide ground coverage, ensuring sustained visual appeal throughout the spring season.
Saving Seeds and Replanting
Creeping phlox is usually propagated by division or cuttings. However, growing it from seeds can also be rewarding. After the flowers fade, small seed pods form. Let them stay on the plant until they turn brown and begin to split. At this stage, collect the pods before the seeds drop. Clean off any plant debris. Dry the seeds in a cool, shaded place. Once dry, store them in a labeled envelope or airtight container. Keep them in a dark, dry spot until planting.
Sow seeds in early spring. You can start them indoors 6 to 8 weeks before the last frost. Or sow them directly outside once the soil warms. Press seeds gently into moist, well-draining soil. Do not bury them too deep. Keep the soil consistently moist. Seeds usually germinate in 2 to 3 weeks. Hybrid varieties may not grow true to type, but the seedlings can still add beauty and variety to your garden.
FAQ: How to Grow Creeping Phlox
How long does it take for creeping phlox to become established and spread?
Creeping phlox typically takes one full growing season to become well established in your garden. Once rooted, it begins to spread gradually, often covering an area of 18 to 24 inches in width by the second or third year. Growth is fastest when the plant receives full sun, well-draining soil, and light pruning after flowering. Consistent watering during dry spells also encourages healthy expansion.
Can creeping phlox grow successfully in shaded or partially shaded areas?
Creeping phlox thrives best in full sun, where it produces the most vibrant and abundant blooms. However, it can tolerate partial shade, especially in hotter climates where some afternoon shade may actually protect it from sun scorch. In deep shade, the plant’s flowering will be significantly reduced, and its spreading habit will slow, making it less effective as a groundcover.
When is the ideal time to plant creeping phlox for the best results?
The optimal time to plant creeping phlox is in early spring, after the danger of frost has passed, or in early fall, about 6 to 8 weeks before the first expected frost. Spring planting allows ample time for roots to establish before summer, while fall planting gives the plant time to anchor in cooler soil without intense heat stress. Avoid planting in mid-summer, when extreme temperatures can inhibit root development.
How should I care for creeping phlox after blooming to keep it healthy and flowering each year?
After blooming, shear back the foliage by about one-third to encourage dense growth and prevent the center of the plant from thinning. Remove faded flowers to avoid seed formation, which can take energy away from root and foliage development. Feed with a balanced, slow-release fertilizer in early spring and again after flowering. Monitor for signs of root rot or overcrowding, especially in humid regions, and divide plants every 2 to 3 years if needed.
Will creeping phlox overtake other plants or become difficult to control?
Creeping phlox is non-invasive and spreads in a well-behaved, mat-forming pattern. It’s easy to manage with occasional trimming along edges or garden paths. While it spreads outward slowly each year, it doesn’t crowd out neighboring plants aggressively like some groundcovers do. You can easily shape or redirect its growth to maintain clean borders or define planting zones.
Final Thoughts
Growing creeping phlox is one of the easiest and most rewarding ways to bring a vibrant splash of color to your garden in spring. Whether you’re covering slopes, filling gaps between stones, or softening the edges of flower beds, this hardy perennial delivers lasting beauty with minimal effort. Once established, it thrives with little maintenance and returns each year in a blaze of blossoms that attracts bees and butterflies alike.
With the right planting spot, a bit of care, and timely pruning, your creeping phlox can flourish for years, turning dull ground into a living canvas of pinks, purples, and whites. Follow the seasonal tips in this guide and watch your garden transform into a carpet of color every spring.