Hollyhocks are iconic garden flowers that bring vertical drama and classic charm to any outdoor space. For beginners looking to add a splash of color and height to their gardens, growing hollyhocks from seed is a rewarding and enjoyable project. While the process might seem daunting at first, understanding the lifecycle and needs of hollyhocks will empower you to cultivate these striking plants with confidence. This detailed guide will walk you through every stage, from seed preparation to nurturing mature plants, ensuring your hollyhocks flourish season after season.
Growing hollyhocks from seed offers a special connection to your garden, as you witness the transformation from a tiny seed to a towering flower stalk. These plants can grow impressively tall, sometimes reaching heights of over six feet, and their large, colorful blooms create a stunning focal point. However, successful cultivation depends on more than just planting the seeds — it involves understanding the best timing, soil preparation, watering, and pest management strategies. For beginners, mastering these essentials will make the growing experience both smooth and gratifying.
In this comprehensive guide, you’ll learn how to select quality seeds, create the ideal environment for germination, transplant seedlings safely, and care for your hollyhocks throughout the growing season. Whether you have a small balcony garden or a spacious backyard, these tips will help you confidently grow hollyhocks from seed, even if it’s your very first time gardening.
Understanding Hollyhocks and Their Growth Requirements
What Are Hollyhocks?
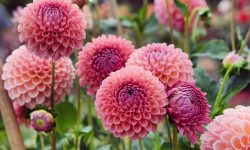
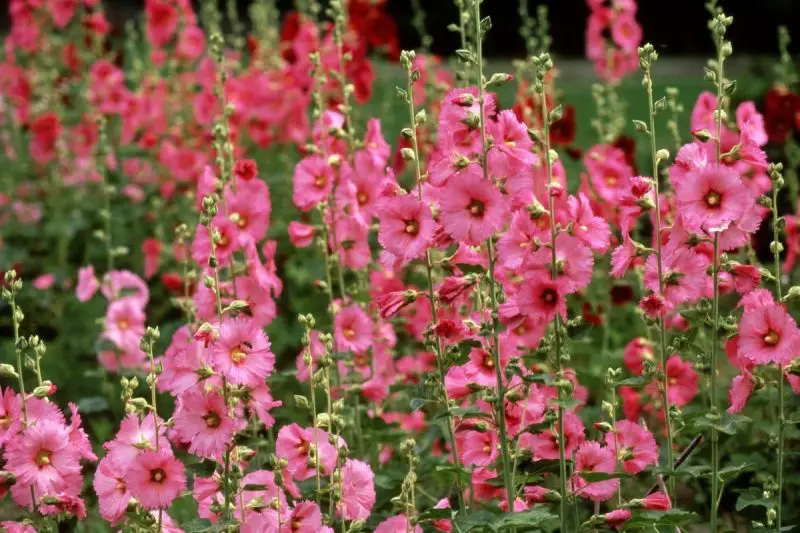
Hollyhocks (Alcea rosea) are biennial or short-lived perennial plants celebrated for their tall flower spikes covered with large, cup-shaped blossoms. They can grow between 6 to 8 feet tall, creating dramatic vertical interest in gardens. Traditionally seen in cottage gardens, hollyhocks bring a nostalgic and elegant look with their vibrant hues and striking form.
Ideal Growing Conditions
To thrive, hollyhocks need full sun exposure, which means at least six hours of direct sunlight daily. They prefer fertile, well-drained soils enriched with organic matter. While adaptable to a range of soil types, hollyhocks do not perform well in heavy, waterlogged soils that can promote root rot and fungal diseases.
Adequate spacing is important for airflow around plants, reducing the risk of rust—a common fungal problem with hollyhocks. Consistent moisture is necessary, especially for young seedlings, but care must be taken to avoid overly wet conditions.
Selecting and Preparing Hollyhock Seeds
Choosing Quality Seeds
The success of growing hollyhocks from seed begins with selecting high-quality seeds. Fresh seeds typically germinate better and faster. You can purchase seeds from trusted garden suppliers or harvest seeds yourself from mature hollyhock plants after flowering.
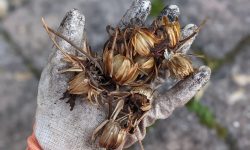
If collecting your own seeds, allow flower heads to dry completely on the plant before harvesting. Store the seeds in a cool, dry place to maintain viability.
Seed Preparation Techniques
Hollyhock seeds have a tough outer coat, which can delay germination if not treated properly. Soaking seeds overnight in lukewarm water softens the seed coat and encourages faster sprouting. This is a simple step that greatly increases germination rates and is especially helpful for beginners.
After soaking, sow the seeds within 24 hours to ensure they remain viable. Use a sterile, light seed-starting mix to provide an ideal environment free from pests and diseases.
Starting Hollyhocks Indoors
When and How to Sow Seeds
Starting hollyhock seeds indoors offers better control over temperature and moisture, resulting in higher success for beginners. Sow the seeds about a quarter-inch deep in seed trays or pots filled with seed-starting mix. Gently cover the seeds and water lightly.
The soil temperature should be maintained between 65°F and 70°F (18°C to 21°C) for optimal germination, which generally takes 7 to 14 days.
Caring for Seedlings Indoors
Keep the soil consistently moist but avoid waterlogging by misting rather than pouring water directly. Place the seedlings in a bright location with indirect sunlight or under grow lights. Insufficient light will cause seedlings to become leggy and weak.
When seedlings develop two or three sets of true leaves, thin them out by snipping weaker seedlings to give stronger ones room to grow and access nutrients.
Hardening Off and Transplanting Outdoors
Hardening Off Process
Before transplanting seedlings outdoors, it’s critical to harden them off. This involves gradually exposing plants to outdoor conditions over 7 to 10 days to prevent shock.
Begin by placing seedlings outside in a shaded, sheltered area for a few hours daily, gradually increasing their exposure to sunlight and wind.
Transplanting to the Garden
Choose a sunny garden spot with well-prepared, fertile, and well-draining soil. Space your plants about 18 to 24 inches apart to allow room for growth and airflow.
Carefully remove seedlings from their containers, taking care to protect the roots. Plant at the same depth as they were in pots and water thoroughly to help the soil settle.
Applying organic mulch around the base helps conserve moisture, regulate soil temperature, and reduce weed competition.
Ongoing Care for Growing Hollyhocks
Watering and Fertilizing
Hollyhocks require regular watering, especially during dry spells. Water at the soil level to keep leaves dry and reduce fungal risks. Overwatering or standing water can cause root rot.
Use a balanced, slow-release fertilizer or organic compost applied in early spring to support healthy growth and abundant flowering. Avoid excessive nitrogen fertilizer, which encourages leafy growth at the expense of blooms.
Supporting Tall Plants
Due to their height, hollyhocks often need staking to prevent them from bending or breaking. Insert stakes early in the season to minimize root disturbance and tie stems loosely to allow movement.
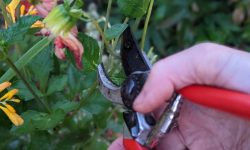
Deadheading spent flowers encourages prolonged blooming and reduces seed drop if you want to control self-seeding.
Managing Common Problems
Diseases: Rust and Others
Rust is the most common disease affecting hollyhocks, causing orange or brown spots on leaves. Prevent rust by ensuring good spacing for air circulation, watering at the base, and promptly removing infected leaves.
If rust spreads, organic fungicides can help control it when used as directed.
Pests: Aphids and Beetles
Aphids and Japanese beetles can damage hollyhocks by feeding on leaves and flowers. Early detection is key. Use gentle sprays of water to remove aphids or introduce beneficial insects such as ladybugs to manage pest populations naturally.
Avoid harsh pesticides that can harm beneficial insects and pollinators.
Encouraging Hollyhocks to Self-Seed
One of the advantages of growing hollyhocks from seed is their natural ability to self-seed. After flowering, allow some seed pods to mature and dry on the plants. The seeds will fall to the ground and often germinate the following season, creating a low-maintenance, self-renewing garden display.
Collecting seeds manually and storing them properly allows you to control where and when you plant new hollyhocks, which is useful for garden design and seed sharing.
Preparing Hollyhocks for Winter
As the growing season ends, cut back flower stalks after the first frost to keep the garden tidy and reduce disease risks.
Apply a thick mulch layer around the plant bases in late fall to protect roots from freezing temperatures, especially in colder climates. Remove mulch gradually in spring to encourage new growth.
Proper winter care ensures your hollyhocks return healthy and ready to bloom again.
FAQ About How to Grow Hollyhocks from Seed for Beginners
How long does it take to grow hollyhocks from seed?
Hollyhocks generally take about 2 to 3 weeks to germinate from seed when conditions are ideal. After germination, seedlings require 6 to 8 weeks of indoor growth before being strong enough to transplant outdoors. Once planted outside, hollyhocks typically bloom in their second year as they are biennial, though some varieties can bloom the first year if started early.
What is the best time to plant hollyhock seeds?
The best time to plant hollyhock seeds indoors is late winter to early spring, around 6 to 8 weeks before the last expected frost date. This timing allows seedlings to grow sturdy before transplanting outside in spring. Direct sowing outdoors is possible in late spring after the soil has warmed, but indoor starting offers better control and a longer growing season.
How much sunlight do hollyhocks need?
Hollyhocks thrive in full sun, which means they need at least six hours of direct sunlight daily. Sufficient sunlight promotes strong stems and abundant flowering. Planting hollyhocks in shady spots can result in weak growth and fewer blooms.
Can hollyhocks grow in any type of soil?
While hollyhocks prefer rich, well-draining soil, they are adaptable to a variety of garden soils. The key is to avoid heavy, waterlogged soil, which can cause root rot and other problems. Adding organic matter like compost improves soil fertility and drainage, creating an ideal environment for hollyhocks.
How do I prevent rust on hollyhocks?
Rust is a common fungal disease affecting hollyhocks, appearing as orange or brown spots on leaves. To prevent rust, ensure good air circulation by spacing plants properly and avoid overhead watering. Removing infected leaves promptly and applying organic fungicides can help control outbreaks. Growing rust-resistant hollyhock varieties also reduces the risk.
Should I fertilize hollyhocks?
Fertilizing hollyhocks helps promote healthy growth and vibrant flowers. Applying a balanced, slow-release fertilizer in early spring supports the plant’s nutrient needs. Avoid excessive nitrogen fertilization, which encourages leafy growth at the expense of blooms.
How tall do hollyhocks grow from seed?
Hollyhocks can reach heights between 6 to 8 feet when grown from seed under optimal conditions. Their towering flower spikes make them stand out in any garden. Providing staking or support is recommended to prevent tall plants from bending or breaking.
Is it necessary to start hollyhocks indoors?
Starting hollyhocks indoors is not absolutely necessary, but it offers advantages such as better germination control and earlier blooms. In regions with short growing seasons, indoor starting ensures seedlings are strong enough before outdoor planting. Direct sowing outdoors works well in warmer climates with longer summers.
Conclusion
Growing hollyhocks from seed for beginners is a fulfilling gardening adventure that combines patience, care, and observation. By understanding their growth needs, preparing seeds correctly, nurturing seedlings indoors, and caring for plants through every season, you can enjoy beautiful, towering hollyhocks that enhance your garden year after year.
With this detailed guide, you have all the essential knowledge to embark on your hollyhock-growing journey and create a stunning floral display that reflects your effort and love for gardening.