Introduction
Marigolds are among the most beloved flowers in the gardening world, known for their vibrant colors, ease of care, and natural ability to repel pests. Growing marigolds from seeds is a rewarding and budget-friendly way to add beauty to your garden, whether you’re a beginner or a seasoned green thumb. In this guide, you’ll discover everything you need to know about planting, germinating, and nurturing marigolds from seed to full bloom.
Why Grow Marigolds from Seeds?

Growing marigolds from seeds offers several advantages. First, it allows you to choose from a wide variety of cultivars not always available as seedlings at garden centers. Second, it’s more economical, especially if you plan to grow a large number of plants. Lastly, starting from seed allows you to control every stage of the growth process, from soil selection to plant health.
Understanding Marigold Varieties
There are three primary types of marigolds commonly grown from seeds:
African Marigolds (Tagetes erecta)
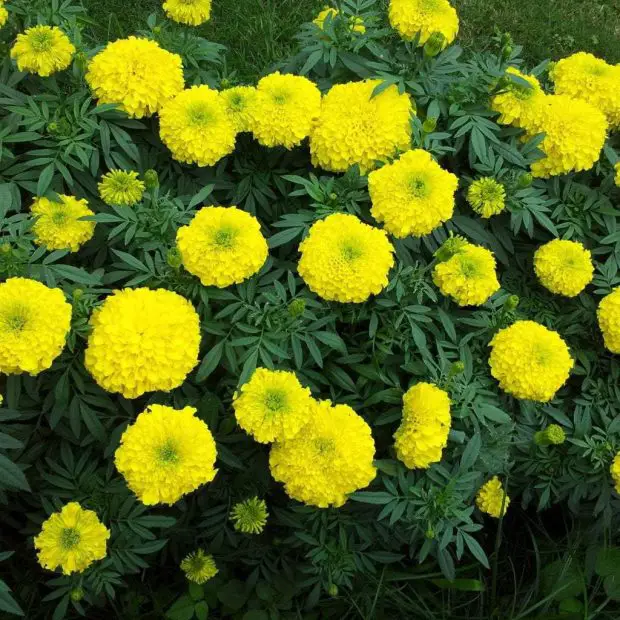
These are the tallest marigold variety, producing large, pom-pom-like flowers in shades of yellow and orange. They are ideal for flower beds and make striking border plants.
French Marigolds (Tagetes patula)
More compact than African types, French marigolds produce smaller flowers with a wider range of colors, including bi-color varieties. They are perfect for containers and edging.
Signet Marigolds (Tagetes tenuifolia)
These marigolds have lacy foliage and smaller, edible blooms. They are especially good for herb gardens and companion planting.
When to Start Marigold Seeds
Timing is essential when growing marigolds from seeds. The seeds should be started indoors about six to eight weeks before the last expected frost date in your area. This gives the seedlings enough time to grow strong before transplanting them outside.
In warmer climates, marigold seeds can also be sown directly into the ground once the danger of frost has passed and the soil has warmed.
Preparing for Planting
Selecting Quality Seeds
Purchase seeds from a reputable supplier or collect them from mature marigold plants at the end of the growing season. Ensure seeds are dry and stored in a cool, dark place if not planting immediately.
Choosing the Right Soil
Marigolds thrive in well-drained, moderately fertile soil. A mix of potting soil and compost works well for seed starting. Avoid heavy, clay-rich soils that retain water and can cause root rot.
Setting Up Containers or Seed Trays
Use shallow containers or seed trays with good drainage. Fill them with your soil mix and moisten lightly before sowing the seeds. Press the seeds gently into the surface and cover with a thin layer of soil, no more than 1/4 inch deep.
Germinating Marigold Seeds
Place the trays in a warm location with temperatures around 70°F (21°C). Marigold seeds typically germinate within 5 to 7 days. During this period, keep the soil consistently moist but not soggy.
Once the seedlings emerge, move them to a bright location or under grow lights for at least 14-16 hours a day to prevent them from becoming leggy.
Transplanting Seedlings
Hardening Off
Before moving marigold seedlings outdoors, they need to be hardened off. This process involves gradually exposing them to outdoor conditions to avoid transplant shock. Begin by placing them outside for a few hours a day, gradually increasing exposure over a week.
Choosing the Planting Site
Marigolds require full sun to thrive, ideally six or more hours of direct sunlight daily. Select a location that receives plenty of light and has well-draining soil.
Spacing
When transplanting, space African marigolds 12 to 18 inches apart, French marigolds 6 to 12 inches apart, and Signet marigolds about 6 inches apart. Proper spacing ensures good air circulation, reducing the risk of fungal diseases.
Caring for Marigold Plants
Watering Needs
Marigolds prefer consistent watering but are relatively drought-tolerant once established. Water the base of the plants when the top inch of soil feels dry. Avoid overhead watering, which can promote mildew.
Fertilizing Marigolds
Over-fertilizing can result in lush foliage with fewer blooms. Use a balanced, slow-release fertilizer at the time of planting and supplement with a diluted liquid feed once a month during the growing season.
Deadheading for Continued Bloom
To encourage continuous blooming, regularly remove spent flowers. This process, called deadheading, helps redirect energy into producing new blooms rather than seed production.
Dealing with Common Issues
Pests
While marigolds are known to repel many pests, they can still fall prey to aphids, spider mites, and slugs. Inspect plants regularly and use organic pest control methods like neem oil or insecticidal soap if needed.
Diseases
Marigolds can occasionally suffer from fungal infections like powdery mildew or damping-off during germination. Ensure proper spacing, avoid overwatering, and maintain good air circulation to prevent these issues.
Saving Seeds for Next Season
At the end of the growing season, allow some flowers to go to seed. Once the flower heads dry and turn brown, remove them and extract the seeds. Let the seeds dry completely before storing them in labeled envelopes in a cool, dry location.
Growing marigolds from seeds is not only cost-effective but also immensely satisfying. From brightening up a garden bed to repelling unwanted insects, marigolds are a valuable addition to any garden.
Starting marigolds from seeds is a straightforward process that offers gardeners control, flexibility, and a wide variety of blooms to enjoy throughout the season. With the right soil, sunlight, and care, your marigold plants will flourish from the moment the first sprout appears to the last burst of golden color in the fall. Whether you’re creating a pollinator-friendly garden or simply want cheerful color in your flower beds, marigolds grown from seed are an excellent choice for gardeners of all levels.


