If you’re dreaming of a garden that bursts with color from spring through fall, salvias are your secret weapon. These bold, low-maintenance plants dazzle with long spikes of blooms in every hue imaginable—and they’re beloved by pollinators too. Whether you’re planting in containers, borders, or large beds, salvias can turn any space into a vibrant, flower-filled haven.
In this expert guide on how to grow salvias for endless blooms, you’ll discover practical tips that truly work. From choosing the best varieties for your climate to mastering watering, pruning, and propagation techniques, this article walks you through everything you need to keep your salvias thriving and blooming non-stop.
Understanding Salvias and Their Growth Habits
What Are Salvias?
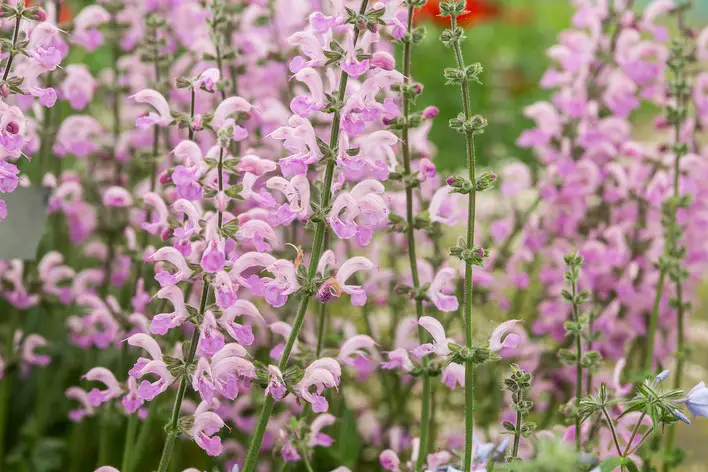
Salvias are a diverse group of flowering plants in the mint family, known for their aromatic leaves and long-lasting, tubular blooms. With over 900 species ranging from annuals to hardy perennials, salvias offer an incredible variety of color, form, and size. Their blooms attract bees, butterflies, and hummingbirds, making them perfect for pollinator-friendly gardens.
Some types, like Salvia splendens, are grown as annuals for their intense summer color, while others, such as Salvia nemorosa and Salvia guaranitica, are perennials that return each year in the right climates. Their foliage often has a pleasant scent, and their flowers can bloom repeatedly throughout the growing season.
Common Growth Habits and Blooming Patterns
Salvias typically grow upright or in mounding forms, with heights ranging from one to four feet depending on the variety. Most thrive in full sun and well-drained soil, and many can tolerate drought once established. With proper care, many salvias bloom from late spring to fall, especially when regularly deadheaded or lightly pruned after the first flush.
Knowing how different salvias grow and flower helps you choose the right types for your space and ensures long-lasting beauty. This understanding is key to learning how to grow salvias for endless blooms.
Choosing the Right Location for Maximum Blooms
Full Sun is Essential
To achieve the most vibrant and continuous blooms, salvias need to be planted in a spot that receives full sun. At least six hours of direct sunlight each day is ideal, though many varieties thrive with even more. Sunlight encourages compact, bushy growth and maximizes flower production. Without enough light, salvias may become leggy, with fewer blooms and weakened stems.
In hot southern climates, some afternoon shade may be tolerated—especially by more tender varieties—but full morning sun is still crucial. If you notice your salvias stretching toward the light or failing to flower profusely, consider relocating them to a brighter position in your garden.
Soil Conditions That Support Healthy Growth
Along with sunlight, soil quality plays a vital role in salvia performance. Salvias do best in well-draining soil with a light to medium texture—sandy loam or loamy soil works particularly well. Poor drainage can quickly lead to root rot, especially in climates with frequent rainfall or heavy clay soils.
Before planting, observe how water moves through the soil after a rain or watering. If puddles linger or the ground feels soggy for hours, consider improving drainage by amending the soil with compost or planting salvias in raised beds. Container planting is also a good option for areas with challenging soil.
Air Circulation and Spacing
Good airflow around your salvias helps prevent fungal diseases like powdery mildew and encourages stronger stems. Avoid crowding salvias too closely with other plants or structures. Allow enough space between plants—usually 12 to 24 inches depending on the variety—to let air move freely and sunlight reach all sides of the plant.
By carefully choosing a location with ample sun, proper drainage, and good airflow, you set the stage for vigorous, bloom-filled salvia plants. These foundational conditions are essential for anyone learning how to grow salvias for endless blooms.
Preparing the Soil for Strong Roots and Flowers
Testing and Amending Your Soil
Before planting salvias, it’s important to understand what kind of soil you’re working with. Healthy soil is the foundation for strong roots and abundant blooms. Salvias prefer a slightly acidic to neutral pH, ideally between 6.0 and 7.0. You can use a simple home soil test kit to check pH and nutrient levels.
If your soil is too acidic or alkaline, it can be corrected with soil amendments. Adding composted organic matter helps balance pH and improves nutrient content. In clay-heavy soils, incorporate sand or perlite to loosen the texture and enhance drainage. If the soil is sandy and lacks nutrients, enriching it with aged manure or worm castings will support healthier plant development.
Adding Compost and Organic Fertilizer
Mixing in generous amounts of compost before planting gives salvias a rich, well-draining base that supports root growth and flower production. Compost increases microbial activity in the soil, improves water retention in sandy soils, and boosts overall soil structure.
For an extra boost, apply an all-purpose organic fertilizer or a starter fertilizer when planting. Look for products that are balanced or slightly higher in phosphorus, which encourages strong root systems and promotes flowering. Avoid high-nitrogen fertilizers at this stage, as they can cause lush foliage at the expense of blooms.
By investing time in soil preparation, you’re laying the groundwork for a thriving salvia garden. Strong roots lead to strong plants—and strong plants lead to endless, vibrant blooms throughout the growing season. This is a critical step in mastering how to grow salvias for endless blooms.
When and How to Plant Salvias for the Best Results
Timing Your Planting by Climate
The best time to plant salvias depends on your local climate and whether you’re growing annual or perennial varieties. In most regions, spring—after the last threat of frost—is the ideal planting time. This gives salvias a full growing season to establish strong roots and start blooming.
In warm climates where winters are mild, salvias can also be planted in the fall. Fall planting allows perennials to settle in before the next bloom cycle begins in spring. Avoid planting in extreme heat or just before cold snaps, as newly transplanted salvias are sensitive to stress from temperature fluctuations.
Knowing your USDA hardiness zone will help determine the most suitable planting window and which salvia species will thrive as annuals or perennials in your area.
Planting Salvias from Nursery Pots
If you’re planting salvias from containers or nursery-grown starts, begin by selecting healthy plants with vibrant foliage and no signs of disease or wilting. Prepare the planting hole to be about twice as wide as the root ball and just as deep. This extra space encourages outward root growth and better stability.
Carefully remove the salvia from its pot, loosen the roots gently if they’re tightly bound, and position it so the base of the stem is level with the surrounding soil. Fill in with amended soil, press down lightly, and water thoroughly to eliminate air pockets and help the soil settle around the roots.
Mulch around the base with compost or shredded bark to retain moisture and suppress weeds, but keep mulch a few inches away from the stem to prevent rot.
By planting salvias at the right time and using proper technique, you give your plants the best possible start—one that leads to stronger growth, better flowering, and the long-lasting garden beauty you expect when learning how to grow salvias for endless blooms.
Growing Salvias from Seeds or Cuttings
Starting Salvias from Seeds Indoors
Growing salvias from seeds is a cost-effective way to fill your garden with vibrant color. Start the seeds indoors 6 to 8 weeks before your region’s last expected frost. Use clean seed trays filled with a light, well-draining seed-starting mix, and sow the seeds on the surface or just barely cover them with a fine layer of soil.
Salvia seeds need warmth and light to germinate. Maintain a temperature around 70–75°F (21–24°C), and place trays near a sunny window or under grow lights for 12 to 14 hours per day. Mist the soil regularly to keep it moist but not soggy. Germination can take anywhere from 10 to 21 days, depending on the species.
Once seedlings develop two sets of true leaves, they can be transplanted into individual pots to grow stronger before moving outdoors. Harden them off gradually by exposing them to outdoor conditions for a few hours each day over a week before transplanting.
Propagating Salvias from Stem Cuttings
Taking cuttings is a quick, effective way to grow more salvias identical to the parent plant. The best time is late spring or early summer, when stems are vigorous but not flowering.
Choose a healthy, non-flowering stem and cut just below a node, about 4 to 6 inches long. Remove lower leaves and dip the base in rooting hormone. Insert the cutting into moist potting mix or perlite.
Cover with a plastic dome or bag to retain humidity and place in bright, indirect light. Keep the soil slightly moist. Roots usually form within two to four weeks. Once rooted, gradually acclimate the plant to outdoor conditions before transplanting.
Watering Salvias for Continuous Flowering
To keep salvias blooming, consistent and deep watering is essential. While mature plants tolerate some drought, they flower more abundantly with regular moisture—especially during hot or dry weather. Newly planted salvias need watering two to three times a week until roots establish.
Afterward, water deeply once or twice a week, allowing the top few inches of soil to dry out between sessions. This encourages deeper root growth and healthier plants. Morning is the best time to water, as it reduces the risk of fungal issues by allowing foliage to dry quickly.
Salvias in containers dry out faster and may need more frequent watering. Ensure pots drain well and avoid letting them sit in excess water. Applying mulch around in-ground plants helps conserve moisture and maintain steady soil conditions.
With the right watering routine, salvias will reward you with continuous, vivid blooms throughout the growing season.
Fertilizing Salvias for Healthier Plants and More Blooms
Salvias are not heavy feeders, but the right fertilizer can significantly enhance their vigor and flower production. For most varieties, a balanced, slow-release fertilizer applied in early spring supports steady growth through the season. Look for a product with equal parts nitrogen, phosphorus, and potassium (such as 10-10-10 or 14-14-14).
Once plants are established and actively growing, you can supplement with a diluted liquid fertilizer every four to six weeks during the blooming period. Phosphorus-rich blends are particularly effective in boosting flower output. However, avoid high-nitrogen fertilizers, as these may lead to excessive leafy growth at the expense of blooms.
For organic gardeners, compost, worm castings, or fish emulsion offer excellent alternatives. These improve soil health while gently feeding the plant. Regardless of the method, always water after fertilizing to help nutrients reach the roots and prevent fertilizer burn.
Healthy, well-fed salvias are far more likely to produce vibrant, long-lasting blooms—making this step essential for any gardener aiming for a showy, thriving salvia display.
Pruning Techniques to Extend Bloom Time
Deadheading for Repeat Flowering
Consistently deadheading salvias keeps the plant’s energy focused on producing new blooms rather than setting seed. When removing spent flowers, cut just above a set of healthy leaves or a side bud—this helps direct growth to areas that can quickly rebound with more flowers. For compact or bushy salvias, deadheading also helps maintain a tidy shape. Make it a weekly habit during peak bloom periods to maximize flower output throughout the season.
Cutting Back After First Flush
Once the first bloom flush fades, especially in mid to late summer, pruning the plant back by about one-third rejuvenates it. Use clean pruners to cut above a leaf node to promote branching and encourage bushier, flower-filled regrowth. This technique is particularly effective for long-blooming perennial salvias like Salvia nemorosa or Salvia guaranitica. Water and lightly fertilize after pruning to help the plant recover quickly and deliver an impressive second display.
Supporting Salvias Through the Seasons
Spring Care for a Strong Start
As winter fades, salvias need a fresh start to grow vigorously. Begin by clearing away any dead leaves, stems, or mulch leftover from the cold months. Apply a layer of compost or aged organic matter around the base of each plant to enrich the soil and encourage root development. A balanced, slow-release fertilizer can also help kickstart healthy growth. Early spring is the best time to prune back woody or leggy growth, especially on perennial varieties. Trim stems to just above a healthy pair of leaves to stimulate bushier new shoots. If clumps have become crowded, divide the plants carefully and replant them in fresh soil to revitalize their growth and prevent competition.
Summer Maintenance for Maximum Blooms
Salvias thrive in summer but may need extra care during heatwaves or dry spells. Water deeply once or twice a week, depending on weather and soil conditions, to keep roots consistently moist without waterlogging. Continue to deadhead spent blooms regularly to encourage fresh flower spikes. Inspect the plants for signs of common pests like aphids, spider mites, or whiteflies, and treat with neem oil or insecticidal soap if needed. Cut back any leggy or floppy stems to maintain a compact shape and improve airflow, which helps reduce fungal issues. If plants appear tired mid-season, a light application of liquid fertilizer can revive blooming.
Fall Care to Prepare for Dormancy
As temperatures cool and flowering slows, it’s time to transition salvias toward dormancy. Stop fertilizing by early fall to allow plants to harden off before winter. Begin reducing watering, especially if autumn rains are consistent. For annual salvias, remove them completely once they’ve been killed by frost. For perennial types, wait until the foliage has naturally died back, then prune the stems to 2–4 inches above the ground. Clearing away dead material at this stage helps prevent overwintering pests and diseases while keeping the garden tidy.
Winter Protection in Colder Zones
In USDA zones 6 and below, salvias benefit from extra winter insulation. Once the ground has frozen lightly, apply a thick 3–4 inch mulch layer of straw, shredded leaves, or bark around the base of each plant to protect the roots from temperature fluctuations. Avoid piling mulch directly against the stems to prevent rot. In areas with harsh winters, use burlap covers or frost blankets over in-ground salvias to shield them from wind and snow. Salvias grown in pots should be brought indoors or moved to a sheltered location like a garage or cold frame to prevent root freeze. Keep them only slightly moist until spring returns.
Companion Planting with Salvias for a Healthier Garden
Choosing the Right Companions
Select plants that thrive in similar conditions—full sun and well-drained soil. Lavender pairs well with salvias, offering complementary color and fragrance. Yarrow and coreopsis add texture and long-lasting blooms. Echinacea not only blends beautifully but also supports pollinators like bees and butterflies. Together, these plants create a vibrant, low-maintenance garden that thrives even in dry periods.
Pest and Disease Control Benefits
Salvias produce aromatic oils that naturally repel pests such as aphids, whiteflies, and spider mites. When planted near vegetables like tomatoes, peppers, or lettuce, they help protect more vulnerable crops. Their strong scent also confuses insects searching for host plants. Companion planting with salvias boosts overall garden diversity, which leads to better pest control and fewer disease outbreaks.
Common Salvias Growing Mistakes to Avoid
Overwatering and Poor Drainage
One of the most common mistakes with salvias is overwatering, especially when they’re planted in heavy clay soil or containers without proper drainage. Salvias are drought-tolerant once established and thrive in well-draining soil. When their roots sit in waterlogged conditions, it creates an ideal environment for fungal infections and root rot, which can cause sudden wilting and death. To avoid this, amend garden beds with compost or sand to improve drainage, and choose pots with multiple drainage holes. Water only when the top 2 to 3 inches of soil are dry to the touch, and avoid overhead watering to reduce humidity around the foliage.
Ignoring the Need for Pruning
Pruning is not just for shaping—it’s essential for keeping salvias productive and healthy. Without regular deadheading, the plant’s energy shifts toward seed production rather than new flower development. Over time, unpruned salvias can become leggy, woody at the base, and produce fewer blooms. Lightly prune in spring to remove winter-damaged stems, and after each major flush of flowers, cut back the plant by about one-third to stimulate fresh growth. End-of-season pruning in fall also helps prevent disease and maintains a tidy structure through winter.
Planting in Too Much Shade
Sunlight is a key factor in salvia blooming. When grown in partial to full shade, especially in northern-facing gardens or under trees, salvias may stretch for light, become spindly, and produce few flowers. They need a minimum of 6 hours of direct sunlight per day, and ideally more in cooler climates. If you’re noticing poor blooming or pale, floppy stems, it’s likely a sign your salvia isn’t getting enough sun. In that case, consider transplanting to a sunnier, south-facing area or thinning surrounding plants that block light. Full sun not only boosts blooming but also helps keep the foliage dry and disease-free.
Harvesting and Using Salvias Beyond the Garden
Harvesting and using salvias beyond the garden opens up a world of practical and decorative possibilities. Many salvia varieties, especially Salvia officinalis (common sage), are valued for their culinary, medicinal, and aromatic properties. Harvesting is best done in the morning after the dew has dried but before the sun is too strong, which helps preserve the essential oils in the leaves and flowers. For culinary use, snip young, tender leaves regularly to encourage bushy growth and enhance flavor in dishes such as roasted vegetables, poultry, and herbal teas. When drying leaves or flowers for later use, hang small bundles upside down in a warm, dry, and dark place with good air circulation to preserve color and potency.
In addition to the kitchen, salvias can be used in homemade potpourri, smudge sticks, or herbal sachets, thanks to their strong fragrance and natural oils. Flowering salvias like Salvia elegans (pineapple sage) and Salvia guaranitica (anise-scented sage) add color and scent to floral arrangements, both fresh and dried. Some salvias, especially the ornamental types, are also ideal for cutting gardens. Regular harvesting not only provides material for home use but also stimulates continuous blooming throughout the season. Whether you’re drying stems for craft projects or using leaves for health and wellness remedies, salvias offer a rich array of uses that go far beyond their role as ornamental plants.
Encouraging Wildlife with Blooming Salvias
Encouraging wildlife with blooming salvias is one of the most rewarding aspects of growing these vibrant, nectar-rich plants. Salvias are known magnets for a variety of pollinators, including bees, butterflies, and hummingbirds. Their tubular flowers are particularly attractive to long-tongued pollinators like hummingbirds and certain bee species, which can easily access the nectar deep within the blooms. By planting salvias in clusters and allowing them to flower freely, you create a consistent food source that supports these beneficial visitors throughout the growing season.
Beyond pollinators, salvias can also attract predatory insects such as ladybugs and lacewings, which help naturally control aphids and other garden pests. This contributes to a healthier, more balanced ecosystem without the need for chemical interventions. Some salvias, especially native or perennial varieties, offer cover and shelter for small birds and beneficial ground-dwelling insects. Allowing spent flowers to go to seed can provide a natural food source for seed-eating birds in late summer and fall.
Planting salvias alongside other pollinator-friendly species enhances their impact, creating a thriving microhabitat that benefits both wildlife and your garden. Whether you live in a rural or urban setting, incorporating blooming salvias can transform your space into a haven for biodiversity and support declining pollinator populations year after year.
Long-Term Maintenance for Continuous Success
Dividing and Replanting Every Few Years
As perennial salvias mature, their centers can thin out or become woody, reducing their flowering potential. To maintain plant health and vigor, it’s important to divide established clumps every three to four years. The best time to do this is in early spring, just as new growth begins to emerge. Gently dig up the entire plant, separate the healthiest sections with roots and shoots, and replant them in fresh, well-draining soil. This process not only revitalizes older plants but also gives you new divisions to expand your garden or share with others. Replanting ensures that each clump has room to grow and encourages more vibrant and abundant blooming.
Monitoring for Pests and Diseases
Although salvias are generally hardy and resistant to most pests, it’s still wise to monitor your plants regularly. In humid conditions, powdery mildew may appear on the leaves, especially if there’s poor air circulation. Spider mites and aphids may also be attracted during dry spells or periods of stress. Early detection is key—look for signs like distorted leaves, webbing, or sticky residue. Treat minor infestations with a strong spray of water or apply organic solutions such as neem oil or insecticidal soap. Keeping the area around your salvias clean and removing dead or diseased foliage promptly can further reduce the risk of problems and support long-term plant health.
FAQ About Growing Salvias
How often should I water salvias during different seasons?
Salvias prefer consistent moisture but dislike soggy soil. During the growing season—spring through early fall—water them deeply once or twice a week, allowing the top inch of soil to dry out between waterings. In cooler months or during dormancy, reduce watering significantly, especially for perennial varieties. Overwatering in winter can lead to root rot, particularly in heavy soils.
Do salvias need to be fertilized regularly?
Salvias are not heavy feeders, but occasional fertilizing helps support continuous blooms. In spring, apply a balanced slow-release fertilizer or compost to encourage vigorous growth. For repeat bloomers, a midseason boost with a low-nitrogen, bloom-focused fertilizer (like 5-10-10) can help prolong flowering. Avoid excessive nitrogen, which encourages foliage at the expense of flowers.
What should I do if my salvias become too leggy?
Leggy growth usually results from too little sunlight or infrequent pruning. Make sure your salvias are planted in a location that receives at least six hours of direct sun per day. To correct legginess, prune the plant back by one-third in late spring or early summer, and deadhead spent blooms regularly. This encourages bushier growth and additional flowering cycles.
When is the best time to cut back salvias?
The timing depends on whether your salvia is annual, perennial, or woody-stemmed. For herbaceous perennials, cut back in late fall after the first frost or in early spring before new growth starts. Woody salvias benefit from a harder pruning in early spring when new buds are visible, and lighter shaping after each bloom cycle in summer to maintain form and encourage reblooming.
Can I grow salvias in containers successfully?
Yes, salvias adapt well to container gardening as long as the pot has excellent drainage and is large enough for root development. Use a high-quality potting mix and water when the top inch of soil feels dry. Container-grown salvias may dry out more quickly than those in the ground, so monitor moisture regularly, especially in hot weather. Fertilize monthly during the growing season to support healthy blooms.
Conclusion: Unlock Endless Blooms with These Proven Techniques
With their vibrant colors, resilience, and remarkable ability to attract pollinators, salvias are more than just a beautiful addition to your garden—they’re a long-term investment in biodiversity, beauty, and joy. By understanding their seasonal needs, maintaining proper pruning and care routines, and exploring ways to harvest or propagate them, you can enjoy their blooms year after year. Whether you’re growing salvias in flower beds, borders, or containers, a little attention goes a long way in ensuring their health and continuous performance. Let salvias bring structure, scent, and seasonal magic to your landscape, one bloom at a time.

