Coneflowers, with their vibrant daisy-like blooms and striking cone-shaped centers, are a staple in pollinator-friendly gardens. Known botanically as Echinacea, these hardy perennials not only add color and texture but also provide an excellent opportunity for seed saving. Harvesting coneflower seeds allows you to expand your garden for free, share with fellow gardeners, or ensure that your favorite varieties return year after year.
This guide will take you through every step of harvesting, cleaning, and storing coneflower seeds, while also offering expert tips for maximizing germination rates and ensuring healthy future blooms. Whether you are a seasoned gardener or just starting out, understanding the seed-harvesting process will give you greater control over your garden’s growth cycle.
Understanding Coneflower Seed Production
When to Harvest Coneflower Seeds
Timing is crucial when collecting coneflower seeds, as harvesting too early can result in immature seeds that will not germinate well, while waiting too long may lead to seed loss from wind or birds. Generally, the best time to harvest is in late summer to early fall, when the flowers have completed their bloom cycle and the seed heads have dried on the plant. You’ll notice the petals have completely fallen away, leaving behind a spiky, cone-shaped center that turns from green to dark brown. This color change signals that the seeds inside have fully matured.
To confirm readiness, gently rub the seed head with your fingers—if the seeds are firm, dark, and detach easily, they are ready for collection. Avoid harvesting immediately after rain, as damp seeds can encourage mold growth during storage. Instead, choose a dry, sunny day, which helps ensure seeds are free of excess moisture.
Another good indicator of maturity is the presence of birds, such as goldfinches, feeding on the seed heads. While this can mean some seeds are lost to wildlife, it also confirms the seeds have ripened enough to be viable. If you want to maximize your harvest, you can cover the seed heads with breathable mesh bags to keep birds away until you are ready to collect them.
Tools and Materials Needed for Harvesting
Harvesting coneflower seeds successfully requires the right tools and materials to ensure efficiency, protect the seeds’ quality, and keep the process clean. While the task is simple, using the proper equipment makes the job smoother and helps you avoid damaging the seeds or the plant.
A pair of sharp, clean pruning shears or garden scissors is essential for cutting the seed heads neatly without crushing them. Wearing lightweight gardening gloves will protect your hands from the plant’s stiff stems and any spiny seed head textures. A small bucket, basket, or cloth bag is ideal for collecting the harvested seed heads, keeping them organized and preventing seed loss during transport.
You will also need a clean, flat surface such as a tray, mesh screen, or piece of parchment paper for drying the seeds. This allows air to circulate and prevents mold or rot. If you plan to store the seeds for an extended period, have paper envelopes or resealable paper seed packets ready, along with a waterproof marker for labeling. Storing seeds in paper rather than plastic helps prevent trapped moisture, which can shorten seed viability.
For those who harvest large quantities, a fine mesh sieve or strainer can help separate seeds from chaff more quickly. Having these tools prepared ahead of time not only saves time but also ensures that your coneflower seeds remain in top condition for future planting.
Step-by-Step Guide to Harvesting Coneflower Seeds
Step 1: Select Mature Seed Heads
Start by identifying seed heads that have fully matured on the plant. Look for cones that are dark brown to almost black, with dry, stiff spikes. The petals will have completely fallen away, and the seeds inside will be firm rather than soft. Avoid collecting from seed heads that are still green, as these seeds are not yet viable and may fail to germinate. For the highest quality seeds, choose heads that have matured naturally on the plant rather than those cut prematurely. Observing the plant for a few days before harvest can help you pinpoint the perfect stage.
Step 2: Cut the Seed Heads
Use clean, sharp pruning shears or garden scissors to cut the stem about 6 inches below the cone. This length makes it easier to handle the seed heads without crushing the seeds or damaging the cone. Always disinfect your tools before use to prevent spreading any fungal spores or diseases between plants. As you cut, place each seed head gently into a paper bag, cloth sack, or bucket to prevent seeds from scattering in the wind. If you’re harvesting on a breezy day, keeping the container partially covered can help you avoid losing seeds.
Step 3: Dry the Seed Heads Further
Even if seed heads appear dry outdoors, there’s often residual moisture inside. To ensure long-term seed viability, place the harvested cones in a single layer on a tray, screen, or sheet of newspaper in a warm, well-ventilated indoor space. Avoid direct sunlight, as excessive heat can damage the delicate embryo inside the seed. Allow them to air-dry for 5–7 days, turning them occasionally to promote even drying. Proper drying is critical to prevent mold during storage and to ensure maximum germination rates later.
Step 4: Remove the Seeds
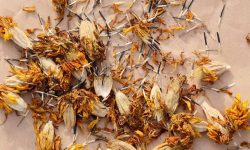
Once completely dry, it’s time to extract the seeds. Hold a cone over a clean, flat surface such as a shallow bowl or tray. Gently rub or roll the cone between your fingers, or use a twisting motion to loosen the seeds from their spiky bracts. You’ll notice both seeds and bits of dried plant material (chaff) falling away. Work slowly to avoid crushing the seeds, and if some are stubbornly lodged, a gentle tap on the side of the bowl can help dislodge them.
Step 5: Clean the Seeds
Separating seeds from chaff is important for both storage and sowing. One simple method is to blow gently across the seeds to carry away the lighter debris, or use a small handheld fan set on the lowest speed. For even finer cleaning, a mesh strainer can be used to shake out the chaff while retaining the seeds. Clean seeds are less prone to harboring pests or fungus, and they store much longer. Once cleaned, your seeds are ready for labeling and storage in airtight containers or envelopes.
Identifying Healthy and Viable Seeds
Identifying healthy and viable coneflower seeds is a crucial step to ensure successful germination and strong plant growth in the following season. Healthy seeds typically come from fully mature flower heads that have dried naturally on the plant. The best time to check is when the petals have fallen off, and the central cone turns a dark brown or almost black color, signaling seed readiness. Gently rubbing the cone should release seeds easily, indicating they have fully separated from the seed head.
A viable coneflower seed is usually firm to the touch, elongated in shape, and dark brown to black in color. Avoid seeds that are soft, pale, moldy, or show signs of damage, as they are unlikely to germinate well. Another tip is to perform a simple “float test” — place the seeds in a small container of water. Seeds that sink are generally viable, while those that float are often empty or underdeveloped.
It is also helpful to select seeds from the healthiest and most vigorous plants in your garden. This practice ensures that future blooms inherit desirable traits such as strong stems, vibrant color, and longer flowering periods. By taking the time to identify and select only healthy seeds, you increase your chances of producing a lush, colorful coneflower display year after year.
How to Store Coneflower Seeds Properly
Proper seed storage is essential if you want your coneflower seeds to stay viable for future planting. Once harvested, ensure that the seeds are completely dry before putting them into storage. Any remaining moisture can lead to mold growth or premature germination, so allow them to air-dry for several days in a well-ventilated, shaded spot. Avoid placing them in direct sunlight, as this can damage the seed’s natural oils and reduce its germination rate.
For storage containers, choose airtight options such as glass jars, metal tins, or high-quality zip-lock bags to protect the seeds from moisture and pests. Adding a small packet of silica gel or a bit of powdered milk wrapped in tissue can help absorb any residual humidity. If using paper envelopes, store them in a sealed container to provide an extra layer of protection. Always label each container with the seed variety and harvest date to track their freshness.
Keep your seeds in a cool, dark, and dry location—ideally between 35°F and 50°F (1.5°C to 10°C). A refrigerator works well for long-term storage, as it maintains a consistent temperature and low humidity. Avoid frequent temperature fluctuations, as they can trigger dormancy loss and reduce viability. When handled and stored properly, coneflower seeds can remain viable for three to five years, ensuring a reliable supply for future gardens.
Preventing Mold and Pest Damage During Storage
Preventing mold and pest damage during storage is essential to maintain the quality and germination rate of coneflower seeds. Before placing seeds into storage, make sure they are completely dry. Even slight moisture trapped inside can lead to mold growth, which can quickly ruin the entire batch. To ensure dryness, spread the seeds out on a paper towel or mesh screen in a well-ventilated, shaded area for at least a week. Avoid direct sunlight during this process, as it can damage the seed embryo.
Choosing the right storage container is equally important. Airtight glass jars, metal tins, or high-quality plastic containers can help keep pests such as weevils, moths, or ants away from the seeds. Adding a small packet of silica gel or a tablespoon of dry rice wrapped in tissue inside the container can help absorb any residual moisture, providing extra protection against mold.
The storage location also plays a crucial role. Keep seeds in a cool, dark, and dry environment where temperature and humidity remain stable, such as a pantry or a climate-controlled cabinet. Avoid storing seeds in areas with fluctuating conditions, like garages or sheds, which can encourage condensation and create a favorable environment for mold or pests. Periodically check the seeds during storage, especially in the first few months, to detect any signs of mold spots, musty odor, or insect activity early. Prompt intervention—such as drying the seeds again or replacing the container—can prevent the problem from spreading.
Using Harvested Seeds for Next Season’s Blooms
Once you have successfully harvested and stored your coneflower seeds, the next step is to prepare them for planting to ensure vibrant blooms in the following season. Coneflower seeds benefit greatly from a process called cold stratification, which mimics the natural winter conditions seeds experience outdoors. This helps break seed dormancy and improves germination rates. To cold stratify, place the seeds in a moist paper towel inside a sealed plastic bag and store them in the refrigerator for 30 to 60 days before planting.
When you’re ready to sow, choose a well-draining soil mix rich in organic matter, as coneflowers prefer moderately fertile soil with good aeration. You can start seeds indoors 6 to 8 weeks before the last expected frost date, or sow them directly outdoors after the danger of frost has passed. Plant seeds about ¼ inch deep and keep the soil consistently moist but not soggy until seedlings emerge, usually within two to three weeks.
If planting outdoors directly, scattering seeds in prepared garden beds in late fall allows natural stratification over winter, leading to early spring germination. Be mindful that seedlings started from seeds often take a full growing season before producing flowers, so patience is key.
By using your own harvested seeds, you not only save money but also nurture plants adapted to your local environment, which often results in stronger growth and more abundant blooms. Regularly saving and planting your own coneflower seeds helps sustain a thriving, colorful garden year after year.
Encouraging Self-Seeding in the Garden
Allowing coneflowers to self-seed is a natural and effortless way to expand your garden and enjoy vibrant blooms year after year without extra work. To encourage self-seeding, simply leave some flower heads on the plants after the blooming season ends, allowing the seeds to mature and fall naturally onto the soil below. This not only supports local wildlife, such as goldfinches and other seed-eating birds that feed on the cones during winter, but also helps disperse seeds across your garden, creating new growth in unexpected places.
To optimize self-seeding, avoid cutting back the plants too early in the fall. Leaving the dried seed heads intact through winter protects the seeds and gives them time to naturally stratify, improving germination chances in spring. You can gently shake or tap the seed heads over bare soil to encourage seed drop in specific areas or simply let nature take its course. If you want to control where new plants grow, lightly rake the soil to expose it, creating ideal conditions for seed-to-soil contact.
While self-seeding is convenient, it can sometimes lead to seedlings with varied flower colors or traits due to cross-pollination. For gardeners seeking uniformity or specific cultivars, manual seed collection and controlled sowing remain the best options. Nonetheless, encouraging self-seeding adds a wild, natural charm to your garden and helps sustain pollinators and wildlife throughout the year.
Common Mistakes When Harvesting Coneflower Seeds
Harvesting Seeds Too Early
Harvesting coneflower seeds before they are fully mature is a common error that can undermine your entire seed-saving effort. Immature seeds tend to be lighter in color, often pale tan or greenish, and feel soft or even slightly squishy to the touch. Such seeds have not yet completed their development and lack the necessary nutrients and energy to germinate properly. By picking seeds too soon, you reduce your chances of successful propagation, resulting in wasted time and resources. The best practice is to wait until the seed heads are completely dry, dark brown or black, and the seeds easily fall away when rubbed between your fingers. Patience in this stage pays off with higher germination rates and healthier seedlings.
Failing to Dry Seeds Properly
After cutting seed heads from the plant, many gardeners overlook the importance of thoroughly drying the seeds before storage. Even if the seed heads look dry on the outside, moisture can remain trapped inside the cones or seeds, creating a breeding ground for mold and fungal infections once stored. Seeds stored with excess moisture may develop a musty odor, discoloration, or visible mold patches, rendering them unusable. To prevent this, spread seed heads or extracted seeds in a single layer on a clean, breathable surface such as paper towels, mesh screens, or cardboard in a cool, well-ventilated area away from direct sunlight. Allow them to dry completely for 5 to 10 days, turning occasionally to promote even airflow. This drying step ensures your seeds remain viable and healthy during storage.
Using Inappropriate Storage Containers
The choice of storage container significantly impacts seed longevity. Storing seeds in sealed plastic bags or containers without confirming that they are fully dry can trap humidity, which encourages mold growth and seed rot. Plastic containers are airtight, but they can create a moist environment if any residual moisture is present. Instead, the ideal approach is to store dry seeds in breathable containers like paper envelopes, muslin bags, or cardboard seed packets. Once the seeds are safely inside these breathable containers, place them in an airtight glass jar or metal tin with a desiccant pack (such as silica gel) to absorb any remaining moisture. This combination balances airflow and moisture control, maintaining seed health for longer periods. Proper labeling with the seed variety and harvest date also helps you track seed viability over time.
Ignoring Pest Prevention
Pests such as seed weevils, moth larvae, ants, and other insects are attracted to stored seeds as a food source and can quickly destroy an entire batch if not managed. Many gardeners neglect this threat, leading to frustrating losses. To prevent infestations, it’s important to freeze freshly harvested seeds for 3 to 5 days before storing. Freezing kills any insect eggs or larvae that may be hiding within the seed heads. Additionally, store seeds in cool, dry locations away from areas prone to pests, such as garages or basements without pest control. Regularly inspect stored seeds for signs of insect activity like tiny holes, frass (insect droppings), or webbing. If infestation occurs, discard affected seeds immediately to prevent spread. Using airtight containers and desiccants further deters pests by creating inhospitable conditions.
Collecting Seeds from Weak or Diseased Plants
Saving seeds from unhealthy or diseased coneflowers can unknowingly pass on genetic weaknesses, reducing the vigor and resilience of future plants. Plants suffering from fungal infections, pests, or poor growth often produce seeds that are less viable or that carry susceptibility to the same issues. To maintain a healthy garden population, select seeds only from strong, vigorous plants that exhibit desired traits such as abundant flowering, robust stems, and good disease resistance. Visually inspect parent plants during seed collection, avoiding those with discoloration, wilting, or insect damage. Over time, this selective seed saving improves your garden’s overall health and ensures more consistent, beautiful blooms year after year.
Benefits of Harvesting Your Own Coneflower Seeds
Harvesting your own coneflower seeds offers numerous advantages that go beyond simply saving money. One of the key benefits is the ability to cultivate plants that are well-adapted to your local environment. When you collect seeds from coneflowers grown in your garden, those plants have already proven their resilience to the specific climate, soil conditions, and pests in your area. This natural selection process often results in stronger, healthier plants with higher survival rates compared to those purchased from nurseries or mail-order suppliers.
Growing coneflowers from your own seeds also allows you to preserve and propagate your favorite cultivars, especially if you have varieties with unique colors, shapes, or growth habits. By saving seeds annually, you can maintain genetic diversity and even experiment with creating new hybrids over time. This hands-on approach enhances your gardening experience and deepens your connection with your plants.
Moreover, seed harvesting promotes sustainability by reducing reliance on commercial seed production, which often involves large-scale farming, packaging, and shipping that contribute to environmental impact. By recycling seeds within your own garden, you reduce waste and help foster biodiversity in your local ecosystem.
Finally, there is a rewarding sense of accomplishment and self-sufficiency that comes with successfully harvesting, storing, and growing plants from your own seeds. Watching coneflowers bloom year after year from seeds you collected yourself is deeply satisfying and encourages continued engagement with gardening as a hobby and lifestyle.
Frequently Asked Questions (FAQ) About Harvesting Coneflower Seeds
How do I know when coneflower seeds are ready to harvest?
Coneflower seeds are ready to harvest when the flower petals have completely fallen off and the central seed cone has turned dry and dark brown or black. The seeds inside should feel firm and easily detach when you rub the cone between your fingers. Avoid harvesting while the cones are still green or moist to ensure seed viability.
Can I harvest seeds from any coneflower variety?
Yes, most coneflower varieties produce viable seeds, but some hybrid cultivars may not come true from seed, meaning the seedlings might differ in flower color or form from the parent plant. If you want to maintain specific traits, it’s better to propagate those varieties by division or cuttings.
How should I store harvested coneflower seeds?
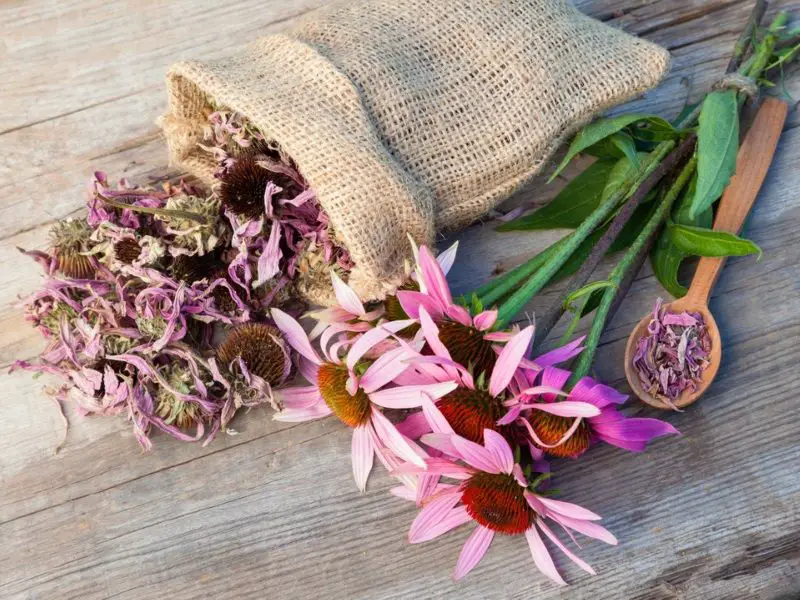
Store seeds in a cool, dry place inside breathable containers like paper envelopes or cloth bags. To further protect them, place these envelopes in airtight jars or tins with desiccant packets to keep moisture out. Label your containers with the seed variety and harvest date. Properly stored seeds can remain viable for up to five years.
Do coneflower seeds need special treatment before planting?
Yes, coneflower seeds benefit from cold stratification, which mimics winter conditions and helps break seed dormancy. You can stratify seeds by placing them in a moist paper towel inside a sealed plastic bag and refrigerating them for 30 to 60 days before sowing. This improves germination rates and leads to stronger seedlings.
What are common mistakes to avoid when harvesting coneflower seeds?
Common mistakes include harvesting seeds too early before they are fully mature, failing to dry seeds properly before storage, using inappropriate storage containers that trap moisture, ignoring pest prevention which can lead to seed infestation, and collecting seeds from weak or diseased plants which can pass on poor traits.
Final Thoughts
Learning how to harvest coneflower seeds is a valuable skill for any gardener who wants to extend the beauty of these resilient perennials year after year. By understanding the seed’s life cycle, choosing the right time to harvest, and storing them properly, you can enjoy healthy, colorful blooms while also building a more self-sustaining garden.
With a little patience and care, the seeds you gather this season will grow into the vibrant flowers of next year, creating a cycle of beauty that renews itself season after season.