Zinnias are among the easiest and most rewarding flowers to grow, filling gardens with vivid color and cheerful blooms all summer long. What makes them even more special is their ability to give back each season through their seeds. With just a little care, you can collect seeds from your favorite zinnia varieties and grow them again next year. This process saves money, preserves unique colors, and deepens your connection with the plants you nurture. Harvesting zinnia seeds is simple but requires patience and timing to ensure the seeds are fully mature and ready for long-term storage.
Understanding the right time and method to harvest is key to keeping your zinnias thriving year after year. By learning how to identify mature seeds, dry them properly, and store them in the right conditions, you can build a personal collection of strong, reliable seeds. This guide covers every step, from recognizing when blooms are ready for harvest to organizing and labeling your seeds for future planting. Once you master this process, your zinnia garden will become a lasting cycle of color, beauty, and renewal every season.
Understanding the Zinnia Life Cycle Before Harvesting Seeds
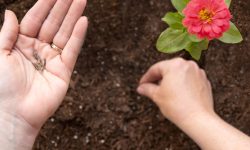
To harvest zinnia seeds successfully, it’s essential to understand how these flowers grow and mature. Zinnias begin their life from a single seed, sprouting into strong green stems that produce vibrant, multi-petaled blooms. Each flower head contains both ray florets and disc florets, which together form hundreds of tiny seeds as the plant matures. After the flower fades, the petals dry and fall off, leaving behind a seed head packed with potential. Knowing this process helps you recognize exactly when the seeds are ready to collect and ensures they reach full maturity before harvesting.
Zinnias typically take around 60 to 70 days from germination to full bloom. Once the blooms start to fade and turn brown, the plant begins channeling energy from the petals into developing seeds. During this stage, it’s important not to cut the flowers too early. Seeds that are harvested before they dry naturally may be immature and have low germination rates. Patience is key—allow the seed heads to dry completely on the plant before removing them. Mature seeds are darker, harder, and detach easily from the flower base.
Understanding the zinnia life cycle also helps you plan for seed saving in the future. By observing how long it takes your plants to flower and set seed, you can estimate the right timing for each variety. This knowledge allows you to collect the best-quality seeds year after year, ensuring healthy plants and consistent blooms. Each cycle builds stronger, more adapted seeds suited to your local climate. Knowing how zinnias grow from start to finish makes the harvesting process smoother, more efficient, and far more rewarding.
Identifying When Zinnia Seeds Are Ready to Harvest
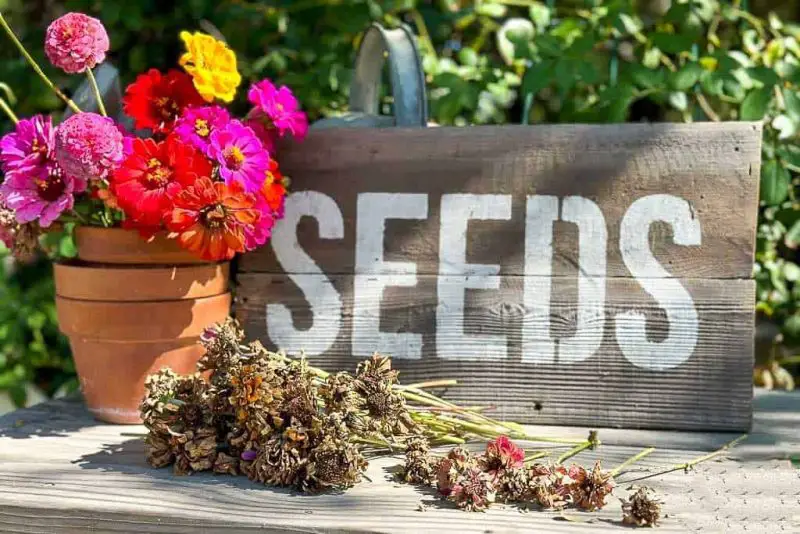
Knowing the exact moment to harvest zinnia seeds determines whether they will sprout successfully the following season. Seeds that are collected too early may still be soft and pale, lacking the nutrients needed for germination. Mature zinnia seeds, by contrast, are dark brown, firm, and dry. The best time to harvest is when the flower head has completely dried on the plant and the petals have turned crisp and faded in color. The seed head should feel papery to the touch and show signs of loosening seeds at the base. At this stage, the plant has completed its reproductive cycle, and the seeds are fully developed and ready for collection.
It’s important to let the seed heads dry naturally on the plant whenever possible. Zinnias that are left to mature under the sun produce stronger, more viable seeds. Resist the urge to cut flowers immediately after blooming; instead, select a few of your healthiest, most vibrant zinnias and allow them to dry fully. Watch for the central disc of the flower to darken and the outer petals to crumble away. When you gently tug on a seed and it releases easily, it’s ready to harvest. Seeds that resist or appear light in color still need more time to ripen.
Timing your harvest also depends on your local climate. In cooler regions, you may need to harvest slightly earlier if frost threatens, finishing the drying process indoors. In warm climates, seeds can remain on the plant longer without damage. Observing your plants closely during late summer and early fall ensures you gather seeds at peak maturity. By identifying this precise window, you preserve strong genetics and ensure a steady supply of healthy zinnias for next year’s garden.
How to Harvest Zinnia Seeds Step by Step
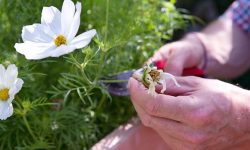
Harvesting zinnia seeds is a rewarding and simple process that requires only a few careful steps. Start by choosing a dry, sunny day when the seed heads are fully mature and crisp to the touch. Using clean scissors or garden shears, cut the dried flower heads from the plant, leaving about two inches of stem attached. This extra length makes handling easier and reduces the risk of seeds scattering. Place the harvested heads in a paper bag or shallow tray to prevent moisture buildup. Avoid using plastic bags, as trapped humidity can cause mold. Let the heads sit indoors in a warm, dry space for several days to finish drying completely.
Once the seed heads are fully dry, it’s time to extract the seeds. Hold a dried flower head over a clean surface, such as a tray or piece of paper, and gently pull apart the petals and center disc. The seeds are small, arrow-shaped structures found near the base of the petals. As you crumble the dried material, mature seeds will fall free, leaving behind the chaff and petals. If you’re harvesting multiple varieties, separate them carefully to prevent mixing. Sorting as you go makes storage and labeling easier later on.
After extracting the seeds, remove any remaining debris and inspect each seed for firmness and dark color. Discard soft, pale, or damaged ones, as they may not germinate well. To ensure complete dryness, spread the clean seeds on a paper towel or fine mesh screen for another few days. Once they’re crisp and dry to the touch, they’re ready for storage. This careful, step-by-step harvesting process guarantees that your saved zinnia seeds are mature, healthy, and ready to grow into vibrant new plants next season.
Cleaning and Drying Zinnia Seeds Properly
Cleaning Zinnia Seeds
Properly preparing zinnia seeds before storage is essential to keep them free from mold, pests, and leftover plant debris. After harvesting, separate the seeds from the dried petals and chaff using your hands or by gently blowing across them to remove lightweight materials. A fine mesh strainer or sieve can help sift out dust and smaller debris without losing seeds. Work slowly and carefully to avoid damaging the delicate outer layer of the seeds, as it protects the embryo inside. If you harvested multiple zinnia varieties, keep each type in a separate container to maintain purity and avoid cross-mixing of colors.
Once separated, inspect the seeds closely. Mature zinnia seeds should be firm, dry, and dark brown or gray. Discard any that appear soft, pale, or shriveled. Cleaning is not only about appearance—it helps improve air circulation during drying and prevents leftover plant material from harboring moisture or fungus. This careful step ensures your seeds stay viable for a long time. Clean, well-sorted zinnia seeds germinate more evenly and are far less likely to develop mold once stored. Proper cleaning sets the foundation for successful drying and long-term preservation.
Drying Zinnia Seeds
After cleaning, thorough drying is essential for keeping your zinnia seeds in top condition. Spread the seeds evenly on a paper towel, screen, or fine mesh tray in a single layer. Keep them in a warm, airy space out of direct sunlight, as harsh heat can damage their natural oils and reduce germination. Maintain good air circulation by stirring or gently shaking the seeds once a day to ensure all sides dry evenly. Depending on humidity levels, the drying process usually takes five to seven days.
You’ll know the seeds are ready when they feel completely hard and crisp to the touch. To test, press one between your fingers—it should not bend or feel flexible. Any remaining moisture can cause mold or rot during storage, so take your time to make sure they’re fully dry. Once drying is complete, store the seeds immediately in a labeled paper envelope or breathable bag until you’re ready to seal them for long-term storage. Proper drying preserves seed quality, ensuring strong germination and healthy growth when planted the following season.
How to Store Zinnia Seeds for Maximum Longevity
Proper storage is the final and most important step in preserving zinnia seeds for future planting. Even well-harvested and dried seeds can lose viability if kept in poor conditions. Begin by choosing the right container—paper envelopes, glass jars with tight lids, or small metal tins work best. Avoid plastic bags, as they trap humidity and encourage mold. Label each container clearly with the zinnia variety, harvest date, and color if known. This small detail helps you stay organized and ensures that your favorite varieties are easy to identify next season. Keeping everything labeled also prevents confusion between hybrids and open-pollinated types, which may produce different results when replanted.
The ideal storage location is cool, dark, and dry. Aim for temperatures between 50°F and 60°F, with minimal humidity. A basement, pantry, or even a refrigerator drawer can be a perfect spot as long as the container remains airtight. Avoid exposing the seeds to sunlight or fluctuating temperatures, as heat and moisture can quickly reduce their germination rate. If storing in a refrigerator, add a small packet of silica gel or uncooked rice inside the container to absorb excess moisture. These simple precautions can extend the life of your seeds for several years without any loss of quality.
Check your stored zinnia seeds every few months to ensure they remain dry and mold-free. If any condensation forms, open the container briefly to let moisture escape before resealing it. Properly stored zinnia seeds can stay viable for three to five years, though planting them within two years yields the best results. By mastering good storage habits, you preserve not only your seeds but also the colors and beauty of your favorite zinnias for seasons to come.
Testing and Preparing Zinnia Seeds for Planting
Testing Zinnia Seed Viability
Before planting your saved zinnia seeds, it’s wise to test their viability to ensure they will sprout successfully. Over time, even well-stored seeds can lose their ability to germinate. To test, place ten seeds on a damp paper towel, fold it gently, and seal it inside a clear plastic bag or container. Keep the setup in a warm area with indirect light, ideally around 70°F. Check the towel daily to ensure it stays moist but not soaked. Within five to seven days, viable seeds will begin to sprout tiny roots. Count the number of germinated seeds to estimate your germination rate—if at least seven out of ten sprout, your batch is in good condition.
This simple test helps you plan your planting accurately. If germination is low, sow more seeds than usual to compensate or replace the batch with fresher ones. Avoid reusing test seeds in the garden; they are fragile after sprouting and unlikely to survive transplanting. Testing before planting prevents wasted time and effort in the garden. It also allows you to track which stored varieties retain the best germination rates over the years. Reliable seeds ensure stronger plants and more uniform blooms across your zinnia beds.
Preparing Zinnia Seeds for Sowing
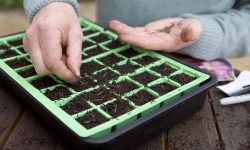
Once you’ve confirmed the seeds are viable, preparing them properly sets the stage for successful growth. Before sowing, let the seeds rest at room temperature for one or two days to adjust from storage. This prevents condensation when they meet warm, moist soil. If the seeds were refrigerated, allow them to reach room temperature gradually. Some gardeners lightly rub zinnia seeds between two pieces of paper to remove excess husks, improving contact with soil during germination. This optional step can slightly speed up sprouting.
You can sow zinnia seeds directly outdoors after the danger of frost has passed, or start them indoors four to six weeks early for a head start. Plant them about a quarter-inch deep in loose, well-draining soil. Keep the soil consistently moist until seedlings emerge, usually within a week. Healthy, mature seeds germinate quickly, producing strong seedlings with deep green leaves. Proper preparation ensures your saved zinnia seeds grow into vigorous plants, ready to fill your garden with color, beauty, and life once again.
Common Mistakes When Harvesting and Storing Zinnia Seeds
Harvesting Too Early
One of the most common mistakes gardeners make when collecting zinnia seeds is harvesting too early, before the seeds have fully ripened. Immature seeds are usually light tan, soft, and underdeveloped. They may look ready from the outside, but inside they lack the hardened embryo needed for germination. When these seeds are dried and stored, they often shrivel or mold quickly. To ensure maturity, allow flower heads to dry naturally on the plant until they turn completely brown and crisp. The petals should crumble easily, and the seeds should feel firm and dark brown to gray in color.
If you live in an area with early frost, you can still let the heads dry indoors. Cut them with a few inches of stem and hang them upside down in a warm, dry spot for about a week. This allows the seeds to finish ripening off the plant. Harvesting early is tempting, but patience always yields better results. Mature seeds not only germinate faster but also produce healthier, more vigorous plants. By observing your zinnias closely and giving them time to complete their life cycle, you’ll collect a batch of strong, viable seeds for years of colorful blooms.
Failing to Dry Seeds Properly
Improper drying is another major reason many gardeners lose their harvested seeds. Even when the surface appears dry, residual moisture can linger inside the seed, especially in humid climates. If stored too soon, this hidden moisture leads to mold, rot, or premature decay. To avoid this, spread your cleaned zinnia seeds in a single layer on a flat surface such as a paper towel, mesh screen, or uncoated cardboard. Keep them in a warm, well-ventilated place out of direct sunlight. Direct heat can damage the embryo and reduce germination rates.
Stir or gently shake the seeds once a day to ensure even drying. Depending on humidity, the process can take anywhere from five to ten days. Seeds are ready when they feel hard, crisp, and make a faint clicking sound when dropped on a surface. Testing one or two by bending them slightly can help—if they snap instead of flexing, they’re fully dry. Taking the time to dry seeds thoroughly ensures long-term preservation and minimizes the risk of storage problems. Proper drying protects your effort and guarantees successful growth when you replant next season.
Storing in Humid or Hot Conditions
Even perfectly harvested and dried seeds can fail if stored in poor conditions. Humidity and heat are the worst enemies of seed longevity. When kept in warm or damp spaces, seeds quickly absorb moisture from the air, which shortens their life span. Many gardeners make the mistake of storing seeds in plastic bags or unsealed containers that trap condensation. Over time, this moisture leads to fungus or seed rot. The ideal solution is to use paper envelopes, small glass jars, or metal tins that allow limited air exchange while staying moisture-free.
Temperature control is equally critical. Store zinnia seeds in a consistently cool place between 50°F and 60°F. Basements, cellars, or refrigerator drawers work best as long as humidity is low. You can include a silica gel packet or a tablespoon of uncooked rice in the container to absorb extra moisture. Always label each batch clearly with the harvest date and variety so you can track freshness over the years. Seeds kept cool and dry can last up to five years with excellent germination. Avoid windowsills, garages, or sheds where temperatures fluctuate. Good storage habits preserve your seeds’ vitality and ensure strong, colorful zinnias bloom year after year.
Reusing and Sharing Zinnia Seeds for Future Gardens
Reusing zinnia seeds is one of the most sustainable and rewarding gardening practices. Once you’ve harvested, cleaned, and stored your seeds correctly, you can use them to regrow vibrant flowers year after year. When spring arrives, simply bring the seeds to room temperature and sow them as you would store-bought ones. Over time, saved seeds often adapt to your local soil and climate, producing stronger, more resilient plants. This natural adaptation creates zinnias that thrive beautifully in your environment with minimal care. By saving and reusing seeds each season, you also preserve the exact colors and varieties that perform best in your garden, ensuring consistent and reliable blooms.
Sharing zinnia seeds with other gardeners is equally meaningful. Seeds are tiny gifts that carry color, life, and joy, making them perfect for community exchanges or as personal presents. You can create small seed packets labeled with the variety name, bloom color, and harvest year. Many gardening groups or local plant swaps welcome homegrown seeds, allowing you to share your garden’s beauty with others. Sharing also helps maintain genetic diversity among zinnias, as different regions introduce subtle variations in each generation. It’s a simple act that connects gardeners and preserves the species in its many stunning forms.
When reusing or sharing, always include a few planting tips on each packet. Mention the best sowing time, preferred soil type, and sunlight needs to help others succeed. Encourage recipients to save seeds from their own plants to continue the cycle. Through reusing and sharing, zinnias become more than just flowers—they become part of a living legacy passed from one garden to another. Each bloom that grows from a saved seed continues a story of beauty, sustainability, and generosity that lasts far beyond a single season.
FAQs About Harvesting and Storing Zinnia Seeds
When is the best time to harvest zinnia seeds?
The best time to harvest zinnia seeds is when the flower heads have completely dried on the plant and turned brown. The petals should crumble easily when touched, and the seeds inside should be dark, hard, and dry. Fully mature seeds ensure strong germination and healthy plants next season.
How do I know if my zinnia seeds are fully dry?
You can tell zinnia seeds are fully dry when they feel hard, crisp, and make a slight clicking sound when dropped. If they feel soft or bend easily, they still contain moisture. Continue drying them in a warm, well-ventilated area for several more days before storing.
Can I store zinnia seeds in plastic bags?
It’s best not to use plastic bags for storing zinnia seeds because they trap humidity, which can cause mold or spoilage. Instead, store them in labeled paper envelopes or airtight glass jars with silica gel packets. These materials keep the seeds dry and extend their storage life effectively.
How long do zinnia seeds stay viable?
Zinnia seeds remain viable for three to five years if stored properly in a cool, dry, and dark place. The ideal temperature range is between 50°F and 60°F. However, for the best germination results and strongest seedlings, use your seeds within two years of harvest.
Can I plant seeds collected from hybrid zinnias?
Yes, you can plant seeds from hybrid zinnias, but the resulting plants may not look exactly like the parent. Hybrid offspring often vary in color, shape, or size. For consistent results, collect seeds from open-pollinated or heirloom zinnias, which reproduce true to their original variety.