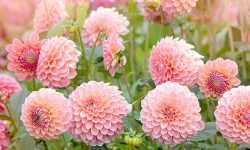
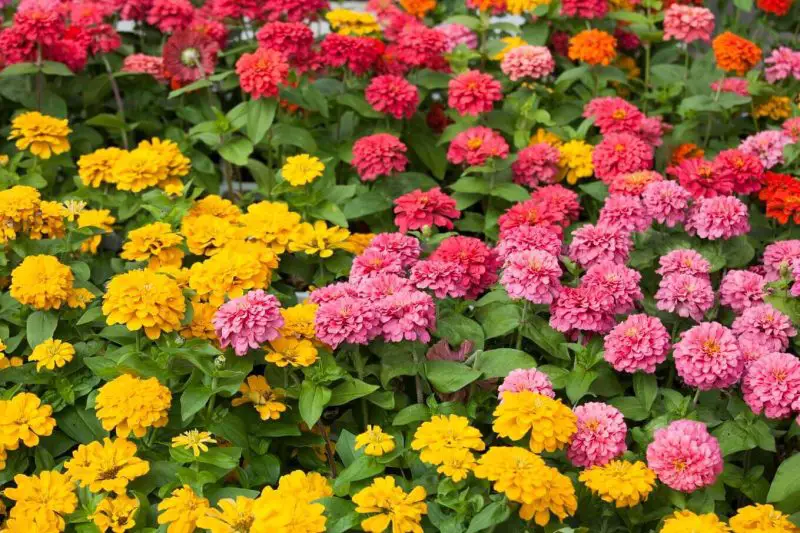
Zinnias are among the most cherished flowers in home gardens, loved for their vibrant colors, extended bloom time, and effortless cultivation. Beyond their visual appeal, they offer gardeners an added reward: the ability to easily propagate new plants from seeds harvested right at home.
By learning when and how to collect zinnia seeds—and how to dry and store them correctly—you can create a continuous cycle of blooming beauty season after season. This guide walks you through reliable, gardener-approved methods to ensure successful seed harvesting and future garden success.
Understanding Zinnia Seed Production
How Zinnias Reproduce Through Seeds
Zinnias are annual flowers, which means they complete their life cycle—from seed to bloom to seed again—within one growing season. After the flowers fade, the plants begin producing seeds at the base of each blossom. These seeds are designed to ensure the next generation of plants, making them ideal for gardeners who want to collect and replant.
Each flower head is made up of tiny florets that mature into seeds when properly pollinated. Insects like bees and butterflies often assist in this process, especially if you’re growing multiple zinnia varieties nearby.
Types of Zinnias and Seed Viability
There are many cultivars of zinnias, including single, double, and dahlia-flowered types. While most open-pollinated zinnias will produce seeds that grow true to type, hybrids may not. If you’re harvesting from hybrid varieties, keep in mind that the seeds might yield unpredictable results, but they can still produce healthy, colorful plants.
Recognizing the Right Time to Harvest
Timing plays a critical role in successful zinnia seed collection. Harvesting too early results in immature seeds with poor germination, while waiting too long may risk seed loss to weather or wildlife. Knowing the specific signs of maturity ensures that your efforts yield strong, viable seeds for next season’s garden.
Signs That Zinnia Flowers Are Ready for Harvest
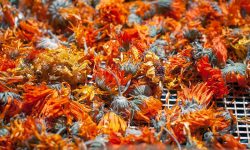
The clearest indicator that zinnia seeds are ready is the condition of the flower head. After a zinnia bloom fades and begins to dry, the seed development process accelerates inside the central disk of the flower. You’ll know it’s time to harvest when the following conditions are met:
The flower head has turned completely brown and feels papery or crispy to the touch.
Petals are shriveled or have fallen off entirely.
The back of the flower head may appear slightly shrunken or concave.
When pulled apart, the flower reveals firm, dark seeds—typically gray, tan, or black—attached to the base of each petal.
These characteristics indicate that the plant has completed its reproductive cycle and the seeds have reached full physiological maturity.
Understanding the Seed Maturation Timeline
Zinnia seeds typically take three to four weeks to fully mature after the bloom begins to fade. During this period, it’s important not to deadhead the flowers too early, as removing the heads before seed set will halt seed development. If you’re used to deadheading for more blooms, designate a few healthy flower heads on each plant to remain intact specifically for seed production.
Environmental conditions also affect the seed’s maturation timeline. Hot, dry weather accelerates the drying process, while prolonged rain or high humidity can delay seed ripening and promote mold formation. If extended wet weather is forecast, consider cutting nearly mature heads and finishing the drying process indoors in a controlled environment.
Identifying Viable Seeds During Harvest
When separating the dried flower head, look for the seeds at the base of the withered petals. Viable zinnia seeds are typically arrowhead-shaped with a sharp point on one end and a rougher surface texture. They feel solid and resist bending or crushing. Underdeveloped seeds will be pale, lightweight, and sometimes hollow—these should be discarded.
For gardeners interested in saving specific colors or forms, it’s best to tag individual flowers when they are in peak bloom, then return to collect seeds once the heads mature. This practice ensures you harvest seeds from the exact flowers you want to reproduce, rather than guessing later when all blooms have browned.
Managing Multiple Varieties and Cross-Pollination
If you’re growing more than one zinnia variety in close proximity, cross-pollination can occur, especially with help from pollinators like bees. This means the seeds you collect may not produce flowers identical to the parent plant. For more predictable results, isolate varieties by at least 100 to 150 feet or grow them at different times.
However, for many gardeners, cross-pollination is part of the fun. You might discover new color combinations or unexpected flower forms that add diversity to your garden in the next season. Still, if preserving a specific cultivar is your goal, consider growing only one variety or using physical barriers like row covers during the flowering stage.
How to Harvest Zinnia Seeds Properly
Harvesting zinnia seeds is a straightforward yet precise task that requires attention to detail to ensure healthy, viable seeds. Proper technique not only preserves seed quality but also helps prevent contamination, disease spread, and loss of viable genetics. Following a careful, step-by-step method ensures the success of your next growing season.
Step 1: Choose the Right Tools and Conditions
For clean and efficient harvesting, prepare a few essential tools: sharp garden scissors or pruners, a paper bag or tray for collecting flower heads, and gloves if your plants are thorny or if you’re working in hot sun. Always harvest on a dry day—preferably mid-morning—after dew has evaporated but before midday heat, which can cause seed brittleness or shattering.
Avoid harvesting flower heads that are still damp from rain or irrigation. Excess moisture at the time of harvest can lead to mold growth during the drying process.
Step 2: Cut Mature Flower Heads
Use your scissors or pruners to snip off fully dried flower heads at the base of the stem. It’s best to leave about 3 to 4 inches of stem attached to help with air circulation during the drying phase. Handle each flower head gently to avoid dislodging seeds prematurely, especially if they’re dry and loose.
Inspect each head before cutting. It should be brown, crispy, and devoid of living green tissue. Avoid heads with signs of mildew, rot, or insect damage, as these may harbor pathogens that reduce seed viability.
Step 3: Dry the Flower Heads Thoroughly
Place harvested flower heads in a single layer on a mesh screen, drying rack, or breathable surface such as newspaper in a well-ventilated, shaded, and low-humidity environment. Do not pile heads on top of one another, as this can trap moisture and lead to decay. Allow them to dry for 7 to 14 days, depending on humidity levels.
For areas with high humidity or risk of rain, consider using a dehydrator on the lowest setting or placing the flower heads in a paper bag with holes punched in it, stored in a dry indoor location with good airflow.
Step 4: Extract the Seeds Carefully
Once the flower heads are fully dry and brittle, gently pull them apart by hand. Zinnia seeds are located at the base of each shriveled petal, attached like tiny arrows. Grasp the petal and tug gently to pull the seed free, or crumble the head and sift out the seeds manually.
Separate seeds from the surrounding plant material (chaff) to reduce the risk of mold or pests during storage. You can use a fine mesh sieve, a screen, or simply pick out debris by hand.
Step 5: Clean and Inspect the Seeds
After separation, inspect seeds closely. Mature zinnia seeds are firm, arrowhead-shaped, and dark tan to gray. Discard any that appear hollow, thin, moldy, or discolored. For gardeners who want high germination rates, consider float testing: drop a few seeds into a glass of water. Viable seeds generally sink, while non-viable ones float. (Be sure to dry them again if you test this way.)
Clean seeds can be further dried for an additional day before storage to remove residual moisture and reduce spoilage risk.
Step 6: Label and Store Seeds Properly
Once fully dry, place your seeds in breathable paper envelopes or seed packets. Label each with the variety name, harvest date, and any notes about the plant’s performance or color. Store them in an airtight container in a cool, dark, and dry place, such as a basement, pantry, or refrigerator.
Avoid using plastic bags for long-term storage, as they trap humidity. Properly stored zinnia seeds can remain viable for 3 to 5 years, although germination rates are highest within the first two seasons.
Drying Seeds to Ensure Longevity
Proper drying is one of the most critical steps in preserving the viability and longevity of zinnia seeds. Inadequately dried seeds can develop mold, lose their ability to germinate, or deteriorate quickly in storage. Mastering the drying process ensures your harvested seeds remain healthy and capable of producing vigorous plants in future seasons.
Why Drying Is Essential for Seed Health
Zinnia seeds, like all seeds, contain internal moisture. If this moisture is not properly reduced to safe storage levels (typically around 8% to 10%), the seeds may begin to respire actively, leading to internal decay, microbial activity, or fungal growth. Seeds with high moisture content also tend to have a significantly shorter shelf life and can lose their germination potential within weeks.
Drying seeds slowly and thoroughly helps them enter a dormant, stable state. This is essential for maintaining long-term viability—especially if you plan to store seeds for more than one season.
Ideal Drying Conditions for Zinnia Seeds
Zinnia seeds dry best in warm, dry, and well-ventilated conditions. The optimal temperature range for air-drying is between 65°F and 75°F (18°C to 24°C), with relative humidity between 30% and 50%. Avoid direct sunlight, as UV exposure can damage the seed’s protective coating and reduce viability.
Air circulation is also crucial. A fan on a low setting nearby can help maintain airflow without disturbing the seeds. If you’re drying indoors in a humid climate, a dehumidifier can be helpful to maintain stable drying conditions.
Step-by-Step Drying Process
After harvesting mature, dry zinnia flower heads, begin the drying process as follows:
Spread Flower Heads or Loose Seeds Evenly
Place flower heads or extracted seeds in a single, thin layer on a drying screen, mesh tray, or clean paper surface such as a paper towel or brown kraft paper. Ensure they are not stacked or overlapping, as this traps moisture.
For best results, use a mesh screen that allows air to circulate from both above and below. This prevents condensation buildup and accelerates the drying process without overheating the seeds.
Monitor Drying Progress Daily
Depending on ambient humidity, zinnia seeds can take anywhere from 5 to 14 days to dry completely. Check daily for any signs of mold, and stir or flip seeds gently with clean fingers or a wooden stick to ensure even drying.
To test dryness, take a few seeds and try bending them. Fully dry seeds will snap cleanly or resist bending without being soft or pliable. If they feel leathery or flexible, they need more time.
Consider Using a Low-Heat Dehydrator
In especially humid environments or if you need to dry a large volume of seeds quickly, a food dehydrator can be used—but only at very low temperatures. Set the temperature between 85°F and 95°F (29°C to 35°C). Higher temperatures may cook the seeds and render them nonviable.
Place seeds in a single layer on dehydrator trays with mesh inserts. Check every few hours and remove seeds once they become firm, dry, and slightly brittle.
Avoid Common Mistakes During Drying
One of the most frequent errors gardeners make is rushing the drying process by placing seeds in a warm oven or under direct sun. Both of these can destroy the embryo inside the seed. Another mistake is placing seeds in an airtight container before they are fully dry—leading to condensation and mold.
Patience and proper airflow are far more effective in preserving seed quality than speed.
Verifying Seed Dryness Before Storage
If you’re unsure whether your seeds are dry enough for long-term storage, use one of the following methods:
The Jar Test
Place a handful of dried seeds into a glass jar with a few tablespoons of dry rice or silica gel packets. Seal tightly and leave for 24 hours. If condensation appears inside the jar, the seeds are still releasing moisture and need more drying time.
The Desiccant Packet Test
Put a batch of seeds in a sealed container with a digital hygrometer and a desiccant packet. After 24–48 hours, check the humidity level. A reading below 45% generally indicates that seeds are ready for storage.
Storing Zinnia Seeds for Maximum Viability
Importance of Proper Seed Storage
Preserving zinnia seed viability depends on creating optimal conditions that reduce exposure to moisture, heat, light, and oxygen. When stored correctly, zinnia seeds can remain viable for three to five years or longer, ensuring reliable germination and vigorous growth season after season.
Choosing the Right Containers and Conditions
Airtight Containers for Longevity
Glass jars with tight lids, plastic seed vials, metal tins with gaskets, or vacuum-sealed bags are excellent choices. These prevent moisture infiltration and help stabilize humidity levels. Including desiccant packs, such as silica gel, further protects seeds from ambient moisture.
Blocking Light to Prevent Premature Activation
Exposure to light can degrade seed quality or trigger hormonal changes. Use opaque containers or store transparent jars in dark environments. Wrapping containers in foil or brown paper is a simple way to prevent UV penetration.
Labeling Seeds for Easy Identification
Clearly mark each container with the zinnia variety name, harvest date, and growing location. Use waterproof ink or permanent markers to prevent fading. Organized labeling ensures efficient use and helps track viability over time.
Maintaining Cool, Stable Temperatures
Store seeds at temperatures between 35°F and 45°F (1.5°C to 7°C). Refrigeration is ideal, but avoid freezer storage unless seeds are extremely dry. Keep seeds away from fluctuating temperatures such as refrigerator doors or warm closets.
Enhancing Longevity with Advanced Storage Methods
Reducing Oxygen Exposure
Vacuum sealing removes excess air that can accelerate seed degradation. More advanced methods like nitrogen flushing are used in professional seed banks to slow aging processes.
Monitoring Internal Humidity
Humidity indicator cards placed inside containers offer a non-invasive way to monitor seed conditions. This allows gardeners to detect and fix issues early without opening the containers.
Checking Viability Before Planting
Conduct an annual germination test by wrapping 10 seeds in a moist paper towel, sealing them in a bag, and storing them in a warm place. After 5–7 days, count how many seeds sprout. If the germination rate is below 70%, either sow more seeds or replace the batch.
Sowing Harvested Seeds for Best Results
Preparing the Soil for Germination
Zinnias prefer well-drained soil with full sun exposure. Before planting, amend the soil with compost to boost organic matter and fertility. If you’re starting seeds indoors, use a sterile seed-starting mix for better control over moisture and disease.
Plant seeds at about one-quarter inch deep and keep the soil consistently moist—but not wet—until germination, which typically occurs within 5 to 10 days in warm temperatures.
Timing Your Planting for Bloom Success
For early blooms, start seeds indoors about 4 to 6 weeks before your last spring frost. If you prefer direct sowing, wait until the soil has warmed to at least 70°F (21°C) and there’s no longer a threat of frost. Successive sowings every few weeks can result in continuous flowering throughout the summer.
Troubleshooting Seed Harvest and Germination Issues
Identifying Poor Seed Development in Flowers
One of the most common issues gardeners face when harvesting zinnia seeds is discovering that the seeds are underdeveloped or nonviable. This often results from harvesting too early, especially if the flower head hasn’t fully dried on the plant. Healthy seeds develop only when pollination is successful and the flower is allowed to age naturally on the stem until it becomes crisp and brown.
Another factor is weather. Excessive rain or humidity during the flowering and seed development stage can cause rot or fungal infections in seed heads, leading to malformed or hollow seeds. Check for fully formed, arrowhead-shaped seeds that are hard and dark tan to brown in color. If they are thin, pale, or soft, they are likely immature.
Common Drying and Storage Mistakes
Improper drying is a major contributor to seed failure during storage. If seeds are not fully dry before being stored, internal moisture can lead to mold, mildew, or rot. Always allow harvested seeds to dry for at least one to two weeks in a well-ventilated area out of direct sunlight. Seeds should feel firm and brittle when ready for storage.
Storing seeds in warm, humid environments is another common mistake. This can reduce germination potential over time, even if the seeds were healthy at harvest. Use airtight containers with desiccants and store them in a consistently cool, dark place.
Diagnosing Low Germination Rates
If seeds fail to sprout, start by reviewing their storage conditions. High humidity, poor airflow, or temperature fluctuations during storage can lead to rapid viability loss. Seeds more than three years old may naturally lose germination strength, so it’s important to conduct a germination test before planting large quantities.
Another common issue is soil temperature during sowing. Zinnia seeds need consistent warmth—ideally between 70°F and 80°F (21°C to 27°C)—to germinate. Planting in soil that is too cold, especially in early spring, can delay or completely prevent sprouting. Using seed-starting heat mats can help if you’re sowing indoors.
Avoiding Fungal and Damping-Off Diseases
Once seeds sprout, seedlings are highly vulnerable to damping-off, a fungal disease that causes young plants to collapse at the soil line. This is usually caused by contaminated soil, overwatering, or lack of airflow. To prevent it, use sterile seed-starting mix, avoid excessive watering, and provide good ventilation.
You can also pre-treat zinnia seeds with an organic fungicide or cinnamon powder before sowing. This creates a protective barrier against soil-borne pathogens during the critical germination window.
Recognizing Genetic Variability in Saved Seeds
When saving seeds from hybrid zinnia varieties, expect some genetic unpredictability. Many garden zinnias are F1 hybrids, and seeds collected from them may not produce flowers identical to the parent plant. Instead, they may revert to traits of earlier generations or express unexpected colors and growth patterns.
To ensure more consistent results, save seeds from open-pollinated or heirloom varieties, which tend to maintain stable traits through generations. Isolating different zinnia types in the garden can also help reduce cross-pollination and improve seed purity.
Environmental Factors That Interfere with Seed Maturity
Poor light, nutrient deficiencies, and late-season frost can all hinder seed development. Ensure that zinnias are planted in full sun with well-drained, moderately fertile soil. Avoid excessive nitrogen during flowering, as it promotes leaf growth over bloom and seed production.
Late blooms often don’t have enough time to develop viable seeds before cold weather sets in. For fall harvesting, begin collecting seeds from early blooms rather than waiting for the final flush.
Best Practices for Year-to-Year Zinnia Propagation
Selecting the Right Parent Plants for Seed Collection
The success of annual zinnia propagation heavily depends on the quality of the parent plants from which you collect seeds. Choose only the healthiest, most vigorous specimens that display disease resistance, strong stem structure, and abundant, symmetrical blooms. Plants showing signs of mildew, pest infestation, or weak branching should not be used for seed saving, as these undesirable traits can be genetically passed on.
For greater genetic stability, prioritize open-pollinated or heirloom zinnia varieties. These types consistently reproduce true-to-type offspring, making them ideal for gardeners who want predictable results in size, color, and plant form. If you are saving seeds from F1 hybrids, be aware that the resulting plants may show genetic variation, including changes in bloom color, petal shape, or plant vigor.
Ensuring Optimal Isolation for Seed Purity
Zinnias are primarily pollinated by bees and butterflies, which can carry pollen from one plant to another with ease. If you are growing multiple zinnia cultivars within close proximity, cross-pollination is likely. To maintain varietal purity, isolate different cultivars by at least 300 to 500 feet if you are in an open field or garden setting. Alternatively, use fine mesh pollination bags over developing blooms and hand-pollinate to control parentage.
This method is especially valuable if you intend to save seeds for breeding or for resale. Controlled pollination allows you to selectively propagate traits such as drought tolerance, color intensity, or compact growth.
Timing Your Growing Season for Maximum Seed Yield
To ensure a reliable seed harvest every year, plan your planting calendar with seed maturity in mind. In most USDA zones, it’s ideal to sow zinnia seeds outdoors once the soil temperature is consistently above 70°F (21°C). This allows for a longer bloom period and gives early flowers enough time to produce fully mature seeds before the onset of fall frost.
Staggered planting every two to three weeks can also extend the bloom and seed-collection window. This technique ensures you’ll have several waves of flower heads from which to collect seeds at various stages of the season.
Harvesting and Rotating Seed Stocks Annually
Even under ideal storage conditions, zinnia seeds gradually lose germination strength over time. To avoid relying solely on older seed stock, make it a habit to collect fresh seeds annually and label them clearly with the variety, harvest date, and any notable plant traits.
Keep older seeds for backup or experimentation, but rotate in new seeds each season to maintain high germination rates. This also gives you the opportunity to observe long-term changes in plant traits and performance, especially if you’re engaging in amateur zinnia breeding.
Soil Preparation for Optimal Regrowth
Once you’ve saved your seeds, prepare the soil for the next season’s propagation. Zinnias thrive in light, well-draining soils with a slightly acidic to neutral pH (6.0 to 7.0). Incorporate organic matter such as compost or aged leaf mold to enhance soil structure and microbial life.
Avoid using high-nitrogen fertilizers early in the season, as these can encourage lush foliage at the expense of flowers and seed set. Instead, choose a balanced or bloom-promoting fertilizer (e.g., 5-10-10) once the plants are well established.
For best results, rotate your zinnia planting location every one to two years to prevent soil-borne diseases like Alternaria leaf spot or powdery mildew from accumulating in the soil.
Testing Germination Rates Before Planting
Before committing large garden space to saved seeds, conduct a basic germination test. Place 10–20 seeds between damp paper towels in a sealed plastic bag and store in a warm place for 5–7 days. If fewer than 70% germinate, consider supplementing your sowing with newer seeds or increasing your sowing density to compensate for lower viability.
Tracking germination rates over the years helps you understand how well your storage methods are working and whether adjustments are needed in drying or container selection.
Integrating Zinnia Propagation into a Sustainable Garden Plan
By saving seeds annually and propagating zinnias yourself, you not only reduce costs but also contribute to the sustainability of your garden. Zinnias attract a wide range of pollinators, support biodiversity, and integrate well with companion plants such as cosmos, marigolds, and basil.
Keeping a simple propagation journal—recording plant performance, bloom timing, and seed harvest notes—will help you improve results year after year. Over time, you’ll develop zinnia strains that are uniquely adapted to your local climate, soil, and aesthetic preferences.
FAQ
How do I know when zinnia seeds are ready to harvest?
Zinnia seeds are ready to harvest when the flower heads have turned completely brown and feel dry to the touch. The petals should be faded and brittle, and the center of the bloom may look slightly sunken or papery. Gently pull apart the dried flower head—inside, you should find arrowhead-shaped seeds attached to the base of the petals. These seeds should be dark gray to brown and firm. If they are still pale or soft, they are likely immature and may not germinate well.
Can I harvest seeds from zinnias grown in containers?
Yes, container-grown zinnias produce seeds just as garden-grown ones do. In fact, container zinnias can be easier to monitor for seed maturity because you can control their environment more precisely. Ensure that the containers are not overwatered during the seed-setting stage, as excess moisture can promote rot or mold on drying flower heads. Choose healthy, robust flowers that are not diseased or pest-damaged for seed collection.
Will seeds from hybrid zinnia varieties grow true to the parent plant?
Seeds harvested from hybrid zinnias often do not grow true to the parent plant. Hybrids are bred for specific traits like color, shape, or disease resistance, and those traits may not pass down consistently to the next generation. The resulting plants can vary widely in appearance. However, open-pollinated and heirloom varieties typically do grow true, so if consistency is important to you, grow and save seeds from those types instead.
What’s the best way to dry zinnia seeds after harvesting?
After harvesting, spread the seeds out in a single layer on a paper towel, newspaper, or mesh screen in a cool, dark, and well-ventilated area. Avoid humid spots like kitchens or bathrooms. Let them dry undisturbed for 7 to 14 days. To check for dryness, try snapping one in half—if it breaks cleanly and feels hard, it’s ready. Proper drying prevents mold and helps preserve germination rates during storage.
How should I store zinnia seeds to maintain their viability?
Once thoroughly dry, store your zinnia seeds in paper envelopes, small glass jars, or sealable plastic bags. Include labels with the variety name and date of harvest. Place these containers in a cool, dry, and dark location—ideally a cabinet, closet, or refrigerator. For long-term storage, maintaining consistent temperature and low humidity is crucial. Seeds stored properly can remain viable for three to five years, although germination rates gradually decrease after the first year.
Do I need to treat zinnia seeds before planting them?
Zinnia seeds do not require stratification (cold treatment) or scarification (scratching the seed coat). They are ready to plant immediately after drying and can germinate reliably when placed in warm soil. For best results, start them indoors 4 to 6 weeks before your last frost date or sow directly outdoors once temperatures stay above 70°F (21°C).
What are common mistakes when harvesting zinnia seeds?
A common mistake is harvesting flower heads too early—seeds taken from flowers that are still partially green or moist usually fail to germinate. Another issue is poor drying, which can lead to mold or rot during storage. Lastly, storing seeds in unventilated or humid areas (like plastic bags without drying agents) can reduce their shelf life. Always allow seeds to fully dry before storage and use proper containers to keep moisture out.
Can I save seeds from zinnias year after year and improve the strain?
Yes, if you consistently save seeds from your healthiest, most vigorous plants over multiple seasons, you can gradually select for desirable traits like disease resistance, bloom size, or color intensity. This process is called selective seed saving. Just be sure to isolate different varieties by distance or plant them at separate times to prevent unwanted cross-pollination.
How many seeds can I expect from one zinnia flower?
Each zinnia flower can produce 20 to 50 seeds, depending on the variety and growing conditions. Larger, fully mature blooms generally yield more seeds. Double-flowered varieties might contain fewer viable seeds due to their tightly packed petal structures. Always inspect seeds for firmness and color to determine maturity before saving.
Can I use zinnia seeds harvested from cut flowers or bouquets?
Generally, seeds from fresh cut flowers are not mature enough to germinate, as most florists harvest blooms before they begin to go to seed. However, if the cut flower was left to dry naturally in the vase and the flower head has turned brown and dry, there’s a slight chance viable seeds might be present. Still, it’s much more reliable to harvest directly from garden plants that have been left to naturally complete their life cycle.
Conclusion
Learning how to harvest zinnia seeds offers more than just a cost-saving gardening technique—it provides a deeper connection to the natural cycle of your garden. By observing, collecting, and nurturing seeds from one season to the next, you not only ensure a continuous display of colorful blooms but also engage in the rewarding act of sustainability. With the right timing, techniques, and storage, your harvested zinnia seeds can fill your garden with life year after year.