Taking a cutting from a rose bush and successfully growing a new plant from it may seem like a gardening task suited for experts. However, this process is surprisingly simple when done with the right timing, tools, and care. Knowing how to plant a cutting from a rose bush easily allows any gardener, from beginner to seasoned hobbyist, to expand their rose garden without needing to buy new plants. Propagating roses from cuttings is a rewarding and cost-effective way to preserve your favorite varieties.
In this guide, you’ll discover every step of the rose cutting process, from selecting the right stem to ensuring healthy root development. By understanding each stage, you will be equipped to plant your own rose cuttings and watch them flourish into full-grown bushes. Whether you’re growing them in pots or straight in the garden, learning this method gives you control over your garden’s design and helps maintain genetic consistency across your roses.
With patience and the right technique, growing roses from cuttings is a sustainable gardening practice. This article will walk you through the best methods and detailed tips so that your efforts lead to thriving blooms.
Understanding the Basics of Rose Propagation
Rose propagation through cuttings involves taking a healthy stem from an existing rose bush and encouraging it to grow roots. This process is known as vegetative propagation, and it results in a new plant that is genetically identical to the parent. Many gardeners prefer this method over grafting or seed planting because it’s straightforward, and the results are consistent.
The success of rose propagation largely depends on the time of year and the condition of the plant. Softwood cuttings, taken in late spring or early summer, root faster and more easily than hardwood cuttings, which are taken in fall or winter. Cuttings should come from a bush that is disease-free and actively growing to ensure the best chances of success.
It’s also important to understand that different types of roses propagate at different rates. Shrub roses and antique varieties tend to root more easily than hybrid teas or grafted roses. This variation doesn’t mean certain roses can’t be grown from cuttings, only that they may require more attention and care during the rooting phase.
Choosing the Right Time for Taking Rose Cuttings
Timing plays a crucial role in rose cutting success. While roses can technically be propagated year-round in controlled environments, outdoor conditions favor specific seasons for the best outcomes. Late spring through early summer is typically the ideal time to take cuttings. During this period, rose plants are actively growing, and their stems are in the softwood stage, meaning they are flexible and green but mature enough to support new roots.
If cuttings are taken too early, the stems may be too tender and prone to rotting. If taken too late, the stems may become woody and slow to root. Aim for a balance where the stem is neither too soft nor too hard. You can test the stem by bending it gently. A good cutting should snap with some resistance but not crumble or bend limply.
Morning is the best time of day to take cuttings since the plant is fully hydrated. This helps reduce stress on the parent plant and ensures the cutting retains moisture. Watering the rose bush a day before taking cuttings can also make the process smoother and more successful.
Selecting a Healthy Cutting from the Rose Bush
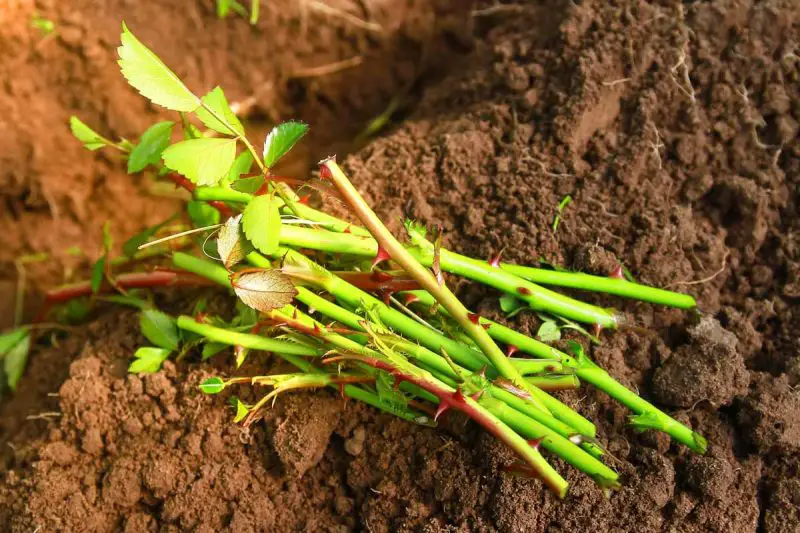
Start by identifying a strong and healthy stem that has recently finished blooming. Avoid stems that have signs of disease, discoloration, or insect damage. The ideal stem should be about the thickness of a pencil and approximately six to eight inches long. It should have at least three to five leaf nodes, which are the spots on the stem where leaves emerge.
Use sterilized pruning shears to cut the stem just below a leaf node. This spot is where rooting hormones are most active. Make a clean, angled cut to prevent water from pooling on the surface, which can lead to rot. The angle also increases the surface area for root growth.
Remove any flowers, buds, and most leaves from the cutting. Leave only the top two sets of leaves to reduce moisture loss through transpiration. Trimming the leaves in half can also help the cutting retain energy while it focuses on root development. Keep the cuttings in a cool, moist place while you prepare the planting medium.
Preparing the Soil or Rooting Medium
The rooting medium is essential for the successful development of rose cuttings. A light, well-draining mix is key to preventing waterlogging while allowing roots to form freely. You can create an ideal rooting medium by mixing equal parts of perlite and peat moss. Another effective mix includes coarse sand with potting soil or vermiculite.
If planting directly into garden soil, ensure the area is well-draining and rich in organic matter. Avoid clay-heavy or compacted soils, as they tend to retain too much moisture and can suffocate developing roots. Raised beds or containers are also suitable options because they allow more control over drainage and nutrient levels.
Before planting, water the rooting medium thoroughly and let any excess water drain away. The medium should be damp but not soggy. This moisture helps the cutting transition from stem to self-sustaining plant. A properly prepared medium creates a stable environment where the cutting can establish roots without the risk of rot.
Using Rooting Hormone for Faster Results
Rooting hormone increases the likelihood of success by stimulating root growth at the cut end of the stem. While rose cuttings can root naturally, applying rooting hormone significantly boosts the odds and speeds up the process. It comes in powder, liquid, or gel form, and each type is effective when used properly.
To apply rooting hormone, dip the cut end of the stem about one inch deep into the powder or gel. Tap off any excess to prevent clumping, which can hinder air flow around the base. Make sure the area covered by the hormone will be in contact with the rooting medium.
Once treated with rooting hormone, avoid touching the coated end with your hands or any non-sterile surface. Immediately insert the treated cutting into the prepared soil or rooting medium, gently firming the material around it to hold it upright. This close contact between stem and medium is vital for root initiation.
Planting the Rose Cutting Properly
When planting the cutting, make a small hole in the medium with a pencil or stick to prevent the rooting hormone from rubbing off. Insert the cutting deep enough so that at least two nodes are below the surface. This depth helps stabilize the cutting and gives multiple points from which roots can develop.
Space multiple cuttings at least a few inches apart to allow airflow and reduce the risk of fungal disease. Ensure the cuttings are standing upright and not leaning, as poor positioning can hinder root formation. Press the medium gently around the base to eliminate air pockets and provide firm support.
After planting, lightly water the soil again to settle it around the cutting. Be careful not to overwater, as this can dislodge the cutting or saturate the medium. Maintaining a slightly moist environment is the key to encouraging healthy root development over the coming weeks.
Creating a Humid Environment for Rooting
Humidity is essential for rose cuttings because it prevents the stem from drying out before roots form. The easiest way to create a humid environment is to cover the cutting with a clear plastic dome or a plastic bag. This cover traps moisture around the plant and mimics the conditions of a greenhouse.
To avoid fungal growth, make sure the plastic does not touch the leaves. Use sticks or wire hoops to hold the cover above the cutting. Open the covering once a day for a few minutes to allow fresh air to circulate and prevent mold. Place the covered cutting in a location with indirect sunlight and stable temperatures.
Avoid placing the cutting in direct sun, which can overheat the humid chamber and dry out the plant. Temperatures between 65 and 75°F are ideal for root development. Keep an eye on condensation inside the cover; it indicates that humidity levels are high enough to support rooting.
Caring for the Cutting During Root Development
Over the next few weeks, your cutting will begin the rooting process. This phase requires consistent moisture and warmth, but not excessive water. Check the soil every couple of days and mist it lightly if it begins to dry out. Do not let the cutting sit in standing water or soggy soil.
You can test for root development after about three to four weeks by gently tugging on the cutting. If you feel resistance, roots are forming. Be patient, as some rose varieties take longer to root, especially if grown from hardwood cuttings during cooler months.
During this time, avoid fertilizing the cutting, as the nutrients can burn delicate developing roots. Focus on providing a stable, non-stressful environment. If any leaves begin to yellow or drop, don’t panic. It’s a normal part of the transition as the cutting shifts its energy to root formation.
Transplanting the Rooted Cutting to a Permanent Location
Once your rose cutting has developed a healthy root system, usually in about six to eight weeks, it’s ready for transplanting. Choose a planting site with full sun, good air circulation, and fertile, well-draining soil. If transplanting to a container, make sure it’s large enough to accommodate the growing roots and has drainage holes.
Before transplanting, harden off the cutting by gradually exposing it to outdoor conditions over several days. This process reduces transplant shock and prepares the plant for life in a less controlled environment. Begin by placing the cutting in a shaded area outdoors, then slowly introduce it to more sunlight and airflow.
When transplanting, dig a hole deep enough to cover the root ball and surrounding soil. Gently place the cutting into the hole and fill it with loose soil, pressing it down lightly. Water thoroughly to settle the roots and encourage immediate growth. Over the next few weeks, monitor the plant closely and water as needed to maintain steady moisture.
Encouraging Growth and Flower Production
Now that your rose cutting is successfully transplanted, the next phase is encouraging growth and eventually flowering. Begin feeding the plant with a balanced fertilizer after a few weeks in its new location. Choose a slow-release formula or liquid feed designed for roses to promote strong root and shoot development.
Regular watering is essential during the first season. Keep the soil consistently moist but never waterlogged. Deep watering helps the roots grow downward, creating a stable foundation. Mulching around the base of the plant retains moisture, suppresses weeds, and keeps roots cool in warmer weather.
Prune lightly during the first year to encourage bushy growth, but avoid heavy pruning until the second season. With proper care, your cutting will grow into a full rose bush, ready to produce blooms the following year. Be patient, as roses often take time to establish and flourish.
Troubleshooting Common Problems with Rose Cuttings
If your cutting begins to wilt, turn brown, or collapse, it may be due to excess moisture, fungal infection, or poor cutting selection. Always use sterilized tools and remove any decaying leaves promptly. Proper ventilation and careful watering are your best defenses against rot.
If roots fail to develop after several weeks, the cutting may not have been healthy or the conditions may not have been ideal. Try again using fresh cuttings, better rooting hormone, or a more controlled environment. Success rates improve with practice and refinement of your technique.
Pests are rare at this stage, but occasionally, aphids or fungal gnats may appear. Remove pests manually or use gentle, organic sprays safe for young plants. Keep the growing area clean and free of dead plant material to discourage infestations.
FAQ About How to Plant a Cutting from a Rose Bush
What is the best time of year to take rose cuttings?
The best time to take rose cuttings is in late spring to early summer when the stems are in the softwood stage. During this period, the plant is actively growing, and the stems are flexible enough to root easily while still mature enough to support new growth. Fall hardwood cuttings are also possible but may take longer to root.
How long does it take for a rose cutting to root?
Rose cuttings usually take about 3 to 6 weeks to develop roots, depending on the variety, temperature, and humidity levels. Some cuttings may take longer, especially if taken during cooler months. Gently tugging on the cutting after a few weeks can help you determine if roots have formed.
Do I need to use rooting hormone for rose cuttings?
Using rooting hormone is not mandatory, but it significantly increases the chances of successful rooting. It helps stimulate root growth and protects the cutting from fungal issues. Most gardeners see faster and more consistent results when using powder, gel, or liquid rooting hormone.
Can I plant rose cuttings directly in the ground?
Yes, you can plant rose cuttings directly in the ground if the soil is well-draining and conditions are favorable. However, planting in pots or containers first allows more control over temperature and moisture, increasing the chances of success. Once the cutting has rooted, you can transplant it into the garden.
How do I know if my rose cutting is successful?
You’ll know a rose cutting is successful when new leaves begin to emerge and the cutting resists gentle pulling, indicating root formation. Over time, you’ll see visible signs of growth, such as taller shoots and stronger stems. A healthy cutting will stay green and upright throughout the rooting phase.
Final Thoughts on Rose Propagation by Cuttings
Learning how to plant a cutting from a rose bush easily offers more than just a cost-effective way to expand your garden. It provides a hands-on connection to your plants and a rewarding experience that deepens your understanding of rose care. With the steps in this guide, you’re equipped to propagate healthy, vibrant roses from your favorite bushes.
Taking the time to follow proper techniques, from selecting the cutting to ensuring a suitable growing environment, results in strong and resilient plants. Over time, this process becomes second nature, allowing you to share roses with others, preserve heirloom varieties, or simply multiply the beauty in your own backyard.
Whether you’re propagating one rose or dozens, this skill adds lasting value to your gardening journey. Start with a single cutting and watch how your rose garden grows from your care and dedication.