Anemones are among the most enchanting spring flowers, known for their delicate, poppy-like blooms and vibrant colors that transform any garden into a captivating floral showcase. Whether you’re aiming to create a romantic cottage garden or a bold color-packed flower bed, planting anemone bulbs is a brilliant way to bring early-season charm to your landscape. With the right planting method, soil preparation, and timing, you can enjoy a lush, stunning display year after year.
What Makes Anemones Special
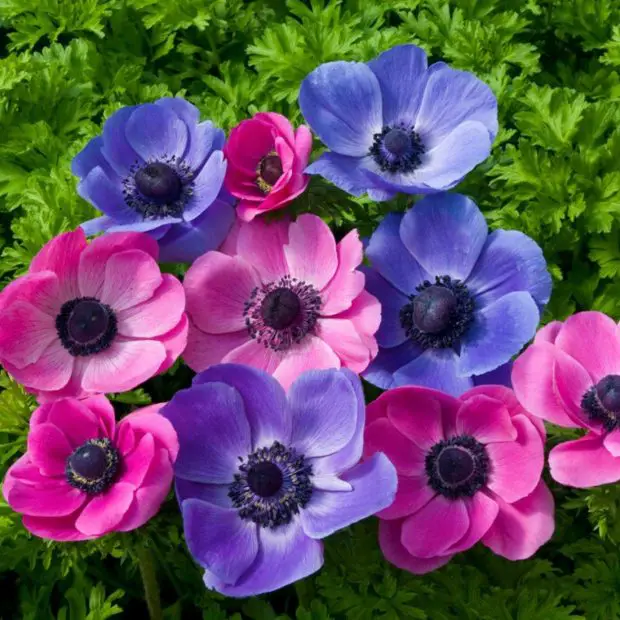
Varieties of Anemones to Know
There are several species of anemones, but when it comes to planting bulbs, most gardeners focus on Anemone coronaria varieties. These include popular cultivars such as ‘De Caen’ and ‘St. Brigid’, loved for their wide range of colors and petal types. ‘De Caen’ offers single-petaled blooms in shades of red, pink, white, and blue, while ‘St. Brigid’ features fuller, ruffled petals.
Other types, such as Anemone blanda, bloom earlier and are lower-growing, ideal for rock gardens and borders. Knowing your variety helps determine the best planting depth, spacing, and care required.
The Role of Anemones in Garden Design
Anemones make excellent companions to tulips, hyacinths, daffodils, and pansies. Their upright stems and bold centers create visual contrast, while their relatively long blooming period ensures continuity between late winter and mid-spring. Whether planted in clusters or interspersed among other flowers, they provide both texture and color, enriching the overall look of your spring garden.
When to Plant Anemone Bulbs
Best Planting Time by Region
Anemone bulbs, often called corms, should be planted in fall in warmer regions where winters are mild. In colder climates, many gardeners prefer to plant them in early spring after the risk of hard frost has passed. Some also pre-sprout bulbs indoors during late winter to get a jump start on the season.
In USDA zones 7–10, fall planting is ideal, allowing the corms to establish roots before winter. In zones 3–6, planting in early spring is recommended, with some protection from late frosts if needed.
Timing for Blooming
Typically, anemones bloom around 10–12 weeks after planting. Fall-planted corms will begin flowering in early spring, while spring-planted ones bloom later in the season. For continuous flowering, consider staggering planting times over several weeks.
Preparing to Plant Anemone Bulbs
Soaking the Bulbs
Unlike many other bulbs, anemone corms benefit from soaking before planting. Their natural form is small and shriveled, resembling dried nuts. Soaking them in room-temperature water for 8 to 12 hours helps rehydrate the corms, making it easier for roots to emerge and growth to begin.
Choosing a Planting Site
Anemones require full sun to partial shade and prefer well-draining soil. A location that receives at least 5–6 hours of direct sunlight each day is ideal. Avoid low-lying areas where water collects after rainfall, as excessive moisture may cause the bulbs to rot.
Soil Conditions for Success
Amend your soil with compost, leaf mold, or well-rotted manure to improve texture and drainage. Sandy loam is ideal, and the soil pH should be slightly acidic to neutral. If your garden soil is heavy clay, consider planting anemones in raised beds or containers where drainage can be better controlled.
How to Plant Anemone Bulbs Correctly
Depth and Spacing
Plant anemone corms about 1 to 2 inches deep, depending on their size. Space them approximately 3 to 6 inches apart to give the foliage and flowers room to expand. Place the bulbs with the pointy end facing up, but don’t worry too much—they’ll still grow even if planted sideways.
Covering and Watering
Once planted, cover the bulbs with soil and water thoroughly. Moisture helps settle the soil and activates root development. Keep the soil consistently moist but not soggy during the initial growth period. Overwatering at this stage can lead to fungal problems.
Caring for Anemones After Planting
Light and Water Requirements
Ensure the planted area receives ample sunlight, especially during the early growing phase. Water the site regularly to maintain even soil moisture. In dry climates, a layer of mulch can help retain moisture and suppress weeds.
Fertilization Schedule
Apply a balanced, slow-release fertilizer at planting time. As the plants begin to emerge, follow up with a liquid feed high in phosphorus to support flowering. Avoid fertilizers that are too rich in nitrogen, as this may encourage foliage at the expense of flowers.
Staking and Support
Some taller varieties, especially in windy locations, may require gentle support to keep the stems upright. Lightweight plant stakes or small flower rings are often enough. Planting in groups can also help support each other naturally.
Common Problems and Solutions
Pest Issues
While anemones are relatively resistant to most pests, they may occasionally attract slugs, aphids, or spider mites. Regular inspection and prompt action—such as handpicking slugs or spraying with insecticidal soap—can keep infestations under control.
Disease Prevention
Good air circulation and proper drainage are the best defenses against diseases like root rot or powdery mildew. Avoid overhead watering and remove any yellowing or damaged foliage to reduce the risk of fungal infections.
Poor Blooming
If your anemones fail to bloom, possible causes include too little sunlight, overcrowding, or overly rich nitrogen soil. Adjusting these factors can restore flowering in the next cycle.
Extending the Bloom Season
Staggered Planting
To enjoy an extended blooming period, plant corms in batches spaced 7 to 10 days apart. This technique produces waves of blossoms and ensures your garden remains colorful for several weeks.
Combining Early and Late Varieties
Mixing early bloomers like Anemone blanda with mid-to-late bloomers like De Caen extends the floral display. This diversity adds both aesthetic richness and resilience to unpredictable weather patterns.
Deadheading for Continued Growth
Removing spent flowers encourages plants to divert energy toward new blooms instead of seed production. Regular deadheading also keeps the garden looking tidy and vibrant.
Overwintering and Long-Term Care
In-Ground Overwintering
In warmer zones, anemones can be left in the ground year-round. Cover the planting area with a layer of mulch to protect against occasional frosts. In regions with harsh winters, it’s better to dig up the corms in late fall and store them indoors.
Storing Anemone Bulbs
To store bulbs, allow foliage to die back naturally, then gently lift the corms from the soil. Brush off excess dirt and allow them to dry in a cool, airy place for a few days. Store in paper bags or mesh containers filled with dry peat moss in a dark, frost-free location.
Replanting for Success
Replant stored corms in the following season using the same soaking and planting technique. Over time, you may notice that some corms multiply or produce offsets, allowing you to expand your anemone garden with little extra cost.
Frequently Asked Questions (FAQ)
When do anemones bloom after planting?
Anemones generally bloom 10 to 12 weeks after planting. Fall-planted bulbs bloom in early spring, while spring-planted ones bloom later in the season.
Can I grow anemones in pots or containers?
Yes, anemones grow well in containers with good drainage. Use a lightweight potting mix, ensure regular watering, and place containers where they get at least 5–6 hours of sunlight daily.
Do anemones come back every year?
In mild climates, anemone bulbs can naturalize and return each year. In colder zones, you may need to lift and store them during winter for replanting next season.
How deep should I plant anemone bulbs?
Plant anemone corms about 1 to 2 inches deep. Too deep can delay sprouting; too shallow may expose them to frost or pests.
What is the best way to store anemone bulbs over winter?
Lift the bulbs after foliage dies, dry them for a few days, and store in a dark, dry, frost-free place in breathable bags or containers filled with dry peat moss or vermiculite.
Conclusion
Planting anemone bulbs is one of the most rewarding ways to add bold, graceful color to your spring garden. Their early blooms bring life to outdoor spaces just as winter fades, offering joy and vibrancy. With a little preparation and ongoing care, your anemone display will become a seasonal highlight that returns more beautiful each year. From proper soaking to thoughtful placement and care, these timeless flowers are surprisingly easy to grow—and incredibly satisfying to behold.