Black Eyed Susans bring a splash of sunshine to any garden with their bright yellow petals and striking dark centers. These easy-to-grow flowers are perfect for gardeners seeking long-lasting color and low-maintenance beauty. Starting from seeds allows you to enjoy a fuller garden and witness the entire growth process.
With the right planting techniques and ongoing care, you can encourage continuous blooming and vibrant health. This guide covers everything you need to know—from preparing your soil to troubleshooting common issues—helping you cultivate stunning Black Eyed Susans that flourish season after season.
Understanding Black Eyed Susan Seeds

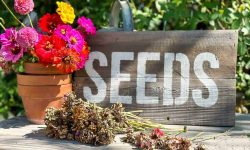
Black Eyed Susan seeds are small and lightweight, making them easy to sow directly into the garden. These seeds require light for germination, so they should be sown on the soil surface without covering. They usually germinate within 7 to 21 days when kept at temperatures between 70°F and 75°F (21°C to 24°C). Fresh seeds have higher germination rates, so using seeds from recent harvests is best.
Before planting, soak the seeds in water for a few hours to help soften the seed coat and improve sprouting. Black Eyed Susan seeds are hardy and can tolerate slight variations in soil conditions, but well-draining soil encourages better growth. Understanding these basic seed needs helps ensure successful germination and healthy seedlings for a vibrant flower display.
To increase germination success, start seeds indoors 6 to 8 weeks before the last frost date. Use seed trays with a light, well-draining mix and keep the soil consistently moist but not soggy. Gradually harden off seedlings by exposing them to outdoor conditions before transplanting. This process helps young plants adjust and reduces transplant shock. Proper seed handling and timing create a strong foundation for vigorous Black Eyed Susan plants that bloom beautifully throughout the season.
Preparing to Plant Black Eyed Susan Seeds
Choosing the Ideal Location
Black Eyed Susans need plenty of sunlight to flourish. Select a garden spot that gets at least six hours of direct sun daily, as insufficient light leads to weak growth and fewer flowers. These plants prefer soil that drains well because standing water can cause root rot and other fungal problems. Although they tolerate various soil types, they thrive best in moderately fertile, sandy, or loamy soil. Ensuring good air circulation around the plants reduces humidity levels and helps prevent diseases such as powdery mildew and leaf spot. Avoid planting near dense shrubs or trees that cast shade or trap moisture, as this can stress the plants and limit blooming potential.
Soil Preparation
Proper soil preparation is key for strong Black Eyed Susan plants. Start by clearing the planting area of weeds, roots, stones, and other debris to reduce competition and obstacles for roots. Loosen the soil deeply, about 6 to 8 inches, to allow roots to grow freely and access nutrients easily. Incorporate plenty of organic matter such as compost or well-aged manure to improve soil fertility, moisture retention, and aeration. Avoid fertilizers that are too rich in nitrogen, which encourage leafy growth but reduce flower production. Instead, use balanced fertilizers or organic amendments that support both root development and abundant blooming. Well-prepared soil creates a healthy environment that promotes vigorous growth and long-lasting flowers.
How to Plant Black Eyed Susan Seeds
Direct Sowing Outdoors
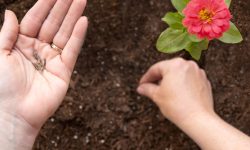
Direct sowing Black Eyed Susan seeds outdoors is a simple, natural method to grow strong plants. Wait until after the last frost when soil temperatures warm up to ensure better germination. Scatter the seeds thinly on the prepared soil to prevent overcrowding. Lightly press or rake the seeds into the soil and cover with no more than a 1/4 inch of soil to protect them while allowing light to reach them.
Keep the soil consistently moist during the germination period but avoid overwatering, which can cause seeds to rot. Germination usually takes between 7 and 30 days depending on conditions. After seedlings emerge and grow several inches tall, thin them to 12 to 18 inches apart to give each plant enough space to mature fully without competition for nutrients and light.
Starting Seeds Indoors
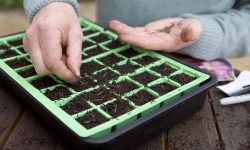
Starting Black Eyed Susan seeds indoors is ideal for gardeners wanting earlier blooms or living in cooler climates. Sow seeds 6 to 8 weeks before the last frost date in seed trays filled with a light, well-draining seed-starting mix. Scatter seeds on the surface and cover lightly with soil. Keep the soil moist and maintain temperatures between 65°F and 75°F to encourage even germination.
Once seedlings have developed two to three true leaves, transplant each into individual pots to allow stronger root growth. Gradually harden off seedlings by exposing them to outdoor conditions over 7 to 10 days. This helps them adjust to changes in temperature, sunlight, and wind. Finally, transplant hardened seedlings into the garden, spacing them adequately to support healthy growth and flowering.
Caring for Black Eyed Susan Seedlings
Watering and Moisture Management
Consistent moisture is crucial for young Black Eyed Susan seedlings. Keep the soil evenly moist to support healthy root growth. Avoid overwatering, as soggy soil can cause damping-off disease, which kills seedlings quickly. Water gently to prevent disturbing fragile roots and soil.
As seedlings grow and mature, these plants become drought-tolerant. They need less frequent watering once established. During dry spells, deep watering once a week encourages strong, deep roots. This helps plants survive periods without rain and supports vigorous flowering.
Fertilizing Young Plants
Young seedlings usually do not need heavy fertilizing if soil is well-prepared. However, if growth slows or leaves turn pale, a light feeding can help. Use a balanced, slow-release fertilizer or a diluted liquid fertilizer to provide essential nutrients gently.
Avoid high-nitrogen fertilizers, which promote leafy growth but reduce flower production. Proper feeding encourages healthy plants with abundant blooms. Regular monitoring helps adjust fertilization based on plant response.
Troubleshooting Poor Germination and Weak Seedlings
Poor germination and weak seedlings can be frustrating but often result from common, fixable issues. One major cause is improper soil moisture. Seeds need consistently moist but not waterlogged soil to sprout. Too much water causes seeds to rot, while too little moisture prevents germination. Monitor soil moisture carefully and water gently to maintain balance.
Seed quality also impacts germination success. Old or improperly stored seeds lose viability over time. Always use fresh seeds from reliable sources and store unused seeds in a cool, dry place to preserve their potential. Additionally, planting seeds too deep or in heavy, compacted soil can hinder sprouting. Seeds need light and well-aerated soil to emerge easily.
Weak seedlings often suffer from inadequate light. Seedlings stretch toward light when it’s insufficient, becoming leggy and fragile. Provide at least 12-16 hours of bright, indirect sunlight or use grow lights to strengthen young plants. Temperature fluctuations or cold drafts can also stunt growth. Keep seedlings in a stable, warm environment between 65°F and 75°F.
Finally, poor soil fertility or nutrient imbalances may weaken seedlings. Use a mild, balanced fertilizer after true leaves develop to support healthy growth. Addressing these factors early ensures stronger, more vigorous Black Eyed Susan seedlings ready for transplanting.
Promoting More Blooms: Advanced Care Tips
Deadheading for Continuous Flowering
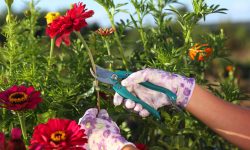
Regular deadheading is crucial for prolonging the flowering period of Black Eyed Susans. By promptly removing spent blooms, the plant redirects its energy from seed production to generating new flower buds. Use clean, sharp garden scissors or pruners to snip faded flowers just above the nearest healthy leaf node or side shoot. This practice encourages a more vigorous and bushy growth habit. Deadheading also prevents the garden from looking untidy with dried flowers. To maximize results, check your plants weekly during the blooming season and remove any wilted flowers. This simple routine can significantly extend your garden’s vibrant display well into late fall.
Consistent deadheading also helps reduce the chances of diseases by eliminating decaying plant material where fungal spores might develop. Moreover, it attracts pollinators such as bees and butterflies by maintaining an abundance of fresh flowers, supporting overall garden health and biodiversity.
Pruning and Cutting Back
Pruning Black Eyed Susans in mid to late summer serves multiple purposes. Lightly trimming back leggy or overgrown stems encourages the plant to produce new shoots and can stimulate a secondary bloom cycle. Use clean pruning shears to remove weak or damaged stems, promoting better air circulation and reducing the risk of fungal diseases. Avoid cutting too harshly, as some healthy growth is necessary for continued flowering.
At the end of the growing season, typically after the first frost, cut the plants down to about 3-4 inches above the soil surface. This helps the plant conserve energy during winter dormancy and encourages robust growth in the next season. Removing old foliage also reduces overwintering sites for pests and diseases, ensuring a healthier start come spring.
Proper pruning practices contribute not only to plant health but also enhance the aesthetic appeal of your garden by maintaining a neat and tidy appearance throughout the year.
Mulching to Retain Moisture and Suppress Weeds
Applying mulch around Black Eyed Susans is an excellent way to improve soil conditions and plant health. Organic mulches like shredded bark, straw, or compost help retain soil moisture by slowing evaporation, which reduces the need for frequent watering. This is especially important during hot, dry summer months when consistent moisture supports continuous blooming.
Mulching also effectively suppresses weeds by blocking sunlight, preventing them from competing with your Black Eyed Susans for nutrients and water. This reduces garden maintenance time and improves plant vigor. Additionally, mulch acts as an insulating layer, moderating soil temperature fluctuations to protect roots from heat stress in summer and freezing temperatures in winter.
As the mulch decomposes, it enriches the soil by adding organic matter that improves soil structure and nutrient availability. Over time, this enhances root growth and supports the long-term health and productivity of your Black Eyed Susan plants. Regularly replenish the mulch layer to maintain these benefits throughout the growing season.
Troubleshooting Common Issues with Black Eyed Susans
Pest Problems
While Black Eyed Susans are quite hardy, they can still attract pests such as aphids, spider mites, and caterpillars. Aphids cluster on new growth, sucking sap and causing distortion, so check leaves regularly. Spider mites thrive in dry, dusty conditions and create fine webs under leaves. Caterpillars can chew through foliage and flowers, leaving holes. Use insecticidal soap or neem oil sprays to control infestations early. For sustainable control, encourage beneficial insects like ladybugs and lacewings, which prey on these pests. Keeping plants healthy and avoiding over-fertilization reduces pest vulnerability.
Regular monitoring and early intervention prevent severe damage and maintain plant vigor. Handpicking larger pests like caterpillars can also be effective for small infestations.
Disease Management
Black Eyed Susans can suffer from fungal diseases such as powdery mildew, leaf spot, and root rot if conditions are unfavorable. Powdery mildew appears as white, powdery patches on leaves and stems, often in humid, crowded settings. Leaf spot causes dark lesions and can defoliate plants. Root rot results from poorly drained soils and overwatering, leading to wilting and yellowing. To prevent these, plant in well-drained soil and maintain good spacing to improve airflow. Avoid overhead watering to keep foliage dry. Remove any infected or dead plant material promptly and dispose of it to reduce pathogen spread. Fungicides can be used as a last resort but good cultural practices are most effective.
Maintaining garden hygiene and rotating planting sites also help minimize disease recurrence.
Environmental Stress
Black Eyed Susans are resilient but sensitive to extreme environmental conditions. Prolonged heat can cause wilting and reduced blooms, while drought stresses the plants, leading to poor growth. Conversely, excessive moisture from heavy rains or poor drainage may cause root damage and fungal infections. To support your plants, water deeply but infrequently, focusing on early morning or evening watering. Mulch helps retain moisture and regulate soil temperature. In regions with intense sun or heat waves, provide temporary shade with cloth or garden netting to protect tender foliage. Improving soil drainage with organic matter reduces waterlogging risks.
Monitoring weather conditions and adjusting care accordingly will help your Black Eyed Susans thrive despite environmental challenges.
Flowering Time and Extending Bloom Season
Black Eyed Susans typically bloom from early summer through fall, offering vibrant color for several months. The exact flowering time varies based on local climate and growing conditions. In warmer regions, blooms often start earlier and last longer, while cooler areas may experience a shorter season. Regular deadheading of spent flowers is crucial to extend the bloom period. Removing faded blooms encourages the plant to focus energy on producing new flower buds instead of seeds.
Providing adequate sunlight, consistent watering, and balanced fertilization supports healthy growth and continuous flowering. Light pruning in mid to late summer can stimulate a second wave of blooms, adding to the garden’s visual appeal. Applying mulch helps retain soil moisture and regulate temperature, which further enhances flowering. Using these care techniques together allows gardeners to enjoy a longer and more abundant blooming season with Black Eyed Susans.
Harvesting and Using Black Eyed Susan Flowers
When to Harvest for Bouquets
The best time to harvest Black Eyed Susan flowers is early in the morning when the blooms are fresh and fully open but not wilted. Cutting stems at a sharp angle helps the flowers absorb water more efficiently. Immediately placing the cut stems in clean water prolongs their freshness and vase life. These vibrant blooms add a cheerful touch to indoor arrangements and are excellent for brightening up any room. Regularly harvesting flowers also encourages the plant to produce more blooms.
Choosing the right stage for harvesting also prevents damaging the plant. Avoid cutting too many flowers at once to allow continuous blooming. Use clean, sharp tools to reduce stress on stems and avoid infection. Proper care after harvesting, like changing water regularly and trimming stems, helps flowers stay fresh longer in vases.
Preserving Flowers by Drying
Drying Black Eyed Susan flowers is a great way to enjoy their beauty long after the growing season. Gather small bunches and tie the stems loosely with natural string or rubber bands. Hang them upside down in a cool, dark, and well-ventilated space to maintain their color and shape. Avoid direct sunlight, which can cause fading. Once fully dried, the flowers become perfect for use in wreaths, home décor, or craft projects. Properly dried blooms can last for many months while preserving their delicate charm.
Before drying, remove any damaged or wilted petals to improve the final look. Check periodically during drying to ensure no mold develops. If flowers feel brittle and stems snap easily, they are ready to use. You can also spray dried flowers with a light hairspray to reduce petal loss and maintain their form for decorative use.
Propagation Beyond Seeds: Dividing and Transplanting
Dividing Established Plants
Dividing mature Black Eyed Susan clumps revitalizes plants and promotes healthy growth. This process helps prevent overcrowding and encourages more blooms. The best time to divide is early spring before new growth or in early fall. Carefully dig up the entire clump, trying to keep as much root intact as possible. Use a sharp knife or spade to separate the roots into smaller sections, each with several shoots. Replant divisions at the same depth as before, spacing them about 12 to 18 inches apart. Water thoroughly after planting to help roots settle and reduce transplant shock.
Regular division every 3 to 4 years keeps plants vigorous and productive. Divided plants also offer a cost-effective way to expand your garden or share with others. Avoid dividing during extreme heat or drought to minimize stress. Applying mulch after planting conserves moisture and protects roots. Monitoring new divisions closely for signs of stress ensures successful establishment and long-term growth.
Transplanting Seedlings and Young Plants
Transplanting seedlings and young Black Eyed Susans requires gentle handling to avoid root damage. Water seedlings well a day before transplanting to keep roots hydrated. When moving plants, loosen soil carefully around roots and avoid disturbing the root ball. Plant seedlings at the same depth as in their pots to prevent stem rot. After transplanting, water immediately to settle soil and reduce air pockets. Providing some shade for a few days helps reduce transplant shock, especially in hot weather.
Hardening off seedlings before transplanting is essential. Gradually expose young plants to outdoor conditions by increasing time outside over 7 to 10 days. This acclimation strengthens seedlings and improves survival rates. Avoid planting during very hot, dry, or windy days to minimize stress. Mulching around new transplants helps retain moisture and suppress weeds. Consistent watering during the first few weeks supports root development and vigorous growth.
Propagation Methods Beyond Seed Sowing
Propagation methods beyond seed sowing offer gardeners alternative ways to grow Black Eyed Susans. One common technique is division, which involves separating mature plants into smaller sections. This method rejuvenates older clumps and speeds up garden expansion. Division is best done in early spring or fall when the plant is dormant or less stressed. Each division should have healthy roots and shoots for successful establishment. Proper spacing and watering after division are crucial for recovery.
Another effective method is stem cuttings. Take healthy, semi-hardwood cuttings in late spring or early summer. Remove lower leaves and dip the cut end in rooting hormone to encourage root growth. Plant cuttings in a moist, well-draining medium and keep them in a shaded, humid environment until roots develop. This method produces genetically identical plants, preserving desirable traits like flower color and growth habit. Both division and cuttings provide reliable options for increasing Black Eyed Susan plants without relying solely on seeds.
Black Eyed Susan’s Role in the Garden Ecosystem
Attracting Pollinators
Black Eyed Susans are natural magnets for pollinators like bees and butterflies. Their bright yellow petals and dark centers make them easy to spot. These insects play a crucial role in fertilizing not only Black Eyed Susans but also nearby plants. This helps increase fruit and seed production in your garden. Providing continuous blooms ensures a steady food source for pollinators throughout the growing season. Planting Black Eyed Susans alongside other nectar-rich flowers further enhances pollinator activity and garden health.
By attracting pollinators, Black Eyed Susans help boost the overall productivity of your garden. Pollinators increase cross-pollination, leading to stronger, healthier plants. Their visits also support the reproduction of many flowering species nearby. Including Black Eyed Susans in your garden design can create a vibrant, lively space filled with beneficial insect activity.
Supporting Wildlife
Beyond pollinators, Black Eyed Susans contribute to local wildlife by offering food and habitat. Birds, especially finches, enjoy feeding on the seeds during fall and winter. Leaving seed heads standing provides vital nourishment when other food is scarce. Additionally, the dense foliage offers shelter for beneficial insects and small creatures. This makes Black Eyed Susans an important part of a wildlife-friendly garden. Supporting diverse wildlife promotes ecological balance and helps control pests naturally.
In addition to feeding birds, Black Eyed Susans provide habitat for various beneficial insects such as ladybugs and lacewings. These insects help control common garden pests naturally, reducing the need for chemical interventions. By supporting a diverse range of wildlife, Black Eyed Susans contribute to a balanced and thriving garden ecosystem.
Ecological Benefits of Black Eyed Susan in the Garden
Black Eyed Susans offer significant ecological benefits by enhancing biodiversity in garden spaces. Their bright blooms attract a wide range of pollinators, including bees, butterflies, and hoverflies. These insects play a crucial role in pollinating other plants, which helps maintain healthy plant populations and supports local food webs. Planting Black Eyed Susans encourages a balanced ecosystem where beneficial insects thrive naturally.
Additionally, Black Eyed Susans contribute to soil health and erosion control. Their robust root systems help stabilize soil, reducing runoff during heavy rains. This prevents soil erosion and promotes water retention, which benefits surrounding plants. The plant’s presence supports beneficial microorganisms in the soil, improving nutrient cycling and overall garden vitality. Incorporating Black Eyed Susans into your garden not only adds beauty but also promotes a sustainable, eco-friendly environment.
Common Mistakes in Growing and Caring for Black Eyed Susans
Overwatering and Poor Drainage
Black Eyed Susans prefer well-drained soil and can suffer if water accumulates around their roots. Excess moisture causes root rot, which weakens the plant and can lead to death. It is important to water only when the top inch of soil feels dry. Avoid watering too frequently or letting water pool in planting areas.
Ensuring good drainage is key to healthy growth. Adding organic matter like compost can improve soil structure and drainage. Planting in raised beds or sloped areas helps excess water drain away quickly. Proper soil moisture management prevents fungal diseases and supports strong root development.
Insufficient Sunlight
These plants need full sun, ideally at least six hours of direct light each day. Without enough sunlight, Black Eyed Susans become leggy and produce fewer flowers. Shade or partial sunlight leads to weak stems and sparse blooms, reducing the plant’s overall appeal.
Choosing a sunny location for planting is essential. If growing indoors or in containers, place them near bright windows or under grow lights. Sunlight fuels photosynthesis, which supports vibrant flower production and healthy foliage.
Overfertilizing
Applying too much fertilizer, especially high-nitrogen formulas, causes excessive leaf growth at the expense of flowers. Black Eyed Susans do well in moderately fertile soil and do not need heavy feeding. Overfertilizing can make the plant lush but less floriferous.
To maintain balance, use a balanced fertilizer with equal nitrogen, phosphorus, and potassium or a low-nitrogen mix. Apply fertilizer sparingly, following package directions. This promotes strong stems, healthy leaves, and abundant flower production.
Ignoring Pest and Disease Signs
Failing to monitor plants can allow pest infestations or diseases to spread unchecked. Aphids, spider mites, and fungal infections are common issues. Early detection and treatment help protect the plant’s health and flowering ability.
Inspect plants regularly, especially the undersides of leaves and stems. Use natural predators like ladybugs or insecticidal soaps to control pests. Remove affected foliage promptly to reduce disease spread. Proper care and vigilance ensure vibrant, healthy Black Eyed Susans.
FAQ: Growing and Caring for Black Eyed Susans
How long does it take for Black Eyed Susan seeds to germinate, and what conditions are best?
Black Eyed Susan seeds usually germinate within 7 to 30 days. They prefer consistent moisture and temperatures between 65°F and 75°F. Lightly cover seeds with soil, as they need some light for germination. Avoid overwatering to prevent damping-off disease.
What is the best soil type for planting Black Eyed Susans?
They thrive in well-drained, moderately fertile soil with a pH between 6.0 and 7.5. Sandy or loamy soils work best. Heavy clay soils should be amended with organic matter to improve drainage and prevent root rot.
How often should I water Black Eyed Susans during different growth stages?
Keep soil evenly moist during seedling and establishment phases, watering lightly but regularly. Once mature, they tolerate drought and only need deep watering once a week during dry spells. Avoid waterlogging to prevent fungal issues.
Can Black Eyed Susans be grown in containers, and what care do they need?
Yes, they grow well in containers with good drainage. Use a high-quality potting mix and place containers in full sun. Water consistently but avoid soggy soil. Fertilize monthly with a balanced, slow-release fertilizer for best results.
What common pests and diseases affect Black Eyed Susans, and how can I manage them?
Aphids, spider mites, powdery mildew, and root rot are common problems. Regularly inspect plants and remove affected parts. Use insecticidal soap or neem oil for pests. Ensure good air circulation and avoid overwatering to prevent diseases.
Conclusion: Growing Black Eyed Susans for a Vibrant Garden
Planting and caring for Black Eyed Susan seeds is a rewarding process that yields bright, cheerful blooms with relatively low maintenance. Understanding proper planting techniques, nurturing seedlings, and practicing good garden care ensures abundant flowers season after season. Their ability to attract pollinators and wildlife adds ecological benefits beyond beauty. With patience and attention to detail, gardeners can enjoy long-lasting displays of these iconic yellow flowers, enhancing garden vibrancy and natural charm.