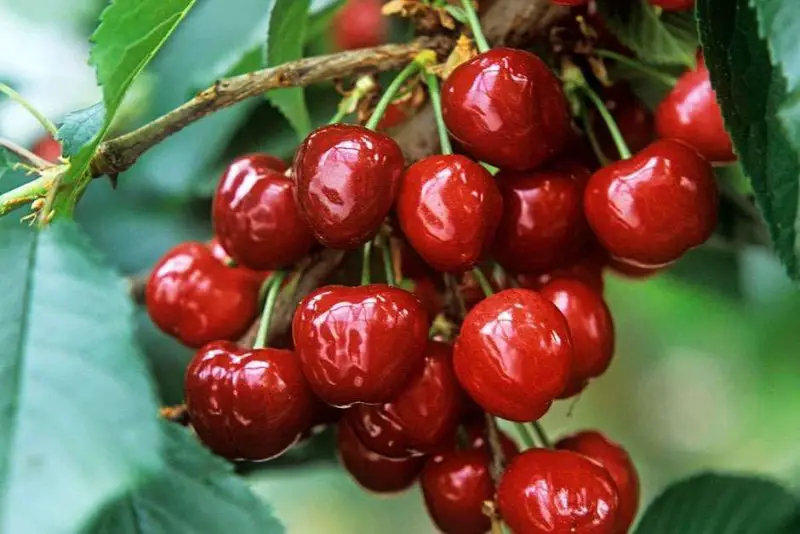
There’s something deeply rewarding about planting a cherry seed and nurturing it into a lush, fruit-bearing tree. Unlike buying a sapling from a nursery, growing a cherry tree from seed connects you with the full life cycle of the plant, from its earliest form to its flowering and fruiting glory. This process may take time and patience, but the end result—a thriving cherry tree grown with your own hands—is well worth the wait.
Whether you dream of harvesting juicy cherries or simply want to cultivate a beautiful ornamental tree, starting from seed can be both cost-effective and emotionally satisfying. With the right guidance, tools, and techniques, you can turn a simple cherry pit into a flourishing part of your landscape or garden.
Understanding Cherry Seed Germination
Why Fresh Seeds Matter
The quality and freshness of your cherry seeds play a critical role in whether or not they will germinate. Fresh pits from ripe cherries contain living embryos with the potential to grow into healthy trees, while old, dried, or heat-processed seeds may be non-viable. For the best results, select cherries that are organic and untreated, as conventionally grown fruits may be exposed to chemicals that reduce seed viability. Cherries that come straight from backyard trees or local orchards are ideal, since they are not only fresher but also better adapted to your regional climate, giving young seedlings a head start in adjusting to local conditions. Avoid using pits from canned, frozen, or cooked cherries, as the high temperatures involved in processing usually kill the seeds.
Sweet vs. Sour Cherry Seeds
Choosing between sweet and sour cherry varieties affects more than just fruit flavor—it directly influences the success and ease of your growing journey. Sweet cherries (Prunus avium) are typically grown in milder climates with longer growing seasons and require a more extended stratification period to break dormancy. They are also more susceptible to frost damage and may struggle in colder zones. On the other hand, sour cherries (Prunus cerasus) are naturally hardier, more tolerant of frost, and often easier for first-time growers to manage. They tend to germinate more readily, adapt better to a wider range of soils, and require less pruning in early years. If you’re planting in a region with cold winters, sour cherries are usually the more reliable choice. Understanding the differences helps you tailor your care routine, from seed preparation to eventual transplanting.
Dormancy and Stratification
Cherry seeds have an inbuilt biological mechanism that prevents them from sprouting immediately after harvest. This built-in dormancy is nature’s way of protecting the seed from germinating at the wrong time—such as late summer or fall—when young seedlings would not survive the coming winter. To successfully grow a cherry tree from seed, you must replicate the conditions the seed would naturally experience during winter. This process is called cold stratification.
To stratify cherry seeds at home, clean and dry the pits for a few days, then gently crack the outer shell to improve moisture absorption. Place the seeds in a moist medium like peat moss, vermiculite, or damp paper towels, and store them in a refrigerator at around 1°C to 5°C (34°F to 41°F) for about 10 to 12 weeks. This chilled period simulates the seed’s winter rest, encouraging internal chemical and hormonal changes that will lead to sprouting once the seed is returned to warmer, spring-like conditions. Skipping or rushing this step is one of the most common reasons cherry seeds fail to germinate, so patience and proper timing are essential.
Preparing the Seeds for Planting
Cleaning and Drying the Pits
After removing the pits from fresh cherries, rinse them thoroughly under running water to remove all fruit flesh, which can otherwise attract mold or bacteria. Use your fingers or a soft brush to scrub off any sticky residue. After cleaning, place the pits on a paper towel and let them air dry for 3 to 5 days in a cool, shaded location. Proper drying ensures the seed coat hardens slightly, reducing the risk of rot during cold stratification.
Cracking the Outer Shell
Cherry pits have a tough outer shell that naturally protects the embryo but can delay germination. To encourage quicker sprouting, use a nutcracker or light tap from a hammer to carefully crack the shell—just enough to expose the inner seed without crushing it. This technique, known as scarification, helps moisture penetrate faster during stratification. If you’re unsure, you can skip this step, but be prepared for a slightly longer germination timeline.
Cold Stratification Process
To mimic natural winter dormancy, cherry seeds need cold stratification. Place the cleaned (and optionally cracked) seeds in a zip-lock bag filled with a small amount of moist peat moss, coconut coir, vermiculite, or even damp paper towel. Ensure the medium is moist but not dripping wet to prevent fungal growth. Label the bag with the date and refrigerate it for 10 to 12 weeks at 34–40°F (1–4°C). Check weekly to maintain moisture and remove any seeds showing signs of rot or mold. After this period, seeds should be ready for planting in warm soil or containers.
Choosing the Right Time and Location to Plant
When to Plant Cherry Seeds Outdoors
Once the cold stratification period is complete, cherry seeds are ready to be sown directly into the garden. The ideal time is early spring, when soil temperatures begin to rise and the threat of hard frost has passed—typically after your local last frost date. Planting at this time allows seedlings to take full advantage of the warming weather and a long growing season, which supports stronger root development and healthier growth. If winters are mild in your region, you may also plant seeds in late fall, letting nature handle the stratification process over winter.
Indoor Planting Option
Starting cherry seeds indoors can give you a head start on the season and greater control over growing conditions. After cold stratification, sow seeds in small pots filled with a light, well-draining potting mix. Keep the containers in a warm, sunny area—ideally near a south-facing window—or use a grow light to provide at least 12 hours of light per day. Maintain even moisture but avoid overwatering. When seedlings grow a few inches tall and develop several true leaves, begin hardening them off before transplanting outdoors. This indoor method is especially helpful in colder regions with short growing seasons.
Finding the Ideal Spot in Your Garden
To give your cherry seedlings the best chance at success, choose a planting site with full sun exposure, meaning at least 6 to 8 hours of direct sunlight each day. Sunlight is essential for robust leaf and root growth. The soil should be loamy and well-draining, with a slightly acidic to neutral pH (around 6.0 to 7.0). Avoid areas prone to standing water or heavy clay soil, which can lead to poor root development and disease. A gentle slope or raised bed can improve drainage. Also, select a spot protected from harsh winds, which can damage young trees and stunt their early growth.
Planting Cherry Seeds in Soil
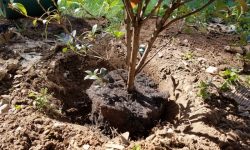
Once your cherry seeds have completed the cold stratification process and you’re ready to plant, preparing the soil and planting site properly is key to healthy seedling development. Start by loosening the soil to a depth of at least 8 to 10 inches to improve aeration and root penetration. If your native soil is heavy or clay-like, amend it with compost or well-rotted manure to increase drainage and organic matter.
Plant each seed about 1 to 2 inches deep, with the pointed end facing down. Space seeds at least 12 inches apart if you’re sowing directly outdoors, giving them enough room to grow without competition. Gently firm the soil over the seed and water thoroughly to help settle the soil around it. Moisture is essential at this stage, so keep the soil consistently damp—but never soggy—throughout the germination period.
If you’re planting in pots, choose containers with drainage holes and use a well-draining seed-starting mix. Cover the seed lightly and water until the soil feels evenly moist. Place the container in a warm, bright spot, and monitor regularly for the first signs of growth, which can take several weeks to a few months depending on the variety.
Adding a thin layer of organic mulch over the planting area can help conserve soil moisture and protect the seed from temperature fluctuations. As the seed begins to sprout, continue to monitor soil moisture and ensure the young seedlings receive plenty of light to encourage strong, upright growth.
Caring for Seedlings After Germination
Once your cherry seeds sprout, their needs shift from dormancy to active growth. The first few weeks are crucial for developing strong, healthy seedlings that can eventually grow into mature, fruit-bearing trees.
Start by ensuring consistent moisture. Cherry seedlings have shallow root systems at this stage, so the soil should stay evenly moist but never waterlogged. Overwatering can lead to damping-off disease, a common fungal issue that kills young plants. Water gently at the base and avoid getting the leaves wet to minimize the risk of infection.
Next, focus on light and temperature. If growing indoors, place seedlings in a sunny window where they receive at least 6 to 8 hours of light per day, or supplement with a grow light. Outdoors, be sure they’re in a location with full sun and sheltered from strong winds that could damage their tender stems.
As the seedlings grow, thin them if needed by snipping the weaker ones at the soil line, allowing the strongest plants to thrive with less competition for light, water, and nutrients.
When the seedlings reach a height of 4 to 6 inches and have developed several sets of true leaves, begin feeding them lightly with a balanced, diluted liquid fertilizer every few weeks. Avoid over-fertilizing, as young cherry plants are sensitive to excess nutrients.
Finally, protect your seedlings from pests such as aphids, slugs, or rabbits. Use natural deterrents, barriers, or insecticidal soap if necessary. At this stage, gentle care and consistent monitoring will go a long way in ensuring that your cherry trees grow strong enough to be transplanted into their permanent home later on.
Protecting Young Trees During Their First Year
Shielding From Pests and Wildlife
Young cherry trees are especially susceptible to damage from both large and small garden pests. Birds may peck at new growth, while rabbits and deer often nibble tender shoots and leaves, potentially stunting growth or even killing the young tree. To protect your seedlings, surround them with wire mesh or tree guards that extend several inches below and above the soil line. This not only deters ground-level critters but also discourages burrowing rodents.
For insect threats like aphids, scale insects, or caterpillars, inspect the foliage regularly, especially the undersides of leaves where pests often hide. Spray with insecticidal soap or neem oil at the first sign of infestation. Keeping the planting area clean and weed-free can also minimize hiding places for harmful bugs and reduce fungal issues.
In areas where larger wildlife is a concern, consider using motion-activated sprinklers or odor deterrents to keep them away. The goal is to create a secure zone around your cherry sapling until it’s mature enough to withstand occasional pest contact.
Weather Protection and Mulching
Sudden weather shifts can be hard on fragile young cherry trees, especially during their first growing season. In regions with late spring frosts, it’s wise to use floating row covers or cold frames when a cold snap is forecast. These simple barriers can make the difference between survival and frostburn.
Mulching is another critical component of first-year care. Apply a 2–3 inch layer of organic mulch—such as shredded bark, compost, or straw—around the base of the tree, keeping it a couple of inches away from the trunk to prevent rot. This mulch helps regulate soil temperature, suppresses weed growth, and retains essential moisture during hot or dry spells.
In windy or exposed areas, staking the young tree can provide additional support. Use soft ties and be sure the stake allows the tree to move slightly—this helps strengthen the trunk. Continue monitoring weather forecasts during the first year and act quickly to shield your tree when conditions turn extreme.
By maintaining a careful balance of protection, moisture, and attention, your young cherry tree will have the best possible start toward a fruitful future.
Training and Shaping for Future Fruit Production
Proper training in a cherry tree’s early years sets the foundation for strong structure and high fruit yield later on. Begin by selecting one central leader—the main upright stem—to serve as the tree’s backbone. From there, allow 3 to 5 evenly spaced lateral branches to form the primary scaffold. These branches should be well-distributed around the trunk to create a balanced canopy.
Remove any competing vertical shoots, low-growing branches, or inward-facing limbs that may crowd the center. This open-center structure improves airflow and light penetration, which are essential for healthy fruiting.
Training should begin when the tree is still small and flexible, usually during the first or second year. Light pruning once a year helps reinforce the desired shape and encourages the tree to direct its energy into productive wood rather than excessive leafy growth. With consistent shaping, your cherry tree will develop a strong framework capable of supporting abundant harvests for years to come.
Fertilizing and Feeding Your Tree as It Grows
As your cherry tree matures from seedling to sapling, providing the right nutrients is essential for vigorous growth and long-term health. In the first year, go easy on fertilizer—too much nitrogen can encourage excessive leafy growth at the expense of root development. If your soil is poor, consider adding a small amount of balanced, slow-release fertilizer (such as 10-10-10) in early spring once new growth appears.
From the second year onward, feed your tree annually in early spring before bud break. Use a balanced fertilizer or one slightly higher in nitrogen to support foliage and branch development, then switch to a low-nitrogen, high-phosphorus mix later in the season to promote flowering and fruit formation.
Always water thoroughly after applying fertilizer to help nutrients reach the roots and prevent root burn. For organic options, compost or well-rotted manure applied as a top dressing in early spring can provide a steady nutrient source without overwhelming young roots.
Monitoring the color of the leaves, the pace of growth, and overall tree vigor will guide your feeding routine. Over time, mature trees may only require light fertilization if grown in rich, healthy soil.
Patience and Time: When to Expect Fruit
Typical Timeline for Fruiting
Cherry trees started from seed are a long-term commitment. Most take 5 to 10 years before they begin to bear fruit, depending on the species—sweet cherries (Prunus avium) often take longer than sour cherries (Prunus cerasus). In ideal conditions with excellent care, flowering may begin as early as year 4 or 5, but consistent fruiting typically won’t happen until several seasons later. Be prepared for a long wait, and think of each year as an investment in the future of your tree.
Factors That Influence Fruit Production
Several environmental and cultural elements play a role in whether and when your tree fruits. Sunlight is crucial—cherry trees need full sun for at least 6 to 8 hours daily. Pruning in early spring to shape the canopy and encourage air circulation can stimulate stronger flowering. Pollination is another key factor: many cherry varieties are not self-fertile and require a compatible cherry tree nearby for cross-pollination. Watering, fertilization, soil quality, and pest control also directly affect the tree’s ability to put energy into fruit production rather than just survival or foliage.
If your cherry tree is healthy but not producing, look into whether it’s getting enough sunlight, if it has a pollination partner, or if your pruning strategy might need adjusting. A stressed or overcrowded tree often delays or aborts fruiting.
Grafting for Predictable Results
If waiting up to ten years feels too long, grafting offers a quicker solution. It also ensures your seed-grown tree produces a specific cherry variety. By attaching a scion from a mature tree to your seedling rootstock, you can shorten the wait for fruit. This method is common in commercial orchards for its reliability.
Grafted trees can often begin flowering and fruiting in just 2 to 4 years, depending on care and conditions. Additionally, using your hardy seed-grown tree as rootstock can result in a plant more resilient to local soil and climate challenges. If you’re comfortable with the process or can work with a local nursery, grafting bridges the gap between nature’s pace and your gardening goals.
Troubleshooting Common Problems
Poor Germination Rates
Low germination rates can be frustrating after weeks or months of waiting. One common cause is incomplete or improper stratification—cherry seeds need a chilling period of 8 to 12 weeks at temperatures between 33–41°F (0.5–5°C) to break dormancy. If this step is skipped or cut short, the embryo inside the seed may remain inactive.
Another issue could be old or non-viable seeds. Cherry pits collected from store-bought fruit are often from hybrid varieties that may not germinate well or at all. For better results, collect fresh pits from locally grown, healthy, and fully ripe cherries, or source seeds from a reputable nursery.
Additionally, overwatering during germination can cause seeds to rot before they sprout. Ensure your medium is moist but not soggy, and use a well-draining mix.
Yellowing Leaves or Stunted Growth
If your young seedlings develop yellowing leaves, slow growth, or weak stems, the problem may lie in nutrient availability or soil health. Nitrogen deficiency is a common cause of pale foliage, and phosphorus or potassium shortages can also slow development. Use a balanced, diluted fertilizer designed for young trees or seedling stages.
Another frequent issue is poor drainage. Cherry seedlings dislike waterlogged conditions, which can suffocate roots and cause rot. Make sure containers or seed beds have proper drainage holes, and consider mixing in sand or perlite to lighten dense soils.
Finally, compacted roots in undersized pots may stunt growth. If roots begin to circle or outgrow the container, transplant your seedling into a larger pot with fresh soil to promote healthy development.
Pests and Disease Management
Even young cherry trees can fall victim to fungal diseases and insect pests. One common fungal issue is cherry leaf spot, which causes small purple or red spots that lead to early leaf drop. Another is powdery mildew, which shows up as a white film on leaves and stems, especially in humid conditions. Combat both with regular leaf cleanup, good air circulation, and applications of organic fungicides such as sulfur or neem oil if needed.
Insects like borers, aphids, and caterpillars may also target young trees. Aphids suck sap from tender leaves, causing curling and yellowing. Borers, if left unchecked, can cause serious structural damage. Use insecticidal soap, horticultural oil, or row covers to deter pests, and check regularly for signs of infestation.
Space seedlings properly to improve airflow and reduce disease risk. Water at the base to keep foliage dry and prevent fungal issues. Avoid overhead watering, especially in humid conditions. Rotate pots or garden spots each season to break pest cycles. Remove leaf litter and debris that may hide pests or diseases over winter.
Growing Cherries in Containers
Growing cherry trees in containers is a practical solution for gardeners with limited space, urban balconies, or patios. It allows you to control soil conditions more precisely and even extend the growing season by moving the tree indoors or into shelter when needed. However, success with container-grown cherries depends on choosing the right variety, container size, soil, and care.
Choosing the Right Variety
Dwarf or semi-dwarf cherry cultivars are best suited for container growing, as their smaller root systems are more manageable and less demanding in confined spaces. Varieties like ‘Stella’, ‘Compact Stella’, ‘North Star’, or ‘Carmine Jewel’ are popular choices due to their compact growth and self-pollinating nature.
Container and Soil Requirements
Select a container that is at least 15 to 20 gallons in volume with good drainage holes. As the tree matures, it may need to be upgraded to a 25-gallon or larger container. Use a high-quality potting mix rich in organic matter, and avoid garden soil, which can compact and reduce drainage.
For best results, mix in some coarse sand or perlite to improve aeration and drainage. Place the container on bricks or a wheeled stand to improve air circulation and mobility.
Watering and Fertilizing in Containers
Container-grown cherry trees dry out more quickly than those planted in the ground. Regular watering is essential, especially during the growing season, but avoid waterlogging. Check the top inch of soil—if it’s dry, it’s time to water.
Use a balanced slow-release fertilizer or a diluted liquid fertilizer every 2 to 4 weeks during spring and early summer. Avoid high-nitrogen fertilizers, which encourage excessive leafy growth at the expense of flowers and fruit.
Pruning and Maintenance
Prune container-grown cherries annually to maintain a compact shape, improve airflow, and encourage fruiting. Focus on removing crossing branches and any vertical shoots that crowd the center of the tree.
Inspect regularly for signs of root circling or compaction. Every 2 to 3 years, you may need to root prune or repot the tree to refresh the soil and maintain healthy root growth.
Sunlight and Pollination
Place the container in a sunny location with at least 6–8 hours of direct sunlight daily. While some varieties are self-pollinating, others may still benefit from cross-pollination. If growing multiple cherry trees, place them close together to enhance fruit production.
Winter Protection
Cherry trees in containers are more vulnerable to cold temperatures because their roots are less insulated. In colder climates, move the container to a sheltered location such as a garage, greenhouse, or unheated porch during winter dormancy. Wrapping the pot in burlap or bubble wrap can help insulate the roots.
With proper care and the right variety, container-grown cherry trees can thrive and even produce fruit—making them a delightful and rewarding option for gardeners with limited ground space.
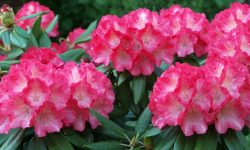
Encouraging Blossoms and Fruit in Later Years
As cherry trees mature, they need proper care to bloom and fruit well each year. Prune in late winter or early spring to remove dead, crowded, or crossing branches. This allows more sunlight and air into the canopy. Keep fruiting spurs intact, as they produce blossoms and fruit. Your tree needs 6 to 8 hours of direct sunlight daily. Without enough light, flowers may not form. In early spring, use a balanced fertilizer such as 10-10-10. As buds form, switch to one higher in potassium and lower in nitrogen. This supports fruit without too much leafy growth. If your tree is not self-pollinating, plant a compatible variety nearby or graft a pollinator branch. Water regularly and mulch to hold moisture and control weeds. Watch for pests and diseases that can harm the tree. With patience and care, your cherry tree will bloom and bear sweet fruit.
Celebrating the First Blossoms and Beyond
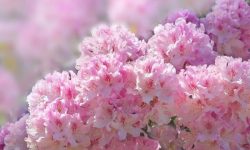
Seeing the first blossoms on your cherry tree is a moment of joy and deep satisfaction, especially after years of nurturing it from a seed. These delicate flowers mark the beginning of a new chapter — the transition from growth to potential fruiting. Take time to observe and photograph the blooms, as they not only symbolize success but also help you track the tree’s development over the years.
As your tree continues to mature, continue your care with patience and consistency. Monitor how the flowers develop into fruit, and take notes on flowering time, blossom density, and weather conditions. This will help you fine-tune your care strategies in the future. Even if the first blooms don’t result in fruit, they are a sign that your tree is entering its reproductive phase.
This stage is a wonderful opportunity to share your gardening journey with others. You can exchange tips with fellow gardeners or simply enjoy the blossoms with friends and family. Each new season brings stronger growth and better chances of a fruitful harvest. The long process from seed to bloom reflects your dedication and effort. Every blossom is a reward that celebrates your care and bond with nature.
Frequently Asked Questions About Planning Chery Seeds
How long does it take for a cherry tree grown from seed to bear fruit?
Cherry trees grown from seed typically take 7 to 10 years to begin bearing fruit. This long timeframe is due to the juvenile period of cherry trees, during which they grow roots, branches, and a strong structure before producing blossoms. Factors like variety, climate, soil quality, and care practices (such as pruning and fertilizing) can affect how soon your tree fruits. Grafting a scion from a mature tree can significantly shorten this period.
Can I grow a cherry tree from store-bought cherries?
Yes, you can grow a cherry tree from the pits of store-bought cherries, but there are a few important considerations. Most store-bought cherries are hybrids, so the seed may not produce a tree identical to the parent. Also, the seeds must be cleaned, dried, and stratified in the fridge for 10 to 12 weeks before planting. With patience and proper care, many of these seeds can germinate and grow into healthy trees, although fruiting characteristics may vary.
Why are my cherry seeds not germinating?
Poor germination can be caused by several factors. The most common reasons are inadequate chilling time, excess moisture, or old or non-viable seeds. Ensure your seeds have undergone proper cold stratification (10–12 weeks in moist, cool conditions around 34–40°F or 1–4°C). Avoid letting the medium get soggy, which can cause mold. Always use fresh, disease-free seeds and consider testing viability in water—floating seeds are usually less viable.
Can I grow cherry trees in pots or containers?
Yes, cherry trees can grow in containers, especially dwarf or semi-dwarf varieties. Choose a pot that is at least 18–24 inches wide and deep, with excellent drainage. Use a rich, well-draining potting mix, and ensure the tree gets at least 6 to 8 hours of sunlight daily. Regular watering and annual pruning are essential to manage size and promote fruiting. Repotting every few years helps prevent root binding and nutrient depletion.
Do cherry trees grown from seed need a second tree to produce fruit?
That depends on the variety. Many sweet cherry trees are not self-pollinating and require another compatible variety nearby to produce fruit. Sour cherries, like Montmorency, are usually self-fertile and can produce fruit on their own. If your seed-grown tree is of unknown variety, it’s safest to plant a second cherry tree within 50–100 feet to encourage cross-pollination. Alternatively, grafting a pollinator branch onto your tree can help ensure reliable fruiting.
Conclusion: Growing a Legacy From a Single Seed
Growing a cherry tree from seed is more than just a gardening project—it’s an act of hope, patience, and deep-rooted joy. Each stage, from preparing the pit to seeing your tree bloom, brings its own rewards. While it may take years to bear fruit, the journey is as fulfilling as the harvest itself.
With the right knowledge and care, anyone can turn a humble cherry seed into a flourishing tree that offers shade, beauty, and perhaps one day, a bounty of delicious cherries. Start today, and watch your small beginning grow into something extraordinary.