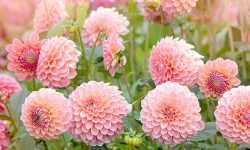
Anthuriums, with their glossy leaves and long-lasting, heart-shaped blooms, are a favorite among indoor plant enthusiasts. Propagating these tropical beauties not only allows you to expand your collection but also ensures your existing plants remain vibrant and vigorous over time. Whether you’re a beginner or an experienced gardener, learning how to propagate anthurium can be a rewarding way to multiply your plants and share them with others.
In this guide, you’ll discover proven methods to propagate anthurium successfully, from division and stem cuttings to root care and aftercare tips. With the right approach and a bit of patience, you can grow healthy new plants that thrive for years to come. Let’s explore how to do it right from the start.
Understanding Anthurium and Its Growth Habits
Anthuriums are native to the tropical rainforests of Central and South America, where they thrive in warm, humid conditions with filtered light and rich, well-draining soil. These plants are part of the Araceae family and grow as epiphytes or terrestrials, meaning they can grow on other plants or in the ground, depending on the species and environment.
Their growth habit is characterized by a central stem, or crown, from which thick, leathery leaves and aerial roots emerge. New growth typically appears at the base of the plant or along the nodes of existing stems. As the plant matures, it can become leggy, with older leaves dying off while new shoots develop from the crown or sides.
Understanding this pattern is essential for successful propagation. Because anthuriums grow from a central point and develop offsets or side shoots, they’re ideal candidates for division and stem cuttings. Knowing how and where the plant puts out new growth helps you choose the right parts to propagate while keeping the parent plant healthy and strong.
Why Propagate Anthurium?
Different Methods to Propagate Anthurium
There are three main ways to propagate anthurium: division, stem cuttings, and seed propagation. Each method varies in difficulty and time to maturity.
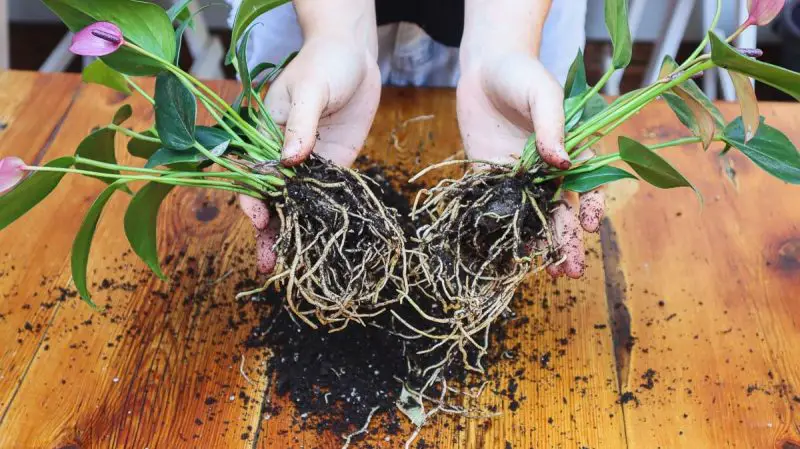
Propagation by Division
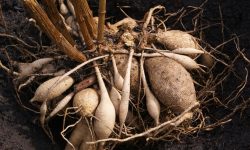
Division is one of the easiest and fastest ways to propagate anthurium. It involves separating a mature plant into smaller sections, each with its own roots and stems.
To divide an anthurium, carefully remove it from its pot and gently tease apart the root ball. Use clean, sharp tools to separate the clumps, ensuring each division has at least one healthy stem and root system. Replant the divisions into fresh, well-draining soil.
Division works best during the growing season in spring or early summer when the plant is actively producing new growth.
Propagation by Stem Cuttings
Stem cutting propagation involves taking a cutting from a healthy stem and encouraging it to root independently.
Select a healthy stem with several nodes and cut a section about 4 to 6 inches long. Remove the lower leaves to expose the nodes, which will form roots. Place the cutting in a moist growing medium such as sphagnum moss or perlite and maintain high humidity to promote rooting.
Using rooting hormone on the cut end can improve success rates. Once roots develop, transplant the cutting into potting mix suitable for anthuriums.
This method requires patience, as rooting can take several weeks to months.
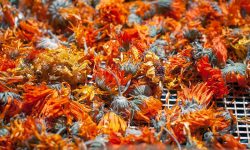
Propagation by Seeds
Seed propagation is less common for anthuriums because it takes much longer for plants to mature and flower.
Seeds must be fresh and sown in a sterile, moist medium. Germination requires warm, humid conditions and can take several weeks. Growing anthuriums from seed allows for genetic variation, which is useful for breeding new varieties.
Seed propagation is usually pursued by growers interested in experimenting with plant genetics rather than casual gardeners.
Preparing for Propagation: Essential Tools and Materials
Before starting anthurium propagation, having the right tools and materials ready will ensure a smooth, successful process. Clean, sharp scissors or pruning shears are essential for making precise cuts without damaging the plant tissue. Sterilizing your tools with rubbing alcohol or boiling water helps prevent the spread of disease or infection.
You’ll also need a well-draining potting mix—ideally one that mimics the anthurium’s native tropical environment. A blend of orchid bark, perlite, and peat moss or coconut coir provides the ideal airy structure. Small pots or containers with drainage holes are important for housing your cuttings or divisions. If you’re propagating via cuttings, a transparent plastic bag or humidity dome can help retain moisture and promote root development in the early stages.
Optional but helpful items include rooting hormone to stimulate faster root growth and disposable gloves to keep your hands clean, especially when handling sap. Preparing these materials ahead of time makes propagation more efficient and increases the chances of growing healthy new plants.
Best Time to Propagate Anthurium
Guide to Propagate Anthurium by Stem Cuttings
Propagating anthurium by stem cuttings is a reliable method that allows gardeners to create new plants from healthy mature stems, especially when division is not practical. This technique is ideal for rejuvenating leggy plants or increasing your collection without disturbing the root system.
To begin, choose a healthy stem with at least one node—the swollen area on the stem where roots and leaves emerge. Ideally, the stem should also have an aerial root or two, as this will accelerate rooting. Use a sterile, sharp knife or pruning shears to make a clean cut just below a node. If the cutting has leaves, you can leave one or two attached, but remove any large or damaged ones to reduce water loss during rooting.
After cutting, allow the stem to air dry for a couple of hours. This helps prevent rot by forming a callus over the cut end. Next, plant the stem cutting in a small pot filled with a moist, airy propagation mix—such as sphagnum moss, perlite, or a light blend of peat and orchid bark. Gently press the stem into the medium, ensuring that at least one node is buried.
To encourage root development, place the pot in a warm, humid environment with bright but indirect light. A humidity dome or plastic bag loosely covering the pot can help maintain consistent moisture. Mist regularly, and avoid letting the medium dry out completely. In about 4–6 weeks, new roots should form. Once you see active new growth, you can transfer the rooted cutting into a standard anthurium potting mix and care for it as you would a mature plant.
Caring for Newly Propagated Anthuriums
Once your anthurium cuttings or divisions are rooted, gentle care is key to their continued success. Place the young plants in a warm spot with bright, indirect light—direct sun can scorch their tender leaves. Keep the soil lightly moist but never soggy, and ensure the pot has good drainage to prevent root rot.
Humidity is especially important during this stage. Aim for 60–80% humidity to mimic their tropical environment. A small humidifier or grouping plants together can help. Avoid fertilizing heavily right away; instead, wait about four to six weeks and then start with a diluted, balanced fertilizer every four to six weeks.
As the plants grow stronger, gradually introduce them to their regular care routine. With consistent moisture, warmth, and patience, your new anthuriums will thrive and begin producing lush foliage—and eventually, vibrant flowers.
Common Challenges in Anthurium Propagation and How to Overcome Them
Propagating anthuriums can be highly rewarding, but several common issues may arise during the process. Understanding these challenges and how to handle them can greatly improve your success rate.
One of the most frequent problems is root rot, typically caused by overly wet soil or poor drainage. To prevent this, always use a well-aerated potting mix, such as one containing orchid bark, perlite, and peat. Make sure containers have adequate drainage holes, and avoid watering until the top inch of soil feels dry.
Another issue is slow or no root development. This often happens when cuttings are taken from unhealthy parent plants or placed in conditions that are too cold or dry. Ensure cuttings are taken from vigorous, disease-free stems, and keep humidity high—ideally above 60%. Bottom heat or a seedling heat mat can also stimulate faster root growth in cooler environments.
Yellowing leaves or wilting after propagation can be a sign of transplant shock. Minimize this by handling roots gently, keeping humidity high, and avoiding direct sunlight until the new plants are well established.
Finally, fungal infections can occasionally affect newly propagated plants, especially if airflow is poor or humidity is excessive without ventilation. Always sterilize your tools before cutting, and consider using a natural fungicide or cinnamon powder on cut surfaces to reduce the risk of infection.
By addressing these common pitfalls early, you’ll help your young anthuriums adapt more easily and grow into healthy, vibrant plants.
Enhancing Propagation Success with Environmental Controls
Creating the right environment is key to helping your newly propagated anthuriums thrive. These tropical plants are sensitive to changes in temperature, humidity, and light, so simulating their natural conditions can greatly increase your success rate.
Start by maintaining a warm environment, ideally between 70–85°F (21–29°C), as consistent warmth encourages strong root development. Avoid exposing cuttings or divisions to sudden temperature drops, which can stunt growth or cause rot. High humidity is equally important—aim for 60–80% relative humidity by using a humidifier, covering the plant with a humidity dome, or placing a tray of water nearby to create a moist microclimate.
Lighting should be bright but indirect. Too much sun can scorch tender leaves, while too little light may slow growth and delay rooting. Place your propagated anthuriums near a bright window with filtered light or under grow lights for optimal results.
Good airflow is also essential. Gentle circulation reduces the risk of mold, mildew, and fungal infections while still preserving moisture. A small fan set on low nearby can improve air quality without drying out the plants.
By carefully managing these environmental factors—temperature, humidity, light, and air circulation—you’ll create the perfect conditions for your anthuriums to root quickly and grow into strong, healthy plants.
How Long Does It Take for Anthurium Cuttings to Root?
Anthurium cuttings typically take between 4 to 6 weeks to develop roots under ideal conditions. However, several factors can influence this timeline, including temperature, humidity, and the overall health of the cutting.
In a warm, humid environment with bright, indirect light, you may begin to see small roots forming within the first three weeks. By week six, well-developed roots usually emerge, making the cutting ready for transplanting into soil or a permanent potting mix.
If temperatures are cooler or humidity is too low, rooting may be delayed by a week or more. Using rooting hormone can help speed up the process, and ensuring the cutting includes at least one healthy node will also increase the chances of success.
Patience is key during this stage. Keep the growing medium consistently moist but not soggy, and avoid disturbing the cutting until roots are fully formed. Once the roots are at least a few inches long and the plant shows signs of new leaf growth, it’s a clear signal that the cutting has successfully taken root.
Signs That Your New Anthurium Plants Are Thriving
Healthy, thriving anthurium plants show clear and consistent signs of growth once they’ve successfully rooted. One of the earliest indicators is the emergence of new leaves. These fresh leaves are often smaller and lighter in color at first but will deepen to a rich green as they mature. The appearance of new foliage every few weeks is a strong sign that your plant is settling in well.
Another key sign is vigorous root development. If roots begin to grow out of drainage holes or visibly expand in the pot, it means your anthurium is actively growing. While you shouldn’t disturb the plant unnecessarily, gentle lifting of the root ball can confirm healthy white roots if needed.
Upright, firm stems and perky leaves also point to good health. Drooping or curling leaves can be signs of stress, while a sturdy, upright posture indicates strong internal hydration and cell structure.
Over time, the development of new flower spikes or bright red or pink spathes (the colorful, petal-like parts) signals that the plant is not only thriving but also mature enough to bloom again. With proper light, humidity, and regular care, these signs together confirm your propagation efforts have paid off.
When and How to Transplant Propagated Anthuriums
You should transplant propagated anthuriums once they’ve developed strong roots and at least one or two new leaves. This usually happens about 6 to 8 weeks after propagation, depending on environmental conditions. Transplanting too early can damage fragile roots, so it’s best to wait until the plant shows clear signs of active growth.
To transplant, choose a pot that’s slightly larger than the root system and has good drainage. Use a well-aerated potting mix, such as one made from orchid bark, perlite, and coco coir or peat moss. Gently remove the plant from its propagation medium, taking care not to disturb the roots more than necessary.
Place the plant in the new pot, fill around it with fresh mix, and water thoroughly to help settle the roots. Keep the newly transplanted anthurium in a warm, humid spot with indirect light for the first couple of weeks. Once established, you can gradually return to your normal care routine.
Propagation Tips for Different Anthurium Varieties
While the basic propagation methods—such as division and stem cuttings—apply to most anthurium species, each variety may have specific needs that influence success rates and growth patterns.
For Anthurium andraeanum (Flamingo Flower), division is often the most reliable approach. This variety typically produces offshoots or basal pups near the base of the plant, making it easy to separate and replant them. These offshoots usually come with their own roots, which reduces transplant shock.
Anthurium clarinervium and other foliage types prefer to be propagated through stem cuttings with aerial roots. Their slower growth means patience is essential, and maintaining high humidity is especially important to prevent dehydration during rooting. Use a clear container or humidity dome to retain moisture and improve success rates.
With Anthurium veitchii and other “strap-leaf” varieties, propagation by division is less common due to their upright, singular growth habit. Instead, wait for side shoots to develop or propagate through careful stem sections that include aerial roots. These varieties may take longer to establish but reward growers with dramatic foliage once mature.
Always tailor your care techniques to the specific growth habit and requirements of each anthurium type. Providing the right light levels, humidity, and propagation timing ensures that both flowering and foliage-focused varieties root more successfully and thrive in the long term.
Propagating Anthurium Outdoors vs. Indoors
Anthurium can be propagated both indoors and outdoors, but each setting has pros and cons depending on your climate.
Indoor propagation offers better control over temperature, humidity, and light—key factors for successful rooting. It’s ideal for cooler or dry climates and helps protect young plants from pests and weather extremes. Tools like heat mats and humidity domes can further improve success rates.
Outdoor propagation works well in warm, tropical zones (USDA 10–11) where natural humidity supports healthy growth. However, outdoor plants are more vulnerable to sunburn, heavy rain, and pests. Providing shade or shelter helps minimize risks.
For most gardeners, indoor propagation ensures more consistent results, while outdoor methods can work if conditions stay warm, humid, and stable.
Troubleshooting Propagation Failures
When anthurium propagation fails, the cause is often environmental stress or improper technique. If cuttings rot before rooting, overwatering or poor drainage is likely to blame. Always use a well-aerated mix and allow the medium to dry slightly between waterings.
Lack of root development can stem from low humidity, cold temperatures, or insufficient light. Ensure the cuttings are kept in bright, indirect light, with consistent warmth around 70–80°F (21–27°C), and maintain high humidity.
If leaves yellow or wilt, check for fungal issues or damage during cutting. Sterilize tools, trim only healthy growth, and use rooting hormone to reduce infection risk. Making small adjustments can dramatically improve your propagation success.
Long-Term Care for Propagated Anthurium Plants
Conclusion
Propagating anthurium is a gratifying way to expand your collection and enjoy these beautiful tropical plants longer. Whether through division, stem cuttings, or seed propagation, success depends on understanding the plant’s growth habits, preparing the right environment, and providing attentive care.
With patience and the right techniques, you can grow healthy, vibrant anthuriums that will brighten your home and garden for years to come.