Clematis is one of the most breathtaking flowering vines in any garden. With blooms ranging from dainty bells to large, star-shaped flowers in vivid colors, it’s easy to see why so many gardeners fall in love with clematis. But instead of buying new plants each season, what if you could expand your clematis collection for free? Propagating clematis not only saves money but also offers the satisfaction of growing thriving plants from your own garden.
Whether you’re a seasoned gardener or just starting your green-thumb journey, learning how to propagate clematis opens up exciting possibilities. From increasing flower coverage to filling bare fences and trellises, propagation helps create a lush, vibrant landscape that’s uniquely your own. With the right techniques and timing, you can enjoy an abundance of blooms without needing to purchase more plants.
Understanding Clematis Propagation
What Propagation Means and Why It Matters
Propagation is the process of creating new plants from an existing one. For clematis, this can be done through several methods, including cuttings, layering, division, and seeds. Each technique offers its own advantages, depending on the plant variety, your garden goals, and the time of year.
By propagating clematis, you ensure a consistent supply of healthy plants that carry the same color, bloom type, and growth habit as the parent vine. This is particularly helpful for preserving hybrid varieties, which may not come true from seed. Propagation also allows you to share your favorite clematis with friends and family or spread it throughout your yard for a bigger visual impact.
When Is the Best Time to Propagate Clematis?
The best time to propagate clematis depends on the method you choose. Softwood cuttings are typically taken in late spring to early summer, when new shoots are pliable but mature enough to root. Semi-hardwood cuttings work well in late summer. Layering can be done in spring or early fall, while division is best in early spring or late fall when the plant is dormant. Understanding the seasonal timing of each method greatly improves your success rate and plant health.
Choosing the Right Propagation Method
Propagating Clematis from Cuttings
Cuttings are one of the most common and effective ways to propagate clematis. This method involves snipping a healthy shoot from the parent plant and encouraging it to form roots in a growing medium. You can choose between softwood or semi-hardwood cuttings depending on the time of year and the type of clematis.
Softwood cuttings are ideal in spring when the new growth is fresh but not too tender. These cuttings root quickly and grow vigorously when cared for properly. Semi-hardwood cuttings are taken later in the season and require slightly more time to root, but they also offer strong results when managed well.
Propagating Clematis by Layering
Layering involves bending a low-growing vine down to the ground, covering part of it with soil, and allowing it to root while still attached to the parent plant. This method mimics natural propagation and requires very little equipment. It’s ideal for gardeners who want a low-risk, hands-off approach. Once rooted, the new vine can be separated from the main plant and relocated.
Spring and fall are great times to try layering since the soil is moist and temperatures are mild. Be patient, as this method takes several weeks or even months for strong roots to form, but the resulting plant is often well-established and transplant-ready.
Propagating Clematis by Division
Dividing a clematis involves digging up the entire plant and separating it into two or more sections, each with roots and growing points. This method is suitable for older, well-established clematis with multiple crowns. Division is best done when the plant is dormant, either in early spring or after the first frost in fall.
While division can be physically demanding, it’s a fast way to multiply clematis plants and refresh aging specimens. Be sure to water the divisions thoroughly after transplanting to reduce shock and promote quick recovery.
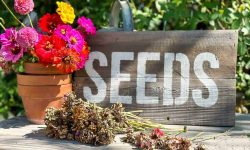
Growing Clematis from Seeds
Growing clematis from seed is possible, but it requires more time and patience than other methods. Many clematis varieties are hybrids, and seeds may not produce plants identical to the parent. Germination can also be slow and unpredictable, sometimes taking several months or even over a year.
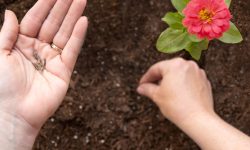
If you’re experimenting or enjoy a surprise, seed propagation can be a rewarding challenge. Collect mature seeds from the plant after flowering and store them in a cool, dry place. Sow them in well-draining soil and keep them moist until germination occurs.
Step-by-Step Guide to Propagating Clematis from Cuttings
Propagating clematis from cuttings is one of the most effective and reliable methods for producing healthy new plants that mirror the parent variety. While it may seem technical at first, the process becomes straightforward once you understand each step. The key is to work carefully, use clean tools, and maintain optimal conditions for rooting. Below is a detailed step-by-step guide to help you succeed.
Selecting the Ideal Parent Plant
Start with a strong, disease-free clematis that has shown vigorous growth and consistent blooming. The best cuttings come from healthy, non-flowering shoots that are firm but not woody. Avoid taking cuttings from stressed plants or those recently pruned. If possible, select shoots that are actively growing with plump leaf nodes and no signs of pest damage.
Early morning is the ideal time to take cuttings because the plant is fully hydrated and less prone to wilting. Make sure the foliage is dry to minimize the risk of fungal infection during the rooting stage.
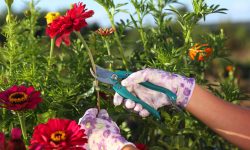
Taking and Preparing the Cuttings
Using sterilized pruners or a sharp knife, snip a stem about 4 to 6 inches long. The cutting should have at least two pairs of leaf nodes. Make the lower cut just below a node, which is where roots are most likely to emerge. Remove the leaves from the lower node, leaving the top pair intact. If the remaining leaves are large, you can cut them in half to reduce water loss through transpiration.
Optional but recommended, dip the cut end into rooting hormone powder or gel. This helps stimulate root development and increases the success rate, especially with clematis, which can be slow to root.
Choosing the Right Growing Medium
Clematis cuttings need a light, well-draining, and sterile rooting medium. A 50/50 mix of perlite and peat moss works well, or you can use coarse sand mixed with a small amount of compost. Avoid dense or heavy soil, as it can suffocate young roots or encourage rot. Fill small pots or seed trays with the moist medium, pressing gently to firm it before planting the cuttings.
Planting the Cuttings
Insert the cutting about one-third of its length into the rooting mix, making sure the exposed node is fully buried. You can place multiple cuttings in the same tray if spacing allows, but avoid crowding. Label each cutting with the variety name and date to track progress.
To maintain humidity, cover the container with a clear plastic bag or a propagator lid. This creates a mini greenhouse effect and reduces moisture loss. Be sure to keep the plastic from touching the leaves by using sticks or wire supports.
Providing the Right Environment
Place the cuttings in a warm, bright location out of direct sunlight. Indirect light or filtered sun is best. Temperatures around 65–75°F (18–24°C) are ideal for rooting clematis. Check the medium daily to ensure it remains slightly moist but not soggy. Mist occasionally if the humidity drops.
Air circulation is important to prevent fungal diseases, so open the plastic cover for a few minutes each day
How to Care for Newly Propagated Clematis
Once your clematis cuttings have rooted and begun to grow, gentle care is essential to ensure strong development. Start by keeping them in a bright but sheltered spot, avoiding direct harsh sunlight that may scorch tender growth. Water consistently to maintain lightly moist soil, but be careful not to overwater, as young roots are still delicate and prone to rot.
As the plant establishes, gradually introduce it to outdoor conditions through a process of hardening off. This usually takes about a week or two, depending on weather. When transplanting, choose a spot with rich, well-drained soil and provide sturdy support. Continue to water regularly during the first growing season and avoid fertilizing until the plant shows new, vigorous growth. With proper early care, your propagated clematis will soon reward you with lush vines and beautiful blooms.
Troubleshooting Propagation Challenges
Even with careful technique, propagating clematis can sometimes present a few common challenges. One of the most frequent issues is wilting or blackened cuttings, often caused by fungal infections or excessive humidity. To prevent this, always use sterilized tools, ensure good airflow, and avoid overwatering. If rot appears, remove affected cuttings immediately to protect the healthy ones.
Another problem is slow or no root development. This may stem from cuttings taken at the wrong stage of growth, poor soil conditions, or lack of warmth. Clematis cuttings root best when taken from semi-ripe wood during late spring or early summer and kept at a steady temperature between 65–75°F (18–24°C). Using a rooting hormone can also improve success rates.
If leaves yellow or fall off, it may signal too much light or a nutrient imbalance. Adjust placement and check the soil quality if needed. With patience, close observation, and a few simple corrections, you can overcome these setbacks and achieve strong, healthy clematis plants.
Encouraging Strong Growth After Propagation
Once your clematis has successfully rooted and been transplanted, the next critical phase is fostering strong, vigorous growth. Begin by placing the young plant in a location with full morning sun and afternoon shade, which encourages healthy leaf development without scorching tender foliage. Clematis thrives in cool roots and warm tops, so consider mulching the base or planting low ground covers nearby to shade the root zone.
Watering should be consistent but not excessive. Keep the soil evenly moist, especially during dry periods, as clematis dislikes both soggy and bone-dry conditions. As the plant establishes, begin feeding with a balanced, low-nitrogen fertilizer every 4–6 weeks during the growing season to promote sturdy stems and flower formation.
Pruning young clematis lightly in the first year helps guide growth and prevent tangling. Pinching back new shoots can encourage bushier, fuller plants. Providing a trellis or support system from the start allows the vine to climb confidently and reduces transplant shock. With attentive care in this early stage, your propagated clematis will develop into a thriving, flowering vine that brings beauty to your garden for years to come.
Benefits of Propagating Your Own Clematis
Propagating your own clematis offers more than just a new plant—it provides a range of practical and personal benefits that enhance your gardening experience. One of the most immediate advantages is cost savings. Purchasing multiple clematis plants from a nursery can become expensive, especially for premium or rare varieties. By taking cuttings from an existing vine, you can expand your garden significantly at little to no cost.
Another major benefit is the ability to replicate plants with proven performance. When you propagate from a clematis that thrives in your specific climate and soil, you’re essentially cloning a plant that has already adapted well. This gives your new vines a better chance of long-term success.
In addition, propagation allows for experimentation and creative garden planning. You can create matching borders, repeat color patterns throughout different garden zones, or even train new plants in containers, trellises, or arbors. It’s also an excellent way to share your favorite varieties with fellow gardeners or give meaningful, homegrown gifts.
Beyond the practical advantages, propagating clematis is deeply rewarding. Watching a small cutting transform into a strong, blooming vine through your care builds confidence and connection with your garden. It turns your role from just a grower into a creator—someone who brings beauty to life with patience and intention.
Frequently Asked Questions About Propagating Clematis
How long does it take for clematis cuttings to root?
Clematis cuttings typically take 4 to 6 weeks to root under optimal conditions. This timeframe depends on the temperature, humidity, and the health of the cutting. Keep the environment warm (around 20–24°C or 68–75°F), moist but not soggy, and ensure bright indirect light to encourage steady root formation.
Can I propagate clematis in water?
While some gardeners experiment with water propagation, clematis cuttings generally do best in soil or a moist propagation mix like perlite and peat. Water doesn’t provide enough oxygen to support root development for woody vines like clematis, often leading to stem rot before roots can form.
What time of year is best for clematis propagation?
The ideal time to propagate clematis is late spring to early summer when the plant is actively growing. This is when softwood or semi-ripe cuttings are most viable. Avoid propagating during winter dormancy or peak flowering, as energy is not directed toward root development during those periods.
Why are my clematis cuttings wilting?
Wilting is usually caused by improper humidity, overwatering, or insufficient airflow. Newly taken cuttings lack roots to absorb water, so maintaining high humidity through a plastic cover or propagation dome is key. At the same time, avoid waterlogging, which can cause rot. Make sure the medium is damp, not soaked, and that the container has drainage.
Do I need to use rooting hormone for clematis cuttings?
Using rooting hormone is strongly recommended for clematis propagation. It helps stimulate faster and more reliable root development, especially for woody or semi-woody stems. While not absolutely necessary, it greatly increases the success rate and is worth the small investment for healthier, faster-growing new plants.
Conclusion: Multiply the Magic of Clematis
Learning how to propagate clematis is one of the most rewarding skills any gardener can develop. It allows you to expand your floral display, preserve your favorite varieties, and build a garden rich in color and texture—all with plants you’ve grown by hand. Whether you’re rooting a single cutting or planning a full garden expansion, propagation is your gateway to more blooms and a bolder, more beautiful landscape. With patience, practice, and the right techniques, your clematis will flourish far beyond your expectations.