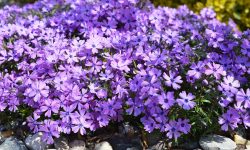
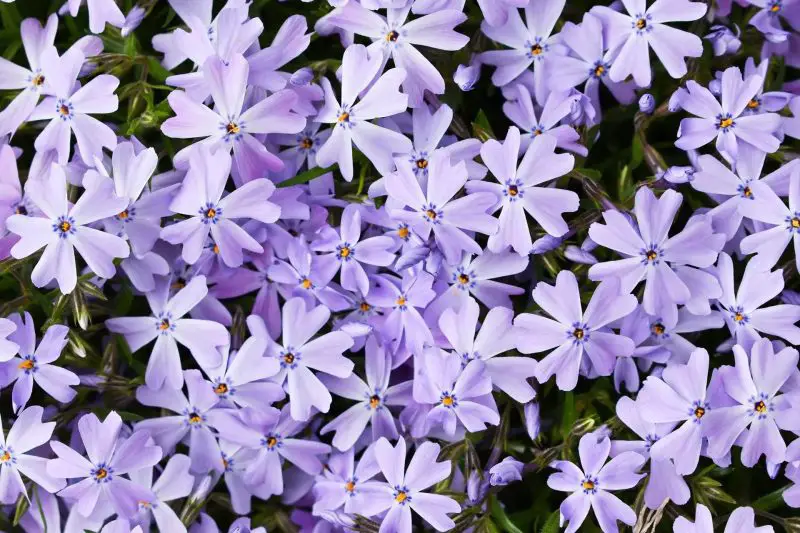
Creeping phlox is one of the most captivating groundcovers you can grow, famous for its dense mats of colorful flowers that appear each spring. Its ability to spread naturally makes it ideal for filling bare garden spaces, covering slopes, or softening the edges of pathways. While it spreads slowly on its own, learning how to propagate creeping phlox the right way allows gardeners to expand their displays much faster. With just a few careful steps, you can transform a small patch into a lush carpet of vibrant color that returns year after year.
Propagation may sound complex, but creeping phlox is surprisingly easy to multiply once you understand its growing rhythm. Whether you prefer division, stem cuttings, or layering, each method has its own charm and success rate. By following the right techniques and providing the right environment, you’ll not only produce healthy new plants but also speed up their establishment. In this guide, we’ll explore everything you need to know—from choosing the best time and method to ensuring rapid root development and successful transplanting.
Understanding Creeping Phlox Before Propagation
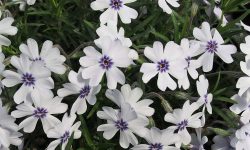
Before you start propagating creeping phlox, it is essential to understand its growth behavior and natural cycle. Creeping phlox (Phlox subulata) is a low-growing perennial known for its dense, mat-like foliage and vibrant spring blooms. It spreads horizontally across the ground, rooting at nodes along the stems as it grows. This creeping nature makes it an ideal plant for propagation, as each rooted section can become a new, independent plant. Its evergreen leaves also allow it to stay visually appealing even after the flowering season ends, keeping your garden lively year-round.
The plant thrives in well-drained soil and full sunlight, though it can tolerate partial shade in hotter climates. Creeping phlox grows best in USDA hardiness zones 3 through 9, adapting well to both cold and warm environments. Its resilience makes it easy to maintain once established, but understanding when it actively grows is the secret to successful propagation. Late spring through early summer, just after flowering, is the best time to begin because the plant channels its energy into root and stem development.
Creeping phlox uses surface roots to spread, which makes it naturally suited for division and layering. However, propagating at the wrong time or in poor conditions can slow its recovery and reduce success rates. Knowing the plant’s habits, seasonal rhythm, and environmental needs helps gardeners choose the best method for fast and healthy results. By aligning your propagation timing with its active growth period, you ensure the plant establishes quickly, creating dense carpets of color within a single season.
Best Time and Conditions for Propagating Creeping Phlox
The ideal time to propagate creeping phlox is right after its blooming period ends in late spring or early summer. During this time, the plant shifts its energy from flower production to root and stem growth, which makes it easier for new divisions or cuttings to establish. Avoid propagating during extreme heat or frost, as both conditions can stress the plant and reduce its survival rate. By waiting until the flowers fade and the plant enters an active growth stage, you give new sections the best chance to develop strong root systems quickly.
Temperature plays a vital role in successful propagation. Creeping phlox prefers mild, stable conditions between 60°F and 75°F. Warm soil and gentle humidity help stimulate root formation, especially when using cuttings or divisions. If temperatures are too cold, root growth slows down. If too hot, moisture evaporates quickly, and the plant may wilt. Lightly shaded areas with morning sunlight are perfect for early propagation, giving enough warmth without exposing tender sections to harsh midday rays. Maintaining consistent moisture in well-drained soil keeps the process stable.
Soil quality also determines propagation success. Creeping phlox thrives in slightly acidic to neutral soil with good drainage. Heavy clay soil should be amended with sand or compost to improve aeration and prevent waterlogging. A balanced environment of warmth, moisture, and loose soil texture supports healthy root formation and quick establishment. Gardeners who prepare these conditions before dividing or planting new sections often see faster results. When done at the right time and under the right conditions, creeping phlox propagation becomes effortless and rewarding.
Methods of Propagating Creeping Phlox
Division
Division is the simplest and most reliable way to propagate creeping phlox. It works best for mature plants that have spread widely and developed dense roots. Begin by digging up the entire clump carefully, ensuring that you lift the roots intact. Shake off excess soil to expose the root structure. Using a clean, sharp knife or garden spade, divide the plant into smaller sections. Each division should include a strong root system and several green stems. Replant the new sections immediately at the same depth as before, and water thoroughly to help them settle. Consistent moisture during the first few weeks encourages quick establishment.
This method not only produces new plants but also revitalizes old ones. Dividing every two to three years prevents overcrowding and improves flowering. It also enhances air circulation and reduces disease risk. The divisions root quickly and begin spreading again within weeks, making this the fastest way to expand your garden’s coverage. When done correctly, division helps maintain vigorous, colorful carpets of creeping phlox that return stronger each spring. It’s an ideal method for gardeners seeking quick, visible results without complex tools or greenhouse setups.
Stem Cuttings
Propagating creeping phlox from stem cuttings is an effective way to produce many plants from one healthy parent. Choose soft, green stems that show no signs of disease or flowering. Cut sections about four to six inches long, making a clean cut just below a leaf node. Remove the lower leaves to reduce water loss and dip the cut end in rooting hormone powder. Plant the prepared cuttings in a mix of sand and peat moss for proper aeration and drainage. Keep the growing medium moist but never soggy, and cover the pot with a light plastic dome to retain humidity.
Place the container in bright, indirect light with temperatures between 65°F and 75°F. Within three to four weeks, roots will form, and the cuttings will begin showing new growth. Gently tug on them to check for resistance, a sign of root development. Gradually harden the new plants by exposing them to outdoor conditions for short periods. Once established, transplant them into garden beds with fertile, well-drained soil. This method takes patience but rewards you with many vigorous young plants that bloom beautifully the following spring.
Layering
Layering is a natural, low-stress propagation method that allows creeping phlox to multiply without removing the mother plant. Choose a healthy stem that lies close to the ground and bend it gently until a section touches the soil. Pin that section down with a small garden staple or a stone, leaving the growing tip uncovered. Cover the pinned area lightly with soil and keep it evenly moist. Over time, new roots will form at the buried section, creating a separate plant. The process usually takes four to six weeks, depending on temperature and humidity.
When roots are established, cut the new plant from the parent stem and transplant it into a new location. This technique works best in late spring or early summer when stems are flexible and actively growing. It produces strong, self-sufficient plants with minimal effort. Layering also maintains visual continuity in the garden, allowing new plants to blend seamlessly with the existing patch. With this method, gardeners can fill empty spaces naturally and create a continuous carpet of vibrant creeping phlox without disrupting the landscape design.
Step-by-Step Guide to Successful Propagation
The first step to successful propagation is selecting a healthy parent plant. Choose a creeping phlox that shows vigorous growth, vibrant foliage, and no signs of disease. Avoid plants with yellowing leaves or thin, weak stems. Begin the process after flowering, when the plant focuses its energy on root growth. Prepare your tools by cleaning them with alcohol to prevent contamination. If using division or cuttings, loosen the surrounding soil before working to avoid root damage. For layering, choose stems that naturally trail close to the ground. Good preparation ensures each new section starts strong and free from stress.
Once the propagation method is chosen, focus on proper planting. Place divided sections, rooted cuttings, or layered stems into soil that drains well but stays evenly moist. A mix of garden soil, compost, and coarse sand creates the ideal balance. Ensure each new piece is planted at the same depth as before. Lightly press the soil around the base to secure it and water gently to eliminate air pockets. Keep the planting area in partial shade for the first few days, allowing the plants to recover and establish before exposing them to full sunlight.
After planting, consistent care is key to fast growth. Maintain even moisture during the early rooting period, avoiding both dryness and overwatering. Apply a light mulch layer to regulate temperature and preserve humidity. In about four to six weeks, you’ll notice new growth signaling successful propagation. Once established, gradually reduce watering and introduce more sunlight. Healthy creeping phlox will begin spreading quickly, filling the garden with color the following spring. By following these steps carefully, even beginners can achieve rapid, reliable results and expand their garden with ease.
Post-Propagation Care for Faster Growth
After propagation, proper care determines how quickly your creeping phlox establishes and spreads. The first few weeks are crucial as new roots adjust to their environment. Keep the soil evenly moist but not soaked to prevent root rot. Water in the morning to allow leaves to dry by evening, which helps reduce fungal risks. Consistent moisture supports root development, especially during warmer days. Avoid overhead watering, as splashing soil on young leaves can introduce disease. Good airflow and moderate humidity give the new plants a stable environment for strong, steady growth.
Sunlight plays an important role in post-propagation success. Gradually increase sun exposure once the plants show new growth. Start with filtered morning light and move toward full sun within two weeks. Creeping phlox needs at least six hours of direct sunlight daily for vibrant blooms and compact foliage. If grown in partial shade, ensure the area still receives bright light for most of the day. Apply a light layer of organic mulch around the base to maintain soil temperature and moisture while suppressing weeds that compete for nutrients.
Feeding also encourages faster establishment. Apply a diluted liquid fertilizer every two to three weeks during the first growing season. Avoid high-nitrogen blends, as they promote leaf growth over roots. A balanced fertilizer or compost tea works best to build strong foundations. Once the plants are established, reduce feeding and allow them to rely on natural soil nutrients. With consistent watering, steady sunlight, and gentle feeding, newly propagated creeping phlox grows vigorously, covering the ground with dense greenery and preparing for its stunning bloom the following spring.
Common Mistakes to Avoid When Propagating Creeping Phlox
Overwatering and Poor Drainage
Overwatering is one of the most frequent causes of failure when propagating creeping phlox. Although the plant enjoys consistent moisture, its roots are shallow and delicate, making them highly sensitive to excess water. When the soil stays constantly wet, roots lose access to oxygen, leading to soft, brown decay and a strong, unpleasant smell. The affected plant begins to wilt even though the soil looks damp. To prevent this, always water deeply but infrequently, allowing the top two inches of soil to dry before watering again. Morning watering is ideal because it lets moisture evaporate through the day.
Poor drainage creates similar problems and often worsens the effects of overwatering. Dense, compacted, or clay-heavy soil traps water around the root zone, suffocating new plants. To fix this, amend the soil with coarse sand, perlite, or compost to improve aeration. Raised beds or slightly sloped planting sites also promote natural drainage. Adding organic matter improves both structure and fertility, helping roots grow stronger and deeper. Avoid planting creeping phlox in low spots where water collects after rain. Maintaining proper soil texture and moisture balance ensures rapid establishment and healthier, longer-lasting blooms.
Propagating at the Wrong Time
Choosing the wrong time to propagate creeping phlox often leads to weak or failed growth. Many gardeners make the mistake of dividing or cutting during mid-summer heat, when high temperatures cause stress and dehydration. Similarly, late-fall propagation exposes tender roots to frost, preventing proper establishment. The best time to propagate is right after the blooming season, in late spring or early summer. During this stage, the plant directs its energy toward root and stem growth instead of flowers, making it ideal for propagation success. Soil temperatures between 60°F and 75°F support steady root activity and nutrient absorption.
If propagation happens too early, roots may not mature enough to survive fluctuating temperatures. If done too late, the plant lacks time to adapt before dormancy. Timing propagation within the plant’s active growth window ensures rapid rooting and healthy development. Gardeners should also consider regional climates—northern areas may need a later start, while southern regions can begin earlier. Watching local weather patterns and soil warmth gives more accurate guidance than relying on a fixed calendar. With proper timing, creeping phlox establishes quickly and maintains long-term vigor.
Ignoring Sunlight Requirements
Another common mistake is underestimating how much sunlight creeping phlox needs to thrive. This plant is sun-loving and requires at least six hours of direct light each day to grow strong and bloom fully. When propagated in too much shade, it becomes leggy, producing fewer leaves and roots. The stems may stretch toward available light, leaving gaps in the mat and reducing the overall appearance of density. Limited sunlight also slows photosynthesis, weakening new growth and reducing the plant’s resilience. For strong, compact plants, always choose a bright location with well-circulated air and full exposure.
Sunlight also affects soil warmth, which directly impacts root formation. In shaded areas, soil remains cooler and damp, which can delay rooting and even attract fungal problems. Warmer, sunlit soil encourages faster cell activity and nutrient uptake. Morning sunlight is best because it stimulates early growth without overheating tender shoots. Afternoon shade can be beneficial in hotter regions to prevent wilting. Understanding light balance allows gardeners to create ideal propagation zones where creeping phlox establishes rapidly and blooms with maximum vibrancy during the next spring season.
Transplanting Propagated Creeping Phlox into the Garden
Once your propagated creeping phlox develops a strong root system, it’s ready for transplanting into the garden. The best time to do this is in early morning or late afternoon, when temperatures are mild. Choose a location that receives at least six hours of sunlight daily and has well-drained, slightly acidic soil. Avoid heavy clay or compacted areas, as poor drainage slows root establishment. Before planting, loosen the soil about six inches deep and mix in compost to improve texture and fertility. Healthy, nutrient-rich soil encourages immediate root growth and faster adaptation to new surroundings.
Carefully remove each propagated plant from its container or propagation bed, handling it gently to avoid disturbing the roots. Dig a hole just large enough to fit the root ball and place the plant at the same depth it grew before. Firm the soil gently around the base and water thoroughly to remove air pockets. Proper watering during the first few weeks helps reduce transplant shock and ensures steady growth. If the weather is hot, add a thin mulch layer to retain moisture and protect roots from rapid drying.
After transplanting, maintain a consistent watering schedule until new growth appears. Avoid overwatering, as young roots need both air and moisture to thrive. Once established, gradually reduce watering frequency and let the soil dry slightly between sessions. Keep the area free from weeds to minimize nutrient competition. Within several weeks, the plants will begin spreading and anchoring firmly into the soil. With patience and care, your newly transplanted creeping phlox will grow quickly, creating dense mats of foliage that bloom beautifully during the next spring season.
Tips to Promote Stronger and Faster Growth
Healthy growth after propagation depends on how well you maintain your creeping phlox during its first few months. The most important factor is consistency. Water regularly but never excessively, keeping the soil evenly moist. In the early stages, roots need hydration to expand, but too much water limits oxygen flow and causes rot. Apply a light mulch layer around the plants to retain moisture and prevent weeds from competing for nutrients. Avoid piling mulch directly against the stems, as it can trap moisture and invite fungal problems. Steady moisture and temperature control encourage stronger, deeper roots that anchor the plant securely.
Fertilization also supports vigorous growth. Creeping phlox responds well to balanced or slow-release fertilizers with equal parts nitrogen, phosphorus, and potassium. Apply fertilizer in early spring and again after blooming to stimulate both foliage and root development. Liquid compost or diluted organic feeds can also be used for gentle nourishment. Overfeeding should be avoided because excessive nutrients can lead to lush leaves and fewer blooms. Combining moderate feeding with consistent watering helps the plant build steady strength without stress. Healthy, nutrient-balanced soil results in faster spread and more vibrant flower coverage.
Regular maintenance ensures continuous improvement throughout the growing season. Trim faded blooms and remove damaged stems to redirect the plant’s energy toward new growth. Light pruning every few months keeps the mat dense and attractive while preventing the center from becoming woody. Monitor for pests such as aphids or spider mites and treat them early with mild soap sprays. By keeping a consistent care routine and providing optimal sunlight, moisture, and nutrients, you can accelerate your creeping phlox’s establishment, resulting in a fuller, faster-spreading carpet of color.
Frequently Asked Questions About Propagating Creeping Phlox
When is the best time to propagate creeping phlox?
The best time to propagate creeping phlox is right after it finishes blooming in late spring or early summer. During this period, the plant focuses its energy on root and stem growth, allowing new sections or cuttings to establish quickly and develop strong, healthy roots before the next season.
Can creeping phlox be grown from cuttings?
Yes, creeping phlox can be successfully propagated from stem cuttings. Take four to six-inch cuttings from healthy, non-flowering stems. Dip the ends in rooting hormone, plant them in a well-drained mix, and keep them moist until roots form. Within a month, new growth usually appears, signaling successful propagation.
How long does it take for propagated phlox to root?
Rooting time depends on the propagation method and growing conditions. Under ideal warmth and moisture, stem cuttings typically root within three to four weeks. Divisions and layered stems often establish faster because they already have partial root systems. Consistent care and moderate sunlight ensure quicker root formation.
Why do my new creeping phlox plants wilt after propagation?
Wilting often occurs when plants receive too much direct sunlight or insufficient water during early establishment. Newly propagated sections are sensitive to heat and dry soil. Place them in partial shade, maintain steady moisture, and avoid overwatering. Within a few weeks, they recover and begin producing healthy growth.
How soon will newly propagated creeping phlox bloom?
Most newly propagated creeping phlox plants bloom the following spring after propagation. Although they may not flower in the first year, they spend that time developing a strong root network. With proper care, sunlight, and light feeding, they reward gardeners with full, colorful blooms in their second growing season.
Final Thoughts
Propagating creeping phlox is a rewarding process that allows gardeners to expand their garden’s beauty with ease. With the right timing, method, and consistent care, new plants establish quickly and flourish into dense, colorful carpets. Whether you use division, cuttings, or layering, patience and precision make all the difference. Maintaining proper sunlight, soil drainage, and moisture ensures strong growth and vibrant blooms each spring. Over time, your efforts will transform simple cuttings into a breathtaking landscape of living color. Creeping phlox, once propagated correctly, becomes a long-lasting symbol of renewal and natural elegance in every garden.