Gardenias are beloved for their glossy green leaves and intoxicatingly fragrant blooms, making them a favorite in gardens and landscapes. Propagating gardenias allows gardeners to expand their collection, share plants with friends, or experiment with new varieties. While propagation can seem challenging, understanding the right techniques ensures healthy, thriving plants that bloom beautifully year after year.
This guide provides expert advice on every step of gardenia propagation, from selecting stems and preparing cuttings to caring for young plants and troubleshooting common problems. Whether you are a beginner or an experienced gardener, these methods will help you grow strong, vigorous gardenias with minimal risk and maximum success.
Understanding Gardenia Plant Characteristics
Gardenia Growth Habits
Gardenias are evergreen shrubs native to tropical and subtropical regions. They grow best in warm climates with high humidity. These plants prefer well-draining soil that is rich in organic matter. Proper sunlight is essential, with partial shade being ideal to prevent leaf burn.
The flowering season varies depending on the cultivar. Most gardenias bloom in late spring and summer. The flowers are highly fragrant, attracting pollinators like bees and butterflies. Leaf care is critical because yellowing or spotted leaves indicate stress or nutrient deficiencies. Maintaining consistent watering and avoiding sudden temperature changes help the plant flourish.
Understanding these growth habits is essential for propagation. Knowing the plant’s natural environment helps recreate suitable conditions for new cuttings or seedlings. Healthy parent plants are more likely to produce vigorous offspring, making propagation efforts more successful.
Choosing the Right Gardenia for Propagation
Choosing the right gardenia also involves considering the plant’s flowering stage. While it’s tempting to select stems with buds or blooms, it’s best to avoid cutting from flowering branches, as energy is directed toward blooms rather than root development. Instead, focus on healthy, non-flowering stems to improve the likelihood of successful propagation. Seasonal timing matters too; late spring to early summer is ideal when the plant is actively growing and the environment is warm and humid.
Additionally, examine the plant’s overall structure. Stems that are straight, flexible, and free from damage or scars provide the best rooting potential. Avoid sections that are too soft or brittle, as they may rot or fail to establish roots. By carefully selecting robust, semi-hardwood stems from a vigorous gardenia, you increase the chances of creating resilient new plants that will thrive once potted or planted in the garden.
Methods of Propagating Gardenias
Propagation by Stem Cuttings
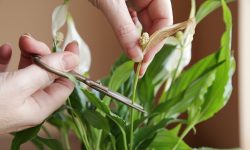
Stem cuttings are the most common method for propagating gardenias. Cut a 4-6 inch stem just below a node using a clean, sharp knife. Remove the lower leaves while leaving the top two to four leaves intact. This reduces water loss and promotes root development.
Dip the cut end in rooting hormone to encourage faster root growth. Place the cutting in a well-draining medium, such as a mix of peat moss and perlite. Keep the soil moist but not soggy and cover the cutting with a plastic bag to maintain humidity. Place in bright, indirect light.
Roots typically develop within four to eight weeks. Once roots are established, gradually acclimate the new plant to normal humidity levels. Transplant into a pot with rich, well-draining soil. Stem cuttings offer the advantage of producing clones of the parent plant, ensuring identical flowers and foliage.
Propagation by Layering
Layering is another effective propagation method, particularly for larger gardenias. Select a low-growing branch that can be bent to the ground without breaking. Gently wound the branch by scraping a small section of bark to expose the cambium layer.
Bury the wounded section in soil and secure it with a pin or rock. Keep the soil consistently moist to encourage root growth. After several weeks, roots will develop from the wounded section. Once established, cut the new plant from the parent and transplant it.
Layering is advantageous because the new plant remains attached to the parent while rooting. This reduces stress and increases the success rate compared to cuttings. It is ideal for gardeners with mature plants that have long, flexible branches.
Propagation by Seeds
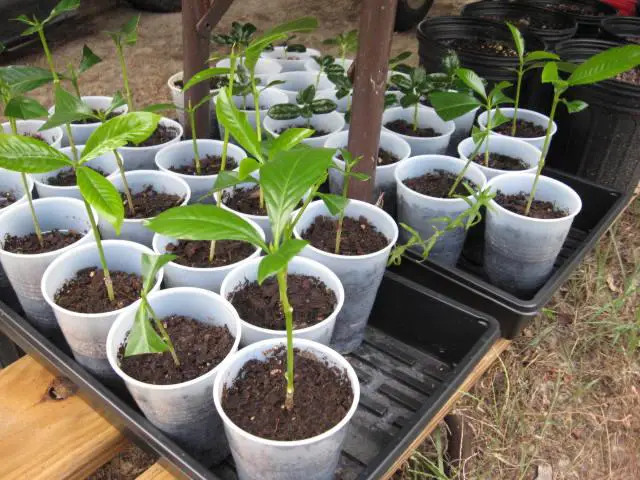
Although propagating gardenias by seeds is less common, it offers unique opportunities for creating new varieties. After collecting fresh seeds from mature fruits, it is crucial to remove any pulp and rinse them thoroughly. Soaking seeds in warm water for several hours softens the seed coat, which improves germination rates. Using fresh seeds rather than stored ones increases the likelihood of successful sprouting. Gardenia seeds are delicate and require gentle handling to avoid damage that could prevent growth.
Once prepared, plant the seeds in a light, well-draining medium such as a mixture of peat moss and perlite. Maintain consistent moisture without waterlogging the soil, and provide a warm environment with indirect sunlight to encourage germination. Seed-grown gardenias often take longer to flower and may show variations from the parent plant, which can be advantageous for developing unique cultivars. Regular monitoring, patience, and proper care during the germination stage are essential for nurturing strong, healthy seedlings.
Preparing Gardenia Cuttings
Selecting the Best Stems
Choosing the right stems is the first and most important step for successful gardenia propagation. Healthy, semi-hardwood stems are ideal because they are mature enough to produce roots but still flexible enough to handle without breaking. Avoid old, woody stems as they are less likely to develop roots and often fail during the propagation process. Focus on stems with active growth, several nodes, and vibrant green leaves, since roots will emerge from the nodes. Remove any damaged, diseased, or weak stems before taking cuttings.
Careful inspection of the parent plant is essential. Stems should be firm to the touch but bend slightly under pressure without snapping. Healthy leaves indicate that the cutting has sufficient energy to support root development. By selecting optimal stems, gardeners increase the chances of rooting success and reduce stress on the plant. Well-chosen cuttings serve as the foundation for vigorous new gardenias, ensuring strong growth, abundant foliage, and beautiful flowers once they are transplanted into suitable soil. Proper selection is the key to propagating healthy, long-lasting gardenia plants.
Preparing the Cutting for Rooting
After selecting the right stems, trim each cutting to a manageable length of 4-6 inches. Remove the lower leaves while keeping the top two to four leaves intact. This practice reduces water loss and directs the plant’s energy toward root formation rather than maintaining excess foliage. Use a clean, sharp, and sterilized knife or scissors to prevent crushing the stem and avoid introducing pathogens that could slow or prevent rooting.
Applying rooting hormone to the cut end encourages faster and more robust root development by stimulating cell division. Insert the treated cutting into a well-draining, pre-moistened medium such as peat moss mixed with perlite or sand. Maintain a warm and humid environment to support steady root growth. Regularly monitor soil moisture to prevent drying or overwatering. By carefully preparing the cutting and providing optimal conditions, gardeners ensure the development of strong, healthy roots that will produce vigorous new gardenias capable of thriving when transplanted.
Creating the Right Propagation Environment
Soil and Medium Selection
Choosing the right soil or propagation medium is one of the most critical steps for successful gardenia rooting. Gardenias thrive in a light, well-draining medium that retains some moisture but does not become soggy. A mixture of peat moss and perlite or sand offers the perfect balance of aeration and moisture retention. Heavy garden soil should be avoided, as it can hold too much water, suffocate roots, and encourage fungal infections. Sterilizing the medium before use creates a clean environment for delicate cuttings, reducing the risk of disease and ensuring optimal conditions for root development.
Consistent moisture is key to successful propagation. The medium should remain slightly damp at all times, allowing cuttings to absorb water without becoming waterlogged. Well-draining soil promotes faster root growth, stronger stems, and healthier new leaves. Using the proper medium also accelerates acclimation once the cutting is transplanted. Gardenias planted in unsuitable soil may struggle to form roots, become stressed, and develop weak growth. A carefully prepared, nutrient-balanced, and well-draining medium is the foundation for propagating vigorous, long-lasting gardenias that will thrive for years.
Temperature and Humidity Control
Temperature and humidity are vital factors for rooting gardenia cuttings. Gardenias prefer warm conditions, ideally between 70-75°F, which encourages root initiation and overall plant vigor. Avoid placing cuttings in direct sunlight, as strong light can scorch tender leaves and cause excessive water loss. Maintaining high humidity helps prevent dehydration, supports healthy leaf function, and stimulates faster root development. Humidity control is especially important during the early stages of propagation.
To maintain stable conditions, use a plastic dome, bag, or mini-greenhouse to trap moisture and create a controlled microclimate. Monitor daily to prevent condensation from building up excessively, which could lead to fungal growth or stem rot. Gradually reduce humidity as roots establish, allowing the cutting to acclimate to normal air conditions. By controlling temperature and humidity, gardeners can create optimal conditions that maximize rooting success, produce vigorous growth, and ensure strong, healthy gardenia plants ready for transplanting into pots or garden beds. Proper environmental management significantly improves long-term survival and flowering potential.
Caring for Gardenia Cuttings
Watering and Moisture Management
Proper watering is critical for the success of gardenia cuttings. The propagation medium must remain consistently moist but never waterlogged. Excess water can suffocate the developing roots and encourage stem rot, which can quickly kill the cutting. Using a well-draining medium, such as a mix of peat moss and perlite, helps maintain the right balance of moisture while allowing air to reach the roots. Regularly check the medium’s moisture level to ensure it stays slightly damp, adjusting watering as necessary based on temperature and humidity.
Mist the leaves lightly to maintain ambient humidity, particularly in dry climates or indoors with low moisture. Avoid saturating foliage excessively, as wet leaves create a favorable environment for fungal growth and other pathogens. Consistent moisture management supports steady root development and overall plant health. By carefully monitoring water and humidity, gardeners provide the ideal conditions for cuttings to thrive, producing strong roots and vigorous new growth ready for eventual transplantation.
Providing Light and Air Circulation
Gardenia cuttings require bright, indirect light for healthy development. Direct sunlight can scorch tender leaves and stress the cutting, reducing the chances of rooting. Moderate light promotes steady growth, allowing the cutting to conserve energy while forming strong roots. Position cuttings near east- or north-facing windows or use filtered light if indoors. Proper lighting supports photosynthesis without causing heat or moisture stress.
Air circulation is equally important to prevent mold, mildew, and other fungal problems. A gentle fan or small open ventilation area ensures the environment remains fresh without drying out the cuttings. Maintaining a balance of light and airflow encourages healthy root formation, reduces disease risk, and promotes robust new shoots. By managing both light exposure and air circulation, gardeners create an optimal microclimate, ensuring gardenia cuttings develop into strong, vigorous plants capable of thriving once transplanted into soil or containers.
Transplanting Rooted Gardenias
Timing and Preparation
Proper timing is essential for successful gardenia transplantation. Roots should be fully developed, thick, white, and healthy before the cutting is moved. Transplanting too early can damage fragile roots, delay growth, and increase the risk of transplant shock. Carefully inspecting the root system ensures that the cutting has the energy and structure to thrive in a new environment. Roots should be fibrous and well-branched, indicating readiness for soil or container planting.
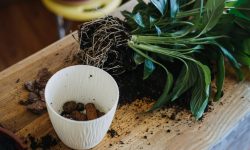
Equally important is preparing the soil or container correctly. Use rich, well-draining soil amended with organic matter such as compost or peat moss to provide nutrients and improve texture. Lightly moisten the soil before planting to reduce stress and encourage root-to-soil contact. Position the cutting carefully, firm the soil gently around the roots, and water lightly. Proper timing and preparation create ideal conditions for the cutting to establish quickly, promoting vigorous foliage growth and future flowering success.
Acclimating to Outdoor Conditions
Gardenias transplanted outdoors require gradual acclimation to prevent shock. Start by placing the plant in partial shade, exposing it to sunlight for only a few hours a day. Gradually increase light exposure over one to two weeks. Sudden shifts in temperature or sunlight can burn leaves and stress the plant, slowing root establishment.
During acclimation, monitor soil moisture closely. Keep the soil consistently damp but not waterlogged. Maintain stable environmental conditions, avoiding drafts, sudden temperature drops, or excessive wind. Gradual acclimation strengthens the plant’s root system, encourages vigorous new growth, and ensures the gardenia will produce abundant, healthy blooms in its new outdoor location. Patience during this period is key to long-term survival and flowering success.
Leaf Yellowing and Drop
Leaf yellowing in gardenias often signals overwatering, poor drainage, or nutrient deficiencies. Ensure the propagation medium or soil drains efficiently to prevent waterlogging. Water sparingly and allow the top layer of soil to dry slightly between waterings. Applying a balanced fertilizer once roots are established supports leaf health and encourages new growth.
Environmental stress, such as low humidity, excessive heat, or sudden light changes, can also cause leaf drop. Maintain stable conditions with consistent moisture, moderate temperature, and proper light. Healthy, green leaves indicate successful rooting and overall plant vigor. Monitoring leaf condition regularly helps detect issues early and prevents further decline in cutting health.
Rot and Fungal Issues
Fungal infections and rot are common threats during propagation and early growth. Using sterile tools, containers, and propagation medium minimizes the risk of introducing pathogens. Avoid excessive moisture and ensure adequate air circulation to reduce fungal development.
If cuttings show signs of rot, remove affected stems immediately to prevent spread. Severe infections may require fungicide treatment. Proper hygiene, controlled watering, and sufficient ventilation greatly reduce propagation failures. Maintaining a clean and well-managed environment supports strong root formation and promotes healthy, disease-free gardenias ready for transplantation and long-term growth.
Enhancing Growth After Propagation
Fertilizing Young Gardenias
Fertilizing newly propagated gardenias is essential to support strong growth and healthy foliage. Once roots have developed, apply a balanced, slow-release fertilizer to provide essential nutrients. Avoid over-fertilizing, which can burn tender roots and stunt development. Regular feeding encourages the plant to produce robust leaves and prepares it for flowering.
Water thoroughly after applying fertilizer to help nutrients reach the root system and prevent chemical buildup on the soil surface. Use a fertilizer suitable for acid-loving plants, as gardenias thrive in slightly acidic conditions. Proper nutrition during the early stages strengthens stems, promotes healthy leaf development, and ensures the plant is well-prepared for future flowering. Consistent fertilization enhances overall vigor, leading to more abundant and fragrant blooms.
Pruning for Strong Structure
Pruning young gardenias encourages bushier growth and a strong structural framework. Remove weak, crossing, or damaged stems to direct energy toward healthy branches. Early pruning helps the plant develop a balanced shape, improving both aesthetics and airflow.
Regular pruning also reduces the risk of disease by preventing crowded foliage and promoting light penetration. By selectively cutting back stems, gardeners can shape the plant gradually while encouraging multiple flowering points. Proper pruning after propagation ensures a vigorous, well-formed gardenia capable of producing abundant blooms and long-lasting beauty. This practice, combined with adequate care, establishes a resilient plant that thrives for years.
Companion Planting and Landscaping Ideas
Pairing Gardenias with Complementary Plants
Pairing gardenias with complementary plants enhances both aesthetics and plant health. Choose companions with similar soil and light requirements. Acid-loving plants like azaleas, camellias, or rhododendrons thrive alongside gardenias. This ensures consistent care and reduces maintenance challenges. Companion plants can also create layered textures, vibrant colors, and extended blooming periods, adding interest to garden beds.
Additionally, companion plants can attract beneficial insects, improving pollination and reducing pest pressure. Planting low-growing companions around the base of gardenias helps retain soil moisture and suppress weeds. Thoughtful combinations enhance the visual appeal while supporting a healthy, balanced garden ecosystem. By selecting compatible plants, gardeners create harmonious landscapes that highlight gardenias’ fragrant blooms and glossy foliage.
Designing Garden Beds and Borders
Gardenias can be integrated into garden beds and borders for a striking visual effect. Place them as focal points or along pathways where their fragrance can be enjoyed. Use varying heights and textures with surrounding plants to create depth and interest. This layering approach highlights the glossy foliage and elegant flowers of gardenias, making them stand out in any landscape design.
Incorporating gardenias into borders also provides practical benefits. Dense planting helps retain soil moisture, regulate temperature, and prevent erosion. Borders can be designed with seasonal plants to maintain color throughout the year, enhancing the overall appeal. Well-planned garden beds ensure that gardenias flourish while complementing the surrounding flora, creating a cohesive and attractive outdoor space.
Seasonal Considerations and Maintenance
When planning landscapes with gardenias, consider seasonal changes. Gardenias prefer warm temperatures but may require protection from frost. Planting with seasonal companions can maintain interest year-round, providing blooms or foliage even when gardenias are not flowering. Adjust watering and care routines based on seasonal rainfall and temperature variations to maintain healthy growth.
Maintenance is also key for long-term success. Regular pruning, mulching, and monitoring for pests keep gardenias and their companions thriving. Incorporating low-maintenance plants can reduce workload while supporting soil health and biodiversity. Seasonal planning ensures a dynamic, visually appealing landscape where gardenias remain the centerpiece throughout the year.
Common mistakes and How to Solve
Overwatering and Poor Drainage
One of the most frequent mistakes in gardenia propagation is overwatering or using poorly draining soil. Excess moisture can suffocate roots, leading to stem rot, fungal infections, and ultimately, cutting death. Gardenias thrive in a medium that holds moisture without becoming soggy, allowing air to reach developing roots. Heavy, compacted, or clay-based soils prevent proper root development and increase disease susceptibility, reducing the chances of successful propagation.
To avoid these issues, use a light, well-draining mix such as peat moss combined with perlite or sand. Monitor the medium carefully and maintain consistent moisture without overwatering. Allow the top layer of soil to dry slightly between waterings, which prevents root suffocation and encourages strong root growth. Proper drainage and controlled watering ensure that cuttings remain healthy, develop robust roots, and establish quickly in their new environment. Maintaining the right moisture balance is crucial for long-term propagation success and prevents common setbacks like yellowing leaves or slow growth.
Inadequate Light and Poor Air Circulation
Providing insufficient light or inadequate air circulation is another common mistake among gardeners. Gardenia cuttings require bright, indirect light to stimulate photosynthesis and encourage healthy root formation. Too much direct sunlight can scorch tender leaves and stress the cutting, while too little light slows growth, weakens stems, and delays root development. Proper light levels ensure steady growth and strong foliage.
Air circulation is equally important in preventing mold, mildew, and fungal infections. Stagnant, humid air creates a breeding ground for pathogens, which can quickly damage cuttings. Use a small fan or allow gentle ventilation around propagation areas to maintain airflow without drying the cuttings. Combined with filtered light, proper ventilation promotes vigorous root development, reduces disease risks, and helps cuttings adapt to transplanting conditions. Managing both light and airflow is critical to producing healthy, robust gardenia plants that thrive long-term.
Neglecting Nutrient and Environmental Needs
Another common mistake is neglecting the nutrient and environmental requirements of gardenia cuttings. Young cuttings need consistent humidity, warm temperatures, and a gradual introduction to fertilization once roots develop. Without these conditions, cuttings may exhibit weak growth, yellowing leaves, or premature leaf drop. Providing the proper environment supports root formation and overall plant vigor.
Gardenias are also sensitive to sudden changes in light, temperature, or moisture. Rapid exposure to extreme conditions can stress the plant and slow establishment. Gradual acclimation, stable environmental conditions, and light feeding with balanced fertilizer ensure cuttings adapt successfully. Meeting these nutrient and environmental needs encourages vigorous growth, strong foliage, and abundant flowering in mature plants. Proper care during propagation prevents common failures and establishes a foundation for healthy, long-lasting gardenias.
FAQ About How to Propagate Gardenia
How long does it take for gardenia cuttings to root?
Gardenia cuttings generally take four to eight weeks to develop roots. Semi-hardwood cuttings rooted in a moist medium with high humidity show faster results. Rooting speed depends on temperature, light, and the health of the parent plant. Patience and consistent care are essential.
Can gardenias be propagated from leaf cuttings?
Leaf cuttings are not ideal for gardenias. They rarely develop roots independently. Stem cuttings or layering are much more effective methods. Focus on healthy semi-hardwood stems to ensure successful propagation and vigorous new plants.
What is the best time of year to propagate gardenias?
Late spring to early summer is ideal for propagation. Plants are actively growing, which encourages root development. Warmer temperatures and increased daylight support faster rooting and healthier cuttings. Avoid winter when growth slows.
How often should propagated gardenias be watered?
Water cuttings to keep the medium consistently moist but not soggy. Overwatering can lead to root rot. Mist leaves occasionally to maintain humidity. Adjust watering frequency based on temperature, medium, and container size.
Why are my gardenia cuttings not rooting?
Poor rooting may result from low humidity, incorrect medium, or unhealthy parent stems. Ensure cuttings are semi-hardwood, use rooting hormone, and maintain warmth. Avoid overwatering and provide bright, indirect light to improve success rates.
Conclusion
Propagating gardenias requires patience, care, and attention to detail. By understanding the plant’s characteristics and selecting the right propagation method, gardeners can grow healthy, flowering plants. Proper environment, watering, light, and care are essential for success.
Using stem cuttings, layering, or seeds allows gardeners to expand their collections and enjoy the beauty of gardenias. Regular maintenance, fertilization, and pruning enhance growth and flowering. With consistent care, anyone can successfully propagate gardenias and create fragrant, vibrant gardens.

