Hydrangeas bring elegance, color, and fullness to any garden. Their large, vibrant blooms are a favorite among gardeners who want to create a show-stopping display that returns season after season. But buying new plants every year can be costly and unnecessary when propagation offers an easy, rewarding alternative.
Learning how to propagate hydrangea allows you to multiply your plants, preserve your favorite varieties, and design a garden rich in texture and color—all with just a few simple steps. Whether you’re a beginner or a seasoned gardener, this guide will walk you through everything you need to grow hydrangeas from cuttings and enjoy long-lasting beauty in your landscape.
Understanding Hydrangea Propagation
Propagation is the art and science of multiplying plants, and in the case of hydrangeas, it’s an accessible technique even for those new to gardening. It involves taking a segment of a parent plant—usually a stem cutting—and encouraging it to grow roots, eventually becoming an independent, mature plant. This process not only saves money but also gives you control over your garden’s design and consistency, as each propagated plant is a genetic clone of the original.
Hydrangeas are particularly well-suited for propagation because of their vigorous growth habits and responsiveness to rooting. Most varieties, from the bold mopheads to the graceful panicle types, propagate well through softwood or semi-hardwood cuttings. With the right method and timing, even a single healthy plant can produce multiple new ones each season. Understanding the basic principles behind propagation—plant hormones, moisture balance, and stem anatomy—can significantly improve your success and deepen your appreciation for how plants regenerate and thrive.
Choosing the Right Time to Propagate Hydrangeas
Timing is one of the most critical factors influencing the success of hydrangea propagation. Choosing the right season ensures the cutting has the energy, warmth, and environmental support it needs to develop strong roots and transition into a thriving new plant. For most gardeners, late spring through early summer offers the ideal window for taking cuttings. During this period, hydrangeas are in an active growth phase, and their stems are still soft enough to root easily while containing high levels of natural growth hormones.
Spring cuttings—particularly from semi-softwood stems—tend to root more reliably and with fewer complications. These stems have matured enough to be sturdy but are still flexible and rich in moisture, making them ideal for rooting. Avoid propagating during the peak of summer heat, as excessive temperatures and strong sun can dry out cuttings and reduce their viability. Similarly, propagation in late fall or winter is generally discouraged unless you’re working indoors with controlled light and humidity, since hydrangeas enter dormancy and show minimal root development during colder months.
Regional climate also plays a role in determining your propagation schedule. In warmer USDA zones, propagation may begin earlier in spring, while in colder regions, you may need to wait until the last frost has passed to ensure your cuttings remain stress-free. Understanding the rhythms of your local environment, alongside your hydrangea’s growth stage, will guide you toward the best possible propagation outcomes.
Preparing to Propagate Hydrangeas
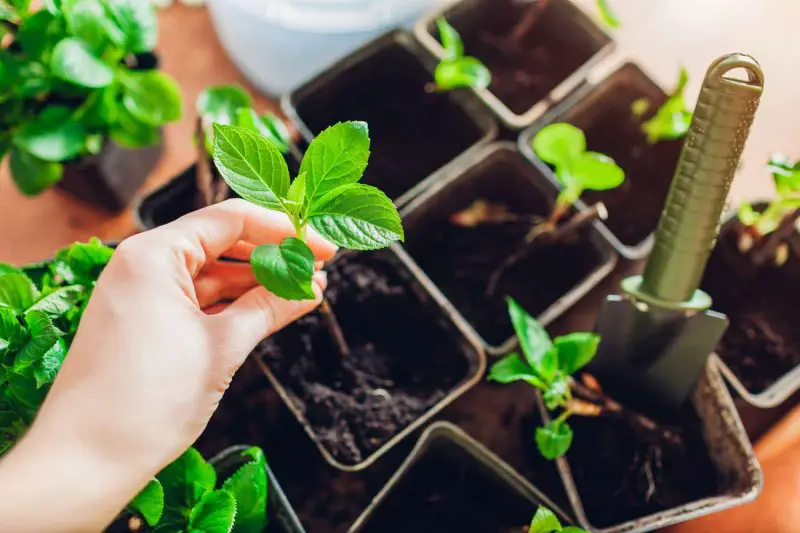
Before you take your first cutting, careful preparation is essential to set the stage for successful hydrangea propagation. This includes assembling the right tools, choosing the healthiest parts of the plant, and ensuring your working environment promotes clean, stress-free root development. Neglecting any of these details can reduce your chances of success or result in weak, slow-growing cuttings.
Start by gathering your tools: a pair of sharp, sterilized pruning shears or scissors, a clean container or tray, high-quality potting mix or propagation medium, and optionally, rooting hormone to stimulate root formation. Sterilization is critical—dirty tools can introduce fungal or bacterial pathogens that cause rot or disease in vulnerable cuttings. Use isopropyl alcohol or a diluted bleach solution to sanitize your tools before and after cutting.
Next, choose your source plant with care. Only propagate from mature, vigorously growing hydrangeas that are free from pests, diseases, and nutrient deficiencies. Inspect stems for firmness, healthy green coloration, and strong leaf nodes. Avoid flowering stems, as they tend to root poorly and are already devoting their energy toward bloom production. Instead, look for non-blooming branches with multiple nodes and soft to semi-woody texture. These are the sections most likely to root quickly and evenly.
Equally important is the propagation environment. Whether you’re rooting cuttings indoors or outdoors, ensure consistent humidity and indirect light. Bright, filtered sunlight helps promote photosynthesis without drying out the cutting. Avoid direct afternoon sun, especially during summer, as it can cause wilting or dehydration. Prepare your propagation station ahead of time to create a seamless transition from cutting to rooting, minimizing plant stress and handling errors. When everything is ready before you make the first cut, your chances of growing strong, healthy hydrangeas from cuttings increase dramatically.
Taking Cuttings from Hydrangeas
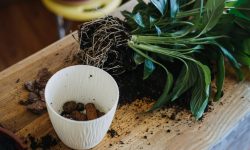
The process of taking cuttings is the cornerstone of hydrangea propagation, and doing it correctly from the start ensures strong, healthy root development. Begin by selecting a suitable stem from your hydrangea plant. The ideal candidate is a non-flowering shoot that grew during the current season. These stems are typically semi-softwood—firm enough to hold structure but still flexible and full of moisture. Avoid stems that are either too woody or too soft and green, as they are less likely to root successfully.
Examine the stem for multiple nodes, which are the small swellings where leaves or buds emerge. Each node has the potential to produce roots, making them the key to successful propagation. Measure about four to six inches in length from the tip of the stem downward, ensuring at least two or three nodes are included within that section. Use sharp, sterilized shears to make a clean, angled cut just below the lowest node. An angled cut increases the surface area for rooting and helps shed excess moisture, reducing the risk of rot.
After cutting, remove the lower leaves to expose at least one node that will be buried in the soil. If the remaining leaves are large, consider trimming them in half to reduce water loss through transpiration. Avoid removing all leaves, as the cutting still requires some foliage for photosynthesis during the rooting phase.
If you plan to take multiple cuttings, place each one immediately in a container of clean water or wrap them in a damp paper towel to keep them hydrated until they’re ready for planting. Time is critical—cuttings should be placed into the growing medium as soon as possible to preserve freshness and maximize their rooting potential. Proper technique at this early stage lays the foundation for healthy, vigorous new hydrangea plants.
Rooting Hydrangea Cuttings
Preparing the Soil or Medium
The success of hydrangea propagation depends heavily on using the right rooting medium. A good mix should retain moisture while draining well to prevent rot. One of the best combinations is equal parts peat moss and perlite, which provides both moisture and air circulation. Coconut coir can replace peat moss if you prefer a more sustainable option.
Before planting, moisten the mix so it’s damp but not wet. When squeezed in your hand, it should feel like a wrung-out sponge—just enough to support root formation without waterlogging the stem.
Fill your pot or tray with the prepared medium and make a small hole using a pencil or stick before inserting the cutting. This helps avoid damaging the stem and ensures good contact with the soil. Firm the mix gently around the base to hold the cutting upright while allowing airflow. With the right preparation, your cuttings will have the best conditions to root quickly and grow strong.
Using Rooting Hormone for Better Results
While hydrangea cuttings can root without assistance, applying rooting hormone significantly boosts success rates—especially in less-than-ideal conditions. Rooting hormone contains synthetic or natural auxins, which are plant hormones that stimulate root cell development. This helps cuttings form roots faster, more uniformly, and with greater strength.
To use it, simply dip the cut end of your hydrangea cutting into the hormone powder or gel, making sure to coat the area around the node where roots will form. Tap off any excess before placing the cutting into the prepared medium. Using rooting hormone is particularly helpful when propagating thicker or semi-woody stems or when rooting in cooler temperatures. It’s a small step that can make a big difference in producing vigorous, resilient new plants.
Creating the Right Microclimate
Hydrangea cuttings root best in a warm, humid, and stable environment. To create this microclimate, cover your pot or tray with a clear plastic bag or humidity dome to retain moisture. Place the setup in bright, indirect light—too much sun can cause overheating, while too little delays rooting.
Maintain temperatures between 65°F and 75°F for optimal root development. Open the cover slightly every few days to allow air circulation and prevent mold. If humidity drops too low, mist the inside of the dome or the cutting itself. This controlled environment mimics natural conditions and gives your cutting the best chance to root successfully.
Watering and Maintenance During Rooting
Proper moisture management is crucial during the rooting stage, as cuttings are highly sensitive to both drought and excess water. Since hydrangea cuttings have no root system at the start, they rely entirely on the humidity in the air and moisture in the soil to stay hydrated. The goal is to maintain a consistently damp—not wet—medium that supports root initiation without promoting fungal growth.
Water the soil lightly after inserting the cutting to settle it in place. From there, monitor moisture levels daily, especially if your environment is warm or dry. If the top inch of soil feels dry to the touch, mist gently or water sparingly at the base. Avoid soaking the soil, as too much water reduces oxygen around the stem and increases the risk of rot.
Humidity also plays a key role. If you’re using a plastic cover or dome, check for condensation inside, which indicates good moisture retention. Open the cover briefly every couple of days to allow fresh air exchange and prevent mold buildup. If leaves begin to yellow or wilt, it may signal too much moisture, poor airflow, or a need for more indirect light.
Throughout the rooting period—typically three to six weeks—stay consistent but gentle in your care. Overhandling or frequent repositioning can disrupt fragile tissue. Focus on maintaining a balanced environment that supports steady, healthy root development, and you’ll be rewarded with strong, viable new hydrangea plants.
Transplanting New Hydrangea Plants
Once your hydrangea cuttings develop a healthy root system—usually within four to six weeks—they’re ready to be transplanted into larger pots or directly into the garden. Choose a mild, overcast day for transplanting to reduce stress on the young plant. If transplanting outdoors, select a spot with partial sun and well-draining, nutrient-rich soil.
Handle the rooted cutting gently to avoid damaging the fragile roots. Dig a hole slightly larger than the root ball, place the plant in position, and backfill with soil, pressing lightly to remove air pockets. Water thoroughly after planting to help the soil settle around the roots.
In the first few weeks, monitor the plant closely for signs of stress. Keep the soil consistently moist but not soggy, and protect it from harsh sun or wind until it’s fully established. Gradual acclimation to outdoor conditions helps ensure a smooth transition and long-term success.
Long-Term Care of Propagated Hydrangeas
Feeding and Fertilizing for Healthy Growth
To encourage vigorous development in young hydrangea plants, begin fertilizing about four to six weeks after transplanting, once the roots have had time to establish. Use a balanced, slow-release fertilizer or a diluted liquid formula with equal parts nitrogen, phosphorus, and potassium to promote both foliage and root growth.
Apply fertilizer in early morning or late afternoon to avoid stressing the plant, and always water afterward to help nutrients absorb into the soil. Avoid overfeeding, as too much nitrogen can result in lush leaves with few flowers.
During the growing season, reapply fertilizer every four to six weeks, adjusting frequency based on your specific soil conditions and hydrangea variety. Organic options like compost tea or fish emulsion can offer gentler nourishment and improve soil health over time.
Pruning for Shape and Vigor
Pruning young hydrangeas helps encourage fuller growth and a well-shaped structure. Begin lightly pruning in the first spring after transplanting to remove weak or crossing stems. Focus on cutting just above healthy buds to promote branching.
For most hydrangea types, avoid heavy pruning in the first year, as it may delay blooming. Instead, shape the plant gradually and remove any dead or damaged wood. Regular light pruning improves airflow, reduces disease risk, and encourages strong, vibrant growth in the seasons ahead.
Protecting Young Plants Through the Seasons
Young hydrangeas need protection from weather extremes to grow successfully. In summer, provide partial shade to prevent leaf scorch and keep the soil evenly moist to support developing roots. As fall arrives, begin acclimating indoor-rooted cuttings to outdoor conditions and mulch heavily to insulate against winter cold.
In winter, move small or potted plants to sheltered areas like a porch or cold frame, watering lightly only when the soil is dry. Remove mulch and check for frost damage in early spring, trimming dead parts if needed. Seasonal care like this ensures your new hydrangeas stay healthy and continue to thrive.
Common Mistakes in Hydrangea Propagation
Propagating hydrangeas may seem straightforward, but many gardeners face setbacks due to avoidable errors. Understanding these common mistakes and knowing how to address them can significantly improve your success rate.
Taking Cuttings at the Wrong Time
One of the most frequent issues is taking cuttings during the wrong season. Cuttings taken too early in spring may not root well due to immature growth, while those taken too late in summer might not establish before dormancy. The ideal time is late spring to early summer when stems are semi-ripe and active growth is strong.
How to fix: Choose non-flowering stems that are firm but still flexible and aim for morning harvesting when plants are fully hydrated.
Using Unhealthy or Flowering Stems
Stems that are flowering or diseased are poor choices for propagation. Flowering stems tend to channel energy into blooming rather than rooting, and infected material can introduce disease to new soil.
How to fix: Always select clean, vigorous, non-flowering shoots with no signs of pests, spots, or discoloration.
Improper Cutting Technique
Another common mistake is cutting too long or too short, or failing to remove lower leaves. Stems with too much foliage lose moisture quickly, and improper cuts can rot before rooting.
How to fix: Cut just below a leaf node, leaving about 4 to 6 inches of stem with two sets of leaves. Remove the bottom leaves cleanly and optionally trim large top leaves to reduce moisture loss.
Skipping Rooting Hormone
While hydrangeas can root without hormone, omitting it often slows rooting or reduces success, especially in challenging conditions.
How to fix: Dip the cut end in a quality rooting hormone before planting. This improves callus formation and speeds root initiation.
Overwatering or Letting Cuttings Dry Out
Improper moisture management is a critical mistake. Overwatering leads to rot, while letting the cutting dry causes wilting and failure.
How to fix: Keep the soil moist but never soggy. Use a spray bottle to mist the medium and maintain consistent humidity with a cover or dome, vented slightly to avoid fungal buildup.
Using the Wrong Soil Medium
Using heavy garden soil or poorly draining potting mix causes problems such as rot, fungal growth, or poor oxygen flow.
How to fix: Use a sterile, well-aerated medium like perlite and peat moss or coconut coir. Ensure containers have drainage holes to avoid waterlogging.
Not Providing Enough Light
Cuttings kept in too much shade or intense sunlight either become leggy or burn before rooting occurs.
How to fix: Place the cuttings in bright, indirect light. A north- or east-facing window works well, or use grow lights if natural light is insufficient.
Neglecting to Harden Off Before Transplanting
Young plants moved directly from a humid rooting environment to the garden may wilt or die due to sudden exposure.
How to fix: Gradually acclimate rooted cuttings over 7 to 10 days. Introduce them to outdoor light and air in increasing durations before planting them in the ground.
Different Propagation Methods Explained
Hydrangeas can be propagated through several techniques, each suited to different gardener preferences, plant varieties, and seasonal conditions. Understanding these methods allows you to choose the best approach based on your timing, resources, and plant health goals.
Propagation by Stem Cuttings
This is the most popular and efficient method for home gardeners, offering quick results and high success rates when done correctly. It involves taking semi-ripe cuttings—typically 4 to 6 inches long—from a non-flowering stem and rooting them in a moist, well-draining medium.
Advantages: Fast turnaround (roots in 2–4 weeks), easy to scale, and clones the parent plant precisely.
When to use it: Late spring to early summer is ideal, when growth is vigorous and not yet hardened.
Key tips: Use sharp tools, remove lower leaves, and apply rooting hormone. Maintain high humidity during rooting by using a plastic dome or bag.
Propagation by Layering
This technique involves bending a low-growing stem to the ground, nicking the bark, and burying part of the stem while it’s still attached to the parent plant. Roots will form at the buried section over weeks or months.
Advantages: Very reliable with minimal maintenance. The cutting remains nourished by the mother plant until rooted.
When to use it: Best done in early spring or late summer. Ideal for large, mature plants with flexible lower branches.
Key tips: Secure the stem to the soil with a landscape pin or stone, keep the buried section moist, and sever from the parent plant once roots form.
Propagation by Division
Division is effective for certain hydrangea species, such as smooth (Hydrangea arborescens) or panicle (Hydrangea paniculata), which grow from multiple stems and root masses. This method involves digging up the plant and splitting the root ball into sections.
Advantages: Instant plants with established roots. Especially useful for rejuvenating crowded hydrangea clumps.
When to use it: Early spring or late fall when the plant is dormant and less stressed by disturbance.
Key tips: Use a sharp spade or knife, ensure each division has strong roots and stems, and replant promptly with plenty of water.
Propagation by Seed
Growing hydrangeas from seed is rare among home gardeners because it is time-consuming and does not guarantee genetic consistency. However, it’s useful for breeding programs or exploring natural variations in open-pollinated plants.
Advantages: Offers potential for genetic diversity and experimentation.
When to use it: Seeds can be started indoors in winter for planting out in spring.
Key tips: Use fresh seeds, sow them in sterile seed-starting mix, and provide bottom heat and consistent moisture for best germination results.
Propagation by Root Cuttings (less common)
Root cuttings are not typical for hydrangeas but may work with vigorous species that produce suckers or basal shoots. It involves taking a section of root and planting it horizontally to encourage sprouting.
Advantages: Potential to grow plants without aerial cuttings, although success is variable.
When to use it: Late winter to early spring during root dormancy.
Key tips: Only take small portions of the root system to avoid harming the parent plant, and monitor for rot or fungal issues.
Varieties of Hydrangea and Their Propagation Differences
Tips for Success in Every Growing Zone
Choose a hydrangea variety that is best suited for your local climate. For example, Hydrangea paniculata performs well in colder zones, while Hydrangea macrophylla thrives in more temperate regions. Before taking cuttings, check the soil temperature to ensure it has warmed to at least 60°F (15°C), which promotes healthy root development. In warmer climates, provide bright but indirect light to prevent stress on young cuttings, while in cooler regions, consider using supplemental lighting if propagating indoors.
Adapt your watering schedule to match local soil drainage and humidity levels. Overwatering is especially risky in humid climates, so ensure the propagation medium drains well. In areas prone to strong winds or late spring frosts, create windbreaks or cover plants during the night to prevent stress or damage. For regions with long, hot summers, start propagation in late spring to give cuttings time to establish before the peak heat arrives. In colder zones with extended winters, consider rooting cuttings indoors and transplanting them once the threat of frost has passed.
Always label your propagated plants and record environmental conditions during the rooting phase. This allows you to track which methods work best in your zone and adjust accordingly. Regular monitoring and fine-tuning of light, moisture, temperature, and protection strategies will help ensure strong, healthy plants regardless of your location.
Troubleshooting Rooting Problems
Rooting problems in hydrangea propagation often result from excess moisture, poor air circulation, or unsuitable conditions. If the base of the cutting turns black or mushy, it’s likely due to rot from overwatering. Improve drainage and reduce watering frequency to correct this.
Slow or no root development may be caused by low humidity, cold temperatures, or using woody cuttings. Keep cuttings in a warm, humid environment with bright, indirect light. Use softwood or semi-hardwood cuttings for best results.
Wilting or yellowing leaves can signal light stress or water loss. Trim large leaves to reduce moisture loss and ensure good airflow. If mold appears, lower humidity and improve ventilation.
By monitoring these factors and making timely adjustments, you can improve rooting success and grow strong new hydrangea plants.
When to Expect Flowers from Propagated Hydrangeas
Timeline from Cutting to Bloom
After taking hydrangea cuttings, root development usually begins within two to four weeks, depending on temperature and humidity. By six to eight weeks, rooted cuttings are typically ready for transplanting into larger pots or the garden. Once transplanted, young hydrangeas focus on growing foliage and establishing strong root systems during their first season.
Most hydrangea cuttings will not bloom until their second year. Flowering depends on variety, climate, and care, especially light exposure and proper fertilization. With consistent watering, light pruning, and protection from frost, you can expect your propagated hydrangeas to start blooming beautifully in their second growing season.
Encouraging Early Bloom Development
To encourage early bloom development in young hydrangeas, focus on providing consistent moisture, balanced fertilization, and sufficient sunlight. Avoid overfeeding with high-nitrogen fertilizers, which promote leafy growth at the expense of blooms. Instead, use a bloom-boosting formula with more phosphorus once the plant is well established.
Pinching back the growing tips in early summer can also help the plant branch out and form more flower buds. Make sure the hydrangea is not stressed by heat, drought, or transplant shock, as these factors can delay blooming. With proper care in their first year, some varieties may produce small blooms earlier than expected.
FAQ
How long does it take for hydrangea cuttings to root?
Hydrangea cuttings typically begin to form roots within two to three weeks when placed in a warm, humid environment with consistent moisture. Full root development, strong enough for transplanting, usually takes four to six weeks depending on the variety and environmental conditions.
Can I propagate hydrangeas in water instead of soil?
Yes, hydrangeas can be propagated in water, especially smooth and bigleaf types. Place the cuttings in a clear container with fresh water and change the water every few days. However, plants rooted in water may take longer to adapt to soil later, so transferring them carefully is crucial.
What time of year is too late to propagate hydrangeas?
Late summer to early fall may be too late in colder zones, as the new cuttings may not have enough time to establish roots before winter. In warmer climates, propagation can extend later into fall if the weather remains mild and frost-free.
Why are my hydrangea cuttings wilting after planting?
Wilting often occurs when cuttings lose too much moisture or are exposed to direct sun. Ensure they’re placed in indirect light with high humidity. Covering with a plastic dome or bag can help retain moisture, and misting regularly supports hydration until roots develop.
Will propagated hydrangeas bloom the first year?
While it’s possible for well-rooted hydrangeas to produce a few blooms in their first year, most will focus on root and foliage growth. Full blooming typically begins in the second growing season, once the plant is better established.
Conclusion: A Blooming Investment in Your Garden
Propagating hydrangeas is a deeply rewarding endeavor for any gardener looking to fill their outdoor space with beauty, texture, and enduring color. With careful timing, the right technique, and patient nurturing, you can turn one beloved plant into an entire garden bed of flourishing hydrangeas. As each propagated cutting takes root and grows, it becomes not just a new plant, but a reflection of your skill, care, and connection to the natural world.