Kalanchoe is a popular succulent known for its colorful blooms, thick leaves, and easy-care nature. Whether you’re a new gardener or a houseplant enthusiast, learning to propagate kalanchoe can help you expand your collection without spending extra money. With the right technique, you can multiply your plants quickly and enjoy even more vibrant greenery around your home.
Propagation isn’t just a fun way to grow more plants. It also keeps your kalanchoes healthy and thriving by encouraging fresh growth. In this guide, you’ll learn how to propagate kalanchoe using simple methods that are perfect for beginners. From leaf cuttings to offsets and stem cuttings, we’ll cover every step you need to take for fast, successful propagation.
Understanding Kalanchoe and Its Growth Habits
Characteristics of Kalanchoe
Kalanchoe is a diverse genus with over 100 recognized species, mostly native to Madagascar and tropical Africa. These plants are well-known for their thick, fleshy leaves that retain water, a hallmark of succulents. Their adaptability makes them suitable for indoor environments and drought-prone gardens. Kalanchoes come in a variety of forms, from compact flowering houseplants to larger varieties used in landscaping.
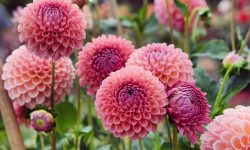
One of the most appealing aspects of kalanchoe is its extended blooming period. While many varieties bloom in late winter or early spring, with proper light and temperature, some can bloom multiple times a year. The vibrant flowers come in shades of red, pink, yellow, orange, and white, often forming tight clusters above the foliage. Their growth is relatively slow, and their small root systems make them ideal for container gardening.
Why Propagate Kalanchoe?
Propagating kalanchoe allows you to expand your collection at no cost. It gives you the opportunity to grow new plants from healthy leaves, stem cuttings, or offsets. This process not only saves money but also helps preserve mature kalanchoes that are becoming woody or sparse. Propagation is especially useful if your plant begins to stretch from lack of light or lose its lower leaves.
Reproducing kalanchoe also gives you more control over your plant’s shape and health. New plants from cuttings often grow more compact and bushy, especially when regularly pinched back. Whether you’re gifting a plant, refreshing an older one, or simply enjoying the process, kalanchoe propagation is both practical and rewarding. It connects you more deeply to your plants and helps ensure a thriving, colorful indoor or outdoor display.
When Is the Best Time to Propagate Kalanchoe?
The best time to propagate kalanchoe is during its active growing season, which typically spans from spring through early summer. This period offers optimal warmth, longer daylight hours, and increased humidity, all of which support root development and overall plant health. Attempting propagation during this time increases the chances of successful rooting, as the plant is naturally in a phase of vigorous growth and energy production.
Avoid propagating kalanchoe during the dormant months of late fall and winter. During these cooler, darker months, the plant’s metabolic rate slows down significantly, reducing the likelihood that new cuttings or offsets will take root or grow well. Even if some success is possible under grow lights or in controlled indoor environments, the results are generally less reliable and slower than during the natural growing season.
For the best outcome, choose a warm day with mild temperatures and indirect light to take your cuttings or separate offsets. Make sure the parent plant is healthy and well-hydrated before propagation, as stressed or dehydrated kalanchoes are less likely to produce viable new plants. If you’re propagating indoors, using a heat mat or humidity dome can further boost your success rate, especially early in the spring when temperatures might still be fluctuating.
Tools and Materials Needed for Propagation
Essential Tools for Success
To propagate kalanchoe successfully, gather the following tools and materials in advance. You’ll need a sharp, sterilized knife or pruning shears, a clean work surface, small pots with drainage holes, well-draining succulent soil mix, and a spray bottle for misting. Optional items include rooting hormone, labels, and a humidity dome.
Using the right soil mix is crucial. Kalanchoe needs excellent drainage to prevent rot, so use a succulent or cactus potting mix. You can also create your own by combining potting soil with sand, perlite, or pumice. The small pots should be shallow but wide enough to accommodate roots as they develop.
The spray bottle helps keep the soil lightly moist during the early stages of propagation. Labels are useful for tracking different cuttings or propagation dates, especially if you’re trying multiple methods like leaf or stem cuttings. A humidity dome or clear plastic cover can help retain moisture and improve rooting in dry environments.
Preparing Your Tools
Always sterilize cutting tools before use to prevent the spread of diseases. You can dip them in rubbing alcohol or use a diluted bleach solution. Let them dry thoroughly before making any cuts. Clean tools ensure a smooth, clean slice that heals faster and reduces the risk of infection.
It’s also a good idea to inspect tools for sharpness. Dull blades can crush plant tissue instead of making a clean cut, increasing the chance of rot. Keep tools sharp and in good condition to maintain the health of both the mother plant and the cuttings.
Before you begin, organize your workspace. Lay down newspaper or a tray to catch debris, and have all tools within reach. This preparation makes the process more efficient and helps ensure you don’t accidentally damage delicate plant parts during handling.
Methods of Propagating Kalanchoe
Leaf Cuttings
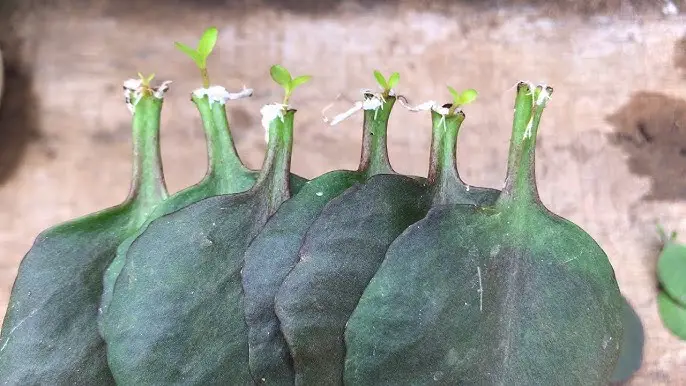
Leaf propagation is one of the simplest and most accessible ways to propagate kalanchoe, especially for beginners. Begin by selecting a healthy, mature leaf from the mother plant. The leaf should be free of any blemishes, tears, or signs of disease. Gently twist or snip it off from the main stem, ensuring you get a clean break at the base where it connects to the stem.
Once the leaf is removed, allow it to sit in a dry, shaded place for two to five days. This step, called callousing, is critical because it helps prevent the leaf from rotting once it’s placed in the soil. After the cut edge has formed a dry, protective layer, lay the leaf flat on top of a well-draining succulent soil mix or insert the end slightly into the soil. Mist the soil lightly every few days to keep it just barely moist, not wet.
Over time, small roots and eventually new leaves will begin to grow from the base of the leaf. This process can take several weeks, and not all leaves will successfully propagate, so it helps to start with multiple leaves. Once the baby plant is about an inch tall with a healthy root system, you can transplant it into a small pot.
Stem Cuttings
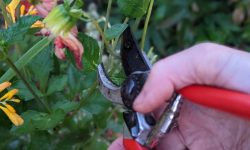
Stem cuttings are especially effective for rejuvenating leggy or overgrown kalanchoes. To start, use sterilized pruning shears or a sharp knife to cut a healthy stem segment about 3 to 5 inches long. Choose a stem that has at least one node and a few leaves. Remove the lower leaves to expose a few inches of bare stem at the bottom.
Let the cutting dry and callous for several days in a warm, shaded area. This is important to reduce the risk of rot when planted. Once calloused, insert the stem into moist, well-draining soil. Press the soil gently around the cutting to provide stability. Keep the soil lightly moist but not soggy, and avoid direct sunlight during the first few weeks to prevent stress.
Roots typically form within two to three weeks. You can test for root development by gently tugging on the stem—if there’s resistance, roots have likely formed. Once established, gradually introduce the new plant to more sunlight and resume normal succulent care.
Offsets and Plantlets
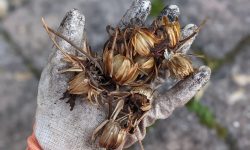
Some kalanchoe varieties, such as Kalanchoe daigremontiana and Kalanchoe delagoensis, naturally produce small plantlets along their leaf margins. These mini-plants are essentially clones of the parent and are one of the easiest propagation methods.
When the plantlets are large enough to handle—typically about half an inch to an inch in size—they can be gently plucked from the mother plant. Be careful not to damage their tiny roots if they have already begun forming. Allow them to sit and dry for a day or two to form a light callous before placing them on top of moist soil.
Offsets, which are small shoots growing at the base of the parent plant, can also be used. To propagate from offsets, gently dig around the base and detach the offset with as many roots intact as possible. Allow it to callous briefly, then replant in a new container.
Both plantlets and offsets usually establish quickly and begin growing within a few weeks. Because they are genetically identical to the parent plant, they will retain all the same traits and care requirements.
Step-by-Step Guide to Propagation
Taking the Cutting
Choose a healthy, mature leaf or stem with no signs of pests or disease. For leaf propagation, pick a full, plump leaf and gently twist it off at the base to get a clean separation. If you’re using a stem cutting, cut a 3–5 inch section with at least one node using sterilized scissors or a sharp blade. Let the cutting rest in a shaded, dry area for two to five days, depending on the thickness of the cutting and the local humidity level. This drying period allows a callus to form over the wound, which helps prevent rot once planted.
Preparing the Soil and Containers
Choose a small pot or tray with drainage holes to prevent water from accumulating at the bottom. Fill it with a well-draining mix such as cactus soil or a homemade blend of potting soil, coarse sand, and perlite in equal parts. Avoid heavy soils that retain moisture, which can cause root rot. Once the callus has formed on your cutting, insert it gently into the soil, just deep enough to hold it upright without wobbling. Do not bury it too deep. Lightly mist the surface to settle the soil and initiate moisture contact with the cutting.
Creating the Right Environment
After planting, position the container in a warm spot with bright, indirect sunlight—ideal temperatures range from 70°F to 80°F (21°C to 27°C). Avoid harsh midday sun, which can dehydrate the cutting. Maintain humidity by loosely covering the pot with a plastic bag or dome, making sure to open it daily for a few minutes to allow airflow and prevent mold buildup. Keep the soil barely moist—water lightly only when the top layer feels completely dry. Overwatering is the most common reason cuttings fail, so err on the side of dryness during early stages.
Common Challenges and How to Avoid Them
Root Rot and Overwatering
One of the most frequent and damaging problems when propagating kalanchoe is root rot caused by overwatering. Unlike many tropical plants, kalanchoe cuttings require minimal moisture during the rooting stage. Using a fast-draining soil mix—such as cactus or succulent soil—is essential. Avoid misting or daily watering, especially in humid environments. It’s best to water sparingly only when the top inch of the soil is completely dry. Containers must have drainage holes to allow excess water to escape, preventing the roots from sitting in moisture. If rot occurs, remove the affected part of the cutting and allow the rest to callous again before replanting.
Poor Root Formation
Lack of root development is a common frustration during kalanchoe propagation. This can result from several factors, including insufficient light, cool temperatures, or premature planting before the cutting has calloused. Kalanchoe cuttings need a warm and bright environment to initiate root growth, ideally with temperatures between 70–75°F (21–24°C). Placing them under indirect sunlight or using a grow light can improve rooting success. Additionally, dipping the cut end in a powdered rooting hormone before planting enhances the likelihood of root development. If roots still fail to appear after several weeks, gently lift the cutting to check for rot or dryness and adjust the conditions as needed.
Mold and Fungal Problems
Mold on the soil surface or on the cuttings themselves is usually a sign of too much humidity or poor airflow. This problem is common when cuttings are placed in closed propagation containers or in environments with stagnant air. White or gray fuzzy mold may appear around the base, or the leaves might develop brown, water-soaked spots. To prevent this, space cuttings adequately to ensure airflow and avoid crowding. Keep the area well-ventilated and consider using a small fan nearby. If mold develops, gently remove it using a cotton swab dipped in diluted hydrogen peroxide or apply a sulfur-based fungicide to stop the spread.
Caring for New Kalanchoe Plants
Once your kalanchoe cuttings have taken root and started to grow, they require thoughtful care to thrive. Begin by gradually acclimating them to stronger light. While bright, indirect sunlight is ideal during the propagation stage, young plants benefit from several hours of direct morning sun once established. Be cautious not to move them into full sun too quickly, as this can cause leaf burn.
Water your new kalanchoe plants sparingly. Let the top inch of the soil dry out completely before watering again. These succulents store moisture in their leaves and stems, so overwatering can quickly lead to root rot. During the growing season, you can feed the plants with a diluted, balanced fertilizer once a month to support healthy development, but stop feeding during the fall and winter months when growth slows.
Keep the indoor temperature stable, ideally between 60°F and 85°F (15°C to 29°C), and avoid drafts or sudden temperature changes. If growing kalanchoe outdoors, bring them inside before temperatures drop below 50°F (10°C).
Pinching off the tips of new growth can encourage a bushier shape and more blooms in the future. Remove any dead or yellowing leaves to keep the plant tidy and prevent disease. As your kalanchoe matures, you can consider repotting it into a slightly larger container to allow more room for root expansion, using the same well-draining soil mix you used for propagation.
Speeding Up the Propagation Process
Using Rooting Hormone
Rooting hormone enhances the success rate of propagation by encouraging quicker cell regeneration at the cutting site. To apply it, moisten the cut end slightly, then dip it into the hormone powder, tapping off any excess. This step is particularly beneficial when propagating kalanchoe from woody or mature stems that are slower to root naturally. While kalanchoe can root without added hormones, especially in ideal conditions, the hormone provides a valuable boost in suboptimal environments, such as during cooler months or in low humidity.
Providing Consistent Warmth and Light
Maintaining steady environmental conditions is key to speeding up root development. Kalanchoe cuttings root best at temperatures between 70°F and 80°F (21°C–27°C). Avoid placing them in drafty windowsills or near air conditioning vents, which can stress the plant tissue. If natural light is limited, use fluorescent or LED grow lights positioned about 6–12 inches above the cuttings. Bright but indirect light for 12 to 14 hours per day supports healthy photosynthesis without drying out the cuttings. A heating mat placed under the container can also help keep the soil temperature within the ideal range, especially in cooler indoor climates.
Monitoring Progress
After planting, it’s important to observe the cuttings for any signs of progress or potential issues. Within the first two weeks, you may notice slight swelling at the base or a firm anchoring in the soil, both signs that roots are developing. Avoid disturbing the cuttings by tugging; instead, gently press the soil around the base to feel for resistance. Yellowing or mushy leaves may signal overwatering or fungal issues. Consistent documentation—through notes or weekly photos—can help you identify what works best in your space and troubleshoot quickly if problems arise. Patience is essential, but with the right conditions, you’ll often see new root systems and fresh top growth within four weeks.
Long-Term Success With Kalanchoe
Building a Thriving Collection
Once you’ve successfully propagated a few plants, you can continue the cycle to build a beautiful indoor succulent garden. Try propagating different kalanchoe varieties to add color and texture to your space. Sharing your propagated plants with friends or local gardening groups can also be a rewarding experience.
To ensure variety and interest in your collection, include both flowering and non-flowering types. You can group kalanchoes with other succulents like echeverias and jade plants for a fuller display. Experiment with decorative pots and shelves to create a dynamic indoor plant arrangement. Labeling different varieties will also help you track their unique care needs and blooming cycles.
Preventing Common Setbacks
Stay vigilant against pests such as mealybugs and aphids, which can affect both young and mature kalanchoes. Avoid placing your plants in overly humid or poorly lit areas. Rotate pots occasionally to ensure even growth and prevent legginess.
In addition to pests, be mindful of overwatering, one of the most common issues with kalanchoes. Always allow the soil to dry out between waterings, and use well-draining soil mixes. Avoid drafts and sudden temperature changes that can shock the plant. Monitor leaf color and texture as early indicators of stress or nutrient imbalances.
Seasonal Tips for Continued Growth
Adjust your kalanchoe care throughout the seasons. In spring and summer, water more frequently and feed with a balanced succulent fertilizer. In fall and winter, reduce watering and allow the plant to rest. Proper seasonal care will support healthy blooms and robust growth.
During late fall, consider pruning leggy stems to shape the plant and encourage fuller growth in the coming season. Move plants closer to windows to maximize light in winter, or supplement with grow lights if necessary. If you want your kalanchoe to bloom again in winter, mimic shorter daylight hours by placing the plant in a dark space for 12 to 14 hours daily for six weeks. This helps initiate the flowering cycle.
FAQ About Long-Term Success With Kalanchoe
What are the signs of overwatering in Kalanchoe?
Overwatered Kalanchoe plants often show yellowing leaves, mushy stems, and root rot. The soil may feel soggy for too long, and the plant could wilt despite wet soil. To prevent this, allow the soil to dry out between waterings and ensure the pot has good drainage.
Can I propagate Kalanchoe from a single leaf?
Yes, you can propagate some types of Kalanchoe from a single healthy leaf. Let the leaf callous over for a few days, then place it on top of well-draining soil. Mist lightly until small roots and plantlets begin to form. However, leaf propagation may take longer than stem cuttings.
How much sunlight do new Kalanchoe cuttings need?
New cuttings should receive bright, indirect sunlight. Too much direct sun can scorch young leaves, while too little light slows root development. A north- or east-facing windowsill is often ideal during the early stages of growth.
Why are my Kalanchoe cuttings not rooting?
Cuttings may fail to root due to overwatering, poor light, or using unhealthy parent material. Ensure the cuttings are taken from a vigorous plant, allow them to callous properly, and plant in dry, well-draining soil. Keep the environment warm and humid for faster rooting.
When can I move propagated Kalanchoe to individual pots?
Once the cuttings have developed several roots and show signs of new leaf growth, they can be moved to individual pots. This typically takes 3–6 weeks. Use a pot that is just slightly larger than the root system to prevent excess moisture retention.
Conclusion
Propagating kalanchoe is an enjoyable and efficient way to grow your plant collection. With just a little knowledge, patience, and the right environment, you can produce healthy, vibrant new plants quickly. Whether you’re using leaf cuttings, stem cuttings, or offsets, each method offers a unique and satisfying experience. Keep practicing, and soon your home will be filled with beautiful kalanchoes that you’ve grown yourself.
By mastering propagation, you not only multiply your plants but also deepen your connection to gardening. It’s a simple act that yields long-lasting beauty, making every new kalanchoe a living testament to your green thumb.