There’s something undeniably magical about lavender. Its soft purple hues, calming fragrance, and timeless charm make it a favorite in gardens and homes across the world. Whether swaying gently in a summer breeze or tucked into a cozy windowsill pot, lavender brings a sense of peace and beauty that’s hard to match.
Imagine being able to multiply that beauty yourself, right from your backyard or kitchen counter. Propagating lavender at home isn’t just a gardening task—it’s an experience of nurturing, patience, and quiet joy. With the right steps, you can create thriving new plants from cuttings and enjoy the satisfaction of growing your own fragrant lavender haven.
Understanding Lavender Propagation
Benefits of Propagating Lavender Yourself
Propagating lavender at home offers a wide range of benefits that go beyond simply saving money on nursery plants. One of the most immediate advantages is the ability to replicate a healthy, thriving lavender plant that you already love. By taking cuttings from a well-performing variety in your garden, you ensure that the new plants will carry the same fragrance, bloom color, and growth habits, maintaining consistency across your landscape.
Another key benefit is cost-effectiveness. A single lavender plant can yield dozens of cuttings, making it easy to expand your garden or even share with friends and neighbors without spending extra at the garden center. This is especially valuable if you’re working with specialty or heirloom varieties that may be hard to find or expensive to purchase.
Propagating lavender also provides a deeper understanding of plant care. As you learn to identify the best stems, maintain ideal rooting conditions, and monitor young plants through their early development, you gain hands-on gardening skills that translate to better care for all your plants. It’s an empowering process that strengthens your confidence and fosters a more sustainable gardening approach.
Finally, there’s a quiet satisfaction in nurturing a plant from cutting to full bloom. Watching your propagated lavender take root, grow strong, and flower is not only rewarding but connects you more deeply to the rhythms of the natural world—a reward far beyond what any store-bought plant can offer.
Choosing the Right Time for Propagation
Timing is one of the most critical elements in lavender propagation. For best results, softwood cuttings should be taken during late spring to early summer when the plant is actively growing. This is when the stems are still flexible but beginning to mature, making them ideal for rooting.
Hardwood cuttings, on the other hand, can be taken in the fall or early winter. These are thicker, more mature stems that take longer to root but can be more resilient. The season you choose may depend on your climate and how quickly you want the new plants to establish.
Being in tune with your lavender’s growth cycle helps you identify the optimal window for taking cuttings. Avoid propagation during periods of extreme heat or when the plant is in full bloom, as the energy is diverted to flower production rather than root development.
Tools and Preparation for Successful Propagation
Having the right tools and setup is essential for clean cuts and a sterile environment that supports healthy root formation. Start by preparing your tools, such as sharp pruning shears, a clean knife, or scissors, and disinfect them with rubbing alcohol to prevent disease transfer.
Next, choose a propagation medium that promotes drainage and aeration. A mix of perlite and peat moss, or coarse sand and vermiculite, works well to maintain moisture without waterlogging the cutting. Prepare your pots or seed trays ahead of time, ensuring they have adequate drainage holes and are filled with moist but not saturated growing medium.
Setting up a humid environment is also important. While not strictly necessary, using a humidity dome, clear plastic bag, or mini greenhouse can improve success rates by reducing moisture loss through transpiration while roots are forming.
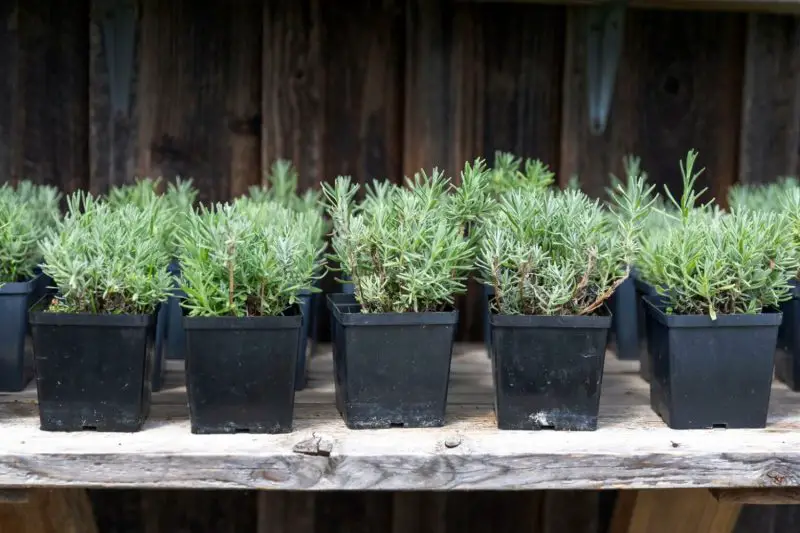
Selecting and Taking Lavender Cuttings
Choosing the right part of the lavender plant is the first critical step in successful propagation. For best results, select healthy, non-flowering stems that are free from disease or pests. These should come from the current season’s growth, where the stems are firm but not woody. Stems that are too soft may rot before rooting, while those that are too woody may struggle to develop roots.
The ideal time to take cuttings is in the morning, when the plant is well-hydrated and the temperatures are cooler. Use sharp, sterile pruning shears to make a clean cut just below a leaf node—this is where roots are most likely to form. Each cutting should be about four to six inches long.
Once cut, gently strip off the lower sets of leaves, leaving just a few at the top. This reduces moisture loss and helps the cutting focus on root development. If desired, dip the cut end in a rooting hormone to encourage faster and stronger root growth, though many lavender varieties root well even without it.
Proper technique during this step sets the foundation for successful propagation and ensures that each cutting has the best chance to thrive during the rooting stage.
Caring for Lavender Cuttings During Rooting
The rooting phase is the most delicate and critical period in the propagation of lavender. To ensure successful root development, maintaining the right balance of moisture, temperature, light, and air circulation is essential. Lavender cuttings are especially prone to rot and fungal infections at this stage, so close attention to their environment can mean the difference between thriving new plants and failure.
After placing your cuttings into a well-draining propagation medium—typically a mix of perlite and peat or a sterile seed-starting mix—lightly water to settle the soil. The medium should remain slightly moist but never wet. Overwatering is the most common reason cuttings fail to root, as excess moisture leads to stem rot. Mist the cuttings lightly if the surface begins to dry out, but avoid soaking the soil.
Humidity is important to prevent desiccation, especially during the first week. Covering the cuttings with a clear humidity dome or placing them in a propagation tray with a plastic lid helps retain moisture without direct water contact. However, ventilation is just as important. Open the cover daily or create small vents to prevent fungal buildup and to introduce fresh air.
Place the cuttings in a location with bright, indirect light. Avoid full sun, which can stress the unrooted cuttings and cause them to wilt. A north-facing windowsill or under a grow light set to a gentle intensity is ideal. Keep the temperature consistently between 65°F and 75°F (18°C to 24°C), as this encourages healthy cell division and root initiation.
Check the cuttings regularly for signs of stress, such as yellowing, mold growth, or softening stems. Any decaying cuttings should be removed immediately to prevent disease from spreading. Gently tug on the base of the cuttings after two to three weeks to feel for resistance—this is usually a sign that roots are forming.
Patience and precision during the rooting stage lead to stronger, more resilient lavender plants. The better care you take now, the greater your chances of producing healthy lavender that will thrive in your garden for years to come.
Transplanting Rooted Lavender into Pots or the Garden
When your lavender cuttings have a strong root system, they are ready to be moved into individual pots or directly into your garden. Use a well-draining potting mix if transplanting to containers, ideally one formulated for herbs or Mediterranean plants.
If planting outdoors, choose a sunny location with excellent drainage. Lavender thrives in sandy or rocky soils with low fertility and prefers full sun for at least six hours a day. Avoid overly rich soils, which can encourage leggy growth and fewer blooms.
Water the new transplants gently and consistently for the first couple of weeks, helping them establish in their new environment. Once established, lavender becomes drought-tolerant and should only be watered when the topsoil is dry.
Propagating Lavender from Seed: What to Expect
Growing lavender from seed takes more time and patience than using cuttings, but it offers the satisfaction of nurturing plants from the very beginning. Germination is often slow and uneven, especially with varieties like English lavender. Expect seeds to take 2 to 4 weeks to sprout, and some may not germinate at all.
To improve success, cold-stratify seeds by placing them in the fridge for 2 to 4 weeks before sowing. Then, surface-sow them on light, well-draining soil and provide bright light without covering them. Keep the soil consistently moist and warm, ideally between 65–70°F (18–21°C), and use a humidity dome if needed.
Seedlings grow slowly and require at least 2 to 3 months before transplanting. During this time, protect them from overwatering, fungal issues, and low airflow. Keep in mind that lavender from seed may vary in traits like fragrance or bloom color due to genetic diversity.
Despite the longer timeline, propagating lavender from seed is ideal for gardeners looking to grow many plants affordably while enjoying the discovery of unique variations. It’s a rewarding process with long-term benefits when managed carefully.
Troubleshooting Common Propagation Challenges
Even with careful preparation, lavender propagation can face setbacks that test the gardener’s patience and precision. Recognizing early signs of problems and understanding their causes is crucial to saving your cuttings and refining future techniques.
One of the most common issues is stem rot, typically caused by excess moisture in the propagation medium or poor air circulation. Lavender cuttings are especially vulnerable to fungal infections during the rooting stage. If stems become soft, dark, or emit an unpleasant smell, rot has likely set in. The solution lies in reducing watering frequency, improving drainage, and ensuring that humidity covers have adequate ventilation.
Wilting or drying out is another frequent problem. While humidity is essential to prevent dehydration, cuttings still need occasional misting to keep their leaves turgid. However, excessive dryness—especially from direct sun or hot indoor spots—can cause irreversible leaf collapse. Repositioning cuttings to an area with bright but indirect light and maintaining consistent humidity usually resolves this.
If cuttings remain green but fail to root after several weeks, this could be a sign of low temperature, poor light, or unsuitable propagation media. Lavender requires warmth and bright conditions to stimulate rooting hormones. A heat mat can provide bottom warmth, while replacing the propagation mix with a lighter, airier combination can enhance aeration around the base of the cuttings.
Mold or mildew growth on leaves or soil surface often results from stagnant air or over-humid conditions. This is particularly problematic when using plastic domes without ventilation. Lifting the cover daily or incorporating small air vents will improve airflow and suppress fungal spores.
Finally, cuttings that show new top growth without root development can mislead gardeners into transplanting too soon. Top growth can occur using stored energy within the cutting. Always confirm rooting by gently checking for resistance before repotting.
By diagnosing these issues accurately and adjusting your technique accordingly, you’ll strengthen your ability to propagate lavender with higher success rates over time.
Best Lavender Varieties for Home Propagation
Choosing the right lavender variety plays a vital role in successful home propagation. Each type has unique traits regarding growth habits, fragrance, size, and climate adaptability. The varieties listed below are particularly suited for propagation at home due to their strong rooting ability, ease of care, and ornamental value.
English Lavender (Lavandula angustifolia) is one of the most popular and reliable choices for home growers. This variety thrives in cooler climates, forms compact bushes, and produces soft purple flowers with a classic, sweet fragrance. It roots well from cuttings, especially cultivars like ‘Hidcote,’ known for its deep purple blooms, and ‘Munstead,’ a compact and tidy grower ideal for containers and borders.
Lavandin (Lavandula x intermedia) is a hybrid between English and Portuguese lavender. Lavandin varieties are vigorous, fast-growing, and produce abundant flower spikes, making them excellent for essential oil production and dried arrangements. ‘Grosso’ and ‘Provence’ are among the top choices for propagation, favored for their large growth habit and strong, clean scent. They do particularly well in warmer, drier climates.
French Lavender (Lavandula dentata) stands out for its serrated foliage and long blooming season. Although it’s less cold-hardy than English lavender, it thrives in warmer zones or indoor settings. French lavender is fast-growing and roots easily from cuttings, offering an attractive option for balconies or greenhouses. Its subtle fragrance and unusual flowers add a decorative element to home gardens.
Spanish Lavender (Lavandula stoechas) is known for its distinctive “rabbit ear” flower bracts and vibrant, eye-catching appearance. This variety prefers hot, dry climates and is well-suited for Mediterranean-style gardens. Spanish lavender can be propagated successfully from softwood cuttings in late spring. Cultivars like ‘Otto Quast’ and ‘Ballerina’ are favored for their vivid colors and drought tolerance.
When selecting lavender for home propagation, consider your local climate, the purpose of your planting (decorative, aromatic, or for dried flowers), and available space. English lavender and Lavandin hybrids are excellent for beginners due to their high success rates and manageable growth. Meanwhile, Spanish and French lavenders offer visual variety and perform well in warm, sunny locations with minimal care.
Timing Your Propagation for Seasonal Success
Proper timing is essential to ensure lavender cuttings root successfully and grow into healthy, thriving plants. The best time to propagate lavender at home is during late spring to early summer, typically from May through July in most temperate regions. During this period, the plant is in active growth, and the stems are flexible but firm—ideal for taking softwood or semi-hardwood cuttings.
Softwood cuttings are best taken in late spring, around mid-May to early June, when new shoots are still tender and energetic. These cuttings tend to root faster but may require extra humidity and care. Semi-hardwood cuttings, taken in late June to July, are slightly more mature and more resilient to environmental changes, often with a higher success rate for beginner gardeners.
If you live in a warmer climate, you may extend propagation into early August, especially for lavandin or Spanish lavender, which handle heat better. However, avoid propagating in fall or winter, as cooler temperatures and reduced light slow rooting and increase the risk of failure.
By aligning your propagation efforts with your local growing season, you maximize your chances of strong root development and healthy lavender plants ready for transplanting in the late summer or early fall.
Lavender Propagation for Indoor Growers
Lavender can thrive indoors when given the right care, making indoor propagation a viable option. Propagate cuttings in a bright, south-facing window or under grow lights that mimic natural sunlight. Maintain consistent humidity during the rooting phase and use a lightweight potting mix.
Indoor-grown lavender needs excellent air circulation and a careful watering schedule. Once rooted and acclimated, these plants can live on sunny windowsills or be moved outdoors during the warmer months.
Indoor propagation allows you to control all aspects of the environment, from humidity to light exposure, which can increase success rates and provide year-round gardening enjoyment.
Lavender Companion Planting After Propagation
Once your propagated lavender has established healthy roots and is ready to be transplanted into the garden, thoughtful companion planting can enhance its growth and overall garden harmony. Lavender thrives in full sun and well-drained soil, and it pairs especially well with other plants that prefer similar conditions.
Excellent companions for lavender include herbs like rosemary, thyme, and sage. These Mediterranean natives not only share similar soil and sunlight preferences but also contribute to a visually cohesive and aromatic garden bed. Their combined fragrance can help deter common pests, creating a more resilient planting area.
Ornamental flowers such as echinacea, yarrow, and coreopsis also make strong companions. Their bold colors contrast beautifully with lavender’s soft purples while attracting beneficial pollinators like bees and butterflies. These combinations create a pollinator-friendly environment and extend blooming interest across seasons.
Avoid pairing lavender with plants that require consistently moist or rich soil, such as ferns or hostas, as these conditions can lead to root rot in lavender. By selecting the right companions, you not only support the health of your young lavender plants but also design a landscape that is both functional and visually appealing.
Frequently Asked Questions (FAQ)
When is the best time of year to propagate lavender?
The best time to propagate lavender is during late spring to early summer when the plant is actively growing. At this stage, the stems are semi-soft and contain enough moisture and energy to develop roots successfully. Avoid propagating in cold weather, as root formation slows significantly and the chances of rot increase.
Can I propagate lavender in water?
While it’s possible to root lavender cuttings in water, it’s not ideal. Lavender is prone to rot in constantly moist conditions, and roots developed in water are often weaker when transferred to soil. Using a well-draining propagation mix gives stronger, healthier root systems and better transplant success.
How long do lavender cuttings take to root?
Lavender cuttings generally take between three to six weeks to root, depending on the variety, environment, and propagation method. Warm temperatures around 70°F and high humidity help speed up the process. Look for resistance when gently tugging the cutting or small root tips emerging at the base.
Do I need to use rooting hormone?
Using rooting hormone is not strictly necessary but can significantly increase the success rate, especially for harder-to-root varieties or during cooler conditions. The hormone encourages faster root development and can help prevent fungal diseases during the early stages.
What type of soil is best for rooting lavender cuttings?
Lavender thrives in well-draining, low-nutrient soil. For propagation, a mix of perlite and peat moss or coarse sand with light compost provides the ideal balance of aeration and moisture retention. Avoid heavy or rich potting mixes that retain too much water.
Can I propagate lavender from mature woody stems?
Mature woody stems are harder to root because they are less flexible and slower to generate new roots. While possible with hardwood propagation methods, using softwood or semi-hardwood cuttings during the growing season yields faster and more reliable results.
How should I care for new lavender plants after propagation?
After the cuttings have rooted, gradually acclimate them to brighter light and reduce humidity levels. Transplant them into individual pots with sandy, alkaline soil, and provide moderate watering. Avoid fertilizing too early. Once established, place the plants in a sunny location to promote robust growth.
Conclusion
Propagating lavender at home is a simple yet rewarding process that allows you to grow more of this fragrant, resilient plant without much cost. With the right timing, proper technique, and a little patience, your cuttings will root successfully and thrive. This not only brings the satisfaction of nurturing life but also fills your garden with the calming scent and timeless beauty of lavender season after season.