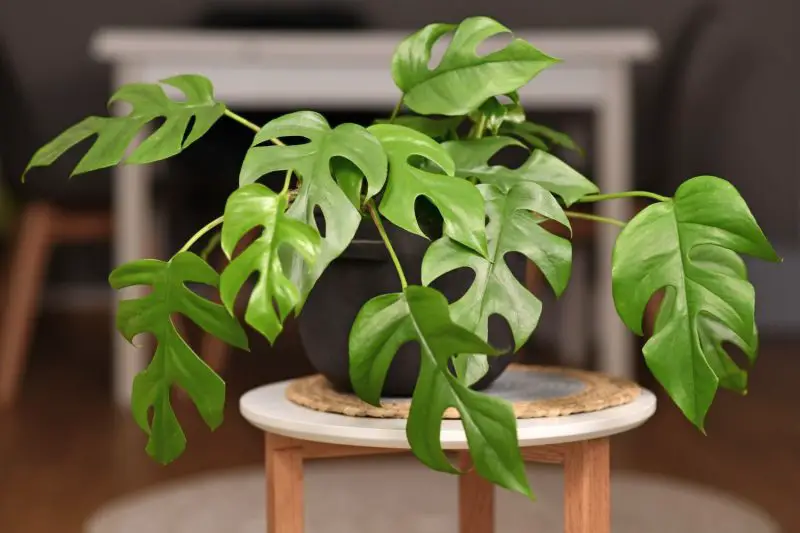
Monstera plants are highly prized houseplants, known for their striking split leaves and exotic tropical appeal. Learning how to propagate Monstera not only helps expand your indoor garden but also allows you to share these stunning plants with friends and family. Propagation is a straightforward process if you understand the plant’s growth habits and provide the right care during each stage. Healthy propagation leads to robust roots, vibrant leaves, and a flourishing plant that enhances the beauty of any indoor space.
Understanding how Monstera grows in nature can help you replicate its ideal conditions at home. Native to the tropical rainforests of Central and South America, Monstera species climb trees and spread by producing aerial roots. These roots allow them to attach to surfaces and absorb moisture from the humid air. By mimicking this natural process, you can encourage healthy growth in propagated cuttings.
Understanding Monstera Growth Patterns
Before propagating, it is important to understand the growth patterns of Monstera plants. These plants are natural climbers, sending out long stems that produce aerial roots along the nodes. Nodes are essential points of growth where roots and leaves develop, and they are the key areas required for successful propagation. Recognizing these nodes is crucial because any cutting without at least one healthy node will not produce roots.
Monstera plants thrive in bright, indirect sunlight, high humidity, and well-draining soil. Their rapid growth is often supported by their climbing habit, as they use aerial roots to secure themselves to moss poles or nearby structures. When propagating, choosing a stem with visible nodes and healthy aerial roots significantly improves the chances of success. New roots often emerge from these nodes quickly when provided with the right moisture and temperature conditions.
Healthy Monstera stems typically have thick, green sections with no signs of pests or disease. Avoid taking cuttings from damaged or yellowing parts of the plant, as these sections may struggle to develop roots. Always select a vigorous, mature stem to ensure a strong start for your new plant.
Preparing the Plant for Propagation
The first step in Monstera propagation involves choosing the right time and preparing the plant properly. Spring and early summer are ideal seasons for propagation because the plant is actively growing, which encourages faster root development. Avoid propagating during winter or periods of dormancy, as root growth is usually slower, and the cuttings may not thrive.
Using sterilized tools is essential when preparing for propagation. A sharp, clean pair of pruning shears or scissors reduces the risk of infection and ensures a clean cut, which helps the plant heal more quickly. Cutting with dull or dirty tools may damage the stem and introduce bacteria, leading to rot or poor root formation.
Inspect the mother plant carefully before making any cuts. Ensure that the stem you choose has at least one or two visible nodes and a healthy leaf. If possible, select a cutting that includes a small aerial root, as these roots can transform into strong underground roots once placed in soil or water.
Taking the Perfect Monstera Cutting
Cutting technique plays a crucial role in successful Monstera propagation. Locate a healthy stem section with one or two nodes and make a clean cut about half an inch below the lowest node. This area is where new roots will emerge, so it is important to include it in the cutting. If your chosen stem has an aerial root, ensure it remains attached because it will help speed up the rooting process.
Once you have taken the cutting, allow it to rest for a short period. Many plant enthusiasts prefer letting the cut end dry and callous for a few hours before placing it in water or soil. This step helps reduce the risk of bacterial infection and rotting. The cutting should remain firm and green, with no signs of wilting before proceeding to the next stage.
The parent plant should also be cared for after removing the cutting. Apply a little cinnamon or rooting hormone powder to the cut area on the mother plant to help it heal quickly and prevent fungal infections. Keep the plant in its usual bright, indirect light to recover and continue growing.
Rooting Monstera in Water
Water propagation is a popular method because it allows you to monitor root development easily. Once you have prepared your cutting, place it in a clean glass or jar filled with room-temperature water. Make sure that at least one node is submerged while the leaves remain above the water surface to prevent rot.
Change the water every few days to keep it fresh and oxygen-rich. Stagnant water can lead to bacterial buildup, which may harm the developing roots. Bright, indirect sunlight is essential during this stage, as too much direct sunlight may overheat the water and stress the cutting.
Within two to four weeks, small white roots should start emerging from the submerged node. Wait until the roots are at least two to three inches long before transferring the cutting to soil. This ensures the plant can absorb nutrients and adapt better to its new growing medium.
Rooting Monstera in Soil
Soil propagation is another effective method that encourages strong root systems right from the start. To propagate in soil, choose a well-draining potting mix that contains peat, perlite, and orchid bark. This combination mimics the natural forest floor conditions where Monstera thrives. Avoid using heavy or compacted soil, as it retains too much moisture and may lead to root rot.
Insert the cutting into the prepared potting mix, making sure the node is buried while the leaf and stem remain above the soil. Gently press the soil around the base to secure the cutting in place. Water lightly to keep the soil slightly moist but never soggy, as excess water can suffocate the roots.
High humidity and consistent warmth are essential during this stage. Placing the pot in a warm, bright area with indirect sunlight encourages faster root growth. Covering the cutting with a clear plastic bag can help maintain humidity, but ensure there is enough airflow to prevent mold or fungal growth.
Caring for Newly Rooted Cuttings
Once your Monstera cutting has developed roots, proper aftercare is essential for healthy growth. Whether you propagated in water or soil, the plant should gradually adjust to its new environment. If you rooted in water, transplant the cutting into a well-draining soil mix once the roots are long enough. Be gentle when handling the roots, as they can be delicate during this stage.
For the first few weeks, keep the soil consistently moist but not overly wet. Bright, indirect sunlight remains important, as young Monstera plants are sensitive to direct sun, which can scorch their tender leaves. Humidity should remain high, especially if the plant is kept indoors where air can be dry. Regular misting or placing a humidity tray nearby can help maintain the right conditions.
As the plant establishes itself, you can begin light fertilization using a balanced, water-soluble fertilizer. Start with half-strength doses to avoid overwhelming the young roots. Over time, you will notice new leaves forming, which is a clear sign that the plant has successfully adapted and is thriving.
Encouraging Healthy and Lush Growth
Healthy propagation is only the first step; ensuring continuous growth requires ongoing care. Providing adequate support, such as a moss pole, encourages Monstera to climb and produce larger, fenestrated leaves. The aerial roots will attach to the moss pole, mimicking the plant’s natural growing conditions and promoting vigorous development.
Regular pruning is also beneficial for encouraging bushier growth. By trimming older or damaged leaves, you allow the plant to focus its energy on producing new, healthy foliage. Ensure you continue to provide high humidity and indirect sunlight, as these conditions are crucial for lush, vibrant leaves.
Monitoring for pests is equally important. Mealybugs, spider mites, and scale insects occasionally target Monstera plants. Early detection and treatment with neem oil or insecticidal soap can prevent infestations from spreading and harming the plant.
Common Problems During Propagation
Even with careful preparation, some cuttings may face challenges during propagation. One common issue is root rot, which often occurs if the water or soil remains too wet. Ensuring proper drainage and regular water changes can prevent this problem. Brown or mushy roots indicate rot, and the affected sections should be trimmed away immediately.
Slow or no root growth may result from insufficient light or low temperatures. Keeping the cutting in a warm area with consistent indirect sunlight usually stimulates root development. Patience is also key, as some cuttings may take longer to root depending on environmental conditions.
Yellowing leaves on the cutting can signal stress, overwatering, or nutrient deficiencies. Adjusting watering practices and ensuring the cutting receives the right humidity often resolves the issue.
FAQs About Propagating Monstera
How long does it take for Monstera cuttings to root?
Monstera cuttings typically take two to four weeks to develop roots in water or soil. Warmer temperatures and high humidity can speed up the process, while cooler conditions may slow root growth.
Can Monstera cuttings grow without a node?
Monstera cuttings cannot grow without a node because roots and new growth emerge from this point. Always ensure your cutting has at least one healthy node to guarantee successful propagation.
Is water or soil better for Monstera propagation?
Both water and soil work well, but water allows you to monitor root growth more easily. Soil, however, encourages stronger roots right from the start, making the transition to regular growth smoother.
When is the best time to propagate Monstera?
Spring and early summer are the best times to propagate Monstera, as the plant is actively growing during these seasons. This active growth phase helps cuttings develop roots faster and adapt better.
How do I prevent Monstera cuttings from rotting?
Use clean tools, change water regularly if propagating in water, and avoid overwatering if propagating in soil. Ensure good airflow and keep the node slightly moist but not soggy to prevent bacterial infections.
Final Thoughts
Learning how to propagate Monstera is a rewarding experience that allows you to expand your collection of these iconic tropical plants. By understanding the plant’s natural growth habits and providing the right care during each stage, you can successfully produce healthy new plants with lush foliage. Proper cutting selection, clean tools, and patience are key factors that ensure a smooth propagation process.
Whether you choose to propagate in water or soil, the end result is equally satisfying—a thriving Monstera with strong roots and vibrant leaves that will enhance your indoor garden for years to come. With time and consistent care, your propagated Monstera can grow just as beautifully as the mother plant, adding to the natural beauty and tropical feel of your home.