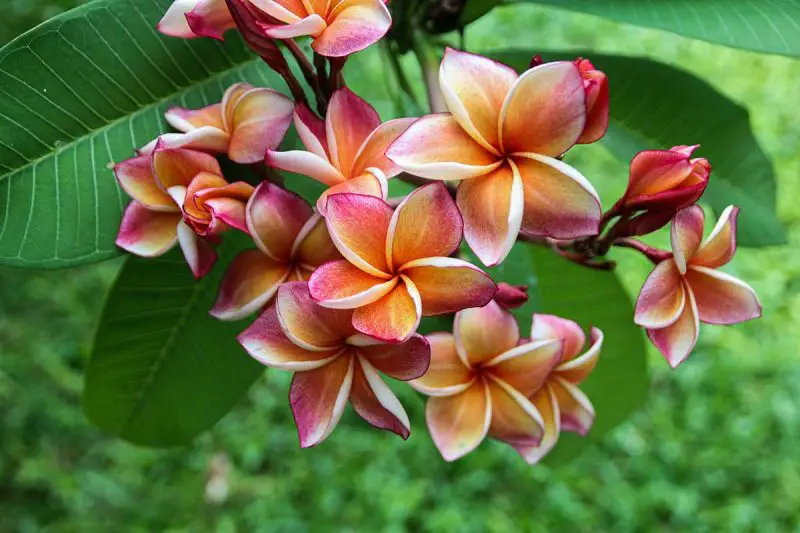
Plumeria, also known as frangipani, is a tropical treasure prized for its fragrant blooms and vibrant colors. Whether grown in containers or gardens, plumeria brings a touch of paradise to any space. Propagating plumeria allows gardeners to expand their collections, preserve favorite varieties, or share beauty with friends. The process is both satisfying and surprisingly simple—with the right guidance, even beginners can succeed.
In this comprehensive guide, you’ll learn proven propagation methods, seasonal timing, troubleshooting tips, and how to care for new plants from cutting to blooming. Whether you choose to grow from cuttings or seeds, this article will walk you through every step with clarity and confidence.
Why Propagate Plumeria?
Multiply Your Collection
Plumeria propagation allows gardeners to rapidly expand their tropical landscape without purchasing new plants. Each mature plumeria can yield several healthy cuttings every growing season, which can be rooted and grown into individual trees. This makes propagation an ideal solution for filling empty spaces in your garden or designing a lush, fragrant border. Over time, you can shape your collection by pruning for form, selecting the most vigorous branches, and arranging colors to create a stunning visual impact. Since cuttings grow faster than seeds and retain the traits of the parent plant, propagation also shortens the time to bloom compared to starting from scratch.
Preserve Rare or Unique Varieties
Some plumeria cultivars, especially heirloom types or hybrids with extraordinary fragrance, deep hues, or double petals, are difficult to find in nurseries. Propagating from an existing rare plant is the only way to guarantee that the new plant retains the exact characteristics of the original. Seed-grown plumerias, while genetically diverse, do not produce identical offspring and may never display the same flower form or scent. Propagation by cuttings, on the other hand, ensures genetic fidelity. This is particularly valuable if you’ve cultivated a special tree for years or inherited a beloved plumeria that you wish to pass down. It’s a method of botanical preservation and personal legacy.
Share with Friends and Gardeners
One of the joys of gardening is sharing the beauty you’ve nurtured with others. Plumeria cuttings make wonderful gifts—living mementos that grow stronger with care. Because they are relatively small and easy to root, plumeria stems can be transported without soil, wrapped simply in newspaper or cloth, and gifted across towns or countries. Sharing cuttings helps preserve unique cultivars and connects gardeners through the mutual appreciation of tropical plants. For gardening groups, plant swaps, or local horticultural events, propagated plumerias are always a favorite. Whether you’re helping a neighbor start their garden or contributing to a community landscape, propagation is an act of generosity rooted in growth.
The Best Time to Propagate Plumeria
Spring: The Ideal Start
Spring is the best time to begin propagating plumeria because the plant is emerging from dormancy and entering its active growth phase. As temperatures rise and daylight increases, plumerias naturally produce new shoots and leaves. This hormonal shift stimulates root development, making spring cuttings more likely to root quickly and successfully. By propagating early in the season, your new plants will have several warm months ahead to establish strong roots before winter. In most tropical and subtropical regions, late March through May is considered prime time for propagation.
Spring is also when plumerias are typically pruned to encourage bushier growth, giving you a perfect opportunity to use healthy trimmings as cuttings. Choose semi-hardened wood—stems that are not too green and not overly woody—for the best rooting results.
Summer: Warmth Promotes Rooting
If you miss the spring window, summer is still an excellent time to propagate plumeria. The consistent heat and longer days provide the optimal environment for root formation. Temperatures between 75°F and 90°F (24°C–32°C) are especially favorable for quick rooting. However, during hot summer days, it’s important to keep newly cut stems in a shaded, well-ventilated spot while they callus over and root. Direct sun can stress unrooted cuttings and lead to dehydration or rot.
Cuttings started in summer may require more frequent misting or protection from extreme heat, especially in arid climates. But with proper care, they usually root within four to six weeks. This allows time for the plant to establish itself and possibly even develop leaves before the growing season ends.
Fall and Winter: Not Recommended
Fall and winter are generally poor times for propagating plumeria. As temperatures drop and daylight hours shorten, plumerias enter dormancy and stop growing. Attempting to root cuttings during this period is risky, as the plant’s internal energy is not focused on growth or regeneration. Cuttings are more prone to rot and may sit without rooting for months, especially if kept in cool or low-light conditions.
If you must take cuttings in fall—for example, to save a damaged plant before frost—store them in a cool, dry place until spring. Plumeria stems can remain viable for weeks or even months if kept dry and out of direct sun. Once warmer weather returns, these stored cuttings can be planted with a much higher chance of success.
How to Propagate Plumeria from Cuttings
Select the Right Cutting
The success of plumeria propagation starts with choosing the right cutting. Look for a healthy branch from a vigorous, disease-free plant. The cutting should be at least 12 to 18 inches long and about as thick as your thumb—this size contains enough stored energy to support rooting. Avoid branches that are too thin or green, as they may dry out quickly, or too woody and old, as they root slowly.
Focus on sections with firm, smooth, greenish-gray bark and multiple leaf nodes, which are key rooting points. If the plant has recently bloomed, choose a stem that has finished flowering but is still firm and full of life. Always use a clean, sharp pruning tool to make the cut, and sterilize it beforehand to prevent transmitting disease.
Let the Cutting Callus
Once you’ve made the cut, do not plant the stem immediately. Allow it to callus—a process where the exposed end dries out and seals itself to prevent infection. Place the cutting upright or laid flat in a shaded, dry area with good air circulation. The callusing process typically takes between 5 to 10 days depending on humidity and temperature.
During this period, avoid moisture and direct sunlight, which can soften the stem or encourage rot. You’ll know the callus has formed when the cut end appears dry, hardened, and slightly crusty to the touch. This protective barrier is essential for successful rooting once the cutting is planted.
Prepare the Potting Mix
Plumeria cuttings require excellent drainage to avoid rot and stimulate healthy root development. Prepare a loose, airy mix that allows water to pass through quickly. A typical mix might include equal parts cactus soil, perlite, and coarse sand. You can also use pumice or orchid bark as an additional amendment to improve aeration.
Avoid using standard garden soil or heavy potting mix, as these tend to retain water and suffocate tender roots. Sterilizing the potting medium in advance is also a good idea, especially if reusing materials, to eliminate fungal spores or bacteria.
Use a container with drainage holes, and choose one that fits the length of the cutting without tipping over. Tall pots or narrow deep containers often work best to keep the cutting upright and stable.
Plant and Position the Cutting
Once the cutting has callused and your soil is ready, it’s time to plant. Insert the dried end 2 to 4 inches deep into the potting mix, ensuring that at least one or two nodes are below the soil surface. These nodes are where new roots will most likely emerge. Press the mix gently around the base of the cutting to anchor it securely but do not compact the soil too tightly.
Position the pot in a warm, bright location that receives plenty of indirect or filtered sunlight. Plumeria cuttings root best in consistent warmth, ideally above 75°F (24°C). A greenhouse, sunny windowsill, or warm patio are excellent spots.
Water the soil lightly after planting and then hold off on watering again until the soil is completely dry. Plumeria cuttings are prone to rot if kept too moist during the early stages of rooting. Some growers prefer misting the cutting lightly every few days instead of direct watering, especially in humid climates.
Monitor for Root Growth
Plumeria cuttings generally begin to root within 4 to 8 weeks, though some may take longer depending on environmental conditions and cutting health. Be patient and avoid disturbing the soil too soon. After about a month, you can check for root development by gently tugging on the cutting. If you feel resistance, rooting has likely begun.
Once roots establish and new leaves begin to emerge from the growing tip, it’s a strong sign your cutting is transitioning into an independent plant. At this point, you can start watering more regularly, always allowing the soil to dry out between waterings. Avoid fertilizing until the plant has several healthy leaves.
As the new plant grows, gradually introduce it to more direct sunlight and consider repotting it into a larger container to encourage continued development. Within a growing season or two, your propagated plumeria may be ready to bloom—bringing your tropical garden dream to life from a single stem.
How to Propagate Plumeria from Seed
Collect or Purchase Fresh Seeds
To begin propagation from seed, start with high-quality, viable plumeria seeds. These seeds form inside long, green to brown pods that take several months to mature on the plant. Once fully ripe, the pod naturally splits open, revealing dozens of dry, winged seeds. Harvest seeds when the pod begins to crack but before it fully opens, to avoid losing them to wind or rain. If you’re purchasing seeds online or from a nursery, always check the harvest date—older seeds have significantly lower germination rates. Freshness is key to successful plumeria seed propagation.
Soak and Prepare Seeds
Before sowing, soak the seeds in warm, room-temperature water for 24 hours. This step softens the tough outer coating and jumpstarts the germination process. You may notice that some seeds float while others sink; both can still germinate, but those that sink tend to have a slightly higher success rate. During soaking, ensure the water stays clean and warm to avoid mold or bacterial growth. You can also wrap soaked seeds in a moist paper towel inside a plastic bag for a few more hours if you’re not quite ready to plant them yet.
Use a Light Starting Mix
For optimal root development, plumeria seeds need to be sown in a well-aerated, moisture-retentive yet fast-draining growing medium. A high-quality seed-starting mix blended with perlite or fine orchid bark is ideal. Avoid heavy potting soil, as it can suffocate emerging roots. When planting, lay each seed flat on the soil surface with the pointed, winged end slightly exposed above the surface. Gently press the lower half into the soil so that only the “wing” remains upright. This orientation mimics how seeds land in nature and improves germination success.
Create a Warm Germination Environment
Plumeria seeds thrive in warm, humid conditions—similar to the tropical environments they originate from. Maintain a temperature between 75°F and 85°F (24°C to 29°C) using a heat mat if needed. Cover your seed tray or pots with a humidity dome or clear plastic wrap to trap moisture and warmth. Bright, indirect light is best at this stage; avoid full sun until after germination. Keep the soil evenly moist but never soggy. Under ideal conditions, seedlings begin to sprout within 7 to 14 days, although some may take a bit longer.
Transplanting Seedlings
Once the seedlings produce two or three sets of true leaves, it’s time to transplant them into individual pots. Use a well-draining soil mix similar to what you’d use for adult plumeria—typically cactus soil blended with sand or perlite. Handle young plants carefully to avoid damaging their fragile roots. After transplanting, introduce them gradually to brighter light conditions to avoid sunburn. Within a few weeks, your seedlings will begin to establish stronger roots and stems. Continue providing warmth and moderate moisture as they grow into young tropical trees.
Differences Between Propagating from Cuttings vs. Seeds
Genetic Variation
When you propagate plumeria from cuttings, you’re creating a perfect genetic clone of the parent plant. This means the resulting plant will have the exact same flower color, shape, fragrance, and growth habit. It’s the best choice if you’re aiming to preserve a rare or especially beautiful cultivar.
In contrast, growing plumeria from seeds introduces genetic diversity. Each seed carries a unique combination of traits from its parent plants, leading to exciting—but unpredictable—results. You might end up with a flower that’s even more stunning than the parent, or one that lacks fragrance or has a completely different color. For hybridizers and curious gardeners, this unpredictability can be a thrilling adventure.
Time to First Bloom
One of the biggest differences between propagation methods is how soon you can expect flowers. Plumeria grown from cuttings can bloom in as little as 9 months to 1 year under ideal conditions, since they’re starting as mature tissue with pre-formed flowering potential. This makes cuttings the preferred method for those seeking fast results.
Seed-grown plumeria, however, require patience. Most seedlings won’t flower until they are at least 2 to 3 years old, and in some cases even longer. The plant must mature fully before producing its first blooms. While the wait can be long, the surprise of seeing an entirely new flower makes it worthwhile for many gardeners.
Growth Rate and Maintenance
Seedlings are delicate in their early stages. They grow more slowly and require careful attention to moisture, temperature, and light during their first several months. Frequent watering and protection from direct sun or cold are crucial until they become established. Their root systems are also less developed, making them more sensitive to transplant shock.
Cuttings, on the other hand, are typically faster-growing once roots develop. They’re hardier and more tolerant of environmental fluctuations compared to seedlings. After successful rooting, they often leap into vigorous growth and adapt well to garden conditions. This resilience makes cuttings a better option for beginner gardeners or those working with limited time and resources.
Common Problems During Propagation
Rotting at the Base
Rot is the most common issue when propagating plumeria, especially from cuttings. It usually occurs if the cutting is planted before the cut end has properly callused or if the soil is kept too wet. The base may turn black and mushy, leading to total failure. To avoid this, always allow the cutting to dry for 5–10 days before planting and use a very well-draining mix like cactus soil with perlite or coarse sand. Water sparingly until clear signs of root development appear.
Poor Root Development
Cuttings or seeds may struggle to form roots if conditions are not ideal. Low temperatures, heavy or compacted soil, or inadequate light can all stunt root growth. In some cases, cuttings may sit in the soil for weeks without change. To promote rooting, maintain warm temperatures (above 75°F or 24°C), use a breathable mix, and ensure plenty of indirect light. Gently tug the cutting after a few weeks—if there’s resistance, roots are forming.
Mold or Fungus on Seeds
When propagating from seed, excessive moisture and poor air circulation can quickly lead to mold or fungal growth, especially on the seed surface or soil. This can kill the seed before it has a chance to sprout. Prevent this by soaking seeds no longer than 24 hours, using sterile containers and soil, and keeping the environment humid but not wet. Once seedlings emerge, remove any covers to increase airflow.
No Germination
Sometimes, seeds simply fail to germinate. This is often due to old, dry, or poorly stored seed stock. Plumeria seeds lose viability quickly, so always check expiration dates or buy from reputable sources. Soaking seeds in warm water for 24 hours before planting can improve success rates by softening the seed coat and jumpstarting germination.
Leaf Drop After Rooting
Even successfully rooted cuttings may experience sudden leaf drop. This can be alarming but is usually a stress response—caused by transplant shock, overwatering, or a sudden change in temperature or light. As long as the stem remains firm and upright, new growth will eventually emerge. Reduce watering, keep the plant warm, and wait for new leaves to form.
Tips for Long-Term Success After Propagation
Acclimate Young Plants Gradually
Newly propagated plumeria—whether from seeds or cuttings—are especially sensitive to environmental stress. Once roots are established, introduce your young plant slowly to full sun. Start with dappled light or a few hours of morning sun each day, then increase exposure over 1–2 weeks. This process helps prevent sunburn and encourages sturdy growth.
Use the Right Potting Mix
For long-term health, plumeria need fast-draining soil that mimics their native tropical habitat. A mix of cactus soil, coarse sand, and perlite (in equal parts) is ideal. Avoid heavy, moisture-retaining potting soil, which can suffocate roots and promote rot. When transplanting rooted cuttings or seedlings, choose a pot with good drainage holes to prevent standing water.
Water Wisely
Overwatering is a common cause of failure after propagation. Once your plumeria is rooted, water deeply but infrequently—only when the top 2–3 inches of soil are dry. During the growing season, this may mean watering once a week, depending on your climate. Reduce watering in fall and stop completely in winter when the plant enters dormancy.
Provide Consistent Warmth and Light
Plumeria thrive in full sun and warm conditions. Ensure your young plants receive at least 6 hours of direct sunlight daily. If growing indoors or in cooler climates, place them near a south-facing window or use grow lights. Avoid drafts or placing near cold windows in winter. Consistent warmth above 65°F (18°C) will support steady, vigorous growth.
Feed During the Growing Season
Once established, feed your plumeria with a high-phosphorus fertilizer (such as 10-30-10) every 2–3 weeks during spring and summer. This encourages flower production and root strength. Avoid fertilizers high in nitrogen, which can lead to lots of foliage but few blooms. Stop fertilizing in fall to allow the plant to enter dormancy naturally.
Repot as Needed
Plumeria can outgrow their containers after a couple of years. If roots start circling the bottom or growing out of drainage holes, it’s time to repot. Move up just one pot size and refresh the soil mix to maintain proper aeration and nutrient availability.
Watch for Pests
Young plumeria plants can attract pests like spider mites, aphids, and mealybugs. Inspect the undersides of leaves regularly. If pests appear, wipe them off with a damp cloth or use insecticidal soap. Keep foliage dry and maintain good air circulation to discourage infestations.
Prune to Shape
Once your plumeria has matured, pruning will encourage branching and more blooms. Prune in late winter or early spring before new growth appears. Always use sterilized tools, and make clean cuts just above a node. Each cut will eventually form two or more new branches, increasing flower potential.
When to Expect Your First Blooms
From Cuttings: Faster Rewards
Plumeria propagated from cuttings typically bloom much sooner than those grown from seed. Under ideal conditions—warm temperatures, full sun, and regular feeding—healthy rooted cuttings can begin producing flowers as early as 12 to 18 months after planting. Some especially vigorous varieties may even bloom in their first summer, especially if the cutting was taken from a mature, blooming parent plant.
From Seeds: A Longer Journey
Seed-grown plumeria take longer to mature and bloom. On average, expect your first flowers 2 to 3 years after germination, though some varieties may take up to 4 years depending on genetics, growing conditions, and care. During this time, the plant focuses on developing a strong root system and branching structure. Patience is key—but the reward is a potentially unique, never-before-seen bloom color or pattern.
Factors That Influence Bloom Time
Several factors can accelerate or delay blooming, including:
Sunlight: Plumeria need at least 6–8 hours of direct sunlight daily to bloom well. Insufficient light is a top reason for bloom delay.
Fertilization: A high-phosphorus fertilizer (like 10-30-10) promotes flower production. Nitrogen-heavy formulas encourage leaf growth at the expense of blooms.
Maturity and Branching: Blooming often occurs on older, well-branched wood. Pruning to encourage branching can speed up flowering.
Temperature and Dormancy: Exposure to warm conditions in spring and summer, followed by a brief dormant period in cooler months, mimics their natural cycle and helps trigger blooming.
Signs Your Plumeria Is Ready to Bloom
Look for swelling tips or “bump-like” structures forming at the end of branches. These are inflorescences, the early stage of a flower cluster. Once visible, blooms can appear within 2 to 4 weeks, depending on weather and care.
Saving and Storing Cuttings for Later Use
If you’re not able to plant your plumeria cuttings immediately, you can store them safely for future use—without losing their viability. After cutting, allow the ends to callus for 7 to 14 days in a shaded, dry, and well-ventilated space. The callusing process is critical to prevent rot when the cuttings are later planted. You’ll know they’re ready when the cut surface is dry, firm, and slightly hardened.
Once callused, wrap each cutting individually in newspaper, kraft paper, or a paper towel to protect them and absorb excess moisture. Then store them in a cardboard box, paper bag, or mesh container to ensure air circulation. Avoid using plastic, which traps humidity and can lead to fungal growth.
Keep the stored cuttings in a cool, dry, and dark place, such as a closet or garage, where temperatures stay between 60°F and 70°F (15°C to 21°C). Avoid direct sunlight, high humidity, or freezing conditions.
Under these proper storage conditions, plumeria cuttings can remain viable for up to 2–3 months, and sometimes even longer. When you’re ready to plant, recheck that the cut ends are still firm and rot-free before proceeding with propagation.
Overwintering Newly Propagated Plumeria
Plumeria are tropical plants that are highly sensitive to cold, especially young, newly propagated ones that haven’t yet developed strong root systems or hardiness. To ensure their survival through the winter, it’s important to provide protection from cold temperatures, frost, and excess moisture.
Move Plants Indoors Before First Frost
Once nighttime temperatures start to drop below 50°F (10°C), bring your potted cuttings or seedlings indoors. Place them in a bright, sunny window that gets at least 6 hours of light daily, or use grow lights if natural light is limited. Warmth and light will help the plant maintain slow, steady growth or stay healthy during dormancy.
Reduce Watering During Dormancy
Plumeria naturally go dormant in cooler months. For both cuttings and seedlings, water very sparingly—just enough to prevent shriveling. Overwatering can lead to root rot, especially in plants with underdeveloped root systems. Let the soil dry out almost completely before watering again.
Maintain Proper Indoor Conditions
Ideal indoor conditions for overwintering include:
Temperature: Keep between 60°F and 75°F (15°C to 24°C).
Humidity: Moderate humidity (avoid very dry or overly humid environments).
Ventilation: Ensure good air circulation to prevent fungal issues.
Monitor for Pests and Stress
Indoor environments can attract pests like spider mites or fungus gnats. Regularly inspect leaves and soil, and use neem oil or insecticidal soap if needed. Also, keep an eye on the leaves—yellowing or soft stems may indicate overwatering or cold stress.
Resume Growth in Spring
As spring approaches and temperatures rise, gradually reintroduce your plumeria to outdoor conditions by hardening them off—placing them outside for a few hours each day and increasing exposure over a week or two. Resume regular watering and feeding once new growth appears.
With proper overwintering care, your newly propagated plumeria will survive the cold season and be ready to thrive and grow once warm weather returns.
FAQ About Propagating Plumeria
How long does it take for plumeria cuttings to root?
Plumeria cuttings typically take between 3 to 6 weeks to root, depending on temperature, humidity, and light conditions. Warmer climates with temperatures around 75–85°F help accelerate root development. You’ll know roots are forming when you feel resistance when gently tugging the cutting. Leaf growth is also a good sign that rooting has begun.
Can I propagate plumeria in water?
Although plumeria can sometimes sprout roots in water, this method is not ideal. The roots developed in water are often too fragile for soil and may rot when transplanted. Rooting in well-draining soil or a cactus mix gives stronger, more transplantable roots and reduces the chance of rot and shock.
What is the best time of year to propagate plumeria?
The best time to propagate plumeria is in late spring through mid-summer. During this period, the plant is actively growing, and the warm temperatures promote faster root development. Avoid propagating in cooler months when plumeria enters dormancy, as rooting will be much slower and less reliable.
Why are my plumeria cuttings rotting instead of rooting?
Rotting usually happens due to excessive moisture or poor air circulation. Common causes include using soil that retains too much water, planting before the cutting has callused properly, or placing the cutting in a humid environment without enough airflow. Let the cutting dry and callus for 5 to 10 days before planting, and always use well-draining soil.
Can I grow plumeria from seeds, and how long will it take to flower?
Yes, you can grow plumeria from seeds, though it requires more patience. Seed-grown plumeria usually take 2 to 3 years to bloom, and sometimes up to 5 years depending on growing conditions. Unlike cuttings, which are genetic clones, seed-grown plants may differ from the parent plant in flower color, fragrance, or growth habit—but this also makes them exciting for gardeners who enjoy surprises.
Conclusion
Propagating plumeria isn’t just about growing more plants—it’s about multiplying joy, color, and tropical beauty in your garden. Each new cutting or seedling holds the promise of fragrant summer blooms and lush green leaves that bring the spirit of the tropics to your home, no matter where you live.
Whether you’re a curious beginner or a seasoned gardener, learning to propagate plumeria connects you more deeply with nature’s rhythms. With a little patience and care, your efforts will blossom—literally—into vibrant, thriving plants that reward you year after year. So pick up that cutting, plant that seed, and start your journey to a garden filled with sunshine and blooms.