Sedum, with its simple yet vibrant beauty, has long been a favorite among garden lovers and nature enthusiasts. Its fleshy leaves, ranging from fresh greens to fiery reds, not only brighten any space but also bring a sense of calm and tranquility. Propagating sedum not only allows you to multiply your plants but also helps create a lush, thriving garden with minimal effort and cost.
The journey of propagating sedum is a deeper connection to nature, a chance to understand the life cycle and resilience of these remarkable plants. Each stem or leaf holds the potential to grow into a flourishing garden. With the detailed and easy-to-follow guidance in this article, you can transform your gardening hobby into a lasting source of joy and inspiration.
Why Propagate Sedum?
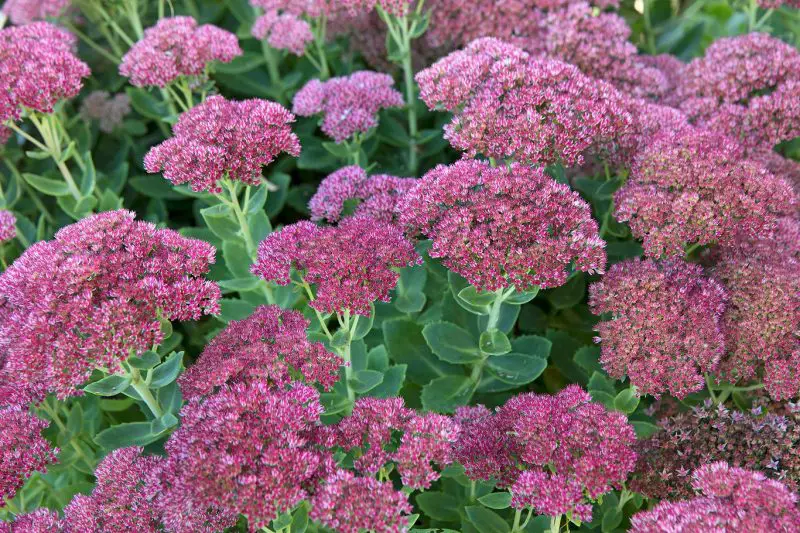
Sedum Herbstfreude Spectabile Autumn Joy Autumn late summer colour colourful plant portrait close up 270918 27092018 27/09/18 27/09/2018 27 27th September 2018 Autumn Alan Titchmarsh PLEASE CREDIT location Rose McMonigall Dipley Mill Hartley Wintney Hook Hampshire photographer Sarah Cuttle
Propagating sedum offers numerous benefits that make it an appealing choice for gardeners of all skill levels. One of the primary advantages is cost savings—rather than purchasing new plants, you can multiply your existing sedum collection at little to no expense. This is especially valuable for rare or favorite cultivars that you want to preserve and expand within your garden.
Sedum is naturally hardy and fast-rooting, which means propagation is generally straightforward and successful even for beginners. Its resilience allows it to thrive in various conditions, making it an excellent candidate for propagation by stem cuttings, leaf cuttings, or division. This versatility lets gardeners experiment with different techniques and find the method best suited to their needs.
Beyond economics and ease, propagating sedum promotes a healthier garden ecosystem. New plants derived from cuttings or divisions often grow more vigorously and can replace older, declining specimens, thus maintaining the vitality of your garden beds or containers. Sharing propagated sedum with friends and fellow gardeners also spreads gardening joy and helps build community connections.
Lastly, propagation is a sustainable gardening practice. By multiplying plants from your own garden, you reduce the demand for commercial production and transport, lowering your environmental footprint. It’s a rewarding way to deepen your relationship with nature, observe plant growth cycles firsthand, and cultivate a thriving garden full of life and color.
When Is the Best Time to Propagate Sedum?
Knowing the optimal timing for propagating sedum can significantly increase your chances of success. The best time to propagate sedum is during the spring and early summer months, typically from late March through June, depending on your climate zone. During this time, sedum plants enter an active growth phase fueled by warmer temperatures, increased sunlight, and more consistent moisture. These conditions help cuttings and divisions develop roots faster and establish stronger growth.
Spring propagation benefits from moderate temperatures, usually ranging between 65°F to 75°F (18°C to 24°C), which provide an ideal environment for root formation without the risk of heat stress. The longer daylight hours also support photosynthesis, giving new plants the energy needed to thrive.
Early summer remains suitable for propagation, but as temperatures rise, it is important to monitor moisture levels carefully to prevent drying out or overheating of young plants. In regions with hot summers, late spring is often preferable to avoid the peak heat, which can cause cuttings to wilt or fail to root properly.
Propagating sedum in early fall is another option, especially in milder climates where temperatures remain moderate. However, as the season progresses and daylight shortens, the plant’s growth slows down naturally in preparation for dormancy. Propagated sedum during this time may root more slowly and require extra care to survive colder weather.
Winter is generally not recommended for propagating sedum because the plant is dormant, and cold temperatures inhibit root growth. Additionally, reduced sunlight and cooler soil temperatures limit the plant’s ability to establish new roots. If propagation during winter is necessary, indoor environments with controlled temperature and lighting may be used to support growth.
By choosing the right time to propagate sedum—preferably in spring or early summer—you give your new plants the best conditions to develop quickly, remain healthy, and contribute to a flourishing garden.
Methods of Propagating Sedum
Sedum is a versatile succulent that can be propagated through several reliable methods. Each method offers unique advantages depending on the sedum variety, the gardener’s experience level, and available materials. Understanding these propagation techniques allows you to choose the most effective way to multiply your plants and maintain a thriving garden.
Propagation by Stem Cuttings
Propagating sedum by stem cuttings is one of the most popular and straightforward methods. It involves cutting a healthy stem segment from the parent plant, letting it dry to form a protective callous, and then placing it in soil or water to root. Stem cuttings typically root quickly and develop into robust new plants. This method works well for most sedum varieties and is ideal for expanding your garden in a short time.
Propagation by Leaf Cuttings
Some sedum species can be propagated from individual leaves. This method involves gently removing a healthy leaf, allowing it to dry and callous, then placing it on well-draining soil to encourage root and plantlet formation. While leaf propagation may take longer to produce full plants compared to stem cuttings, it is an excellent way to maximize the number of new plants from a single parent.
Propagation by Division
Division is a method best suited for mature sedum plants that have formed dense clumps or mats. By digging up the entire plant and carefully separating the root ball into smaller sections, each piece can be replanted separately. This method not only produces new plants quickly but also rejuvenates older sedum patches, promoting healthier growth and vigor.
Propagation by Seeds
Although less common for gardeners, sedum can also be propagated from seeds. Seed propagation requires patience, as germination may take several weeks, and seedlings grow more slowly than cuttings. However, this method allows for genetic diversity and can be useful for breeding or creating new sedum varieties.
Choosing the right propagation method depends on your goals, plant type, and available time. Stem cuttings offer speed and reliability, leaf cuttings maximize plant numbers, division rejuvenates existing plants, and seeds provide variety and novelty. Combining these methods can help you build a lush, thriving sedum garden with ease.
How to Propagate Sedum Using Stem Cuttings
Propagating sedum through stem cuttings is one of the easiest and most efficient methods to grow new plants. This technique works well for both upright and trailing sedum varieties, and it requires very few tools or supplies.
To begin, choose a healthy, non-flowering stem from the parent plant. Using clean, sharp scissors or garden shears, cut a 3 to 6-inch section just below a leaf node. Gently remove the lower leaves from the bottom half of the cutting to prevent rot. Then, let the cutting rest in a dry, shaded area for one to two days until the cut end forms a callous—a protective layer that reduces the risk of disease and improves rooting success.
Once calloused, plant the cutting in a small pot filled with well-draining cactus or succulent soil. Lightly water the soil, then place the pot in a bright, indirect light location. Avoid direct sunlight at this stage, as it can dry out or scorch the tender cutting. Roots typically begin to form within 1 to 2 weeks, and new growth should appear shortly after.
As the cutting establishes roots and grows stronger, you can gradually introduce it to more sunlight and reduce watering frequency. Once fully rooted and actively growing, transplant the young sedum into the garden or a larger container.
This simple process allows you to quickly multiply your favorite sedum varieties while ensuring strong, healthy growth in your expanding succulent collection.
How to Propagate Sedum Using Leaf Cuttings
Propagating sedum with leaf cuttings is a simple and effective method, especially for low-growing or trailing varieties. Begin by selecting a healthy, plump leaf from the parent plant. Gently twist and pull it away, ensuring you get the whole leaf without tearing. Allow the leaf to dry for one to two days in a shaded, well-ventilated spot until the cut end forms a callus—this step helps prevent rot.
Once callused, place the leaf flat on top of moist, well-draining soil. There’s no need to bury it. Keep the soil lightly moist and place the container in a bright, indirect light. Over the next two to four weeks, tiny roots and baby plants will begin to emerge from the base of the leaf. After the new rosettes grow larger and stronger, they can be carefully transplanted into individual pots or directly into your garden. This method is slow but rewarding, perfect for creating lush groundcovers or expanding your sedum collection naturally.
How to Propagate Sedum by Division
Propagating sedum by division is one of the fastest and most effective methods, especially for mature clump-forming types like Autumn Joy or Sedum spectabile. This method works best in early spring or fall when the plant is not actively blooming.
To divide, gently dig up the entire plant and shake off excess soil to expose the roots. Use a clean knife or your hands to separate the root ball into smaller sections, making sure each division has roots and stems attached.
Replant the divisions immediately in well-draining soil, spacing them to allow for future growth. Water lightly to help the roots establish, and provide some shade for a few days until they settle.
Division is a great way to rejuvenate older sedums, reduce overcrowding, and expand your garden with healthy, mature plants almost instantly.
Preparing the Ideal Soil and Environment for Propagation
Creating the right foundation is crucial for successful sedum propagation. Sedum thrives in light, well-draining soil that mimics its native rocky or sandy habitat. To prepare the ideal growing medium, combine regular potting soil with coarse sand, perlite, or pumice in equal parts. This ensures excellent drainage and reduces the risk of root or stem rot, which is especially important when dealing with tender cuttings or leaves.
In terms of environment, choose a warm location with bright, indirect light. Direct sun can scorch fragile cuttings, while low light may hinder root development. A temperature range between 65–75°F (18–24°C) is optimal for encouraging new root growth. Good air circulation also helps prevent fungal issues and promotes healthier development. Whether you’re propagating indoors in containers or directly outdoors in garden beds, taking time to prepare the soil and microclimate will set your sedum cuttings up for strong, vigorous growth.
Troubleshooting Common Problems in Sedum Propagation
Even though sedum is one of the easiest succulents to propagate, issues can still arise—especially if the growing conditions are less than ideal. Identifying problems early and taking quick action can dramatically improve your success rate.
One of the most common problems is rot, which typically results from overwatering or poorly draining soil. If your cuttings or leaves turn mushy or blackened at the base, it’s a sign they’re sitting in too much moisture. To fix this, remove the affected parts and replant in drier, well-draining soil. Always allow cut ends to callous over for a day or two before planting.
Another issue is lack of root formation. If your cuttings don’t develop roots after a few weeks, it may be due to insufficient warmth or light. Make sure they are kept in a bright spot with indirect sunlight and a temperature above 65°F (18°C). Avoid placing them in cold, drafty areas or overly shaded corners.
Leaf drop or shriveling is often caused by excessive sun exposure or dehydration during early propagation stages. Young cuttings and leaves need consistent, but light, moisture until roots form. Mist lightly rather than watering heavily to maintain the right balance.
In rare cases, fungal infections can occur, especially in humid conditions. Use sterile tools when cutting, and avoid overcrowding your propagation trays to allow proper air circulation.
By understanding and addressing these issues promptly, you’ll create a healthier environment for your sedum cuttings to thrive and multiply successfully.
Caring for Newly Propagated Sedum Plants
Once your sedum cuttings or leaf segments have developed roots, proper care is essential to help them grow into healthy, thriving plants. Start by placing them in a bright area with indirect sunlight. Avoid harsh, direct sun during the first few weeks, as tender new roots and foliage can be easily scorched.
Water sparingly—sedum prefers dry conditions, and overwatering is a common mistake. Allow the soil to dry out completely between waterings. As the plants grow stronger, gradually increase their exposure to full sunlight.
Feed lightly with a diluted, balanced fertilizer once a month during the growing season to support root and leaf development. Be cautious not to over-fertilize, as too much can weaken the plant’s compact form and encourage leggy growth.
Keep the area weed-free and monitor for signs of rot or pests. With consistent but minimal care, your new sedum plants will soon mature into hardy, drought-tolerant additions to your garden or containers.
Expanding Your Garden with Propagated Sedum
Propagated sedum offers an easy and cost-effective way to fill out your garden with lush, low-maintenance greenery. Once your young plants are well established, you can begin transplanting them into larger beds, containers, rock gardens, or even vertical planters.
Choose sunny locations with well-draining soil, spacing the plants far enough apart to allow for spreading. Sedum varieties with trailing or creeping habits are especially useful for covering bare spots or cascading over edges.
By repeating the propagation process each growing season, you can steadily increase your sedum collection. You can also mix and match different varieties to create textured, colorful displays that thrive with minimal care. Whether you’re building a drought-tolerant border or enhancing a succulent-themed garden, propagated sedum is the perfect plant to expand with ease.
FAQ About Propagating Sedum
How long does it take for sedum cuttings to root?
Sedum cuttings typically root within 7 to 14 days, depending on the temperature, humidity, and variety. In warm, well-ventilated conditions, roots can begin forming in as little as a week. Stem cuttings tend to root faster than leaf cuttings. Make sure to use well-draining soil and avoid overwatering during this stage to prevent rot.
Can I propagate sedum in water?
Yes, some gardeners successfully propagate sedum in water, especially with stem cuttings. Place the cut ends in a small glass of water, ensuring that only the stem (not the leaves) is submerged. Change the water every few days to prevent bacterial buildup. Once roots are about 1 to 2 inches long, you can transplant the cuttings into soil. However, water propagation is generally less common than soil propagation for sedum.
What’s the best season to propagate sedum?
Spring through early summer is the best time to propagate sedum, as the plants are actively growing and recovering quickly. Propagating during this period gives the new plants time to root and establish before the onset of extreme heat or cold. In mild climates, you can also propagate in early fall, but the plants may need protection over winter.
Why are my sedum cuttings not rooting?
If your sedum cuttings aren’t rooting, possible causes include overly wet soil, poor airflow, low temperatures, or using immature or damaged cuttings. To improve your success, allow cuttings to callus for 1 to 2 days before planting, use a well-draining succulent mix, and provide bright, indirect light. Avoid overwatering and check for signs of mold or rot.
Can I propagate sedum indoors?
Absolutely. Sedum propagation works well indoors as long as the cuttings receive enough light and are placed in well-draining soil. Use a south- or west-facing window, or supplement with a grow light if natural light is insufficient. Keep the temperature between 65–75°F (18–24°C), and ensure good air circulation to prevent mold. Once rooted, you can either grow them as indoor plants or transplant them outside.
Conclusion
Propagating sedum is an accessible and rewarding way to multiply your plants and enhance your garden’s beauty. By mastering stem cuttings, leaf cuttings, and division, you can create a thriving sedum collection that flourishes year after year. With the right soil, environment, and care, your propagated sedums will grow strong and vibrant, filling your garden with resilient and colorful greenery.