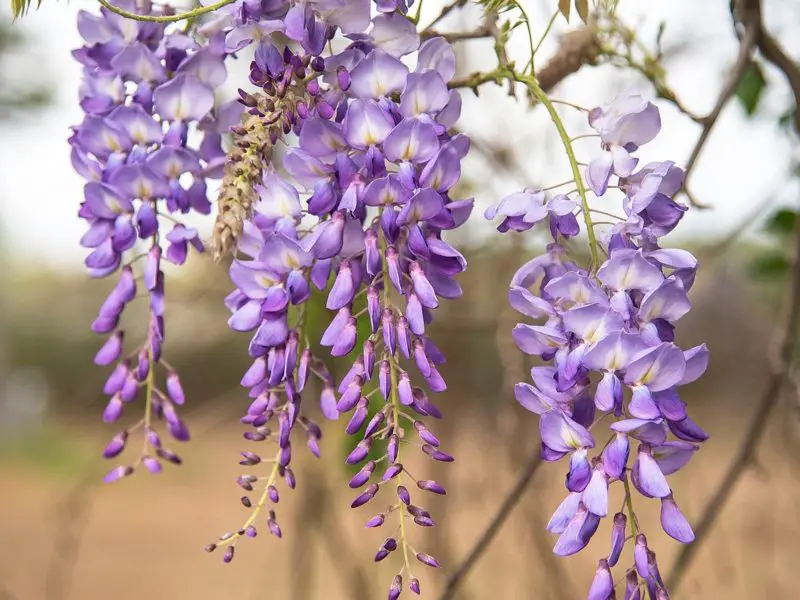
Wisteria vines have an enchanting way of transforming ordinary spaces into magical, flower-draped escapes. Their long, cascading blooms sway gently in the breeze, filling the air with a sweet fragrance and creating a garden scene that feels straight out of a dream. Whether climbing pergolas, fences, or walls, wisteria adds timeless beauty and elegance wherever it grows.
By propagating wisteria at home, you don’t just grow more plants—you cultivate more beauty, more blooms, and more memories. Watching your propagated vines thrive from a simple cutting or seed is deeply rewarding. It’s a chance to share the wonder of wisteria with other corners of your garden—or with friends and family who cherish its charm just as much as you do.
Understanding Wisteria Growth Habits
Wisteria is a vigorous, fast-growing vine that can become both a showstopper and a challenge if not understood properly. It climbs by twining its stems around any available support, which means it needs strong structures like arbors, pergolas, or fences to grow safely and beautifully. Depending on the variety, wisteria can reach lengths of 20 to 30 feet or more, making it an ideal plant for covering large vertical spaces.
Wisteria plants grow in distinct stages. In their early years, they focus on establishing strong roots and leafy vines, often delaying blooms until they’re more mature. This can frustrate some gardeners, but with patience and proper care, flowering becomes more consistent and abundant over time. Most wisteria varieties bloom in spring, with some offering a second, lighter flush in late summer.
Wisteria also goes dormant in winter, shedding its leaves but maintaining its woody vines. This natural rest period is essential for healthy flowering the following season. Understanding these seasonal patterns helps gardeners know when to prune, propagate, or train the plant, ensuring long-term success and spectacular displays year after year.
The Best Time to Propagate Wisteria
The ideal time to propagate wisteria depends on the method you choose, but timing is essential to ensure strong root development and healthy growth. In general, late spring through early summer is the best window for most propagation techniques, as the plant is actively growing and temperatures are warm enough to encourage rooting.
For softwood or semi-hardwood cuttings, the optimal period is late spring to early summer, when new shoots are flexible but beginning to mature. These cuttings root more easily when taken during this active growth phase, especially if kept in a humid environment with indirect sunlight.
If you plan to use hardwood cuttings or layering methods, late fall to early winter is more suitable. At this point, the plant is dormant, and hardwood cuttings can be taken without stressing the parent plant. These cuttings can be rooted indoors or kept outdoors in a protected area to develop roots slowly over winter and be ready to plant the following spring.
No matter the method, avoid propagating during extreme weather—hot summer days can cause cuttings to wilt quickly, while freezing winter temperatures can damage young growth. By choosing the right season and keeping your cuttings protected, you’ll increase your chances of success and enjoy beautiful new vines in seasons to come.
Choosing the Right Mother Plant
Selecting a healthy mother plant is the foundation for successful wisteria propagation. Look for a mature, well-established plant that has a proven history of vigorous growth and abundant blooming. The ideal mother plant should be at least a few years old, free from pests, diseases, or signs of stress such as yellowing leaves or dieback.
Focus on vines with strong stems, firm texture, and rich green foliage. Avoid using overly woody or weak shoots, as they may struggle to root. For cuttings, choose shoots that are semi-ripe—neither too soft nor too hardened. If propagating by layering or division, ensure the root system is robust and branching well.
Using a high-quality parent ensures your propagated plant will inherit the best traits—fast growth, beautiful flowers, and better adaptability—giving your new wisteria the best possible start.
Method 1: Propagating Wisteria from Softwood Cuttings
Propagating wisteria from softwood cuttings is one of the most efficient methods for home gardeners seeking faster results. This technique is typically done in late spring to early summer when the plant is actively growing and soft new shoots are available.
Selecting and Preparing Cuttings
Choose young, healthy shoots that are about 4–6 inches long and still pliable but not mushy. These softwood cuttings should come from vigorous lateral branches, ideally without flower buds. The cutting should include at least two or three nodes (leaf joints), as this is where roots are most likely to form.
Using a sterile, sharp knife or pruners, cut just below a node. Remove the lower leaves, leaving only one or two at the top to reduce moisture loss. If the leaves are large, cut them in half to minimize transpiration.
Rooting Conditions and Hormone Use
Dip the cut end into a rooting hormone powder or gel containing indole-3-butyric acid (IBA), which promotes root development. While wisteria can root without hormone, using it significantly improves success rates and speeds up root formation.
Plant the cutting in a well-draining propagation mix—ideally a blend of peat moss and perlite or coarse sand. The soil must retain moisture without becoming soggy, as excess water can lead to rot.
Maintain high humidity by covering the pot with a clear plastic dome or placing it in a propagator. Ensure the cuttings receive bright, indirect light but no direct sun, which can cause scorching. The ideal temperature for rooting is between 68°F and 75°F (20°C to 24°C).
Monitoring and Root Development
Check moisture levels daily and mist if necessary to maintain humidity. Within 4 to 6 weeks, roots typically begin to develop. You can test rooting progress by gently tugging on the cutting—if there is resistance, roots have likely formed.
After rooting, gradually acclimate the young plant to outdoor conditions by removing the cover over several days. Once established, transplant the cutting into a larger container or directly into the garden.
Technical Considerations
Softwood propagation success can vary depending on environmental factors like temperature, humidity, and the specific wisteria species. Japanese (Wisteria floribunda) and Chinese wisteria (Wisteria sinensis) may root differently, with some cultivars being more cooperative than others. Patience and proper sanitation are key to minimizing fungal issues during this phase.
With the right conditions, this method can yield flowering vines in as little as 2–3 years—far faster than growing from seed—making it ideal for gardeners looking to expand their wisteria collection with genetically identical plants.
Method 2: Propagating Wisteria from Hardwood Cuttings
Propagating wisteria from hardwood cuttings is a reliable and low-maintenance method, especially suited for gardeners working during the plant’s dormant season. This technique, while slower than softwood propagation, offers a higher success rate for strong root formation and long-term growth, particularly in colder climates or with less access to controlled environments.
Timing and Ideal Conditions
Hardwood cuttings should be taken in late autumn to mid-winter, once the plant has gone dormant and the wood has matured. During this period, the plant conserves energy, and the cuttings are less susceptible to desiccation. Temperatures around 40°F to 50°F (4°C to 10°C) are ideal for storage before planting. Rooting occurs slowly and begins as temperatures warm up in late winter to early spring.
Selecting and Preparing the Cuttings
Choose pencil-thick, healthy stems from the current or previous year’s growth. Each cutting should be 8–12 inches long with at least three nodes. Make a straight cut at the base just below a node and a slanted cut at the top above a node to distinguish the planting end from the top. This distinction is vital because reversing the orientation can prevent rooting altogether.
Remove any remaining leaves and side shoots. Dip the basal end into a strong rooting hormone, typically with a higher concentration of indole-3-butyric acid (IBA)—around 3,000 ppm is recommended for woody plants like wisteria. Let it sit for a few minutes before planting.
Planting and Rooting Conditions
Insert the cuttings vertically into a well-drained medium such as a mixture of coarse sand, perlite, and loamy soil. Two-thirds of the cutting should be buried to stabilize it and encourage basal rooting. For best results, space the cuttings several inches apart in a cold frame, greenhouse bench, or directly into the ground in a protected area outdoors.
Moisture consistency is critical: the soil must stay slightly damp but never waterlogged. Covering the area with mulch or plastic sheeting helps retain soil temperature and moisture. In colder regions, apply a layer of straw or use cold-frame lids to prevent freezing.
Rooting Timeline and Transplantation
Root formation with hardwood cuttings takes longer—typically 8 to 16 weeks, depending on environmental conditions. By spring, rooted cuttings can be carefully transplanted into larger pots or nursery beds. It’s essential to avoid disturbing fragile new roots during this process.
Once actively growing, the cuttings should be gradually hardened off to adjust to outdoor conditions. Mature rooted plants can be moved to permanent garden locations by the following fall.
Technical Considerations and Success Factors
Hardwood propagation is especially effective for native American wisteria (Wisteria frutescens), which tends to root more easily than its Asian relatives. Success rates improve with precise hormonal treatment, temperature regulation, and disease prevention. Unlike softwood cuttings, hardwood segments are less vulnerable to rot and fungal infections but benefit greatly from fungicidal dipping before planting.
Although this method requires patience, it produces hardy, vigorous plants with strong root systems—ideal for long-term establishment in the landscape. It also ensures that the new plant is genetically identical to the parent, maintaining desired bloom color, vine vigor, and growth habit. For gardeners with patience and space, hardwood propagation remains a time-tested strategy for expanding a healthy wisteria collection.
Method 3: Propagating Wisteria by Layering
Layering is a time-honored and effective method for propagating wisteria, especially for gardeners who prefer a low-maintenance, high-success approach without requiring specialized tools or materials. Unlike cuttings, which are severed from the parent plant, layering allows the stem to remain attached during root formation, giving it a continual supply of water and nutrients. This technique is ideal for those who want to multiply established plants with minimal risk.
Understanding the Technique
In layering, a flexible, healthy vine is bent down to the ground and partially buried, encouraging roots to form at the point of soil contact. This process mimics how vines naturally spread in the wild. Because the layered section remains attached to the parent plant, it experiences less stress and maintains steady moisture levels, significantly increasing rooting success compared to cuttings.
Wisteria is particularly responsive to simple layering, in which a single stem is pinned down and buried at a node. Serpentine layering can also be used for longer vines, where multiple sections are buried alternately between exposed stem loops, allowing several rooted plants to form along one vine.
Best Time to Layer
The optimal time for layering wisteria is early spring, just as the plant breaks dormancy and sap flow resumes. At this stage, flexible shoots are easier to manipulate, and root development aligns with the plant’s natural growth cycle. Alternatively, layering can also be done in late summer to early fall, but the buried section may take longer to root and often benefits from overwintering protection.
Step-by-Step Technical Process
Select a Suitable Shoot: Choose a young, vigorous vine that’s long, flexible, and close to ground level. Avoid stems that are overly woody or shaded, as they root less easily.
Wound the Stem: Lightly wound the underside of the stem where it will contact the soil by scraping the bark or making a shallow 1-inch notch. This exposes the cambium layer, which stimulates root formation in response to injury.
Apply Rooting Hormone (Optional): Dust the wounded area with a rooting hormone containing IBA (indole-3-butyric acid), typically in a lower concentration (around 1,000 ppm). While not always necessary, it can accelerate root development and improve success.
Secure and Cover the Stem: Bury the wounded section about 2–3 inches deep in the soil. Anchor it firmly using U-shaped landscape pins, a bent wire, or even a small rock. Leave the growing tip of the vine exposed to encourage upward growth.
Water and Mulch: Keep the soil consistently moist but not soggy. Apply mulch around the buried section to regulate temperature and retain moisture, especially in drier climates or exposed areas.
Root Development Timeline
Roots typically begin forming in 6 to 12 weeks during the growing season, although complete root establishment may take a full season depending on soil temperature, humidity, and shoot vigor. In cooler zones, rooting may extend into the following spring, especially if layering is done in late summer or fall.
A gentle tug on the buried portion will indicate whether rooting has occurred—resistance suggests root development. Once well-rooted, the new plant can be severed from the mother vine using clean, sharp pruners and transplanted in early spring or fall.
Key Factors for Success
Soil Texture: Light, loamy soil with good drainage promotes better rooting. Heavy or compacted soils may inhibit air and moisture penetration.
Moisture Balance: Avoid drought or waterlogging. Consistent, even moisture is essential to prevent desiccation or rot during root formation.
Sunlight: Partial shade is ideal during the rooting process to reduce stress and prevent overheating of the soil. Once rooted, the plant can tolerate and even prefer full sun for flowering.
Protection from Frost: If layering in fall, cover the area with mulch, straw, or a frost blanket to protect developing roots from freezing.
Advantages of Layering Wisteria
Layering has one of the highest success rates among propagation techniques, especially for gardeners who lack access to controlled environments like greenhouses. It requires no cutting tools or artificial misting, and because the new plant continues to receive nutrients from the mother vine, there is minimal risk of failure due to shock or dehydration.
It’s particularly effective for older, well-established wisteria vines, which tend to have strong stems close to the ground. Layered plants are also genetically identical to the parent, preserving desirable traits such as flower color, bloom timing, and growth habit.
This method also allows multiple plants to be produced from a single vine over time, especially when using serpentine layering. With patience, layering can expand your garden’s beauty without the need to purchase new plants—making it an excellent option for sustainable, long-term propagation.
Providing the Right Conditions for Rooting
Creating the ideal environment is essential to ensure successful wisteria propagation, especially during the critical rooting phase. Whether you’re using softwood cuttings, hardwood cuttings, or layering, consistent conditions can significantly boost your success rate.
Light and Temperature
Place cuttings in bright, indirect light, avoiding direct sun that may cause dehydration. The ideal temperature for rooting is between 65°F to 75°F (18°C to 24°C). Avoid cold drafts and excessive heat, which can hinder root development or cause stress.
Humidity and Moisture
High humidity supports root formation by preventing moisture loss from the leaves. Use a humidity dome, plastic bag, or misting system if indoors. Keep the soil or propagation medium evenly moist, but never soggy, as overly wet conditions lead to rot.
Soil or Medium
Use a well-draining, sterile rooting medium such as a mix of perlite, peat moss, or coarse sand. This ensures airflow around the developing roots and minimizes fungal issues. For layering, ensure garden soil is loose and enriched with compost for better results.
Air Circulation
Good airflow prevents mold and fungal infections. If propagating indoors, open a nearby window occasionally or use a small fan on a low setting to keep air moving gently around the cuttings or layered area.
Patience and Monitoring
Rooting takes time—anywhere from a few weeks to a few months. Check for signs of mold, stem rot, or drying. Gently tug the cutting after a few weeks to feel for resistance, indicating root growth. Once roots are established, gradually expose the plant to more light and prepare it for transplanting.
By maintaining these controlled conditions, you give your wisteria the best chance to root successfully and thrive as a new plant.
Transplanting Rooted Wisteria
Once your wisteria cuttings or layered stems have developed strong, healthy roots—typically 8 to 12 weeks after propagation—they’re ready for transplanting into their permanent location.
Choose a sunny spot with at least six hours of direct sunlight daily and well-draining, fertile soil. Gently remove the rooted cutting from its container or unearth the layered stem, taking care not to damage the young roots. Dig a hole twice as wide as the root ball and about the same depth. Place the plant in the hole, backfill with soil, and press gently to eliminate air pockets.
Water thoroughly after transplanting and keep the soil consistently moist (but not soggy) during the first few weeks to help the roots establish. Adding a layer of mulch around the base helps retain moisture and regulate temperature. If transplanting in a colder region, avoid moving the plant during winter—spring or early fall is ideal.
Support young wisteria vines with a trellis or arbor early on, as they grow rapidly. With proper care and placement, your new wisteria will settle in and begin its journey toward lush foliage and future blooms.
Caring for Young Wisteria Plants
Young wisteria plants require attentive care during their first year to establish strong roots and vigorous growth. Water deeply and consistently, especially during dry spells, to keep the soil evenly moist—but never waterlogged. A newly transplanted vine may need watering every few days until established.
In early spring, apply a balanced fertilizer (such as 10-10-10) to encourage root and foliage development. Avoid over-fertilizing, as excessive nitrogen can delay blooming and promote only leafy growth.
Train young vines early by gently tying them to a sturdy support like a trellis or arbor. As the plant grows, regularly check ties to ensure they aren’t constricting the stem. Prune away any weak or unwanted shoots to guide the plant’s shape and direct its energy toward strong, upward growth.
Keep the area around the base free of weeds and apply a layer of organic mulch to retain moisture and suppress competition. Protect young plants from harsh winds and extreme cold, especially in the first winter, by using burlap wraps or windbreaks if needed.
With consistent care and attention, your young wisteria will grow into a healthy, flowering vine that transforms your garden over the years.
Common Mistakes When Propagating Wisteria
Many gardeners make common errors that reduce the success rate of wisteria propagation. One frequent mistake is taking cuttings that are either too old or too young. Softwood cuttings should be semi-ripe—not too green or too woody—for optimal rooting.
Another issue is using poor-quality or non-sterile tools, which can introduce diseases. Always use sharp, sanitized pruners when taking cuttings.
Improper soil conditions also hinder rooting. Wisteria cuttings require well-draining, moist, but not soggy soil. Overwatering or compacted soil can lead to rot before roots develop.
Neglecting environmental needs—such as warmth, humidity, and light—is another setback. Cuttings root best in bright, indirect light with consistent humidity and temperatures between 20–25°C (68–77°F).
Lastly, impatience can derail success. Rooting can take several weeks, so disturbing cuttings too early can damage new root growth. Gentle, consistent care and proper technique are key to successful propagation.
How Long Does Wisteria Propagation Take?
Wisteria propagation is a slow but rewarding process. Softwood cuttings usually take 4 to 8 weeks to develop roots under ideal conditions, while hardwood cuttings may require 2 to 4 months or longer. Propagation by layering typically takes 6 to 12 months for strong root systems to form before separation from the mother plant.
Environmental factors like temperature, humidity, and soil quality significantly affect rooting time. Warmer conditions with consistent moisture and good airflow help speed up the process. While wisteria is slow to establish, patience and proper care will lead to healthy, vigorous new vines in time.
Benefits of Propagating Wisteria at Home
Propagating wisteria at home offers a range of practical, economic, and emotional benefits that make the effort truly worthwhile—especially for gardeners seeking to expand their landscape or connect more deeply with their plants.
Cost-Effective Garden Expansion
One of the biggest advantages is cost savings. Instead of purchasing mature wisteria plants from nurseries—which can be expensive—you can grow new vines for free using cuttings or layering from an existing plant. This allows you to fill fences, pergolas, and arbors with lush, flowering vines without straining your budget.
Personal Satisfaction and Fulfillment
There’s a unique joy in watching a plant you’ve propagated flourish. Seeing roots develop, shoots sprout, and blooms appear on a vine you nurtured from a simple cutting is immensely rewarding. It creates a deeper bond between you and your garden.
Control Over Plant Quality
When you propagate from a healthy, high-performing mother plant, you ensure that the new wisteria will have the same desirable traits—such as vibrant flower color, fragrance, and vigorous growth. You also avoid the risk of purchasing mislabeled or weak plants from commercial sources.
Ideal for Gifts and Sharing
Home propagation allows you to create thoughtful gifts for fellow gardeners, friends, or family. A rooted wisteria cutting or potted vine makes a meaningful present that grows over time, symbolizing connection and growth.
Sustainable Gardening Practice
Propagating your own plants reduces demand for mass-produced nursery stock and cuts down on transport-related emissions. It’s a simple step toward more environmentally responsible gardening.
By propagating wisteria at home, you not only save money and customize your garden’s design—you also become part of your landscape’s natural lifecycle, fostering resilience, creativity, and a deeper love for growing things.
FAQ About Propagating Wisteria
What is the easiest method to propagate wisteria at home?
The easiest method for beginners is layering, especially ground layering. This involves bending a flexible vine down to the soil, wounding the stem slightly, and burying part of it while it’s still attached to the parent plant. With consistent moisture and warm weather, roots typically develop within a few months. This technique requires minimal tools and has a high success rate.
How long does it take for propagated wisteria to bloom?
Wisteria grown from cuttings or seeds may take 3 to 7 years to produce flowers, depending on the method, growing conditions, and the maturity of the parent plant. However, layered or divided plants may bloom sooner—often within 2 to 3 years—because they are genetically identical and more mature in structure.
Can I propagate wisteria from a store-bought bouquet?
No, wisteria cuttings from store-bought bouquets are usually not viable for propagation. These cuttings are often too woody, too short, or overly processed, lacking nodes or buds necessary for root and shoot development. For best results, take fresh softwood or hardwood cuttings directly from a healthy, living vine.
When is the best time of year to propagate wisteria?
The ideal time depends on the method:
Softwood cuttings: Late spring to early summer, when growth is fresh and flexible.
Hardwood cuttings: Late fall to early winter, during dormancy.
Layering: Late spring to early fall, when stems are pliable and the weather supports root formation.
Choosing the right season improves rooting success and plant health.
What care do young propagated wisteria plants need?
Newly propagated wisteria requires consistent moisture, bright indirect sunlight, and protection from extreme temperatures. Avoid overwatering to prevent rot, and ensure the soil drains well. Once the roots are strong and new growth appears, you can gradually introduce the plant to more direct sun. Regular observation and patience are key to successful establishment.
Conclusion: Grow Beauty from One Vine
Propagating wisteria at home is a practical and fulfilling way to expand your garden. Whether you choose cuttings or layering, success comes with care, patience, and proper technique. With time, your new vines will reward you with cascading blooms, fragrant evenings, and the knowledge that you cultivated it all yourself. Start small, stay consistent, and watch your garden come alive with every new tend