ZZ plant, also known as Zamioculcas zamiifolia, is a popular houseplant loved for its waxy green leaves and incredible tolerance of low-light environments. For plant enthusiasts looking to expand their indoor jungle or share greenery with friends, learning how to propagate ZZ plant from leaf or stem cuttings is both an exciting and rewarding process. Unlike fast-growing species, ZZ plants require patience, but the end result is always worth the wait.
Many indoor gardeners find the ZZ plant ideal for propagation due to its hardy nature and ability to develop roots in water or soil. Propagating from leaves or stems may take weeks or even months, but each new shoot symbolizes growth and success. With the right techniques and care, anyone can master the art of multiplying this resilient plant.
In this guide, you’ll explore in depth how to propagate ZZ plant from leaf or stem cuttings, discover the factors that impact success, and understand how to troubleshoot common problems. Whether you’re a beginner or a plant pro, you’ll walk away with a complete understanding of what it takes to grow new ZZ plants from cuttings.
Understanding ZZ Plant Propagation
Propagation is the method of creating new plants from an existing one. In the case of the ZZ plant, propagation can be done using either leaf cuttings or stem cuttings. Each method involves removing a section of the plant, providing the right environment, and encouraging root growth. Over time, these sections develop into fully functional new plants.
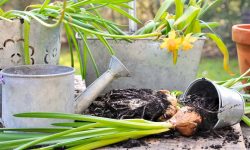
The ZZ plant has specialized structures called rhizomes that store water and nutrients. These rhizomes are key to the plant’s survival in drought conditions and also play an important role during propagation. When a cutting is made, it must eventually grow its own rhizome to support new shoots and leaves. This process is slow but achievable with consistency and the right technique.
It’s essential to understand that ZZ plant propagation is not instantaneous. From cutting to root formation to shoot development, the entire process can take several months. However, the joy of watching roots emerge from a single leaf or stem is unmatched and provides a fulfilling gardening experience.
When to Propagate Your ZZ Plant
Timing plays a significant role in the success of propagation. The ideal time to propagate ZZ plants is during the plant’s active growing season, which typically spans from spring through early fall. During these months, the plant is in growth mode and more likely to produce roots and rhizomes quickly.
Trying to propagate during winter may result in delayed growth or even failure, as the plant naturally slows down during colder months. Even with warmth and humidity, the plant’s biological clock might resist root production. Therefore, it’s best to plan propagation efforts for the warmer months when light and temperature conditions are more favorable.
Another factor to consider is the health of the parent plant. Avoid taking cuttings from a stressed or diseased plant, as this decreases the chance of successful propagation. Only select cuttings from vibrant, healthy leaves or stems that show no signs of discoloration or damage.
Choosing Between Leaf and Stem Cuttings
ZZ plants can be propagated from both leaf and stem cuttings, and each method has its own advantages. Leaf propagation is ideal when you want to experiment or create multiple new plants using minimal resources. It’s a space-efficient method, and even a single leaf can lead to new growth with enough time and care.
On the other hand, stem cuttings offer a faster route to establishing a new plant. Because a stem cutting includes multiple leaves and more cellular structure, it can produce rhizomes and roots more quickly than a single leaf. Stem propagation may also result in a fuller plant earlier on.
Your choice between the two depends on your goals, available materials, and patience. If you’re in no rush and want to test your skills, try the leaf method. If you want a quicker turnaround or fuller results, go with the stem approach.
How to Take Leaf Cuttings Correctly
To propagate using leaves, you’ll need to start by selecting a healthy, mature leaf from the ZZ plant. This leaf should be firm, deep green, and free from any blemishes. Using a clean, sharp knife or pair of scissors, cut the leaf where it connects to the stem. Be sure to include the base of the petiole, which is the small stalk that attaches the leaf to the stem.
Once removed, allow the leaf to dry for a few hours or up to a day in a shaded area. This step, known as callusing, helps prevent rot once the leaf is placed in soil or water. It’s an important step that many beginners overlook, often leading to unsuccessful attempts.
After the leaf has callused, it’s ready for propagation. It can either be inserted into moist soil or placed in water, depending on your chosen method. The most crucial factor is keeping the base of the leaf stable and ensuring that the environment encourages root formation over time.
Propagating Leaf Cuttings in Soil
Soil propagation for leaf cuttings is simple and low-maintenance, making it a favorite among home gardeners. Prepare a small pot with well-draining potting mix, ideally one that includes components like perlite, sand, or coco coir. This ensures that excess water doesn’t accumulate, which can lead to rot.
Insert the base of each callused leaf cutting into the soil so that it stands upright. Firm the soil gently around it to provide stability. Water lightly until the soil is moist but not soggy. Afterward, place the pot in a warm, bright location with indirect sunlight to promote healthy root growth.
It’s important not to disturb the soil for several weeks, even if no visible changes occur. Leaf cuttings need time to generate rhizomes and eventually sprout new growth. Keeping the soil consistently moist and avoiding drastic temperature changes will increase your chances of success.
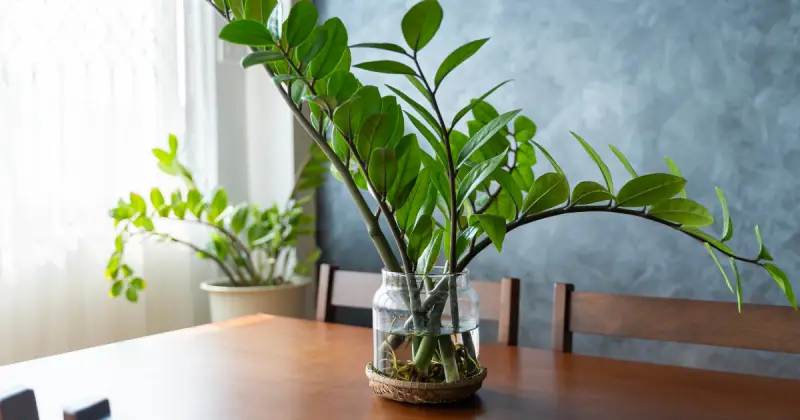
Propagating Leaf Cuttings in Water
Water propagation is visually rewarding and allows you to monitor root development over time. Start by placing your callused leaf cutting into a small glass or jar filled with clean water. Only the bottom part of the leaf should be submerged, with the rest remaining above water to prevent rot.
Position the container in a warm spot with bright, indirect light. Change the water every few days to prevent bacterial buildup and keep the environment clean. Over time, tiny roots will begin to appear from the cut base. Once these roots are at least a few centimeters long and a small rhizome forms, the cutting can be moved into soil.
Be patient, as this method often takes several months before any visible signs of growth occur. However, the advantage lies in being able to observe the process, which can be motivating and educational for those new to propagation.
How to Take Stem Cuttings the Right Way
When propagating with stem cuttings, choose a healthy, mature stem that has several leaves. Use a sterilized cutting tool to snip a segment of the stem about four to six inches long. The cut should be made just below a node, where the plant’s natural growth hormone concentration is higher.
Allow the stem cutting to sit in a shaded, well-ventilated spot for a few hours to form a callus over the cut area. This drying process reduces the risk of rot when the cutting is introduced to soil or water. A well-callused cutting stands a better chance of successful root development.
Once ready, you can proceed with either the soil or water method, both of which support the rooting process. The stem cutting, with its multiple leaves, gives the new plant a head start in terms of energy storage and photosynthesis, often resulting in quicker growth.
Growing Stem Cuttings in Soil
Soil propagation for stem cuttings mirrors the steps used for leaves, with a few added considerations. Use a small container filled with light, well-draining potting soil, and insert the base of the cutting about one or two inches deep. Press the soil gently around the stem to provide support.
Water lightly and position the pot in a location that receives bright but indirect light. Consistent warmth and moisture are key during the first few weeks. You may also cover the pot with a clear plastic bag or dome to increase humidity, which can help speed up root formation.
After several weeks, you may begin to see signs of new growth at the base of the stem. Once the cutting establishes a root system, it will begin to push out new shoots or leaves. Avoid overwatering during this phase, as too much moisture can lead to rot and fungal problems.
Growing Stem Cuttings in Water
Water propagation of stem cuttings follows similar principles as leaf cuttings. Place the base of the stem in a clean container of fresh water, ensuring that several nodes are submerged. Remove any leaves that may sit under the waterline, as they can decay and encourage bacterial growth.
Change the water every three to five days to maintain cleanliness. Place the container near a window with filtered sunlight and avoid exposing it to direct rays, which can overheat the cutting. Over the next few weeks, roots will begin to emerge from the nodes, followed by small rhizomes.
Once the roots are well-established, transfer the cutting into a pot with soil to allow the plant to continue growing. Water thoroughly after transplanting and adjust the plant’s care routine to match that of a mature ZZ plant.
Caring for Your New ZZ Plants
Once the cuttings have been successfully rooted and transferred to soil, they need proper care to continue growing. Water the plants when the top inch of soil becomes dry, and avoid keeping the roots soggy. ZZ plants are drought-tolerant, and overwatering is one of the most common causes of failure.
Keep the young plants in bright, indirect light and avoid direct sun, which can scorch the leaves. A warm, stable environment promotes consistent growth. Fertilize lightly every few months during the growing season to encourage development, but avoid overfeeding.
As the plants mature, you’ll notice them developing rhizomes similar to those of the parent plant. These structures are a good indication that your propagation efforts were successful. With time and continued care, these young plants will grow into full-sized ZZ plants that are just as hardy and attractive.
Troubleshooting Common Propagation Issues
Propagating ZZ plants can sometimes lead to setbacks, especially for beginners. If your cuttings are turning yellow, it may be a sign of overwatering or insufficient light. Adjusting the environment and watering schedule can often reverse this issue.
If roots are not forming after several months, reassess the temperature, lighting, and humidity. Cooler temperatures and low light levels can slow down or halt root development. Using a heating mat or moving the plant to a warmer room may help stimulate growth.
Rot is a common problem when moisture levels are too high. Always allow cuttings to callus properly before planting, and use well-draining soil to minimize risk. Monitoring your cuttings regularly can help you catch problems early and adjust your care strategy as needed.
FAQ about How to Propagate ZZ Plant from Leaf or Stem Cuttings
What is the easiest way to propagate a ZZ plant?
The easiest way to propagate a ZZ plant is through stem cuttings in water. This method allows you to monitor root growth and requires minimal materials. Once roots and rhizomes begin to form, the cutting can be transferred to soil for continued development.
How long does it take for ZZ plant cuttings to root?
ZZ plant cuttings typically take anywhere from 2 to 3 months to form roots and rhizomes, depending on environmental conditions like light, warmth, and humidity. Leaf cuttings generally take longer than stem cuttings, so patience is essential during the propagation process.
Can ZZ plant leaves grow new plants?
Yes, ZZ plant leaves can grow new plants, but the process is slow. A single leaf cutting can eventually develop a rhizome and roots, which will then produce new shoots. It often takes several months before visible growth appears, but it is a viable propagation method.
Should I propagate ZZ plant in soil or water?
Both soil and water are effective mediums for ZZ plant propagation. Water propagation allows for easier monitoring of root growth, while soil propagation reduces transplant shock. The choice depends on your preference and how much observation you want during the rooting phase.
Why are my ZZ plant cuttings not growing?
ZZ plant cuttings may not grow due to low temperatures, insufficient light, overwatering, or improper callusing before planting. Ensure that cuttings are healthy, kept in warm and bright (but indirect) light, and not sitting in soggy soil or contaminated water.
Summary of ZZ Plant Propagation
Propagating ZZ plants from leaf or stem cuttings is a fulfilling process that combines patience, technique, and care. Whether you choose soil or water as your medium, success depends on maintaining the right balance of moisture, temperature, and light. Each method has its own benefits, and experimenting with both can improve your skills and confidence.
The joy of watching a new plant grow from a single leaf or stem cutting is one of the most satisfying experiences in gardening. With the knowledge shared in this guide, you now have everything you need to begin your propagation journey and expand your indoor collection of beautiful ZZ plants.