Iris flowers captivate gardeners with their elegance, rich colors, and timeless beauty, but their true strength lies beneath the surface—in the rhizomes that store energy for future growth. Once the blooming season ends, proper pruning becomes essential to keep these perennials vigorous and ready to produce even more spectacular flowers the following year. Many gardeners make the mistake of neglecting their irises after flowering, assuming the plants no longer need attention. In reality, post-bloom care determines whether your irises thrive or weaken before the next growing cycle.
Pruning after flowering not only improves appearance but also prevents disease and encourages the plant to channel its energy into root and rhizome development. By removing spent blooms and trimming back foliage at the right time, you help the plant focus on building strength for next season’s display. This process also reduces the risk of fungal infections, keeps your garden neat, and prepares irises for healthy regrowth. In this detailed guide, you’ll learn exactly when and how to prune irises after blooming, why timing matters, and the best techniques to ensure strong, resilient growth year after year.
Understanding Why Pruning Irises Matters
Pruning irises after they bloom is not just about maintaining a tidy garden; it plays a crucial role in the plant’s long-term health and performance. When the flowers fade, the plant naturally begins redirecting energy from the blooms into seed production. If these spent flowers remain, the iris wastes valuable nutrients on forming seeds instead of strengthening its rhizomes and roots. By removing old blooms promptly, you allow the plant to conserve energy, which it can then use to store food reserves for the next growing season. This process directly affects how many and how large the blooms will be in the coming year.
Another vital reason for pruning is disease prevention. Dead or decaying flowers and leaves create a breeding ground for pests and fungi, particularly in humid conditions. Common iris problems, such as leaf spot and soft rot, often start in neglected plant debris. By cutting away spent blooms and later trimming the leaves, you improve air circulation around the plant and reduce moisture buildup—two key factors in keeping diseases at bay. Clean, sharp tools also help prevent the spread of infection between plants, ensuring each iris bed remains healthy and productive.
Pruning also encourages stronger growth and a more attractive garden overall. After blooming, iris leaves can become yellow or floppy, detracting from the garden’s appearance. Trimming back the foliage not only refreshes the look of your flower beds but also stimulates new, healthy leaf development. This post-bloom maintenance helps the rhizomes store more energy while preparing the plant for dormancy. Ultimately, regular pruning is one of the simplest yet most effective ways to promote vigorous, resilient irises that return with brighter, fuller blooms each season.
When Is the Best Time to Prune Irises
Timing is one of the most critical factors when pruning irises. Cutting too early can deprive the plant of the energy it needs to strengthen its rhizomes, while pruning too late allows diseases or pests to settle in. The ideal time to prune is right after the blooming period ends, typically in late summer or early fall, depending on your region. Once all the flower stalks have faded and no new buds appear, it’s safe to begin trimming. This ensures that the plant has completed its reproductive phase and is ready to focus on root and rhizome development for next season’s growth.
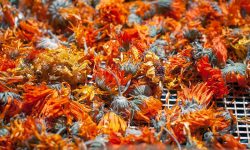
After the final flowers wither, remove the spent stalks as soon as possible to prevent the formation of seed pods. This step helps the plant conserve valuable nutrients that would otherwise go into seed production. However, do not cut the leaves immediately after flowering. The green foliage continues photosynthesis, generating food for the rhizomes. Allow the leaves to remain until they start turning yellow or brown, which indicates that the plant is entering dormancy. This natural process is essential for the irises to store enough energy for a strong return next year.
In most climates, pruning the leaves down to about six inches above the ground should be done in early to mid-fall. In colder regions, this timing also helps prepare the plant for winter by reducing the amount of foliage that can harbor pests or fungal spores. For gardeners in warmer climates, trimming can be delayed slightly until late fall when the foliage naturally begins to decline. By following the right pruning schedule, you give your irises the best possible start for the next growing season, ensuring vigorous roots, clean beds, and a spectacular bloom cycle ahead.
Tools and Preparation Before Pruning Irises
Before you begin pruning your irises, proper preparation ensures the process is efficient and safe for your plants. Using clean, sharp tools is essential to make precise cuts that heal quickly and minimize the risk of disease. A good pair of garden shears or pruners works best for cutting flower stalks, while long-handled scissors can help trim foliage evenly. Always sterilize your tools with rubbing alcohol or a mild bleach solution before and after pruning. This prevents the spread of fungal or bacterial infections, such as soft rot, which can devastate iris beds. Having a small garden knife nearby is also helpful for removing damaged or diseased rhizomes if needed.
Equally important is preparing the work area. Start by inspecting your iris bed and identifying which plants are ready for pruning. Look for stalks that have finished blooming, leaves that are yellowing, or areas showing signs of overcrowding. Remove any visible weeds or debris around the plants, as these can harbor pests and restrict airflow. Working on a dry day is ideal because wet leaves and soil increase the risk of spreading fungal spores. If the weather is humid or rainy, wait until conditions improve before pruning. A clean, dry environment helps your cuts heal faster and keeps the rhizomes healthy.
Before making any cuts, plan your approach. Decide whether you’ll be pruning only the spent flowers or also shaping the foliage. Wear gardening gloves to protect your hands from sharp leaves and potential irritants. Keep a container or garden bag nearby to collect cut material for disposal. Never leave pruned leaves or stalks on the ground, as they attract pests like iris borers. With the right tools, a clean workspace, and an organized plan, your pruning session will be smooth and effective—ensuring your irises remain strong, disease-free, and beautifully prepared for next season’s bloom.
How to Prune Irises Step by Step
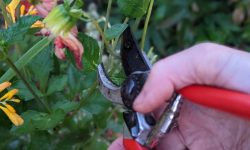
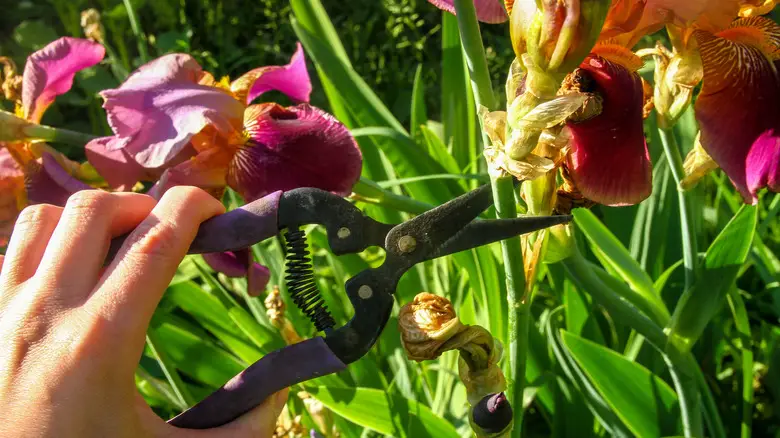
Pruning irises after blooming requires care, precision, and timing to ensure the plant stays healthy and ready for the next growth cycle. Begin the process by removing all spent flower stalks as soon as the last bloom fades. Use sharp, clean pruning shears to cut each stalk close to the base, just above the leaves. This prevents the plant from wasting energy on seed development and helps maintain a neat appearance. Always disinfect your tools before and after pruning to avoid spreading disease between plants. Removing dead or fading flowers early also reduces the chance of attracting pests that feed on decaying petals.
Once flowering has finished, shift your focus to the foliage. The green leaves should remain intact for several weeks after blooming since they continue producing energy through photosynthesis. Wait until the leaves begin to yellow or dry out naturally before trimming them back. Cut the leaves to about six inches above the soil surface, shaping them into a neat, fan-like form. This helps improve airflow around the rhizomes, preventing fungal issues such as leaf spot and rot. Avoid cutting the foliage too short, as it may stress the plant and slow its recovery.
After trimming, clean up all plant debris from around the iris bed. Dead leaves, flower stalks, and decaying material can harbor pests like iris borers and fungal spores that persist through winter. Dispose of this waste instead of composting it to avoid reintroducing disease to your garden. Finally, water the plants lightly to help them recover and consider applying a thin layer of mulch around the base for protection during dormancy. With careful, step-by-step pruning, your irises will enter the resting season strong, setting the stage for vibrant, vigorous blooms in the following spring.
Pruning Different Types of Irises
Bearded Irises
Bearded irises require precise pruning to maintain healthy rhizomes and encourage consistent blooming each year. Once the flowers fade, the first task is to remove the flower stalks as close to the base as possible. Leaving them in place encourages seed formation, which diverts the plant’s energy away from strengthening its rhizomes. It’s best to perform this step soon after flowering ends, typically in mid to late summer. Allowing the foliage to remain for several more weeks helps the plant photosynthesize and build food reserves. Avoid cutting green leaves too early, as doing so weakens next season’s growth.
As the season progresses and the foliage begins to yellow, trim the leaves back to about six inches, shaping them into neat fans. This improves airflow and prevents fungal issues such as leaf spot or soft rot. Be sure to remove all cut material and debris from the surrounding soil, as it can harbor iris borers and disease. Regular post-bloom pruning rejuvenates the plant, helping it channel energy into root development. When done correctly, bearded irises reward you with vigorous growth, healthier foliage, and a stunning display of blooms the following spring.
Siberian Irises
Siberian irises differ from bearded irises in both structure and pruning needs. These varieties have thinner leaves and fibrous roots rather than rhizomes, which makes them more resistant to rot but slower to recover from damage. After the flowers fade, cut back the flower stalks at the base to stop seed formation. The foliage remains attractive for much of the season, adding texture and color to garden borders, so it should be left in place until fall. This allows the leaves to continue storing nutrients and supporting root growth during summer.
In late fall, once the leaves have completely yellowed or turned brown, cut them down to four inches above the soil. This prevents fungal infections that can thrive in damp, decaying foliage during winter. Cleaning away dead leaves also discourages slugs and other pests from nesting around the base. For colder regions, this pruning helps protect the crown from rot caused by freeze-thaw cycles. With proper care, Siberian irises develop dense, healthy clumps and produce elegant blooms that return stronger every year, even in less-than-perfect conditions.
Japanese Irises
Japanese irises are prized for their lush, flat blooms and love of moist conditions, but this same trait makes proper pruning essential to avoid rot. After flowering, immediately remove faded flower stalks to prevent seed formation. Allow the foliage to continue growing for several weeks so it can feed the plant through photosynthesis. Because these irises thrive in wet soil, decaying leaves can create a breeding ground for fungal infections. For that reason, pruning should be timed carefully to remove dying leaves before they begin to decompose.
Once the foliage begins to turn yellow, cut it back to six inches from the ground. In very humid or rainy climates, this can be done slightly earlier to prevent moisture-related diseases. Removing all plant debris helps maintain airflow and keeps the soil surface clean. Japanese irises also benefit from a light layer of mulch after pruning to retain soil moisture and protect the roots during winter. Consistent pruning and sanitation result in vigorous plants with striking, oversized blooms that light up the garden with color and texture each summer.
Post-Pruning Care for Irises
Caring for irises after pruning is just as important as the pruning process itself. Once the foliage and flower stalks are trimmed, the plants begin redirecting their energy into rebuilding root strength and storing nutrients for next year’s bloom. The first step after pruning is to clear the area around the plants completely. Remove all cut leaves, stalks, and debris, as these can harbor pests like iris borers and fungal spores that thrive in decaying material. A clean, open bed ensures proper air circulation, reducing the chance of disease during the dormant season. Once cleaned, water the soil lightly to settle it around the rhizomes. Avoid overwatering at this stage, as the plant’s water needs decrease after active growth ends.
Fertilization is another key aspect of post-pruning care. A balanced, low-nitrogen fertilizer applied shortly after pruning helps replenish nutrients used during the growing and flowering phases. Phosphorus and potassium encourage strong root and rhizome development, preparing the plant for next year’s vigorous growth. In colder climates, adding a thin layer of mulch provides protection from frost and prevents temperature fluctuations that can disturb rhizomes during winter. For warmer regions, a lighter mulch or compost layer helps retain soil moisture while discouraging weed growth.
Monitoring your irises after pruning ensures early detection of issues. Watch for soft rhizomes or discolored leaves, as these can indicate rot or pest damage. Remove any affected parts immediately to prevent spreading. Proper post-pruning care allows your irises to rest and recharge, resulting in stronger plants, healthier foliage, and more abundant, vibrant blooms when the growing season returns. Consistency and attention now guarantee spectacular results later.
Preparing Irises for Winter and Next Season’s Growth
Preparing irises for winter is the final step in ensuring that your plants remain healthy and ready to produce strong, colorful blooms next season. As temperatures begin to drop, irises naturally enter a period of dormancy, during which the rhizomes store energy for spring growth. After pruning, reduce watering gradually to avoid excess moisture in the soil, which can lead to rot in cold weather. The soil should remain slightly damp but never soggy. Once the first frost arrives, stop watering altogether. Remove any remaining plant debris around the bed to prevent overwintering pests and fungal spores. A clean, well-prepared garden bed allows the plants to rest undisturbed through the colder months.
Mulching is a key part of winter preparation. In regions with freezing winters, apply a thin, even layer of mulch—such as straw, pine needles, or shredded leaves—over the iris bed. This helps regulate soil temperature, prevents the freeze-thaw cycle from pushing rhizomes out of the ground, and protects tender new growth. Avoid heavy mulch that traps moisture, as this can suffocate the rhizomes. In warmer climates, a light layer of compost serves the same purpose while providing nutrients for early spring regrowth. Check the mulch occasionally during winter to ensure it stays loose and breathable.
When spring approaches and the danger of frost passes, carefully remove the mulch to expose the rhizomes to sunlight. This encourages early sprouting and helps the soil warm faster. Apply a balanced fertilizer once new leaves appear to boost growth and strengthen stems. Inspect for signs of damage from winter moisture or pests and prune away any weak areas. With the right preparation, your irises will awaken refreshed and ready to deliver a lush display of blooms, rewarding your care and attention with beauty that endures season after season.
Common Mistakes to Avoid When Pruning Irises
Cutting the Leaves Too Early
One of the most common pruning mistakes is cutting iris leaves too soon after flowering. The green foliage plays a vital role in photosynthesis, helping the plant convert sunlight into stored energy for next year’s blooms. When leaves are removed prematurely, the rhizomes do not receive enough nutrients, leading to weak growth and smaller flowers in the following season. Many gardeners mistakenly think trimming early will make their beds look tidy, but it actually deprives the plant of strength and resilience.
To avoid this, wait until the leaves begin to naturally yellow or brown, usually in late summer or early fall. This signals that the plant has completed its nutrient storage process. At that point, trim the leaves down to about six inches in a fan shape. This maintains the plant’s structure, prevents energy loss, and allows good air circulation around the rhizomes. Proper timing not only ensures healthier regrowth but also helps your irises bloom more vibrantly and consistently each spring.
Leaving Old Foliage and Debris Behind
Another major mistake is failing to remove pruned leaves, flower stalks, and other debris after trimming. Dead plant material left around the base of irises can attract pests like iris borers and create an ideal environment for fungal diseases such as leaf spot or rot. During wet or humid conditions, these pathogens spread quickly, weakening the plants and sometimes destroying the rhizomes entirely. Leaving debris also reduces airflow and traps moisture, which can suffocate the roots over time.
After pruning, always clear away all dead or cut material from the iris bed. Dispose of it properly instead of composting, as disease spores can survive and reinfect your garden later. Keeping the area clean ensures that your irises have space to breathe and grow without competition or contamination. A well-maintained bed not only reduces the risk of disease but also creates a fresher, neater appearance, setting the stage for strong growth and dazzling blooms in the next season.
Ignoring Tool Cleanliness and Sharpness
Using dirty or dull pruning tools is another mistake that can have lasting consequences for irises. Dull blades tear the leaves rather than slicing cleanly, leaving ragged edges that take longer to heal and invite disease. Dirty tools can transfer bacteria, fungi, and pests from one plant to another, spreading infections across your garden. Even small wounds caused by unclean cuts can become entry points for rot, especially during damp weather. Over time, this can weaken your entire iris bed.
To prevent this, always use sharp, clean pruning shears or scissors. Disinfect tools before and after each use with rubbing alcohol or a mild bleach solution. Regularly sharpening the blades ensures smooth cuts that heal quickly and minimize stress on the plant. Taking a few extra minutes to maintain your tools not only protects your irises but also extends the life of your gardening equipment. Clean cuts lead to faster recovery, stronger rhizomes, and healthier plants that will flourish beautifully year after year.
Revitalizing Old Iris Clumps After Pruning
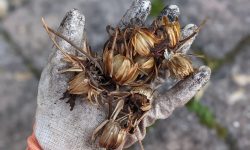
As irises mature, their clumps often become dense, causing reduced airflow, nutrient competition, and smaller blooms. Revitalizing old iris clumps after pruning restores their vigor and ensures they continue to thrive year after year. The best time to rejuvenate overgrown clumps is about four to six weeks after flowering, once pruning is complete and the weather is still warm. Begin by gently digging up the entire clump using a garden fork or spade, taking care not to damage the rhizomes. Shake off loose soil and inspect the roots carefully. Healthy rhizomes should feel firm and appear light brown, while old or rotting ones may feel soft or smell unpleasant. Remove and discard any diseased or shriveled sections.
Next, separate the remaining healthy rhizomes into smaller divisions, each with at least one fan of leaves. Trim the foliage to about six inches to help the plant focus on root recovery rather than leaf growth. Prepare fresh, well-drained soil in a sunny area enriched with compost or aged manure. Replant the divisions with the tops of the rhizomes slightly exposed above the soil surface. Space them about twelve inches apart to promote airflow and prevent future overcrowding. Water the plants lightly after replanting and allow them to establish naturally.
Revitalizing iris clumps after pruning doesn’t just improve appearance—it renews the plant’s energy and stimulates stronger, more frequent blooming. This simple process ensures your irises remain healthy, pest-free, and full of color for years to come. With occasional division and proper maintenance, old iris beds can transform into lush displays of elegant blooms that return brighter and more resilient each season.
FAQs About Pruning Irises
How soon should I prune irises after they finish blooming?
You should begin pruning once all the flowers have faded and no new buds appear—typically in late summer. Start by removing the spent flower stalks but keep the green leaves for several more weeks so they can continue storing nutrients for next year’s blooms.
Should iris leaves be cut back completely?
No, never cut iris leaves all the way to the ground immediately after blooming. Allow them to turn yellow or brown naturally before trimming. When ready, cut the foliage to about six inches high in a fan shape. This helps the plant store energy and prevents fungal infections.
Is it necessary to fertilize after pruning irises?
Yes, a light feeding after pruning helps replenish nutrients used during blooming. Choose a low-nitrogen fertilizer rich in phosphorus and potassium to strengthen rhizomes and roots. Avoid overfertilizing, as too much nitrogen encourages leafy growth rather than flower development.
Can I prune irises in spring instead of fall?
Spring pruning is not recommended, as it removes energy-storing foliage before new growth begins. Fall pruning, after the leaves start to yellow, is ideal. It prepares the plant for dormancy, protects against disease, and promotes stronger regrowth and blooming in the coming season.
How do I prevent disease after pruning my irises?
Always use sterilized tools, remove dead foliage, and clear debris from around the plants. Avoid overwatering, as excess moisture leads to rot and fungal growth. A clean, well-ventilated iris bed allows air circulation, helping your plants recover faster and stay healthy through dormancy.
Conclusion
Pruning irises after blooming is more than a maintenance task—it’s a promise of beauty for the next season. With careful timing, clean techniques, and consistent post-pruning care, irises grow stronger, resist disease, and produce larger, more vibrant blooms year after year. Removing spent flowers, trimming foliage properly, and preparing the plants for winter ensures they rest and rebuild their energy efficiently. Each small effort contributes to a spectacular spring display of color and grace. When you prune with patience and purpose, your irises will reward you with renewed life, resilience, and breathtaking blossoms that return brighter every season.