Plumeria, with its fragrant, vibrant blooms and lush tropical foliage, is a favorite among gardeners looking to bring a touch of paradise into their outdoor spaces. Yet, to unlock the full potential of this stunning plant, proper pruning is essential. Knowing how and when to prune plumeria not only encourages bigger, more abundant flowers but also strengthens the plant’s structure and overall health.
Whether you are a seasoned gardener or a beginner, mastering the art of plumeria pruning can transform your tree into a flourishing showstopper. This guide will walk you through the best practices, timing, and techniques to ensure your plumeria produces spectacular blooms year after year while maintaining a strong, healthy growth habit. Get ready to enjoy a garden filled with radiant color and tropical beauty.
Understanding Plumeria Growth and Blooming Habits
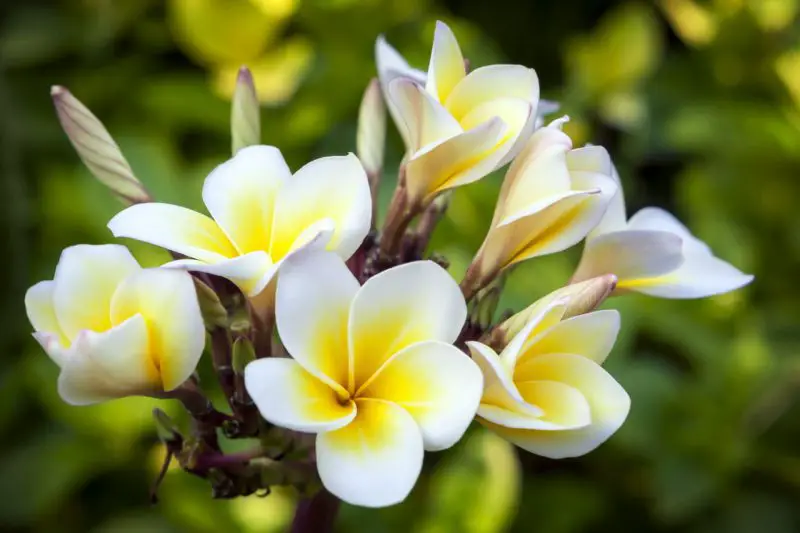
Plumeria plants are tropical trees or large shrubs known for their distinctive, thick, succulent branches and fragrant, vibrant flowers. They typically grow in a spreading, open habit, producing long, smooth stems that can reach heights of 12 to 25 feet or more, depending on the variety and growing conditions. Plumerias grow most actively during warm months, with new shoots and leaves emerging rapidly when temperatures are consistently above 65°F (18°C).
Their blooming habit is closely tied to their growth cycle. Plumerias generally bloom in late spring through summer, sometimes extending into early fall in warmer climates. The flowers develop on new growth from the current season, making proper pruning critical to encourage fresh branches where blooms will appear. Because they bloom on new wood, pruning helps redirect energy into producing strong, healthy branches that support more prolific flowering. Additionally, plumeria blooms open in clusters and can last several days, filling gardens with their sweet, tropical scent.
Understanding this growth and blooming pattern is essential for effective pruning and care, allowing gardeners to maximize both flower size and quantity while maintaining a sturdy plant structure. Proper timing and technique ensure that plumerias stay vibrant and healthy year after year.
When Is the Best Time to Prune Plumeria?
The best time to prune plumeria is during the late winter to early spring, just before the plant breaks dormancy and begins its active growing phase. This timing allows the tree to heal quickly and focus its energy on producing strong new shoots and abundant blooms. Pruning too early in the dormant season can expose fresh cuts to cold damage, while pruning too late might remove flower buds or reduce the upcoming season’s bloom potential.
If you live in a colder climate where plumeria must be brought indoors or protected during winter, prune it just before moving it to its sheltered spot. In tropical or frost-free areas, pruning can be done anytime during the plant’s dormant period but always avoid heavy pruning during the active growing season, as this can stress the plant and reduce flowering.
Light pruning for shaping or removing spent flowers can be done throughout the growing season as needed. However, the main structural pruning to encourage bigger blooms and stronger growth should be reserved for late winter or early spring to maximize results.
Tools Needed for Pruning Plumeria
Pruning plumeria requires a few essential tools to ensure clean cuts and maintain plant health. First and foremost, a pair of sharp pruning shears or secateurs is necessary for cutting smaller branches and stems. Sharp blades reduce damage to the plant by making smooth cuts that heal quickly, minimizing the risk of disease.
For thicker branches, a pair of bypass loppers or pruning saws may be needed. These tools provide the leverage and cutting power required to remove larger limbs without crushing the wood. It’s important to choose bypass-style tools because they make cleaner cuts compared to anvil pruners, which can crush stems and harm the plant.
In addition to cutting tools, having disinfectant such as rubbing alcohol or a bleach solution is vital. Cleaning your tools before and after pruning prevents the spread of diseases and infections between plants. Wearing protective gloves can also help protect your hands from sap and sharp edges.
Lastly, a ladder or step stool might be useful for reaching higher branches on larger plumeria trees safely. Using the right tools not only makes pruning easier but also supports the long-term health and beauty of your plumeria.
Preparing Your Plumeria for Pruning
Before making the first cut, it’s essential to prepare your plumeria to ensure the pruning process goes smoothly and promotes healthy regrowth. Start by closely inspecting the plant and identifying areas that need attention. Look for dead, damaged, or diseased branches, as well as any overly crowded or crossing limbs that can restrict airflow and block sunlight.
Next, clean your pruning tools thoroughly with rubbing alcohol or a diluted bleach solution to prevent the spread of pathogens. Sharp, sanitized tools reduce the risk of tearing the bark and causing unnecessary stress to the plant.
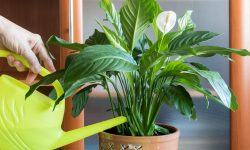
It’s also beneficial to water the plant a day or two before pruning. A well-hydrated plumeria will respond better to trimming and heal more efficiently. In dry conditions, freshly cut stems may take longer to callus and become vulnerable to rot or pest damage.
If your plumeria is potted, consider moving it to a shaded and stable area for easier access and better control during the process. This also reduces the risk of tipping the container while maneuvering around the plant.
Finally, plan your cuts strategically. Visualize the overall shape you want for your plumeria, and consider how each cut will influence the future structure and flowering pattern. By preparing thoroughly, you not only protect your plant but also set it up for vigorous, beautiful growth in the coming season.
Step-by-Step Guide to Pruning Plumeria for Bigger Blooms
Step 1: Let the Cuts Dry and Callous
Immediately after pruning, leave the cut ends exposed to air in a dry, shaded spot. This callusing process usually takes 3–7 days and is essential to prevent rot or infection. Avoid watering the plant from above during this period.
Tip: If your climate is humid or wet, apply garden sulfur or cinnamon powder to the fresh cuts to deter fungal growth.
Step 2: Adjust Watering Carefully
Hold off on watering for about 3–5 days after pruning. Once the cut ends have sealed and the soil feels dry an inch below the surface, resume watering lightly.
Water the base of the plant—not the leaves or branches—and ensure excess water drains away completely. Overwatering at this stage can cause rot.
Step 3: Place in Full Sunlight
Move your plumeria to a spot that receives at least 6 hours of direct sunlight daily. Sunlight helps the plant regenerate branches and supports chlorophyll production for new leaves.
If growing indoors or in a cooler zone, use a grow light to supplement natural sunlight.
Step 4: Monitor for Signs of New Growth
Within 2–4 weeks, you should notice small green shoots or leaf buds forming on the branches. This is a good sign that the plant is healing and actively growing.
Keep checking that the new growth is firm and healthy. Soft, mushy tips may indicate rot, requiring prompt action.
Step 5: Resume Fertilizing Once Growth Begins
Wait until you see clear signs of new leaves or branch development before applying fertilizer. Then, feed your plumeria with a high-phosphorus fertilizer (such as 10-30-10 or 0-50-30) every 2–4 weeks during the growing season.
Avoid nitrogen-heavy formulas immediately after pruning, as they can stimulate excess leafy growth at the expense of flowers.
Step 6: Keep the Area Pest-Free
After pruning, weakened plants are more attractive to pests like mealybugs, spider mites, or whiteflies. Inspect the stems and undersides of leaves every few days.
If pests appear, remove them with a soft cloth or spray neem oil or insecticidal soap. Keep airflow around the plant good by avoiding overcrowding.
Step 7: Protect From Sudden Weather Changes
If you pruned late in the season or live in a region with unpredictable weather, monitor for sudden temperature drops or rain. Bring container-grown plumerias indoors or cover in-ground ones with breathable fabric if needed.
Cold temperatures can stress freshly pruned plants, delaying recovery or causing damage.
Step 8: Light Pruning for Shape Maintenance (Optional)
As new shoots grow and mature, you can perform light shaping to guide your plant’s structure. Use clean, sharp shears and only cut young, green growth—avoid cutting hardened branches again too soon.
Light training at this stage helps form a well-balanced canopy for next year’s blooms.
Caring for Plumeria After Pruning
After pruning, plumeria needs careful attention to ensure a healthy recovery and strong future growth. Start by keeping the cut ends dry and clean for several days, allowing them to callous naturally. Avoid overhead watering, and optionally apply cinnamon or sulfur powder to prevent fungal infections.
Wait about 3–5 days before resuming light watering, only when the soil feels dry. Ensure the plant gets at least 6 hours of direct sunlight daily to encourage new shoots. Once fresh growth appears, begin feeding with a phosphorus-rich fertilizer every 2–4 weeks to support blooming.
Monitor the plant for pests like mealybugs or spider mites and treat promptly with neem oil or insecticidal soap. Avoid overwatering or exposing the plant to sudden temperature changes. As new growth develops, you can lightly shape the plant to encourage a balanced canopy.
Common Mistakes to Avoid When Pruning Plumeria
Pruning plumeria may seem simple, but several common mistakes can reduce blooming, invite disease, or permanently alter the plant’s shape. Here are the most important pitfalls to avoid, along with how to do it right.
Pruning at the Wrong Time
One of the biggest mistakes is pruning during the wrong season. Cutting plumeria in late fall or winter, especially in cooler climates, leaves the plant vulnerable to rot and cold damage. Pruning too early in spring, before the plant exits dormancy, can also disrupt growth.
The right time is late winter to early spring, when temperatures warm and buds start to swell. This timing supports faster healing and encourages fresh growth.
Removing Too Much Too Fast
While it’s tempting to reshape your plumeria drastically in one go, removing too many branches at once can stress the plant, weaken its structure, and significantly delay blooming. Excessive pruning also limits the number of tips that will develop flowers.
Instead, remove no more than one-third of the plant in a single season. Focus on thinning overcrowded areas or cutting weak, crossing, or dead wood to keep the plant open and healthy.
Making Improper Cuts with Unclean Tools
Using dull or unsterilized tools is a silent mistake that often leads to problems later. Jagged cuts heal poorly, and dirty blades can introduce bacteria or fungus directly into the open wound.
Always use sharp, clean pruning shears. Make straight, smooth cuts just above a node or branching point. Avoid tearing the bark or crushing the stem, which can lead to dieback or infection.
Watering or Fertilizing Too Soon After Pruning
Newly pruned plants need a brief recovery period. Watering immediately after pruning increases the risk of rot, especially if moisture enters the fresh cuts. Fertilizing too early can overstimulate the plant before it’s ready.
Let all cuts dry and callous for a few days. Resume watering when the soil feels dry, and wait to fertilize until you see signs of new growth—usually 2–4 weeks later.
Benefits of Regular Pruning for Plumeria
Regular pruning offers a wide range of benefits that go beyond aesthetics—it directly enhances the health, strength, and blooming capacity of your plumeria. When you prune properly, each cut encourages the plant to branch out and form multiple new tips. Since plumeria only produces flowers at the ends of its branches, more tips naturally lead to more blossoms, making regular pruning one of the simplest ways to increase flower production year after year.
Pruning also helps improve air circulation and sunlight penetration throughout the plant’s canopy. A dense, unpruned plumeria can become overcrowded, trapping moisture and creating the perfect environment for fungal diseases. By opening up the structure, you allow light and airflow to reach more parts of the plant, keeping it dry, healthy, and better ventilated—especially important in humid or rainy climates.
Beyond encouraging flowers and preventing disease, regular pruning shapes the overall form of the plant. Plumeria can grow tall and leggy if left untrimmed, but with careful cuts, you can create a bushier, more compact shape that’s not only attractive but also more stable. Stronger branch development reduces the chance of breakage in storms or under the weight of heavy blooms.
Removing dead, damaged, or diseased wood also helps the plant redirect its energy to healthy branches and root growth. This improves nutrient absorption and supports a more balanced internal system. Over time, a well-pruned plumeria becomes more resilient, better rooted, and more capable of bouncing back from environmental stress such as drought, wind, or heat.
In short, regular pruning strengthens your plumeria’s foundation, boosts flowering potential, and helps maintain a vibrant, long-living plant that performs better in every growing season.
How to Prune Different Plumeria Types
While all plumeria varieties benefit from pruning, slight adjustments in technique can help you get the best results depending on the type you’re growing. For common Plumeria rubra, focus on pruning just above a node to encourage branching and flowering. These respond well to shaping and can handle moderate cuts in late winter or early spring.
Plumeria obtusa, with its rounded leaves and slower growth, requires a gentler approach. Remove only dead or weak branches, and avoid heavy pruning that may delay blooming. This type is best shaped gradually over time.
For dwarf or compact cultivars, light pruning is ideal to maintain a symmetrical form. These varieties naturally stay smaller and don’t need major cuts. Use clean, sharp tools and avoid over-thinning, which can reduce bloom density.
No matter the type, always prune during the plant’s dormant period and allow cuts to callous before watering. Tailoring your technique to the specific plumeria variety helps ensure faster recovery, stronger growth, and more abundant blooms.
Propagating Plumeria Through Pruning
One of the most rewarding aspects of pruning plumeria is that the cuttings you remove can be used to grow entirely new plants. Plumeria propagates easily from stem cuttings, making it simple to expand your garden or share with fellow plant lovers. With the right technique, a single pruned branch can become a thriving, blooming tree in just a few seasons.
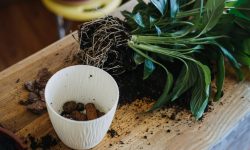
To propagate plumeria through pruning, select healthy, non-flowering branches that are at least 12 to 18 inches long and about as thick as a pencil or more. After making a clean cut with sterilized shears, allow the cutting to dry in a shaded, well-ventilated area for 5 to 10 days. This curing period is crucial, as it helps the cut end callous over and prevents rot when planted.
Once calloused, plant the cutting upright in well-draining soil, such as a cactus or sandy mix. Insert the bottom 3–4 inches of the stem into the soil, firm it gently, and place the container in a bright, warm location. Avoid watering heavily at first—only mist lightly or water sparingly until roots begin to form, typically within 4 to 6 weeks.
Rooted cuttings may take a full growing season before producing leaves or showing visible growth. With patience, proper care, and sunlight, your propagated plumeria will eventually flower just like the parent plant. This method not only multiplies your collection but also preserves unique varieties you love.
Troubleshooting Common Issues After Pruning
After pruning, plumeria may show signs of stress if not cared for properly. One common issue is stem rot, often caused by watering too soon before cuts have dried. If you notice black, mushy areas on the cut ends, trim them back to healthy tissue and let the wound dry fully before watering again.
Delayed growth is another concern—this usually results from pruning too early in the season or in cool weather. Be patient and ensure the plant gets enough warmth and sunlight to resume active growth.
If leaves yellow or drop, check for overwatering or poor drainage. Let the soil dry out between watering and ensure your pot or garden bed drains well. Also watch for pests like mealybugs or scale insects, which may be attracted to tender new growth. Treat infestations promptly with neem oil or insecticidal soap.
By monitoring your plant closely and adjusting care as needed, most post-pruning issues can be resolved quickly and your plumeria will bounce back stronger.
Seasonal Pruning Tips for Year-Round Care
Pruning plumeria at the right time each season ensures healthy growth and long-lasting blooms. In late winter to early spring, perform structural pruning to shape the plant, remove dead branches, and encourage new growth before the growing season begins. This is the best time for major cuts.
During summer, limit pruning to light shaping or removing spent flower stalks and leggy growth. Avoid heavy cuts, as the plant is actively blooming and growing.
In fall, only remove broken or diseased branches to prepare the plant for dormancy. Avoid stimulating new growth that won’t survive colder weather.
In winter, especially in cooler climates, do not prune unless absolutely necessary. Let the plant rest, and focus on protection from cold. Any pruning done in winter may slow spring recovery.
By adjusting your pruning practices seasonally, you support your plumeria’s natural growth cycle and ensure better health and flowering year after year.
FAQ: Pruning and Caring for Plumeria
When is the best time of year to prune plumeria?
The ideal time to prune plumeria is in late winter to early spring, just before new growth starts. This timing allows the plant to heal efficiently and produce more flowering branches during the growing season. Avoid pruning in fall or winter, especially in cooler climates, as the cuts may not heal properly and can lead to rot or cold injury.
How much of the plant can I safely prune at once?
You should not remove more than one-third of the plant’s overall structure in a single pruning session. Excessive pruning can stress the plant, reduce its ability to bloom, and delay recovery. Prioritize removing dead, weak, crossing, or overcrowded branches while preserving a well-balanced form.
Can I use the branches I prune to grow new plumeria plants?
Yes, plumeria cuttings are easy to propagate. Choose firm, healthy, non-blooming branches that are 12–18 inches long. Let the cut ends dry and callous for 5 to 10 days in a shaded, airy place, then plant them in well-draining soil. With warmth and indirect sunlight, roots usually develop in 4–6 weeks.
What should I do if the cut ends start turning black or mushy?
Black or mushy tips are signs of stem rot, often caused by watering too soon or poor airflow. Trim back to healthy tissue using clean, sharp tools. Let the new cut end dry fully, and dust it with cinnamon or sulfur to discourage further rot before watering or replanting.
How long does it take for a pruned plumeria to flower again?
After pruning, new growth generally appears within 2 to 4 weeks in warm conditions. Branches that develop in spring or early summer may bloom later that season or in the following one, depending on variety and growing conditions. Be patient—plumeria needs time to mature new tips before they produce flowers.
Conclusion: Mastering Plumeria Pruning for Gorgeous Gardens
Pruning plumeria is a rewarding gardening skill that directly impacts the beauty and health of these iconic tropical trees. By understanding when and how to prune, selecting the right tools, and following careful aftercare, gardeners can enjoy bigger, more vibrant blooms and stronger growth season after season. Avoiding common mistakes and adapting pruning techniques to your specific plumeria variety ensures your tree remains a stunning centerpiece in your garden or landscape. With regular pruning, your plumeria will flourish, offering breathtaking flowers and lush foliage for years to come.