Zinnias are beloved among gardeners for their radiant colors, long-lasting blooms, and ease of care. Beyond their seasonal charm, zinnias offer something even more valuable: the ability to be self-sustaining. Saving zinnia seeds is not just a practical gardening task—it is a celebration of the plant’s life cycle and an opportunity to build a garden legacy from season to season.
Learning how to save zinnia seeds ensures you can enjoy your favorite varieties year after year. This comprehensive guide explores the science, technique, and timing needed to harvest, dry, store, and successfully germinate zinnia seeds with maximum viability.
Understanding Zinnia Genetics and Seed Viability
Saving zinnia seeds successfully requires more than just proper timing and technique. A deep understanding of zinnia genetics and how it impacts seed viability is crucial for gardeners who want consistent results in color, form, and vigor. Because zinnias are open-pollinated and highly attractive to pollinators, crossbreeding between varieties is common, which directly affects the predictability of saved seeds.
Open-Pollinated vs. Hybrid Zinnias: Why It Matters
Zinnias can be either open-pollinated (OP) or hybrid (F1), and knowing which type you’re growing makes a significant difference when saving seeds. Open-pollinated varieties tend to produce offspring that closely resemble the parent plant, assuming they haven’t cross-pollinated with other zinnias nearby. These are ideal for seed-saving because they retain consistent traits over generations.
Hybrid zinnias, on the other hand, are bred from two genetically distinct parents to emphasize specific traits like disease resistance or unique bloom colors. Seeds saved from hybrids often yield unpredictable results due to genetic segregation. This means plants grown from F1 seeds may revert to one of the parent lines, lose the desired traits, or show weak vigor.
To maintain consistency in your garden, it’s recommended to isolate open-pollinated varieties or grow only one type at a time if you plan to save seeds. If you’re intentionally breeding for diversity, however, hybrid seed saving can still be an experimental and rewarding process.
Cross-Pollination and Its Impact on Seed Purity
Zinnias are primarily pollinated by bees, butterflies, and other insects that move freely between blooms. In mixed plantings, cross-pollination is almost inevitable. While this doesn’t affect the current year’s blooms, it significantly influences the genetic makeup of the seeds you collect.
Seed purity is crucial if you’re preserving a specific cultivar. To reduce cross-pollination, experienced seed savers often use spatial isolation—planting different zinnia varieties at least 300 feet apart—or employ mechanical isolation methods like mesh cages. Controlled pollination using hand-paintbrush techniques is also a viable strategy for preserving heirloom lines or developing new strains.
Seed Viability Over Time
Not all seeds maintain their vigor indefinitely. Even under ideal conditions, zinnia seed viability diminishes with age. Most zinnia seeds remain viable for three to five years if stored properly, but germination rates begin to drop after the second year. This decline is influenced by factors like humidity, temperature fluctuations, and seed maturity at the time of harvest.
To ensure optimal results, always harvest seeds from healthy, fully mature blooms and store them in airtight containers in a cool, dark location. Periodically testing germination rates before planting a large batch will help identify whether older seeds are still worth using.
Genetic Traits to Monitor When Selecting Seed Parents
When saving seeds, the characteristics of the parent plant play a pivotal role in what you’ll see in the next generation. Look for plants with strong stems, disease resistance, abundant blooms, and vibrant colors. These visible traits often have underlying genetic components that get passed down.
It’s also important to note that some mutations—such as double blooms or dwarf growth habits—may not breed true without controlled conditions. If your garden includes both single and double-blooming zinnias, the resulting seed may yield a mix of both forms. Monitoring and documenting your plants over time helps you select the most reliable seed parents and develop a line of zinnias uniquely suited to your preferences and local conditions.
Recognizing the Right Time to Harvest Zinnia Seeds
Timing is a critical factor in successfully harvesting zinnia seeds. Collecting too early can result in immature, non-viable seeds, while waiting too long may lead to seed loss due to dispersal or deterioration from weather and pests. To ensure your seeds are viable and capable of producing healthy new plants, it’s essential to develop an eye for when zinnia seed heads have reached full maturity.
Understanding the Life Cycle of a Zinnia Flower
The process of seed formation in zinnias begins immediately after the flower is pollinated. Once fertilization occurs, the zinnia bloom starts to transition from a vibrant flower to a dry, brittle seed head. During this time, petals fade and wither, and the central disk florets darken and shrink.
Mature seeds develop in the base of each floret within the central flower disk. These seeds are essentially attached to the dried remnants of the flower’s reproductive parts. The plant channels energy into seed development during this post-bloom stage, and interrupting this process by harvesting too soon can compromise germination quality.
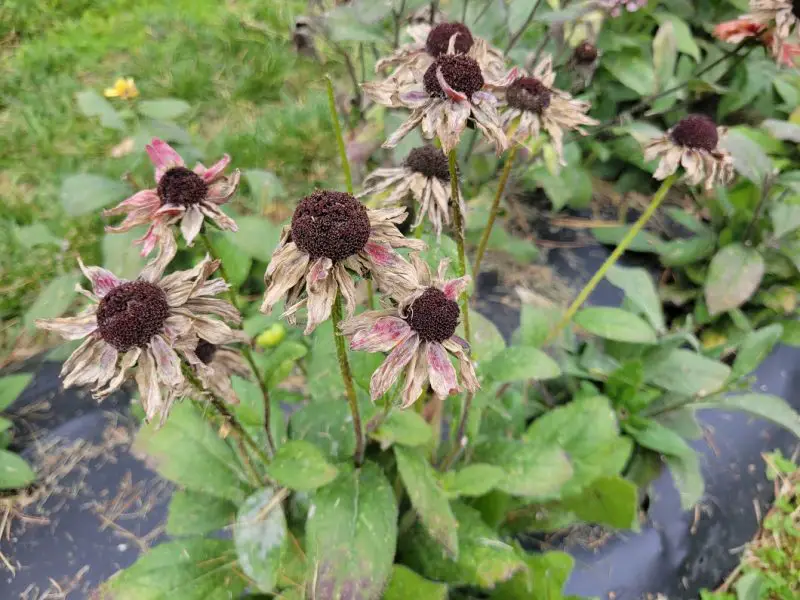
Visual Cues That Indicate Seed Maturity
One of the most reliable indicators of seed readiness is the appearance of the flower head. When seeds are fully developed, the flower head turns completely brown and feels dry and crispy to the touch. The stem directly beneath the flower may also lose its green color and start to brown or feel hollow—this is another sign that the seed head is no longer drawing moisture or nutrients from the plant.
You should also observe the center of the flower for visible seed structures. Gently pulling apart the dried florets should reveal arrowhead-shaped seeds that are firm and dark beige to brown in color. Seeds that appear pale, soft, or underdeveloped are likely immature and less viable.
The Role of Weather and Environmental Conditions
Weather can either help or hinder seed maturity. Prolonged wet or humid conditions near the end of the zinnia’s life cycle can encourage mold growth or cause seeds to rot before they are harvested. Ideally, seed heads should dry on the plant under consistent, warm conditions with minimal rain or morning dew. In areas with early fall rains, you may need to cut the seed heads and finish drying them indoors to avoid fungal issues.
Wind is another environmental factor to watch. As zinnia seed heads dry, they become more brittle and prone to releasing seeds prematurely. High winds can cause mature seed heads to scatter their contents, especially if they are allowed to dry too long in the garden.
When to Begin Inspecting for Harvest
While zinnia blooms can last weeks in full display, seed maturation typically begins a few weeks after the petals fall off. This is the ideal time to start monitoring your plants daily. Keeping a log or marking specific blooms with flags or garden tape can help you track which flowers were pollinated first and will be ready for harvest sooner.
It’s also helpful to identify and tag flowers from your healthiest, most vibrant plants early in the season. That way, when it’s time to collect seeds, you’ll know which ones are most likely to pass on strong genetic traits.
The Relationship Between Bloom Cycle and Seed Timing
Zinnias are continuous bloomers, meaning they produce new flowers throughout the growing season. As a result, seed heads on the same plant can be in various stages of development at once. This staggered maturation requires selective harvesting, focusing only on flower heads that meet maturity criteria while leaving others to continue ripening.
This makes hand-harvesting preferable to mass cutting, especially for gardeners who want to ensure high seed quality and avoid collecting immature seeds that compromise overall germination rates.
How to Harvest Zinnia Seeds Effectively
Harvesting zinnia seeds correctly not only saves money but ensures healthy, vibrant blooms in the seasons ahead. Timing and technique are essential to maintain seed quality and viability.
When Zinnia Seeds Are Ready
Zinnia seeds develop at the base of the flower head after the petals fade. When the flower head turns brown, crisp, and detaches easily from the stem, it’s the ideal time to collect. Picking too early can result in immature seeds with low germination rates.
To check readiness, gently pull apart the dry flower head. Mature seeds are flat, arrow-shaped, and grayish-brown in color, often attached to the dried petal bases.
Best Conditions for Harvesting
Always harvest on dry days after several days without rain. Moisture increases the risk of mold and rot. If rainy weather persists, you can cut nearly-dry flower stems and hang them upside down in a well-ventilated indoor space until they dry completely.
Tools and Technique
Use clean, sharp scissors or pruning snips to prevent damaging seeds or transmitting disease. Carefully clip the seed heads and place them into a breathable container like a mesh basket or tray—never use plastic bags, as they trap moisture.
Once collected, gently rub or crush the dry flower heads to release the seeds. A fine sieve can help separate viable seeds from chaff and petal remnants. Avoid using too much force, which may damage the seeds.
Avoiding Cross-Pollination
If you grow multiple zinnia varieties, bees and other pollinators may cause cross-pollination, producing hybrid seeds that may not resemble the parent plant. To preserve pure strains, harvest from isolated plants or those grown far apart from other varieties.
Post-Harvest Drying
After harvesting and cleaning, lay seeds out on paper or a fine mesh screen in a cool, dry, shaded space for at least 5 to 7 days. This ensures they’re fully dry and less prone to mold during storage.
Once dried, seeds are ready for storage or planting. Be sure to label them with the harvest date, variety, and any special notes about flower traits to help with future planning and selection.
Drying is a critical step in preserving the viability of harvested zinnia seeds. Even if seeds are collected at the perfect moment of maturity, improper drying can lead to moisture retention, fungal contamination, or a significant drop in germination success. Ensuring that your zinnia seeds are dried thoroughly and correctly is the key to maintaining their vitality for future planting seasons.
Why Proper Drying Is Essential
Freshly harvested zinnia seeds may feel dry to the touch on the exterior, but internal moisture levels can remain high, particularly if the seed heads were collected soon after rainfall or morning dew. This residual moisture can cause mold growth, internal decay, or clumping when stored in containers. Seeds that are not fully dried often deteriorate within weeks of storage, making proper drying just as important as timely harvesting.
Additionally, drying helps to harden the seed coat, which protects the embryo inside from physical damage and environmental stress during storage. A strong seed coat increases the chance that the seed will survive dormancy and successfully germinate the following spring.
Initial Cleaning and Separation Before Drying
Before the drying process begins, zinnia seed heads should be carefully separated. Begin by gently pulling apart the dried flower head to release the seeds. You will likely find both fertile seeds and dried floral debris mixed together. It’s important to distinguish between viable seeds and the dried chaff.
Mature zinnia seeds typically have a plump, pointed arrowhead shape and a papery tail where the petal was once attached. Use your fingers to sift through the material and remove any remaining petals, stems, or discolored fragments that can hold moisture and promote mold. While some gardeners prefer to dry the seeds with minimal cleaning first and separate them later, a quick initial sort can speed up and improve the drying process.
Ideal Environmental Conditions for Drying Zinnia Seeds
Zinnia seeds dry best in warm, well-ventilated environments with low humidity. A temperature range between 65°F and 80°F is optimal, as higher temperatures can damage the seed embryo and colder conditions can slow down the drying process excessively.
Air circulation is another crucial factor. Seeds should be spread out in a single layer on a breathable surface that allows air to move freely around them. Materials like parchment paper, paper towels, or mesh screens are preferred over plastic or metal trays, which can trap moisture underneath the seeds.
Avoid direct sunlight during the drying process. While sun exposure may seem helpful, excessive heat and UV radiation can break down the proteins and enzymes inside the seed, reducing viability. Instead, choose a dry, shaded spot indoors, such as a room with an oscillating fan or a covered porch with indirect airflow.
Timeframe for Proper Seed Drying
Most zinnia seeds take five to ten days to dry thoroughly under ideal conditions. During this period, seeds should be gently stirred once a day to expose all surfaces to air and prevent clumping. If you’re drying large quantities, flipping or redistributing the seeds ensures consistent moisture evaporation.
The drying time may vary depending on the local climate. In coastal or humid regions, drying might take up to two weeks. In drier, arid areas, seeds may be ready in as few as four days. Regardless of location, it is important not to rush the process. Seeds that are packaged before completely drying can quickly develop mold, especially when stored in airtight containers.
How to Test Seed Dryness
Testing dryness is a simple but necessary final step before storage. A well-dried zinnia seed should feel hard and brittle. If you attempt to bend it, it should snap cleanly rather than flex. You can also conduct a snap test using your fingernail—if the seed resists pressure and feels tough rather than spongy, it’s dry.
Another reliable method is the paper towel test. Place a handful of dried seeds between two dry paper towels and leave them inside a sealed glass jar for 24 hours. If the towels remain dry and there is no condensation inside the jar, your seeds are sufficiently dry for storage. If moisture forms, continue drying the seeds for several more days.
Avoiding Common Drying Mistakes
One common mistake is drying seeds too quickly using artificial heat sources such as ovens, heat lamps, or food dehydrators. While these methods may seem efficient, high heat can damage the internal embryo of zinnia seeds, reducing their ability to sprout. Air drying is the safest and most effective method.
Another mistake is storing seeds too soon after collection. Even if the flower heads appear dry, internal seed moisture can take days to release. Packaging seeds prematurely in paper envelopes or glass jars creates a microclimate that encourages mold growth. Patience in the drying process will always pay off with better germination outcomes.
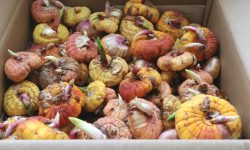
Storing Zinnia Seeds for Maximum Viability
Once zinnia seeds have been fully dried, proper storage becomes the next essential step to ensure their longevity and germination potential. Even the healthiest, most mature seeds can become useless if stored incorrectly. The key to long-term seed viability lies in controlling temperature, humidity, and exposure to light and air.
Understanding the Importance of Seed Dormancy
After drying, zinnia seeds enter a state of dormancy. This is a natural phase in which metabolic activity slows to nearly zero, allowing the seed to survive until conditions are right for germination. Proper storage conditions preserve this dormancy by minimizing internal seed stress and slowing degradation.
If seeds are exposed to inconsistent environments—especially temperature and humidity fluctuations—the protective dormancy can break down prematurely. This reduces vigor, shortens shelf life, and can trigger rot or germination failure when planting.
Selecting the Right Storage Containers
Storage begins with choosing the appropriate container. Breathable paper envelopes are a traditional and effective option, especially when seeds will be stored for only a single season. For longer-term storage, airtight containers like glass jars with rubber seals, metal tins, or heavy-duty plastic containers are preferred.
These containers prevent outside air and moisture from affecting the seeds inside. However, they must only be used once the seeds are fully dried. Even slight internal moisture in a sealed container can create a micro-humid environment that supports mold growth and microbial decay.
Labeling the container with the variety name, collection date, and location harvested adds both organization and traceability—useful for seed savers managing multiple zinnia types.
Ideal Temperature and Humidity Conditions
The most critical factor in long-term seed storage is maintaining a stable, cool, and dry environment. Zinnia seeds remain viable for two to five years if stored under optimal conditions. The ideal temperature is around 32°F to 50°F, making refrigerators or temperature-controlled cellars excellent storage areas.
Humidity levels should be kept below 40% to prevent rehydration. Moisture is the greatest enemy of stored seeds. To combat this, desiccants such as silica gel packets or powdered milk in breathable sachets can be added to storage containers to absorb excess humidity.
Avoid storing seeds in sheds, garages, or greenhouses where temperatures fluctuate dramatically. These swings can reduce seed life by triggering internal chemical processes or causing moisture absorption.
Darkness and Light Sensitivity in Seed Storage
Light is another overlooked factor in seed degradation. Even though zinnia seeds are not classified as highly photosensitive, prolonged exposure to sunlight or artificial light can slowly weaken the protective coat, particularly under high humidity.
Store containers in opaque boxes or within drawers that block light completely. Even inside refrigerators, seeds should be kept in paper envelopes or wrapped in dark fabric to prevent unnecessary exposure when the door is opened.
Freezing Zinnia Seeds: When and How to Use Cold Storage
For gardeners or seed savers looking to keep zinnia seeds beyond the typical two- to three-year viability window, freezing is a potential option. Freezing must be approached with care because sudden changes in temperature and moisture content can fracture the seed coat or damage the embryo inside.
To freeze zinnia seeds successfully, ensure they are thoroughly dried to less than 8% moisture content. Then, double-seal them in moisture-proof containers such as vacuum-sealed bags or heat-sealed foil pouches. Place them in the back of a freezer where temperatures remain stable.
When removing seeds from the freezer, allow them to reach room temperature gradually before opening the container. This prevents condensation from forming on the cold seeds, which would reintroduce moisture and reduce viability.
Monitoring and Periodic Testing of Stored Seeds
Even with ideal storage, it’s important to monitor the condition of seeds over time. At least once a year, inspect containers for signs of moisture, mold, or insect activity. Gently shake the container and listen for a crisp rattle—if the seeds sound soft or stick together, they may have absorbed moisture and need to be re-dried.
A simple germination test can be performed annually to assess viability. Place ten seeds on a damp paper towel, seal them inside a plastic bag, and keep them in a warm location. If fewer than seven germinate after a week, it may be time to replace your seed stock.
Germinating Saved Zinnia Seeds Successfully
When to Start Germination
Zinnia seeds can be started indoors 4 to 6 weeks before the last expected frost, or directly sown outdoors after the soil warms to at least 70°F (21°C). For early blooms or short growing seasons, indoor germination is ideal.
Soil and Container Selection
Use a well-draining, sterile seed-starting mix in shallow trays or small pots. Avoid heavy garden soil, which can retain too much moisture and hinder root development. Containers should have drainage holes to prevent waterlogging.
Light, Temperature, and Moisture
Zinnia seeds require light to germinate, so press them gently into the soil surface rather than burying them deeply. Maintain a consistent temperature between 70–75°F (21–24°C) and keep the surface evenly moist, not soggy.
Covering trays with a clear humidity dome or plastic wrap can help retain warmth and moisture until germination occurs, typically within 5 to 7 days.
Thinning and Transplanting
Once seedlings develop their first true leaves, thin them to prevent overcrowding. Harden them off gradually by exposing them to outdoor conditions over several days before transplanting into the garden or larger containers.
Common Problems When Saving and Growing Zinnia Seeds
Low Germination Rates
One of the most common issues gardeners face is poor seed germination. This is often caused by harvesting seeds too early before they are fully mature. Immature seeds lack the stored energy necessary to sprout.
Improper storage can also degrade seed viability. Seeds stored in humid or fluctuating temperatures may develop mold or lose vigor. Ensuring complete drying before storage and keeping seeds in airtight containers in a cool, dark place can prevent this issue.
Mold or Rot in Stored Seeds
Mold is a serious threat to saved seeds, especially when drying protocols aren’t followed. Seeds that are stored while still retaining moisture often develop mold or mildew, making them unusable.
To avoid this, dry seeds thoroughly for at least 7 to 10 days in a warm, well-ventilated area. Silica gel packs or powdered milk packets can also be added to containers to absorb residual humidity.
Damping-Off Disease in Seedlings
Once seeds germinate, young seedlings may suffer from damping-off, a fungal disease that causes stems to rot at the soil line. This usually stems from overwatering, poor air circulation, or contaminated soil.
Using a sterile seed-starting mix and keeping humidity under control is critical. Water seedlings from the base and ensure containers drain well. Good ventilation, even a small fan, can help deter fungal growth.
Weak or Leggy Seedlings
Zinnia seedlings grown indoors can become leggy if they don’t receive enough light. This leads to weak stems that may collapse before transplanting.
To fix this, use a strong grow light placed just a few inches above the seedlings. Lights should be kept on for 12 to 14 hours a day to mimic natural daylight. Gradually lower the light or raise seedlings as they grow to maintain optimal distance.
Cross-Pollination and Unexpected Results
Zinnias are open-pollinated, meaning insects can transfer pollen between different varieties in your garden. If you save seeds from hybridized plants, the next generation may not resemble the parent plant in color, size, or bloom type.
To prevent this, isolate specific varieties by distance, or grow only one type if you want to preserve its genetic traits. You can also hand-pollinate and bag flower heads to maintain purity, though this requires more technical precision.
Seed Dormancy or Slow Growth
Zinnia seeds typically don’t require stratification or dormancy-breaking techniques. However, very old seeds (over 3 years) may take longer to sprout or fail to germinate entirely due to age-related decline in viability.
Labeling each saved batch with harvest year and conducting germination tests before planting can help ensure you’re using viable seed stock.
Benefits of Saving Zinnia Seeds Over Buying New Each Year
Cost Savings and Sustainability
Saving seeds eliminates the need to purchase new ones annually, making your gardening practice more economical and eco-friendly.
Preserving Heirloom Varieties
For gardeners who cultivate rare or heirloom zinnias, saving seeds ensures these genetic lines are preserved and propagated.
Strengthening Garden Genetics
By consistently saving seeds from the strongest, healthiest plants, you create a localized strain of zinnias uniquely adapted to your garden’s conditions.
Frequently Asked Questions
Can I save seeds from any zinnia variety?
Yes, you can save seeds from any zinnia variety, but the results depend on whether the plant is an open-pollinated or hybrid type. Open-pollinated varieties will typically produce offspring that resemble the parent plant, while seeds from hybrids may yield unpredictable traits. If you’re aiming for consistency in color or flower form, it’s best to save seeds from open-pollinated or heirloom zinnias.
When is the best time to collect zinnia seeds?
The ideal time to collect zinnia seeds is when the flower heads are completely dry and the petals have fallen off. The center of the flower should be brown and brittle, and the seeds should separate easily from the base. Harvesting too early can result in immature seeds that won’t germinate properly.
What do mature zinnia seeds look like?
Mature zinnia seeds are arrowhead-shaped and usually dark brown or gray. Each seed is located at the base of a spent floret and may still be attached to a dry petal or bract. If the seeds are pale, soft, or light green, they are not yet mature and should not be stored.
Do I need to dry the seeds after harvesting?
Yes, drying zinnia seeds thoroughly is essential to prevent mold and ensure long-term viability. After harvesting, spread the seeds in a single layer on a paper towel or screen in a dry, well-ventilated area. Let them dry for at least 7 to 10 days before storing them.
How should I store zinnia seeds for the best results?
Store zinnia seeds in a cool, dark, and dry location. Use airtight containers such as glass jars or sealed envelopes with desiccant packs to control humidity. Label each container with the variety and harvest date. Ideal storage temperatures are between 35°F and 50°F, such as in a refrigerator or temperature-controlled room.
How long do saved zinnia seeds remain viable?
Properly stored zinnia seeds can remain viable for up to 3 to 5 years. However, germination rates tend to decrease gradually over time. To ensure high success rates, it’s best to use seeds within 1 to 2 years and conduct germination tests if the seeds are older.
Can zinnia seeds cross-pollinate?
Yes, zinnias are insect-pollinated and can easily cross with other nearby varieties, especially in a mixed flower bed. If you’re saving seeds and want to maintain specific traits, consider planting one variety at a time or isolating flower heads with mesh bags to prevent cross-pollination.
Do I need to do anything special to prepare zinnia seeds before planting?
Zinnia seeds do not require any special pre-treatment such as stratification or scarification. Simply sow the seeds directly into warm soil or start them indoors 4 to 6 weeks before the last frost. Ensure the planting medium is well-draining and avoid overwatering during early germination stages.
Can I save seeds from zinnias grown in containers?
Absolutely. Container-grown zinnias produce viable seeds just like those in garden beds, provided they are allowed to fully mature on the plant. Be sure to let the blooms dry out completely before harvesting the seeds for best results.
Will my saved zinnia seeds bloom the same color next year?
If your original plant was a hybrid or if you grew multiple varieties together, the saved seeds may produce flowers of varied colors or forms. To maintain color consistency, collect seeds from isolated open-pollinated plants and avoid mixing varieties.
Conclusion: A Rewarding Cycle of Bloom and Renewal
Saving zinnia seeds is a fulfilling way to extend the beauty and joy of gardening across seasons. With proper timing, careful drying, secure storage, and skillful germination, you can enjoy vibrant blooms year after year from your own harvested seeds. More than a gardening technique, it’s a practice that honors the natural cycle of growth, reproduction, and renewal—allowing each flower to give rise to many more in the seasons ahead.
Whether you’re a beginner or a seasoned gardener, embracing the art of seed saving deepens your connection to your garden and empowers you to grow confidently and sustainably.