Amaryllis is one of the most beloved flowering bulbs for indoor and outdoor gardeners alike. Known for its bold, trumpet-shaped blooms and vibrant colors, it brings life to winter windowsills and garden beds with minimal effort. But what many gardeners don’t realize is that getting these stunning blooms year after year relies heavily on how well you store your amaryllis bulbs after the growing season. Learning how to store amaryllis bulbs the right way can make all the difference between a thriving, blooming bulb and one that fails to flower.
In this comprehensive guide, we’ll walk you through every step of amaryllis bulb storage, from timing the dormancy period to ideal conditions, troubleshooting common issues, and everything in between. Whether you’re a beginner or an experienced gardener, this guide will ensure your amaryllis returns stronger and more beautiful with each passing season.
Understanding the Life Cycle of Amaryllis
Amaryllis grows in a repeating cycle of growth, bloom, dormancy, and regrowth. After planting, the bulb produces thick green leaves and a tall flower stalk that blooms for several weeks. Once blooming ends, the plant shifts into a growth phase to store energy in the bulb through its leaves. As the leaves begin to yellow, the plant enters dormancy, usually in late summer or early fall. This rest period is essential for triggering the next bloom.
During dormancy, it’s important to reduce watering and place the bulb in a cool, dark location. This allows the plant to rest and recharge. If the bulb doesn’t get enough rest, it may not flower in the next cycle. You can remove dead foliage once it turns brown, but avoid disturbing the bulb too much during this stage.
After about 8 to 12 weeks, new growth emerges as a sign that the bulb is ready to restart its life cycle. Move it back to a warm, sunny location and resume watering gradually. With proper timing and care, amaryllis can rebloom every year, becoming a long-lasting and rewarding part of your indoor or garden plant collection.
When to Store Amaryllis Bulbs
The best time to store amaryllis bulbs is after the plant has completed its active growing season and the leaves begin to yellow and die back naturally. This usually occurs in late summer or early fall, depending on whether your amaryllis was grown indoors or outdoors. Timing is crucial—storing bulbs too early can interrupt the energy-building process, while waiting too long can lead to rot or reduced blooming potential.
For amaryllis grown indoors in pots, observe the leaves closely. Once they start turning yellow and flop over, it’s a sign that the bulb has entered dormancy. This signals the perfect time to begin preparing for storage. If the plant is grown outdoors in warmer climates, wait until after the foliage has naturally withered or after the first mild frost.
It’s essential not to force dormancy by cutting the leaves while they are still green and photosynthesizing. Letting the plant die back on its own allows it to reabsorb valuable nutrients from the leaves into the bulb, giving it the energy it needs for strong future blooms. When timed correctly, storing amaryllis bulbs gives them a chance to rest and rejuvenate, setting the stage for spectacular flowers in the next blooming cycle.
Preparing Amaryllis Bulbs for Storage
Proper preparation before storage is crucial to protect amaryllis bulbs from rot, pests, and reduced vigor. Once the leaves have naturally yellowed and withered, gently cut back the foliage to about 1–2 inches above the bulb. Avoid removing the leaves prematurely, as they help the plant photosynthesize and store energy for the next blooming season.
Next, carefully remove the bulb from the soil. If it’s grown in a pot, turn the container on its side and tap it gently until the bulb comes loose. For bulbs planted outdoors, use a garden fork to lift them, taking care not to damage the roots or the bulb itself.
Once harvested, shake off excess soil and inspect each bulb. Remove any remaining roots and brush away loose dirt, but do not wash the bulbs with water, as moisture can lead to fungal infections in storage. If any bulbs show signs of rot or soft spots, discard them to prevent spread to healthy ones.
Place the clean, trimmed bulbs in a dry, shaded area with good air circulation for about one to two weeks. This curing period allows the outer layers to dry and form a protective skin, which helps the bulbs resist moisture loss and disease during storage.
After curing, your amaryllis bulbs are ready for their dormant period. Following these steps ensures they stay healthy and primed for vigorous growth and spectacular blooms in the next season.
Ideal Conditions for Storing Amaryllis Bulbs
Temperature Requirements for Dormancy
Maintaining the right temperature is one of the most important factors for successful amaryllis bulb storage. The optimal range is 50°F to 60°F (10°C to 15°C). At this temperature, the bulb remains inactive but safe from cold stress or premature sprouting. If temperatures exceed 65°F (18°C) for extended periods, the bulb may interpret the warmth as a signal to break dormancy and begin growing, which can ruin your bloom timing. Conversely, temperatures below 40°F (4°C) can cause chilling injury, especially to tender bulbs not adapted to cold climates. The key is consistency—do not expose stored bulbs to wide fluctuations or drafts from windows, vents, or exterior walls. A cool pantry, basement corner (if dry), or a temperature-controlled garage often works best.
Humidity and Moisture Control
Controlling humidity is crucial to prevent the most common storage problems: mold, rot, and fungal diseases. Amaryllis bulbs are highly susceptible to excess moisture once in dormancy. The ideal relative humidity is 50% to 60%, enough to keep the bulb from drying out completely, but not so high that it creates a breeding ground for fungi. Never store bulbs in plastic containers or sealed bags, as these can trap condensation. Instead, use paper bags, cardboard boxes lined with newspaper, or mesh baskets, all of which allow the bulbs to breathe while wicking away residual moisture. In very humid climates, consider adding silica gel packets or open containers of baking soda to the storage box to help absorb moisture.
Airflow and Ventilation
Without good air circulation, even ideal temperatures and humidity levels can be undermined. Airflow prevents stale, damp air from building up around the bulbs, which can lead to rot. Use storage containers that naturally encourage ventilation—wire mesh baskets, wooden crates, or cardboard boxes with punched holes are excellent choices. Avoid tightly stacking bulbs on top of each other; instead, space them apart or use layers separated by dry paper or cardboard dividers. Place the storage containers in locations where air can flow freely—not inside closed plastic bins or drawers. If storing many bulbs, rotate or gently reposition them every few weeks to allow for even air exposure.
Darkness and Light Protection
Light, even artificial, can trigger biological responses in bulbs, especially those as reactive as amaryllis. To keep them dormant, you must block light completely. Bulbs should be stored in a completely dark environment, such as a closet, opaque container, or a covered shelf in a cool room. If any part of the bulb is exposed to light for extended periods, it may begin to sprout prematurely, especially if the temperature is also on the warmer side. Wrap individual bulbs in black-out paper or store them in opaque paper bags to provide additional light protection inside partially lit rooms. Make sure no windows or light leaks from overhead bulbs can reach them during dormancy.
Pest Protection Measures
Stored bulbs can attract a variety of unwanted guests, including rodents, insects, and mold spores. Rodents are particularly dangerous—they can chew through bulbs, rendering them useless for the next season. To avoid this, do not store bulbs directly on the floor or in areas prone to rodent activity. Use metal mesh baskets, screened containers, or sealed cabinets with ventilation holes to protect bulbs while allowing airflow. Regularly inspect the storage area for signs of droppings, gnawed paper, or insect presence. For insect prevention, some gardeners add dried lavender, cedar chips, or bay leaves to the storage box, as these are known natural repellents. Also, inspect each bulb before storage and discard any with soft spots, mold, or insect holes to prevent contamination of healthy bulbs.
How Long to Store Amaryllis Bulbs
Amaryllis bulbs should typically be stored for a dormancy period of about 8 to 12 weeks. This rest phase is essential for the bulb to reset and prepare for another vibrant bloom cycle. During this time, the bulb conserves energy, halts visible growth, and recharges its internal reserves. Storing it for the right amount of time mimics its natural rhythm and helps ensure successful flowering in the next growing season.
If bulbs are stored for less than 8 weeks, they may not have sufficient time to rest, which can result in weak or delayed blooms. On the other hand, storing them beyond 12 weeks isn’t usually harmful, but it can cause the bulbs to dry out or begin sprouting prematurely if not checked regularly. Monitor your bulbs occasionally during storage to catch signs of mold, rot, or early sprouting. When the dormancy period is complete and the bulbs appear healthy, you can reintroduce them to warmth, light, and water to initiate their next growth cycle.
It’s also important to note that the ideal storage period can vary slightly depending on your climate and when you want the amaryllis to bloom. For example, if you’re timing blooms for the winter holidays, you can count backward from your desired bloom date and adjust the dormancy period accordingly. Since it typically takes 6 to 8 weeks for the bulb to bloom after being replanted, you should allow about 14 to 20 total weeks for both dormancy and regrowth. By planning the storage duration with your bloom schedule in mind, you can enjoy colorful amaryllis flowers exactly when you want them, whether it’s for a festive display or an early spring burst of color indoors.
How to Wake Amaryllis Bulbs From Dormancy
Waking amaryllis bulbs from dormancy is a gentle but deliberate process that encourages the bulb to break its rest phase and begin growing again. Once the dormancy period of 8 to 12 weeks is complete and you’re ready to bring them back to life, start by removing the bulbs from their storage location. Inspect each one carefully—discard any that are soft, moldy, or show signs of rot. Healthy bulbs should feel firm and dry.
Next, clean off any remaining dry soil or papery layers, but avoid damaging the outer skin. Place the bulbs in a warm room with bright, indirect light to gradually raise their temperature. A temperature range of about 21–24°C (70–75°F) is ideal for waking them up. You can also soak the roots (but not the bulb itself) in lukewarm water for a few hours before planting to help rehydrate and stimulate new growth.
Once ready, pot the bulbs in fresh, well-draining soil, with about one-third of the bulb above the surface. Water sparingly at first—just enough to moisten the soil—until you see a green shoot emerge. Then increase watering gradually and move the pot to a sunny windowsill. With warmth, light, and a little patience, your amaryllis will soon reward you with lush leaves and show-stopping blooms.
Storing Amaryllis Bulbs Grown in the Ground
If you’ve grown amaryllis directly in the ground, especially in regions where winters are cold or frosty, proper storage is essential to protect the bulbs from freezing temperatures. Begin by carefully digging up the bulbs after the foliage has yellowed and naturally died back, usually in late summer or early fall. Use a garden fork or spade to lift them gently, taking care not to damage the bulb or the roots.
After digging, shake off any excess soil but do not wash the bulbs, as moisture can lead to rot. Let the bulbs cure in a warm, dry, and shaded area with good air circulation for 7 to 10 days. This curing process helps toughen the outer layers of the bulb and prepares it for dormancy. Once the bulbs are completely dry, trim off the dried roots and any remaining foliage.
Store the cured bulbs in a cool, dark place with temperatures between 50–60°F (10–15°C). A paper bag, mesh bag, or a box with peat moss or dry vermiculite works well for storing them. Make sure the storage container allows for air circulation and that the bulbs aren’t stacked too closely to avoid moisture buildup. Check them periodically for signs of mold or soft spots, removing any that appear compromised.
With proper care, your in-ground amaryllis bulbs can be safely overwintered and revived for a fresh burst of blooms next growing season.
Common Mistakes to Avoid When Storing Amaryllis Bulbs
Storing Bulbs While Still Green or Actively Growing
One of the most common mistakes is attempting to store amaryllis bulbs while their leaves are still green or when they are actively growing. The bulb needs to go through a complete dormancy period after the foliage dies back naturally. Storing a bulb too early can prevent it from storing enough energy for the next blooming cycle, resulting in weak growth or no flowers.
Leaving Soil or Moisture on Bulbs
Failing to clean the bulbs properly before storage can lead to rot. Soil particles can trap moisture and harbor fungal spores or pests. Always brush off excess soil and allow the bulb to dry completely before storing. Even small amounts of retained moisture can cause mold and decay during dormancy.
Using Plastic Bags or Airtight Containers
Storing bulbs in sealed plastic bags or containers without ventilation is a major error. Amaryllis bulbs need air circulation to remain healthy during storage. Lack of airflow promotes moisture buildup, which encourages fungal infections and rotting. Instead, use paper bags, cardboard boxes, or mesh containers with dry packing material like peat moss, wood shavings, or newspaper.
Storing in Areas That Are Too Warm or Too Cold
Amaryllis bulbs require a cool, dry environment between 10°C and 15°C (50°F to 59°F). Storing them in temperatures that are too warm may prevent them from entering true dormancy, while too cold conditions, especially near freezing, can damage the bulb’s internal tissue. Avoid attics, basements with fluctuating temperatures, or unheated garages in extremely cold regions.
Forgetting to Check Bulbs During Dormancy
Some gardeners place the bulbs in storage and forget about them entirely. It’s important to periodically inspect stored bulbs for signs of mold, rot, or shriveling. Discard any rotting bulbs and adjust conditions if bulbs appear too dry. Occasional monitoring helps ensure healthy reactivation when the time comes to replant.
Cutting Foliage Too Soon
Cutting back leaves immediately after the bloom fades is another common mistake. The foliage plays a vital role in photosynthesis, which replenishes the bulb’s energy. Always wait until the leaves naturally yellow and die back before cutting them off. Premature trimming can weaken the bulb and reduce next season’s blooms.
How to Store Amaryllis Bulbs With Offsets
The life cycle of an amaryllis is a fascinating journey marked by periods of dramatic growth, striking blooms, and restful dormancy. It typically begins when the bulb is planted in well-drained soil and exposed to warmth and light. Within a few weeks, the bulb sends up thick green stalks that eventually support one to three large, trumpet-shaped flowers. This blooming phase often lasts between six to ten weeks, offering a burst of color during the winter or early spring, depending on when the bulb was started.
After the flowers fade, the plant shifts its focus to photosynthesis. Long, strap-like green leaves emerge and stay active for several months, gathering energy to store in the bulb. This post-bloom phase is essential, as it determines the strength of the next season’s flowering. When the leaves begin to yellow naturally, it signals the plant is ready to enter dormancy. During this resting phase, which usually lasts about eight to twelve weeks, the bulb should be kept in a cool, dry, and dark place. Once the dormancy period ends, the bulb can be restarted, repeating the cycle and offering a new season of impressive blooms.
Benefits of Storing Amaryllis Bulbs Properly
Storing amaryllis bulbs properly is one of the most important steps you can take to ensure healthy regrowth and spectacular blooms in the next season. When bulbs are stored in the right environment—cool, dark, and dry—they are protected from excess moisture, which can lead to rot, fungal diseases, or pest infestations. This safeguards the energy reserves within the bulb, preserving the nutrients needed for strong foliage growth and vibrant, full blooms.
Proper storage also encourages a consistent and reliable blooming cycle. Amaryllis bulbs require a dormant period to reset their internal growth clock. Without this rest phase, they may fail to bloom or produce weak flowers. By storing them correctly, you give the bulbs the rest they need to rebloom with strength and beauty—often timed perfectly for indoor winter or holiday displays.
Another long-term benefit is that properly stored bulbs are more likely to multiply by producing healthy offsets. This means you can grow your amaryllis collection year after year without needing to purchase new bulbs. In essence, correct storage ensures that each bulb not only survives the off-season but thrives in the next, bringing you more flowers and more joy with each growing cycle.
Troubleshooting Storage Issues
Mold and Rot on Bulbs
One of the most common problems during amaryllis bulb storage is the development of mold or soft rot. This usually occurs if the bulbs were stored with excess moisture or weren’t fully dried before storage. If you notice white fuzzy mold or soft, mushy areas, remove the bulb immediately from storage. Cut away affected tissue with a sterile knife and allow the bulb to air-dry in a warm, dry place for several days. Dusting the cut areas with sulfur powder or cinnamon can help prevent further infection.
Shriveling or Drying Out
If bulbs appear wrinkled or overly shriveled, they may have been stored in an environment that’s too dry or warm. While a little shrinkage is normal, excessive shriveling can affect next season’s blooms. To rehydrate, you can lightly mist the bulbs or soak the roots—not the bulb—in lukewarm water for a few hours before replanting. Ensure better humidity control in future storage by placing the bulbs in a container with slightly damp vermiculite or peat moss.
Early Sprouting in Storage
Sometimes amaryllis bulbs begin to sprout prematurely while in storage. This is typically caused by exposure to warmth or light. While this isn’t necessarily harmful, it can affect bloom timing. If sprouts are small and healthy, you can go ahead and pot the bulb. In future, ensure you store bulbs in total darkness and keep the temperature consistently between 50–55°F (10–13°C).
Pests or Insect Damage
Bulbs kept in garages, basements, or sheds can sometimes be exposed to pests like rodents, spider mites, or bulb flies. Check stored bulbs regularly for bite marks, tiny webbing, or holes. To prevent infestations, store bulbs in mesh bags or breathable containers and inspect them monthly. A light application of neem oil before storage can deter insects.
Odors or Unusual Smells
A foul odor coming from stored bulbs is a clear sign of decay. This often indicates advanced rot and may be irreversible. Immediately remove any affected bulbs to prevent contamination of others. Clean the storage container with a mild bleach solution and ensure better airflow in future storage setups.
When to Discard Amaryllis Bulbs
Signs of Rot or Mold
If your amaryllis bulb shows visible signs of soft, mushy spots, a foul odor, or mold growing on the surface, it’s a clear indicator of rot. This often happens when bulbs are stored in damp or poorly ventilated conditions. Even a small amount of decay can spread quickly, so it’s safest to discard any bulb showing these symptoms to prevent the infection from affecting nearby healthy bulbs.
Completely Dried Out Bulbs
A healthy dormant amaryllis bulb should feel firm and heavy for its size. If a bulb becomes completely shriveled, papery, or hollow-feeling, it means it has lost too much moisture to survive. Such bulbs typically lack the resources needed to regrow or produce flowers and should be thrown away rather than replanted.
Persistent Pests or Infestations
If a bulb has been attacked by pests such as bulb mites, mealybugs, or other insects and still shows signs of infestation after cleaning or treatment, it may not be worth saving. Pests can burrow deep into the bulb and lay eggs, making it hard to eliminate them entirely. Discarding severely infested bulbs helps prevent the problem from spreading to healthy plants.
Failure to Regrow After Several Seasons
While amaryllis bulbs may occasionally skip a bloom cycle, a bulb that repeatedly fails to sprout new growth or produce leaves even after proper care might be past its productive life. If, after two seasons of proper storage and planting, there is still no sign of growth, it’s time to retire the bulb.
Internal Damage or Mechanical Injury
Bulbs that have been dropped, crushed, or physically damaged may develop internal bruising or split layers. Even if there are no external signs of rot at first, these injuries often lead to decay from the inside out. Bulbs with serious physical damage are unlikely to recover and should be discarded before they contaminate others in storage.
Frequently Asked Questions About Storing Amaryllis Bulbs
How long can you store amaryllis bulbs before replanting?
Amaryllis bulbs can typically be stored for about 8 to 12 weeks. This dormancy period is essential for the bulb to rest and prepare for its next bloom cycle. It’s important not to exceed this time frame too much—prolonged storage may cause the bulb to dry out or lose vitality, reducing the chances of successful blooming.
Do you need to refrigerate amaryllis bulbs during storage?
In most cases, refrigeration is not necessary. Amaryllis bulbs prefer to be stored in a cool, dry, and dark location such as a basement, closet, or garage where the temperature remains between 50–60°F (10–15°C). Refrigeration should only be considered if you’re forcing blooms indoors and live in a warm climate without natural cold periods. Never store bulbs in a refrigerator that contains apples or other fruits, as they emit ethylene gas that can sterilize the bulb.
Can you store amaryllis bulbs with the soil still attached?
No, it’s best to remove all soil before storing amaryllis bulbs. After digging them up, clean the bulbs gently by brushing off excess dirt and cutting off the dried foliage. Leaving soil on the bulbs can retain moisture, which encourages fungal infections or rot during dormancy.
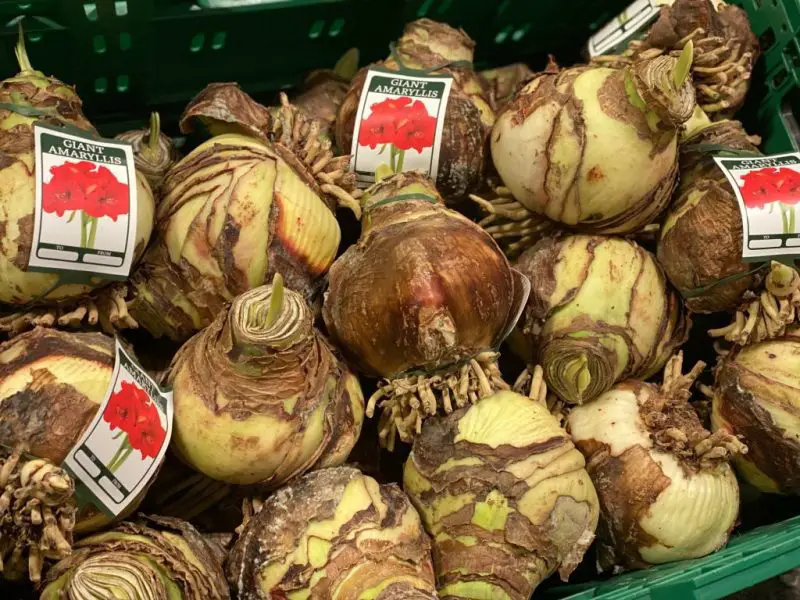
What should healthy amaryllis bulbs look like after storage?
Healthy bulbs should feel firm and heavy, with no signs of mushy or soft spots. The outer layers should be papery and dry, and the roots may appear shriveled but not rotted. If the bulb has small offsets (baby bulbs), those should also appear firm and can be planted separately to propagate new plants.
What are signs that an amaryllis bulb has gone bad during storage?
Signs of a failed bulb include:
Soft, mushy texture, especially near the base
Unpleasant odor, which often indicates rot
Black or moldy patches on the bulb surface
Shriveled and dried-out appearance, indicating dehydration
Any of these signs typically mean the bulb should be discarded to prevent spread to healthy ones.
Conclusion
Storing amaryllis bulbs properly is more than just a seasonal chore—it’s the secret to unlocking spectacular blooms year after year. By understanding when and how to dig, clean, cure, and store your bulbs, you not only extend their lifespan but also boost their flowering potential. Whether you’re working with a single bulb or a collection with offsets, taking the time to store them right protects your investment and keeps your indoor garden vibrant through every winter. With a little care and attention, you’ll be rewarded with bigger, brighter blooms that never fail to impress.