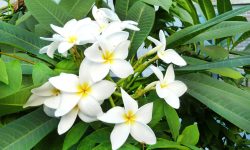
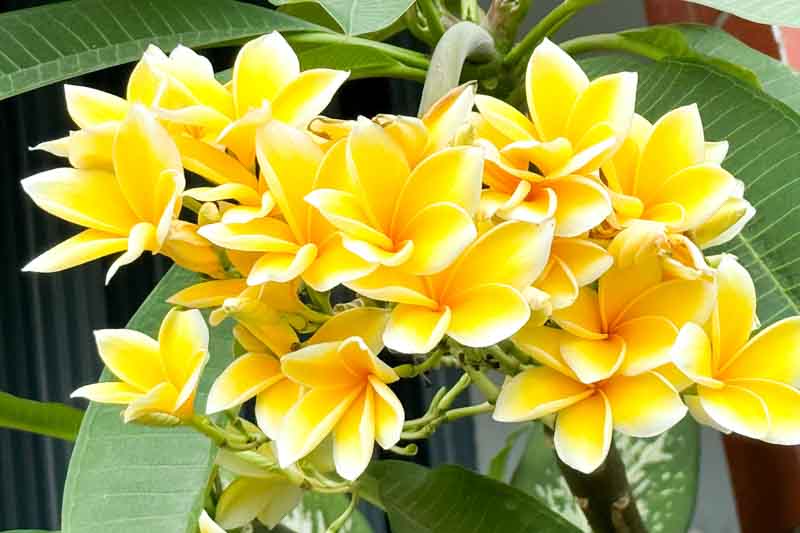
Plumeria, also known as frangipani, is one of the most beloved tropical plants thanks to its intoxicating fragrance and stunning, star-shaped blooms. Whether you’re moving it to a larger pot, a sunnier spot, or a garden bed, transplanting is essential for keeping plumeria vigorous and healthy. Done correctly, it encourages stronger roots, faster growth, and more vibrant flowering. But if done carelessly, it can cause shock, wilted leaves, or even root loss.
Understanding how to transplant plumeria the right way requires patience, timing, and care. Each step — from choosing the right soil and preparing the new location to replanting and watering — plays a vital role in helping the plant adapt successfully. In this guide, you’ll learn everything from when to transplant plumeria to how to minimize stress, ensuring your plant continues to thrive and bloom beautifully for years to come.
When Is the Best Time to Transplant Plumeria
Timing plays a vital role in ensuring successful plumeria transplantation. The best period to move the plant is during its active growing phase, usually from late spring to early summer. This is when soil temperatures remain warm, sunlight hours are longer, and the plant’s internal energy flow is at its strongest. Under these conditions, roots heal rapidly, establish faster, and adapt easily to new surroundings. Transplanting during cold or rainy weather restricts oxygen in the soil, slows nutrient absorption, and risks severe root rot. Warm, dry days provide the most stable environment for the plant to recover smoothly.
Watch for clear growth cues from the plant itself. When new leaves start forming at the branch tips, plumeria is entering a growth surge and ready for transplanting. Avoid disturbing it while in full bloom, as that diverts energy from flowering to stress recovery, leading to dropped buds or wilted stems. Similarly, skip transplanting during late fall or winter dormancy. At that stage, root activity is minimal, and any damage takes much longer to heal. Patience pays off—waiting for growth to resume ensures a stronger recovery afterward.
Climate and soil moisture also influence timing. In tropical or coastal areas, transplanting can occur almost year-round, provided soil temperatures stay above 60°F (15°C). In cooler zones, late spring to midsummer works best, once frost danger has passed and the ground stays consistently warm. Choose a mild, wind-free day, and avoid transplanting just before a storm or heatwave. These simple timing details make a dramatic difference, allowing plumeria to adapt quickly, establish firm roots, and flourish with radiant new growth.
Preparing Plumeria for Transplanting
Proper preparation is the foundation for a successful plumeria transplant. Before moving your plant, start by selecting the right new location or container. Plumeria thrives in bright sunlight, so choose a spot that receives at least six to eight hours of direct light daily. The soil must be light, porous, and quick-draining to prevent water stagnation. If the natural soil in your garden is heavy clay, amend it with coarse sand, pumice, or perlite. This blend enhances aeration and ensures that excess water drains easily. Ideally, the soil temperature should remain above 65°F (18°C) before transplanting, as cold soil can shock tender roots and slow recovery. Preparing the site one week in advance helps nutrients settle evenly and creates stable moisture levels for healthy regrowth.
The day before transplanting, water the soil lightly to soften it, making removal easier. Never transplant in soggy soil — it increases the chance of root tearing. Prune away any damaged or diseased stems to encourage the plant to channel its energy into root development. For tall plumerias, consider staking or trimming back longer branches to prevent breakage during the move. Inspect the root ball carefully; if it’s root-bound, loosen the roots gently using your fingers or a clean garden fork. This encourages outward growth once replanted.
Prepare your tools beforehand: a sharp spade, pruning shears, and gloves for safe handling. Always protect the root ball from direct sunlight and drying winds during transfer by wrapping it loosely in damp burlap or cloth. For potted plumerias, roll or tap the container to loosen the roots rather than pulling them. Completing the move swiftly minimizes exposure and transplant shock. Thorough preparation ensures your plumeria adapts quickly, establishes strong roots, and resumes vibrant growth in its new home.
How to Choose the Right Soil and Location for Transplanted Plumeria
The foundation of a successful plumeria transplant begins with selecting the right soil and location. Plumeria prefers soil that mimics its natural tropical habitat—light, airy, and fast-draining. Heavy clay soil retains too much water, suffocating the roots and causing rot. The ideal mix combines sandy loam, coarse perlite, and organic compost in equal proportions. This mixture ensures proper aeration while maintaining just enough moisture for hydration. Preparing the soil a week before transplanting allows beneficial microbes to settle and improves texture. For best results, the planting site should reach at least 65°F (18°C) before replanting, as cold soil delays root establishment.
Location choice directly impacts plumeria’s recovery and growth. Select a sunny, open area that receives at least six hours of direct light daily. However, newly transplanted plumerias benefit from partial shade for the first ten days to minimize heat stress. Avoid low-lying spots that collect rainwater or areas too close to large trees, as these can block airflow and compete for nutrients. Good circulation helps reduce fungal problems and keeps leaves dry after watering.
In cooler climates, place plumeria near a south-facing wall where heat reflects onto the plant, creating a microclimate. For potted varieties, choose breathable terracotta or clay containers with multiple drainage holes to prevent standing water. If transplanting into the ground, gently slope the soil surface to promote runoff. Combining proper soil composition with an ideal, sunny, and well-drained location ensures long-term success, producing robust roots, healthy foliage, and dazzling tropical blooms season after season.
How to Transplant Plumeria Step-by-Step
Digging and Removing the Plant
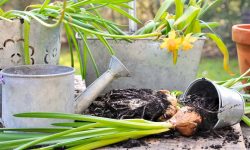
Start by loosening the soil gently around your plumeria to protect the roots. Use a clean, sharp spade and dig in a wide circle about 8 to 10 inches from the base. Work slowly and evenly, cutting around the plant to free the root ball without tearing it. Aim to keep as many roots intact as possible, as damaged roots delay recovery. Once the plant feels loose, lift it carefully by supporting the root ball from underneath instead of pulling the trunk. For large or mature plumeria, having another person assist can help prevent injury or accidental stem breakage.
Shake off excess soil but leave a thin layer clinging to the roots to preserve beneficial microorganisms. Wrap the root ball immediately in damp burlap or soft cloth to prevent dehydration during transport. Keeping roots moist, shaded, and cool is crucial during this phase. Avoid leaving the plant exposed to direct sunlight or wind, as roots dry rapidly. If the move takes longer than expected, mist the burlap lightly to maintain humidity. Proper handling during removal protects delicate roots and gives your plumeria the best chance to adapt quickly after replanting.
Replanting in the New Location
After removing the plant, transfer it to its new spot as soon as possible. The new hole should be roughly twice as wide as the root ball but equal in depth to the roots’ natural position. Gently lower the plumeria into the hole, ensuring that the base of the trunk aligns evenly with the surrounding soil. Filling the hole with well-draining soil is essential — use a blend of sand, perlite, and compost to keep roots aerated. Lightly press the soil around the root ball to eliminate air pockets but avoid compacting it too tightly.
For potted transplants, choose a large, sturdy container with multiple drainage holes. Once planted, water the soil lightly to help it settle, and check that the plumeria stands upright and stable. Leave a shallow basin around the base to guide water directly to the roots during the early weeks. Avoid placing the plant immediately in full sun; gradual acclimation helps it adjust without stress. Consistent soil contact, good drainage, and balanced moisture during this stage ensure that plumeria establishes quickly and begins new root growth soon after.
Watering and Aftercare
After transplanting, the first deep watering is critical to help the soil settle firmly around the roots. Pour water slowly until it seeps out of the bottom or evenly moistens the surrounding ground. This initial soak removes hidden air gaps and helps roots connect with the soil more effectively. Avoid watering again too soon, as excessive moisture prevents proper oxygen flow and increases the chance of rot. Let the top inch of soil dry before repeating. In humid regions, you may only need to water once a week until new growth appears.
During the first few weeks, provide partial shade to protect the plumeria from strong sunlight while it adjusts. Some mild wilting is normal as the plant recovers, but persistent drooping signals either root damage or overwatering. Once the plant stabilizes and new leaves begin forming, gradually return it to full sunlight. After two or three weeks, apply a balanced, diluted fertilizer to promote healthy growth. Maintaining this careful balance of water, light, and observation ensures the plumeria recovers quickly, strengthens its roots, and resumes blooming with vigor.
Caring for Plumeria After Transplanting
Proper care after transplanting determines how quickly and successfully plumeria adapts to its new environment. During the first few weeks, the plant is vulnerable to transplant shock, so attention to detail is essential. Start by maintaining steady moisture without waterlogging the soil. Water deeply once, then allow the top layer to dry before the next watering. This rhythm encourages new root growth and prevents rot. Keep the soil warm — above 65°F (18°C) — and avoid fertilizing for at least two weeks after transplanting. The plant needs time to heal small root injuries before absorbing nutrients efficiently. Patience during this stage ensures a smooth adjustment.
Light exposure is equally important. Avoid placing freshly transplanted plumeria under direct, intense sunlight right away. Instead, provide partial shade for the first 7 to 10 days. This gives the roots time to settle and reestablish water flow to the leaves. Once new leaf buds appear and the plant shows signs of active growth, gradually move it back into full sunlight. Strong, consistent light is essential for rebuilding energy and stimulating photosynthesis, which helps the plant regain strength quickly.
Finally, monitor your plumeria closely for any signs of stress such as drooping leaves, yellowing tips, or wrinkled stems. These may indicate overwatering, excessive sun, or poor soil drainage. Adjust care immediately to correct the issue. After three to four weeks, begin light feeding with a balanced fertilizer to support root and leaf development. Consistent watering, sunlight, and gentle feeding will help the plant recover fully, producing lush foliage and vibrant blooms once again. With careful attention, your transplanted plumeria will thrive beautifully in its new home.
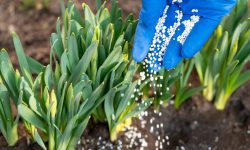
Best Time to Fertilize After Transplanting Plumeria
Fertilizing transplanted plumeria at the right time encourages strong recovery and abundant blooms. Applying fertilizer too soon can burn delicate new roots, while waiting too long delays growth. The ideal time to start fertilizing is four to six weeks after transplanting, once the plant displays new green tips or leaf buds. At this stage, roots have recovered enough to absorb nutrients effectively. A balanced fertilizer with a 10-30-10 NPK ratio supports root development and flowering. Mix it into the soil’s top layer, then water lightly to help nutrients move downward. This promotes even absorption while preventing salt buildup.
Fertilizing should always coincide with active growth periods. Morning application is best, as cooler temperatures allow nutrients to settle without evaporating. Liquid fertilizers work well for potted plumeria, while granular slow-release types are better for garden beds. Feed every four to six weeks during spring and summer, stopping entirely in fall as the plant prepares for dormancy. Overfertilizing, especially with high nitrogen, leads to lush foliage but fewer flowers.
Complement your feeding routine with consistent watering and good drainage. Organic boosters such as compost tea or seaweed extract strengthen root systems and improve soil texture. Observing leaf color provides insight — dark green leaves indicate balanced nutrition, while yellowing suggests deficiencies. With regular feeding, your transplanted plumeria will regain vigor, growing stronger each month and rewarding you with larger, brighter, and longer-lasting blooms throughout the season.
Common Problems After Transplanting and How to Fix Them
Transplant Shock
Transplant shock is one of the most common issues that appear after moving plumeria. When roots are disturbed or damaged, the plant temporarily loses its ability to absorb water and nutrients. Early signs include wilting, pale leaves, or slowed growth during the first few days. The best way to reduce stress is to water deeply right after transplanting, then wait until the top inch of soil becomes dry before watering again. Avoid overwatering — soggy roots worsen the shock instead of helping.
Keep the plant in partial shade for at least a week, protecting it from harsh midday sunlight. Misting the leaves occasionally can help maintain humidity and reduce water loss through transpiration. Do not fertilize immediately, as roots need time to heal before processing nutrients. After about two weeks, new green tips or leaf buds indicate recovery. Gradually increase sunlight exposure each day and resume normal watering. Maintaining warmth, steady moisture, and patience allows plumeria to adjust naturally and regain its tropical vigor without setbacks.
Root Rot
Root rot occurs when transplanted plumeria sits in wet, poorly drained soil for too long. The roots turn soft, dark, and slimy, emitting a sour smell. Above ground, the leaves may yellow or droop despite the soil being wet. Once detected, the plant should be removed immediately from its pot or garden bed. Trim away all rotted sections using sterilized shears and discard any contaminated soil to prevent reinfection. Let the root system dry in a shaded, well-ventilated spot for one to two days.
Before replanting, prepare a new potting mix with equal parts coarse sand, perlite, and organic compost for balanced drainage and nutrition. Avoid watering for the first few days after replanting, then resume gradually once the top layer feels dry. Going forward, water less frequently and ensure the soil dries between sessions. For garden-grown plumeria, slightly elevating the planting area improves airflow and reduces water retention. Regularly checking soil drainage and watering rhythm keeps your plant healthy and prevents future root rot.
Leaf Drop or Wilting
Leaf drop or temporary wilting often happens when plumeria adapts to its new environment. The plant directs energy toward root recovery rather than maintaining foliage, causing older leaves to yellow and fall. This reaction is natural and rarely fatal if managed correctly. To support recovery, keep the soil evenly moist but never soaked. Overwatering during this phase suffocates tender new roots and prolongs stress. Maintain a stable temperature between 65°F and 80°F (18–27°C) to help the plant regain balance.
Avoid fertilizing until new growth appears, as excessive nutrients can overwhelm weakened roots. Providing filtered sunlight or partial shade during the first week helps reduce evaporation. If leaves remain limp, mist them lightly in the morning to maintain humidity. Once the plant produces fresh shoots, gradually increase exposure to direct sunlight. Consistent watering and protection from wind or cold drafts ensure faster recovery. Within several weeks, new leaves emerge, signaling that plumeria has adjusted and resumed healthy, vigorous growth in its new setting.
Tips for Long-Term Success After Transplanting
Ensuring plumeria thrives after transplanting requires consistent care and observation over time. The first key to long-term success is maintaining a steady watering rhythm. Plumeria prefers deep, infrequent watering that allows soil to dry slightly between sessions. This encourages roots to grow strong and deep rather than staying near the surface. Over time, roots become more resilient, helping the plant withstand periods of drought. Using well-draining soil with sand or perlite remains essential, as trapped moisture can undo months of progress. Regularly check for soft or discolored stems, which may signal excessive watering.
The second factor is balanced nutrition. After the plant has stabilized for about a month, introduce a slow-release fertilizer with a balanced ratio such as 10-10-10 or one slightly higher in phosphorus to promote flowering. Fertilize every four to six weeks during the growing season, but stop once fall approaches. Avoid high-nitrogen formulas, as they stimulate leaf growth at the expense of blooms. Organic compost or diluted seaweed extract can also support long-term root health. Feeding moderately but consistently builds a strong foundation for lush foliage and abundant flowers.
Finally, protect your plumeria from environmental stress. In windy or dry areas, mulch around the base to retain soil moisture and regulate temperature. During colder months, move potted plumeria indoors or cover ground plants with frost cloth to prevent cold damage. Prune lightly at the end of the growing season to maintain shape and remove weak branches. By maintaining proper watering, feeding, and climate protection, your transplanted plumeria will flourish year after year, rewarding you with brilliant blooms and a lasting tropical presence.
How to Protect Transplanted Plumeria from Weather Stress
Weather extremes often pose the biggest challenge after transplanting. Plumeria is highly sensitive to sudden temperature shifts, strong winds, and excessive sunlight. During hot, dry spells, water deeply early in the morning to maintain hydration before the day’s heat. Apply a two-inch layer of organic mulch around the base to retain soil moisture and regulate temperature. Avoid plastic coverings that trap heat; instead, use light-colored mulch to reflect sunlight. Temporary shade cloth can protect freshly transplanted plants from sun scorch while still allowing airflow and filtered light for photosynthesis.
Cold weather requires equal attention. Plumeria begins to suffer when temperatures drop below 55°F (13°C). Move potted plants indoors or to a protected space like a greenhouse before frost arrives. For in-ground plumeria, wrap the stems with breathable frost cloth or burlap to preserve warmth. Covering the soil base with mulch helps insulate roots. In regions with harsh winters, transplanting plumeria into movable containers allows for easy relocation.
Wind can also damage new transplants by loosening soil or breaking tender branches. Use soft garden ties or bamboo stakes to support the trunk while avoiding constriction. After windy days, check soil moisture — wind accelerates evaporation and can dry roots quickly. Keeping a steady watering rhythm during these times is essential. Protecting your plumeria from environmental stress during its early establishment ensures faster adaptation, stronger growth, and vibrant flowering even in challenging weather conditions.
FAQs About Transplanting Plumeria
How often should I water plumeria after transplanting?
Water your plumeria deeply right after transplanting, then allow the top inch of soil to dry before watering again. Typically, once every 5 to 7 days is ideal during warm months. Overwatering can cause root rot, while consistent deep watering encourages faster root recovery and healthy new growth.
Can I transplant plumeria while it’s blooming?
It’s best to avoid transplanting when plumeria is in full bloom. During flowering, the plant directs energy to blossoms instead of root repair. Transplanting at this time often leads to flower drop and stress. Wait until after blooming or during early active growth in spring for the smoothest transition.
How long does it take for plumeria to recover after transplanting?
Most plumeria plants recover within four to six weeks, depending on weather, soil, and watering. You’ll know recovery has begun when new leaves or buds appear. Providing partial shade, balanced moisture, and stable warmth during the first month helps speed up adaptation and ensures successful establishment.
Should I prune plumeria before transplanting?
Yes, pruning before transplanting helps reduce water loss and stress. Remove dead, damaged, or weak branches using clean tools. For taller plants, trim some upper stems to prevent breakage during relocation. Light pruning encourages new growth and helps the plant redirect energy to root regeneration after the move.
What’s the best soil mix for transplanted plumeria?
A well-draining mix is essential. Combine equal parts sandy loam, perlite, and compost for ideal aeration and moisture control. Avoid dense or clay-heavy soil, as it traps water and leads to rot. A light, breathable mix supports strong root development and ensures your plumeria establishes quickly after transplanting.
Conclusion: Helping Your Plumeria Thrive After Transplanting
Transplanting plumeria is more than just moving a plant — it’s giving it a new beginning. With the right soil, timing, and post-care, your plumeria can recover quickly and grow even stronger than before. Patience and consistency are key: deep watering, bright sunlight, and balanced feeding will reward you with glossy leaves and breathtaking blooms. Once established, plumeria becomes a symbol of resilience and tropical beauty, filling your garden with fragrance and color year after year. Every successful transplant is a promise of renewed growth and endless blossoms.