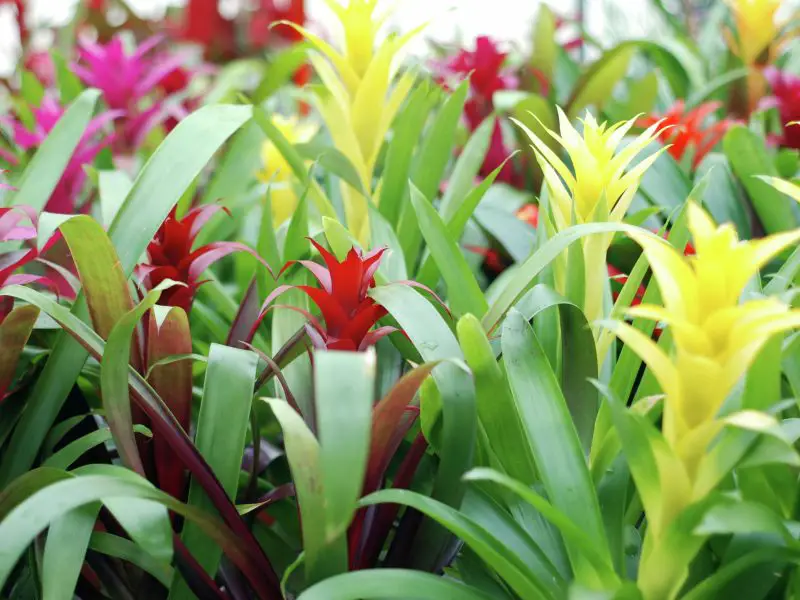
Watering bromeliads may seem simple, but it’s one of the most important steps in keeping these tropical beauties thriving. Whether you grow them indoors or out, understanding how and when to water bromeliads can make the difference between lackluster leaves and vibrant, long-lasting blooms.
Unlike many plants, bromeliads absorb water through their central tank and leaves, not just their roots. Knowing where to pour water, how often, and which mistakes to avoid will help your plant stay healthy and even encourage it to flower. In this guide, you’ll learn everything you need to confidently water bromeliads the right way.
Understanding the Unique Structure of Bromeliads
The Central Tank: Nature’s Water Reservoir
Most bromeliads have a rosette of leaves that form a central cup or tank, which collects rainwater in nature and serves as a key source of hydration. These plants absorb water through this tank and specialized cells on the leaf surfaces, rather than relying only on soil moisture.
In their native habitat, the tank also traps organic debris and insects, releasing nutrients into the water. Indoors, it’s important to mimic this system by keeping the tank about half full with clean, room-temperature water and flushing it weekly to prevent stagnation and salt buildup.
Epiphytic vs. Terrestrial Bromeliads
Bromeliads fall into two categories: epiphytes and terrestrials. Epiphytes, like Tillandsia and Guzmania, grow on trees and absorb moisture from the air using leaf structures called trichomes. These types benefit from misting or soaking and need high humidity.
Terrestrial bromeliads, such as Cryptanthus and Dyckia, grow in soil and have stronger root systems. They prefer well-draining mixes and consistent soil moisture, especially during active growth. Knowing your plant type helps you adjust both watering methods and potting conditions.
How Often Should You Water Bromeliads?
General Guidelines Based on Environment
How often you water bromeliads depends largely on where and how they’re growing. For indoor plants kept in average household conditions, watering once a week is usually enough to maintain healthy moisture levels. These plants are adapted to survive in environments with periodic rainfall, so they don’t require frequent watering like some tropical plants. However, if your home is particularly dry—especially in winter when heaters run—bromeliads may need misting or a light top-up in the central cup more often.
In hot and arid climates or during summer heat waves, the plant’s tank and surrounding air dry out faster. Under these conditions, bromeliads may need water every 3–5 days. On the other hand, if you’re in a region with high humidity or during cooler, rainy seasons, watering less often is best. Always ensure the central tank stays fresh and doesn’t hold stagnant water for too long, as this can encourage bacteria or mold growth.
Adjusting for Indoor and Outdoor Conditions
Where your bromeliad lives—inside or outdoors—also plays a significant role in watering frequency. Indoors, plants benefit from a more stable environment with moderate light, reduced evaporation, and less exposure to wind. As a result, they generally hold onto moisture longer, meaning less frequent watering is needed. Still, indoor air conditioners or heating systems can affect humidity, which might require adjustments.
Outdoor bromeliads are more vulnerable to environmental extremes like direct sun, wind, and fluctuating rainfall. During dry spells or heatwaves, water evaporates quickly from the tank and soil, requiring you to water more frequently. After heavy rains, however, it’s essential to empty and refresh the tank to prevent rot.
Monitoring your specific conditions is key. Feel the soil, check the tank water level, and observe the plant’s leaves. Limp or curling leaves may indicate underwatering, while overly soft or browning bases can suggest too much water or stagnant conditions. Let the environment and the plant itself guide your schedule, rather than sticking to a rigid routine.
The Right Way to Water Bromeliads
Filling the Central Tank
One of the unique features of bromeliads is the “central tank” or cup formed by their rosette of leaves. This tank acts like a natural reservoir where the plant stores water for gradual use. To water properly, slowly pour filtered or rainwater into this central cup until it reaches about halfway up the leaves. It’s important not to overfill, as stagnant water can become a breeding ground for bacteria, mosquitoes, and algae, which may harm the plant. Over time, debris such as dust or dead insects can also collect in the tank. For this reason, flush the tank completely once a week by gently tipping the plant to drain the old water, then refill it with fresh, clean water. This prevents the buildup of salts, minerals, and pathogens and mimics the natural flushing action of rain in the wild.
If you’re using tap water, be cautious—it often contains chlorine or fluoride, which can damage bromeliads over time. If filtered water is unavailable, let tap water sit out for 24 hours before using, allowing harmful chemicals to evaporate.
Watering the Soil or Potting Medium
Although bromeliads absorb moisture from the tank, the roots still play a supportive role, especially in nutrient uptake and anchoring the plant. Some bromeliads are epiphytic (growing on trees), but many are terrestrial or semi-terrestrial and require occasional soil watering. Lightly moisten the potting mix when the top inch feels dry to the touch. Use a well-draining medium like orchid bark, coarse peat, or a cactus mix, which prevents soggy roots and promotes airflow.
Avoid overwatering the potting medium, as bromeliads are highly sensitive to root rot. Never let the plant sit in standing water, and ensure that your pot has proper drainage holes. During hotter months, you may need to water the soil more frequently, but always check moisture levels first. In cooler months or low-light conditions, reduce soil watering accordingly.
For bromeliads mounted on wood or in hanging baskets without traditional soil, mist the root area and structure every few days to provide ambient moisture. These mounted types rely heavily on air humidity and require more frequent misting than potted varieties.
Maintaining Proper Humidity Levels
Bromeliads thrive in humidity levels between 40% and 60%, which mimic their native tropical environments. Indoors, especially during winter or in air-conditioned rooms, humidity often drops too low. This can lead to brown leaf tips, curling, or slowed growth.
To maintain proper moisture, mist the leaves lightly once a day with filtered or distilled water, preferably in the morning. You can also group bromeliads with other houseplants to create a more humid microclimate. A humidity tray — a shallow dish with pebbles and water — placed beneath the pot (without letting the pot touch the water) helps as well.
In especially dry environments, a small humidifier placed nearby works best. Monitor humidity with a hygrometer if possible. Stable humidity encourages healthy foliage, vibrant colors, and long-term plant vigor.
Choosing the Right Water for Bromeliads
Why Tap Water Can Be Harmful
Tap water often contains chlorine, chloramine, fluoride, and mineral salts added during treatment processes. While safe for humans, these chemicals can accumulate in bromeliads’ central tank and root zone, especially when water is not flushed regularly. Over time, this buildup can damage leaf cells, leading to brown tips, pale or scorched foliage, and inhibited nutrient uptake. High mineral content (hard water) may also leave residue on the leaves and soil, altering pH and making conditions less favorable for healthy growth. Some sensitive bromeliad species, such as Guzmania or Vriesea, may suffer visibly faster than more tolerant types.
Best Water Sources for Healthy Growth
To avoid chemical buildup, use rainwater, distilled water, or filtered water whenever possible. These sources are free of additives and more closely resemble the soft, pure water bromeliads receive in their natural tropical environments. Rainwater, in particular, offers a gentle, slightly acidic pH ideal for bromeliad absorption and helps keep the central tank clean. You can collect rainwater using barrels or containers placed outside during showers, then store it in clean jugs for indoor use. If rain isn’t available, distilled water is a safe alternative, and simple home filtration systems that remove chlorine and fluoride also make tap water more plant-friendly. Using the right water source supports brighter foliage, better hydration, and longer-lasting blooms.
Seasonal Watering Tips for Bromeliads
Spring and Summer Care
In spring and summer, bromeliads enter their active growing phase, producing new leaves, pups, or even blooms. Warmer temperatures and longer daylight hours increase the plant’s metabolic rate and evaporation from both the central tank and soil. During this period, check the tank at least twice a week and refill it with clean water whenever it drops below halfway. Lightly moisten the soil if it begins to dry out, but avoid waterlogging. Always empty and rinse the tank every couple of weeks to prevent stagnation and mosquito larvae. In hot or dry climates, additional humidity may be needed, so misting the leaves early in the day or using a humidity tray can support vibrant, healthy growth.
Fall and Winter Adjustments
As temperatures cool and daylight shortens in fall and winter, bromeliads naturally slow their growth or enter dormancy. During this time, reduce watering frequency, both in the tank and the soil, to avoid overwatering and root rot. Refill the tank only when water levels drop significantly, and always use clean, chemical-free water. Avoid keeping the tank overly full, as stagnant water in low light can encourage fungal or bacterial issues. Make sure your bromeliad receives bright, indirect light and maintain good air circulation around the foliage. Keep the plant away from cold drafts, windowsills, or heating vents, as sudden temperature changes and dry air can stress the plant. Moderate care during the off-season will help preserve its strength for vigorous regrowth in spring.
Preventing Overwatering and Root Rot
Recognizing the Signs of Overwatering
Overwatering is one of the most common mistakes in bromeliad care. Because bromeliads absorb moisture through their central tank and leaf bases rather than relying heavily on roots, excess water in the potting medium can quickly create problems. Warning signs include soft or translucent leaves, a persistent musty or sour odor coming from the center cup, and yellow or drooping foliage. The soil may remain constantly wet or develop algae or mold on the surface. In more severe cases, the base of the plant begins to rot, becoming soft and unstable. Regularly monitoring your plant’s appearance and touch-testing the soil can help you detect early signs and take timely action.
How to Save an Overwatered Bromeliad
To rescue an overwatered bromeliad, start by removing it from the pot and gently shaking off the damp soil. Examine the roots and base of the plant—healthy roots are firm and white, while rotting ones appear black, slimy, or smell unpleasant. Use sterilized scissors or pruning shears to cut away all rotted roots and any affected lower leaves. If the plant’s central cup is stagnant or has debris, flush it with clean water and allow it to drain thoroughly. Place the bromeliad in a shaded, well-ventilated area for several hours or overnight to dry out before repotting it in a fresh mix—ideally one with good drainage, such as orchid bark, perlite, or coarse peat. After repotting, wait a few days before watering again, then resume a more conservative routine to avoid repeating the issue.
Choosing the Right Pot and Soil Mix
Best Containers for Drainage
Proper drainage is critical for bromeliads, which are prone to root rot if water lingers around their base. Always select containers with multiple drainage holes to ensure excess water can escape freely. Avoid decorative pots without holes unless you use them strictly as cachepots and place a draining inner pot inside. Terracotta or unglazed clay pots are particularly well-suited because they’re porous, allowing for better airflow and evaporation. These materials help mimic the bromeliad’s natural epiphytic environment, where water drains quickly. For mounted bromeliads or those in hanging baskets, consider slatted wood containers or wire baskets lined with sphagnum moss to provide both support and excellent drainage.
Ideal Soil Composition
Bromeliads naturally grow on trees or rocky surfaces, meaning they’re adapted to light, aerated conditions rather than dense soil. The ideal potting mix should be loose and fast-draining to prevent moisture from sitting at the roots. A suitable blend might include equal parts orchid bark, perlite, and peat moss or coconut coir. This combination provides structure, retains just enough moisture, and allows air to reach the roots. Some growers also incorporate charcoal for extra aeration and to neutralize odors. Avoid using standard potting soil or garden loam, as these are too dense and can suffocate the roots. Replacing the soil mix every two to three years helps maintain healthy structure and prevents salt buildup, which can hinder bromeliad growth over time.
Watering Techniques for Different Bromeliad Types
Tank Bromeliads
Tank bromeliads, such as Aechmea, Guzmania, Neoregalia, and Vriesea, store water in the rosette-shaped central cup formed by their overlapping leaves. This cup should always contain a small amount of clean, non-chlorinated water. However, stagnant water can invite fungal growth and pests like mosquitoes, so it’s important to flush the tank thoroughly with fresh water about once a week. This prevents the buildup of salts, minerals, and organic debris. When flushing, gently pour clean water into the tank until it overflows, allowing the old water to be displaced. During cooler months or in low-light conditions, reduce tank water levels slightly to avoid rot. Additionally, water the soil sparingly to maintain slight moisture without keeping it soggy.
Non-Tank Bromeliads
Non-tank bromeliads, such as those in the Dyckia, Hechtia, and Puya genera, are typically terrestrial or saxicolous and do not form a central reservoir. These species require watering at the root zone rather than from above. Water them thoroughly, allowing excess to drain freely, and then let the soil dry out before the next session. These bromeliads often come from arid or semi-arid environments and are better adapted to drought than to soggy conditions. In fact, overwatering is a common cause of stress or death in these varieties. During their active growing season, they may need more frequent watering, but in winter or in low humidity, cut back to prevent root rot. For container-grown plants, monitor the potting mix closely and adjust watering frequency according to ambient temperature and light levels.
Watering Bromeliad Pups and Young Plants
Nurturing New Growth
Bromeliad pups, or offsets, begin forming at the base of a mature plant once it nears the end of its life cycle. These young shoots depend on their mother for nutrients at first but gradually become self-sufficient. During this early stage, pups require careful attention to moisture because their root systems are still shallow and their central tanks—if present—are small and vulnerable to drying out. Lightly mist the pups a few times a week, especially if they haven’t yet developed a proper cup. If the pup has formed a tiny central reservoir, keep a small amount of water in it, replacing it regularly with clean, room-temperature water. Ensure the soil remains lightly moist but never soggy, as root rot can still occur in developing plants. High humidity can also support healthy growth during this sensitive phase.
When to Transition to Normal Care
You’ll know a bromeliad pup is ready for full care when it has grown to about one-third to one-half the size of the mother plant and has formed a functional tank. At this point, the pup can be gently separated and potted on its own if desired. Once established in its own pot, transition it to a regular watering schedule similar to mature bromeliads—keeping the cup filled with clean water and watering the potting medium just enough to keep it slightly moist. Avoid overwatering during the transition period; instead, prioritize consistency and observation. If the pup’s leaves remain firm, upright, and brightly colored, it’s likely adjusting well to independent growth.
Mistakes to Avoid When Watering Bromeliads
Using Cold or Chlorinated Water
Watering your bromeliads with cold tap water—especially in warm or tropical environments—can cause sudden temperature shock, leading to leaf damage or slowed growth. Bromeliads prefer lukewarm or room-temperature water that mimics the gentle rain of their native habitats. Additionally, many municipal water systems contain chlorine or chloramine, which can harm the delicate tissues of your plant over time. Letting tap water sit uncovered for 24 hours allows chlorine to evaporate naturally, though this doesn’t remove chloramine. To avoid both chemicals entirely, use distilled, rain, or filtered water, especially when filling the central tank or misting young pups.
Forgetting to Flush the Tank
The central tank or “cup” of a bromeliad is not just a reservoir—it’s an active part of the plant’s ecosystem. Over time, organic debris such as fallen leaves, insects, and even fertilizer salts can accumulate, fostering the growth of algae, bacteria, or mosquito larvae. Without regular flushing, these impurities can clog the tank and promote rot, reducing the plant’s overall health and vigor. To prevent this, flush the tank thoroughly with clean, fresh water at least once a week. Pour water into the cup until it overflows and drains out through the leaves, which mimics natural rainfall and helps rinse away harmful build-up.
Neglecting Air Circulation
Bromeliads are epiphytes by nature, often growing high in tree canopies where airflow is constant. In indoor or greenhouse conditions, stagnant air combined with retained moisture can lead to mold, fungal infections, or rot—especially around the base of the leaves and central cup. After watering, it’s essential to ensure good air movement to help the plant dry out properly. This can be achieved by placing the plant in a well-ventilated space, using a fan nearby (on low setting), or avoiding overcrowding multiple bromeliads in a confined area. If leaves begin to feel soft or develop dark spots, it may be a sign that air circulation needs to be improved immediately.
Encouraging Bloom Through Proper Watering
Timing and Triggers for Flowering
Bromeliads are unique in that they flower only once in their life cycle, typically when the plant reaches full maturity—often after one to three years depending on the species and growing conditions. While patience is key, proper watering plays a major role in supporting this transition from foliage to flower. Maintaining consistent moisture in the central tank and around the root zone signals to the plant that environmental conditions are favorable for reproduction.
In addition to regular care, some growers employ a gentle trick to trigger blooming: placing a mature bromeliad in a clear plastic bag for 7 to 10 days with a ripe apple. The apple emits ethylene gas, a natural plant hormone that encourages flower spike development. This technique works best when the plant is already mature and has been receiving adequate light and moisture. Do not attempt this on young plants or those showing signs of stress, as forcing bloom too early may shorten their lifespan or prevent proper pup formation.
Supporting the Blooming Process
Once the flower spike emerges, watering practices remain important to support the plant through this energy-intensive phase. Continue to keep the tank filled with clean, room-temperature water and lightly moisten the soil or growing medium when it feels dry. Avoid letting the tank dry out completely, as this may slow the development of the inflorescence or cause the bloom to fade prematurely.
At the same time, avoid overwatering or allowing stagnant water to sit too long in the tank, which can cause rot right as the plant is most vulnerable. Good drainage and air circulation become even more critical during this period.
After blooming finishes, the central rosette will gradually decline, but this is a natural part of the bromeliad’s lifecycle. Focus on supporting the offsets or “pups” that begin to emerge near the base. These pups are the next generation and, with proper watering and light, will eventually mature and bloom in their own time.
Frequently Asked Questions About Watering Bromeliads
When Do Bromeliads Typically Flower?
Most bromeliads bloom once they’ve reached maturity, which usually takes between one to three years depending on the species, environment, and care. Flowering doesn’t follow a strict calendar but is instead triggered by a combination of internal plant readiness and external cues such as light intensity, humidity, and watering consistency.
How Does Watering Influence Bloom Timing?
Proper watering plays a subtle but crucial role. Keeping the central tank filled with clean, room-temperature water helps signal to the plant that conditions are safe for reproduction. Likewise, watering the root zone occasionally helps maintain overall plant hydration. Irregular or overly dry conditions can delay blooming or weaken the plant’s readiness to flower.
Can You Force a Bromeliad to Bloom?
Yes, but only if the plant is fully mature and healthy. One proven method is to expose the plant to ethylene gas—a natural plant hormone. This can be done by placing the bromeliad in a sealed, clear plastic bag with a ripe apple for 7–10 days. The apple releases ethylene, which can prompt the plant to begin producing a flower spike. However, forcing immature or stressed plants can result in stunted blooms or reduced pup production.
What Should You Do After the Flower Appears?
Continue normal watering routines, ensuring the central tank stays filled and that water does not become stagnant. Avoid soaking the growing medium unless it’s noticeably dry. Keep the plant in bright, indirect light and maintain good airflow to prevent fungal issues as it completes its bloom cycle. This stage is energy-intensive, so stable conditions are important.
What Happens After the Bloom Fades?
Once blooming concludes, the main plant naturally begins to decline. This is expected, as bromeliads are monocarpic—meaning they flower only once. However, small pups will start forming at the base. At this stage, continue caring for the mother plant just enough to support the pups. Once the offsets are a few inches tall and have roots, they can be separated and grown individually. These pups will eventually flower in their own time with proper care.
Conclusion: Nurturing Your Bromeliad With the Right Watering Practices
Mastering how to water bromeliads isn’t just about frequency—it’s about understanding their unique structure, environment, and seasonal needs. Whether grown indoors or outdoors, in pots or mounted on trees, these tropical beauties will reward consistent care with stunning colors and elegant blooms. By choosing the right water, maintaining the central tank, and adjusting to seasonal changes, you’ll create the perfect conditions for your bromeliad to flourish year-round.