Camellias are among the most captivating flowering shrubs, known for their glossy green leaves and elegant blooms that brighten gardens through fall and winter. Their beauty, however, depends greatly on proper care—especially fertilization. Knowing when to fertilize camellias is key to encouraging lush foliage, healthy growth, and abundant flowers. The timing of feeding can determine whether your camellia produces dazzling blossoms or struggles with weak growth and poor bud formation. Fertilizing too early or too late may even harm the plant, making this step crucial for long-term success.
This guide will walk you through every essential detail of fertilizing camellias, from understanding their seasonal growth patterns to selecting the right fertilizer type and application methods. You will learn how to adjust feeding schedules for different climates, recognize nutrient deficiencies, and avoid common mistakes that prevent healthy blooming. With careful attention to timing and soil health, your camellias will reward you with strong roots, glossy leaves, and radiant blooms that return year after year.
Understanding Camellia Growth Cycles
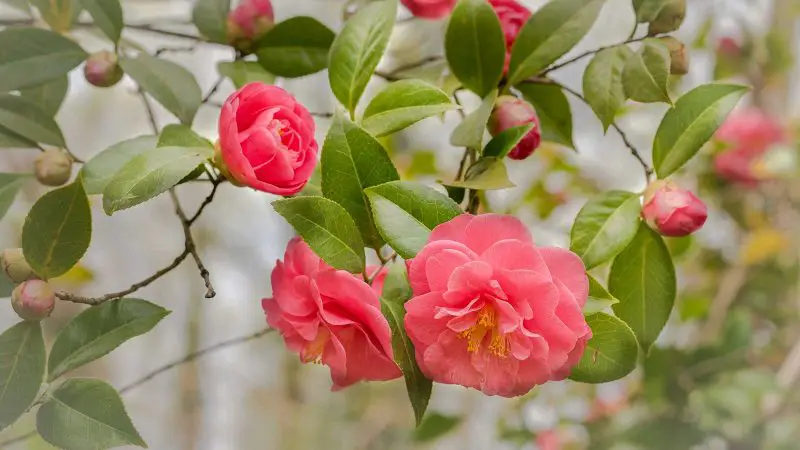
Understanding the natural growth cycle of camellias is the foundation for knowing when to fertilize them. These evergreen shrubs have distinct periods of active growth, dormancy, and blooming that vary slightly depending on the species and climate. Most camellias, including the popular Camellia japonica and Camellia sasanqua, begin new growth in late winter or early spring, followed by a resting period in summer. During this time, the plant focuses on forming buds that will open in the cooler months. Recognizing these phases helps you apply fertilizer at the right moment to support both leaf and flower development without stressing the plant.
The early growing season is the most critical time for fertilization. As new shoots emerge, camellias need nutrients to build strong stems and glossy foliage. A slow-release, balanced fertilizer applied in early spring provides steady nourishment through the growing months. Feeding too early, before the last frost, can stimulate tender new growth that frost may damage. On the other hand, feeding too late in the year encourages soft growth that weakens the plant before winter dormancy. Timing your application properly ensures energy is directed toward healthy roots and future blooms.
Camellias also experience a quiet recovery period after flowering. During this phase, light feeding can replenish nutrients used for blooming and help the plant store energy for the next season. Observing the rhythm of your camellia’s life cycle—new growth, budding, flowering, and rest—allows you to adapt care accordingly. By aligning fertilizer timing with these natural cycles, you give your camellias the best chance to flourish with rich foliage and abundant, vibrant blossoms year after year.
The Best Time to Fertilize Camellias by Season
Timing fertilization correctly throughout the year is essential for maintaining healthy camellias with vigorous blooms. Each season affects the plant’s growth pattern and nutrient needs differently. In early spring, just after the last frost, camellias awaken from dormancy and begin producing new shoots. This is the ideal time to apply the first round of fertilizer, giving the plant the energy to support lush foliage and strong root development. A balanced, slow-release fertilizer provides steady nourishment during these months without overwhelming young growth. Applying fertilizer before new growth begins ensures nutrients are available exactly when the plant needs them most.
As summer approaches, camellias shift from active growth to bud formation. During this stage, a second, lighter feeding helps the plant form healthy flower buds that will open in late fall or winter. Choose a fertilizer with slightly higher potassium content to promote strong buds and improve bloom quality. Avoid overfeeding during this time, as excess nitrogen encourages leaf growth instead of flowers. In regions with hot summers, watering before and after fertilizing prevents salt buildup and protects roots from burning.
By late fall, camellias begin to slow their growth and prepare for rest. This is not the time to fertilize, as doing so may disrupt dormancy and lead to frost damage. Instead, focus on maintaining soil health through mulching and consistent moisture. In winter, let the plant rest naturally before starting the fertilization cycle again in spring. Understanding these seasonal transitions ensures your camellias receive nutrients at the right time, resulting in resilient plants with radiant, long-lasting blooms.
Choosing the Right Fertilizer for Camellias
Selecting the right fertilizer for camellias is crucial to achieving healthy growth and abundant blooms. These plants prefer slightly acidic soil, so they thrive best with fertilizers formulated for acid-loving species such as azaleas or rhododendrons. The ideal fertilizer should have a balanced nutrient ratio—something close to 10-10-10 or 12-6-6—to provide nitrogen for leaf growth, phosphorus for root and flower development, and potassium for overall plant strength. Slow-release or organic fertilizers are excellent choices because they feed the plant gradually, preventing sudden nutrient surges that can stress the roots or cause excessive leafy growth.
Organic options such as composted manure, fish emulsion, or cottonseed meal offer natural nutrients while improving soil structure and microbial activity. They release minerals slowly, encouraging steady growth and better water retention. Liquid fertilizers can also be used for quick nutrient absorption during the active growing season. However, it’s essential to follow label directions carefully to avoid overfertilization, which can lead to leaf burn or bud drop. Always water the plant before and after applying fertilizer to protect the roots from chemical shock.
Soil testing is another valuable step when choosing fertilizer. If your soil is already rich in nitrogen but low in potassium or phosphorus, a targeted blend can correct the imbalance. Adjusting fertilizer types based on soil conditions ensures that your camellia receives the nutrients it needs without waste. By matching the fertilizer to both the plant’s requirements and your soil’s characteristics, you can create the ideal foundation for lush foliage, strong roots, and a breathtaking display of blooms each year.
Recognizing Signs of Nutrient Deficiency in Camellias
Understanding the signs of nutrient deficiency helps you know when your camellias need extra care. These shrubs often reveal their nutrient needs through visible changes in leaf color, growth rate, and flower quality. Pale or yellowing leaves, especially those starting from the tips, may indicate a nitrogen deficiency. When the entire plant appears weak or growth seems stunted, it’s often a sign that the soil lacks sufficient nutrients. In contrast, dark green leaves with no blooms might suggest an excess of nitrogen, meaning it’s time to reduce feeding frequency or switch to a balanced formula.
Iron and magnesium deficiencies are also common in camellias grown in alkaline soil. Iron deficiency typically causes interveinal chlorosis, where leaves turn yellow but veins remain green. Magnesium shortages often appear as yellowing around the leaf edges while the center stays green. These symptoms signal that the soil pH might be too high for camellias to absorb nutrients properly. Correcting this issue often involves applying an acidifying fertilizer or adding organic materials like pine bark or peat moss to lower pH gradually.
Flower performance can also reveal nutrient imbalances. Fewer blooms or buds dropping prematurely often point to phosphorus deficiency. When petals appear dull or smaller than usual, the plant may lack potassium. Regular soil testing ensures you can identify these problems early and make precise adjustments. Addressing deficiencies promptly helps maintain balanced growth, strengthens the root system, and results in healthier, more vibrant flowers that bloom consistently year after year.
How to Apply Fertilizer Properly
Applying fertilizer properly is one of the most important steps in keeping your camellias healthy and blooming beautifully. These plants have shallow, delicate roots that spread widely beneath the soil surface. Before fertilizing, always water the plant thoroughly a day in advance to help reduce root shock. When applying, spread the fertilizer evenly around the drip line—the area under the outermost leaves—rather than close to the base. This helps target the feeder roots where nutrient absorption is strongest. After applying, water again to dissolve the fertilizer and carry nutrients into the soil where roots can access them easily.
Gently work granular fertilizer into the top layer of soil with your hands or a small rake, but avoid disturbing deeper roots. Camellias dislike compacted or damaged soil, so loosen it gently if needed. For container-grown camellias, use a light hand—broadcast a thin layer across the surface, then water thoroughly. If using liquid fertilizer, apply at half the recommended strength to prevent burning the roots, especially during warmer weather. Foliar feeding can also help correct nutrient deficiencies quickly; spray leaves in the early morning or late afternoon to ensure maximum absorption without leaf scorch.
To maintain long-term plant health, follow a consistent feeding routine through the growing season. Begin fertilizing in early spring when new growth emerges, again in midsummer, and once more after flowering ends. Avoid late-season feeding in autumn, as new growth may be damaged by frost. Incorporating organic materials like compost or pine bark improves soil texture and provides gentle nourishment. A 2–3 inch mulch layer also conserves moisture and keeps roots cool. Regular monitoring and balanced feeding promote glossy foliage, abundant buds, and long-lasting blooms that make your camellias thrive year after year.
Factors That Influence Fertilization Success
Soil pH and Nutrient Absorption
Soil pH greatly affects how camellias absorb nutrients. These shrubs thrive in slightly acidic soil, ideally between 5.5 and 6.5. When the pH rises above this level, essential minerals like iron and magnesium become less available, leading to yellowing leaves and reduced vigor. Testing the soil at least once a year helps you identify imbalances early. If the soil is too alkaline, you can use acidifying amendments such as peat moss, pine needles, or elemental sulfur to restore proper acidity. These natural materials not only lower pH gradually but also improve soil texture and organic content.
Healthy soil encourages strong root development, allowing fertilizers to work more efficiently. Acidic soil supports beneficial microorganisms that help break down organic nutrients into forms the roots can absorb easily. On the other hand, poorly balanced soil limits nutrient availability, no matter how often you fertilize. Maintaining consistent acidity ensures your camellias receive the right mix of nutrients throughout their growth cycle. With proper soil management, fertilization becomes more effective, resulting in stronger foliage and more abundant blooms each year.
Temperature and Moisture Levels
Temperature and moisture levels strongly influence how well camellias use fertilizer. During spring and early summer, warm temperatures activate root growth, allowing efficient nutrient uptake. In cooler months, however, their metabolism slows, and excess fertilizer may accumulate in the soil, risking root burn. To prevent this, always adjust feeding frequency according to seasonal changes. Fertilizing lightly in spring and reducing feeding in late summer ensures the plant can fully use nutrients before dormancy.
Moisture consistency is equally critical. Camellias dislike both drought and soggy conditions. Water the soil deeply after fertilizing to help nutrients dissolve and reach the roots evenly. Dry soil blocks nutrient absorption, while overwatering leaches valuable minerals away. A 2- to 3-inch layer of mulch helps maintain steady soil moisture and temperature, especially during hot months. When temperature, moisture, and timing align, your camellias will absorb nutrients efficiently, producing stronger roots, glossy leaves, and vivid flowers that last longer through each blooming season.
Seasonal Feeding Schedule for Camellias
Spring and Early Summer Feeding
Spring marks the beginning of the most active growth phase for camellias. Once the final blooms fade, the plant redirects its energy from flowering to leaf and bud production. Fertilizing at this time provides the nutrients necessary to build strong new growth and prepare for next year’s blossoms. A balanced, acid-forming fertilizer such as 10-10-10 or 12-6-6 works best during this stage. Apply it evenly around the drip line, avoiding direct contact with the trunk to prevent burns. Water deeply after fertilizing to ensure nutrients reach the root zone. This early feeding also helps replenish the minerals depleted during winter dormancy.
In early summer, a lighter feeding continues to support healthy foliage and bud formation as the days grow warmer. Slow-release or organic fertilizers are ideal, as they provide steady nourishment without overwhelming the plant. Watch for signs of over-fertilization, such as leaf tip burn or excessive growth, and adjust accordingly. In regions with long summers, you may divide feedings into two smaller doses spaced six weeks apart for even nutrient supply. Proper spring and summer feeding encourages balanced growth, glossy leaves, and the formation of strong buds that ensure abundant blooms the following year.
Late Summer and Fall Adjustments
As summer progresses into late August, camellias gradually slow their growth and begin shifting energy toward root strengthening and bud maturation. During this phase, heavy feeding can harm more than help. Avoid nitrogen-rich fertilizers that promote soft, new growth vulnerable to autumn chills and early frost. Instead, focus on maintaining steady moisture and soil health through organic mulches like pine bark or leaf mold. These materials slowly release nutrients and protect the root system from temperature fluctuations, preparing the plant for its resting period.
In warmer climates where frost is mild, a very light feeding with a low-nitrogen, high-potassium fertilizer can be applied in early fall to enhance root resilience and disease resistance. However, gardeners in cooler regions should stop feeding entirely by late August. Fertilizing too late disrupts the camellia’s natural dormancy cycle, reducing flower production in spring. Consistent watering, mulching, and soil conditioning are more beneficial during this time. Following these seasonal adjustments ensures your camellias remain strong, well-prepared for winter, and ready to burst into radiant bloom once spring warmth returns.
Common Fertilizing Mistakes to Avoid
Overfertilizing and Its Consequences
One of the most frequent mistakes gardeners make when caring for camellias is overfertilizing. Applying too much fertilizer can lead to a buildup of salts in the soil, which burns delicate roots and hinders nutrient absorption. The result is often scorched leaf edges, stunted growth, and fewer blooms. Excess nitrogen also encourages lush foliage at the expense of flowers, creating an unbalanced plant with soft stems that are more prone to pests and diseases. To prevent this, always follow recommended application rates and water thoroughly after feeding to flush out any residual salts.
Overfertilizing can also alter the soil’s pH, making it too alkaline for camellias, which thrive in acidic environments. Once the pH rises, the roots struggle to access essential nutrients like iron and magnesium. This often leads to chlorosis—yellowing between leaf veins—and general decline in plant health. Using slow-release or organic fertilizers helps minimize the risk of nutrient overload, while annual soil testing ensures levels remain balanced. Moderation is key; providing nutrients gradually keeps the plant healthy without disrupting its natural growth rhythm.
Fertilizing at the Wrong Time
Timing errors are another common reason camellias fail to thrive. Fertilizing too early, while the plant is still blooming, can divert energy away from flower production and cause premature bud drop. Similarly, applying fertilizer too late in the growing season—particularly in late summer or early fall—can stimulate tender new shoots that won’t have time to harden before frost. These soft shoots often die back in winter, leaving the plant weakened and more susceptible to disease. To avoid this, always fertilize after flowering ends and stop feeding before cooler weather sets in.
Many gardeners also forget to adjust their feeding schedule based on climate. In warmer regions, camellias may have longer growing periods and require slightly more frequent light feedings, while in cooler climates, a single spring application is often sufficient. Paying attention to local weather patterns and your camellia’s growth cycle ensures nutrients are delivered exactly when needed. Proper timing promotes stronger roots, resilient leaves, and abundant flowering each season without unnecessary stress on the plant.
Organic Alternatives for Sustainable Growth
Using Natural Fertilizers for Healthier Soil
Organic fertilizers provide a gentle, sustainable way to nourish camellias while improving overall soil health. Unlike synthetic fertilizers, which release nutrients rapidly, organic materials such as compost, cottonseed meal, and fish emulsion decompose slowly, feeding plants over time. This gradual release prevents root burn and maintains balanced nutrition. Organic fertilizers also enhance microbial activity in the soil, which helps break down organic matter into forms the roots can absorb easily. Over time, this process improves soil texture, aeration, and water retention—creating the ideal environment for camellias to thrive.
When applying natural fertilizers, consistency is more important than quantity. A light feeding every six to eight weeks during the growing season supports steady growth without overloading the plant. Mix compost or well-rotted manure into the top layer of soil to increase organic content and encourage beneficial fungi. Organic approaches also maintain soil acidity naturally, which is crucial for camellias’ nutrient uptake. By focusing on long-term soil health, gardeners not only produce healthier shrubs but also reduce environmental impact and improve garden biodiversity.
Compost and Mulch for Sustainable Nutrition
Compost and mulch are essential tools in maintaining nutrient-rich soil for camellias. Compost acts as both a soil conditioner and a slow-release fertilizer, providing a steady supply of nitrogen, phosphorus, and potassium. It also balances soil pH and improves moisture retention, especially valuable during hot or dry periods. Applying a two-inch layer of compost around the base of the shrub each spring replenishes nutrients lost over winter and supports strong new growth. Avoid placing compost directly against the trunk to prevent moisture buildup and potential rot.
Mulching complements composting by protecting the root zone and conserving soil moisture. Materials like pine needles, shredded bark, or leaf mold slowly decompose, enriching the soil while maintaining its slightly acidic condition. Mulch also helps regulate temperature, keeping roots cool in summer and insulated during winter. Replenish mulch annually to maintain a consistent layer, but never pile it too high. Together, compost and mulch form the foundation of sustainable care, reducing the need for chemical fertilizers and ensuring your camellias flourish naturally year after year.
Adjusting Fertilization Based on Climate
Camellias grow across a wide range of climates, and understanding how temperature and seasonal conditions affect their feeding needs is essential for long-term success. In warm, humid regions, camellias often experience extended growing seasons and may benefit from lighter, more frequent feedings. However, it’s important to avoid heavy doses of fertilizer during the peak of summer heat. High temperatures can slow root activity, causing nutrients to accumulate in the soil instead of being absorbed. In these conditions, a diluted, slow-release formula applied every six to eight weeks ensures steady growth without overloading the plant. Water thoroughly after each feeding to prevent salt buildup and promote deep root hydration.
In cooler or temperate climates, the growing season is shorter, so timing becomes even more critical. A single application in early spring, followed by another light feeding in midsummer, is usually sufficient. Once late summer arrives, it’s best to stop fertilizing entirely to allow the plant to harden before frost. In cold regions where winter temperatures drop sharply, avoid feeding after August, as excess nutrients can encourage late growth that won’t survive freezing conditions. Applying mulch before winter protects the root zone and helps retain soil nutrients.
Climate-sensitive fertilization also includes adjusting soil amendments and organic matter based on local rainfall patterns. In rainy areas, nutrients may leach out quickly, requiring slightly more frequent but lighter feedings. In dry zones, ensure consistent watering after each fertilizer application to activate nutrient uptake. By tailoring your fertilization routine to regional climate conditions, you support healthy camellia growth, stronger root systems, and a brilliant display of blooms year after year.
Reviving Neglected or Weak Camellias Through Feeding
Camellias that have been neglected or display poor growth require careful attention to recover fully. Start by assessing the soil and overall plant condition. Many weak camellias suffer from nutrient deficiencies, improper drainage, or incorrect soil pH. Conducting a soil test helps identify which nutrients are lacking and whether the acidity needs adjustment. Applying a slow-release, balanced fertilizer designed for acid-loving plants delivers essential nutrients gradually, supporting recovery without stressing the roots. Always water thoroughly before and after feeding to ensure nutrients penetrate the root zone and are readily available for uptake.
Supplementing with organic matter is equally important. Adding compost, well-rotted manure, or leaf mold improves soil structure and encourages beneficial microbial activity. Healthy soil fosters robust root growth and enhances the plant’s ability to absorb nutrients efficiently. Mulching around the base conserves moisture, moderates soil temperature, and protects roots from extreme weather. Avoid fertilizing during periods of environmental stress, such as high heat or frost, because stressed camellias may struggle to utilize nutrients properly. Proper care during these stages prevents further decline and lays the foundation for long-term health.
Once the plant shows signs of recovery, continue feeding lightly every six to eight weeks during the active growing season. Monitor the camellia’s response, adjusting the feeding schedule based on growth rate and leaf color. Over time, neglected or weak camellias can regain vigor, develop glossy foliage, produce strong shoots, and return to regular, abundant flowering. Observing the plant closely and maintaining a consistent care routine ensures long-term resilience, allowing your camellias to thrive and display vibrant blooms year after year.
FAQ About Fertilizing Camellias
When is the best time to fertilize camellias?
The ideal time to fertilize camellias is after they finish flowering in late winter or early spring. This timing supports new leaf growth and bud development. A lighter feeding in mid-summer can maintain plant vigor, but avoid late autumn to prevent tender shoots that may be damaged by frost.
What type of fertilizer should I use for camellias?
Use fertilizers formulated for acid-loving plants, such as azaleas or rhododendrons. Balanced slow-release fertilizers with moderate nitrogen, phosphorus, and potassium ratios work best. Organic options like compost, cottonseed meal, or fish emulsion are also excellent for improving soil structure and supporting long-term plant health.
How much fertilizer should I apply?
Follow the recommended label rate for the specific fertilizer used. Overfertilizing can burn roots, cause excessive leafy growth, and reduce flowering. Generally, apply evenly around the drip line, water thoroughly afterward, and adjust amounts based on plant size, soil condition, and climate.
Can I fertilize camellias in containers?
Yes, container-grown camellias require regular fertilization because nutrients leach out during watering. Use slow-release or liquid fertilizers at half strength. Ensure thorough watering after application, and consider adding organic matter or compost to improve soil nutrition.
How do I know if my camellia is nutrient deficient?
Signs include yellowing leaves with green veins, stunted growth, pale flowers, or reduced blooming. A soil test can confirm deficiencies. Correct nutrient imbalances using appropriate fertilizers, organic amendments, and soil pH adjustments to restore plant health and encourage vibrant blooms.
Conclusion
Proper fertilization is key to keeping camellias healthy, vibrant, and blooming abundantly. Understanding the right timing, selecting suitable fertilizers, and adjusting care based on climate ensures optimal nutrient uptake. Avoid common mistakes like overfeeding or late-season fertilization, and consider organic alternatives to improve soil health naturally. Regular monitoring of plant growth and soil conditions helps identify deficiencies early, allowing timely corrections. By following a consistent, informed fertilization routine, gardeners can strengthen roots, enhance foliage, and encourage prolific flowers. With patience and attention, camellias will thrive year after year, offering long-lasting beauty and lush blooms.

