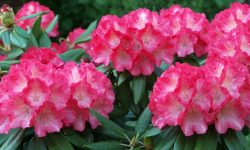
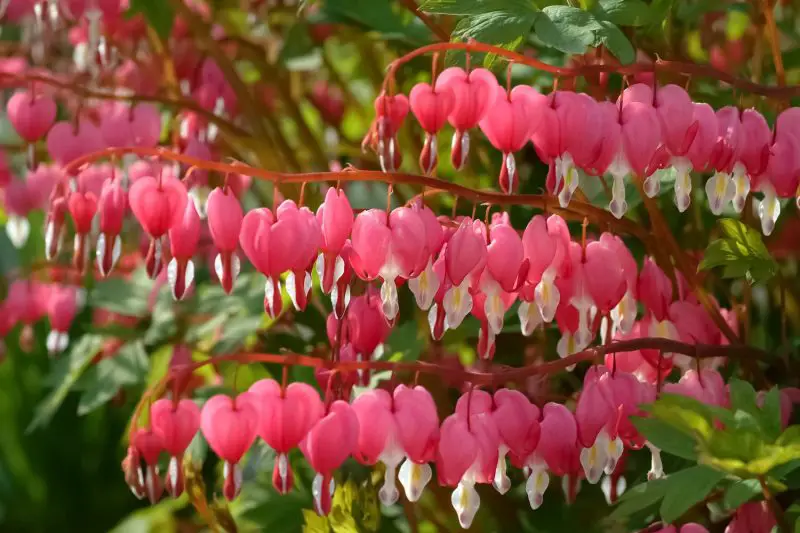
Bleeding hearts (Lamprocapnos spectabilis) are among the most enchanting perennial plants for shade gardens. With their delicate, heart-shaped flowers hanging gracefully along arching stems, they add a romantic charm that few other plants can match. Timing your planting correctly is essential to ensure these beauties thrive and fill your garden with vibrant blooms every spring.
This comprehensive guide will walk you through everything you need to know about when to plant bleeding hearts, how to prepare your garden, and how to care for them to enjoy stunning, long-lasting flowers year after year. Whether you’re starting from seeds, divisions, or nursery transplants, mastering the right timing and techniques will set you on the path to gardening success.
Understanding Bleeding Hearts and Their Growth Cycle
Bleeding hearts are herbaceous perennials native to temperate regions of Asia and North America. Their natural growth cycle is closely tied to seasonal changes, making timing an important factor in successful planting.
Growth Stages of Bleeding Hearts
Bleeding hearts emerge early in the spring, often as soon as the soil temperature reaches around 50°F (10°C). At this time, their underground rhizomes awaken, sending up fresh, fern-like foliage that gradually unfurls and grows rapidly. The plant’s signature heart-shaped, pendulous flowers usually appear in mid to late spring, creating a striking visual display that lasts several weeks.
Following the bloom period, the plant enters a natural dormancy phase by early to mid-summer. During this time, as temperatures rise and soil moisture decreases, the foliage gradually yellows and dies back to the ground. This dormancy period is essential for the plant’s life cycle, allowing it to conserve energy in its root system for the next growing season.
Understanding this growth pattern allows gardeners to time planting for optimal root establishment before the summer dormancy sets in. Well-established roots improve the plant’s resilience and flowering potential in the following spring.
Why Timing Matters
Timing is one of the most critical factors influencing the successful cultivation of bleeding hearts. Planting too early, when the risk of frost still lingers, can damage or kill tender new shoots, setting the plant back significantly. This may result in delayed growth or reduced flowering.
Conversely, planting too late in the season, especially after the plant has started its dormancy process, leaves insufficient time for root development. Without strong roots, bleeding hearts struggle to absorb enough nutrients and water, which diminishes their vigor and flower production in the upcoming season.
Choosing the ideal planting window — generally early spring after the last frost or early fall before the plant’s dormancy — ensures the roots have time to grow and store energy. This preparation supports robust growth and abundant, healthy blooms, making timing a key component in achieving the full garden potential of bleeding hearts.
Best Time to Plant Bleeding Hearts
The optimal planting time for bleeding hearts varies depending on your climate, the planting method, and the form of plant material you have. Understanding these factors will help you choose the best window for your garden.
Planting Bleeding Hearts in Spring
In most temperate regions, early to mid-spring is the prime time for planting bleeding hearts. Once the soil is workable and the danger of frost has passed, you can plant nursery-grown specimens or divisions directly into prepared beds. Spring offers cool temperatures and consistent moisture, ideal conditions for root development. This early planting allows bleeding hearts to establish a strong root system before the warmer, drier months arrive.
For divisions or nursery transplants, spring planting is especially advantageous because these plants have already developed some root and shoot structures, making them more resilient to early season stresses. When planted at this time, bleeding hearts can grow steadily, often rewarding gardeners with abundant flowers by late spring or early summer.
Planting Bleeding Hearts in Fall
In regions with milder winters, planting bleeding hearts in early fall can be an effective strategy. The soil retains warmth from summer, which encourages root growth, while cooler air temperatures reduce plant stress. This extended root development period allows bleeding hearts to enter dormancy well-established and ready to burst into growth early the following spring.
Fall planting, however, requires careful moisture management to prevent drying out. Additionally, protection from early frosts is crucial, especially for young plants with delicate root systems. Applying mulch after planting can help insulate roots during colder nights and stabilize soil temperatures.
Planting from Seeds
Starting bleeding hearts from seed demands more patience and planning but offers the satisfaction of growing plants from scratch. Indoors, sow seeds about 8 to 10 weeks before your area’s last expected frost date on the soil surface, as they require light to germinate. Keep the seed-starting medium moist and maintain temperatures around 65-70°F (18-21°C) for optimal germination.
Once seedlings have grown strong enough and outdoor conditions are favorable—soil temperatures above 60°F (15°C) and frost risk minimal—they should be gradually acclimated to outside conditions before transplanting into the garden.
Alternatively, in colder climates, sowing seeds directly outdoors in fall is common. The natural cold stratification process during winter breaks seed dormancy, allowing seedlings to emerge naturally in spring. This method requires protecting young seedlings from extreme cold and wildlife.
Factors Influencing When to Plant Bleeding Hearts
Several external conditions influence the best time to plant bleeding hearts. Recognizing these factors will help you fine-tune your planting schedule.
Climate and USDA Hardiness Zones
Bleeding hearts thrive in USDA hardiness zones 3 through 9, but the best planting time depends heavily on the specific zone and local climate conditions. In colder zones, such as 3 to 5, it is essential to wait until the danger of the last frost has completely passed before planting. Early planting in these regions risks frost damage to tender shoots and can stunt the plant’s initial growth. Conversely, in warmer zones like 7 through 9, planting in the fall is often preferable. Fall planting allows roots to develop in cooler, moist conditions before the onset of hot summer weather, reducing heat stress on young plants.
In addition to broad zone classifications, local microclimates also play a role in timing. Areas shaded by trees or buildings may warm earlier in the spring, allowing for slightly earlier planting. On the other hand, low-lying or exposed spots may remain colder longer, requiring delayed planting to avoid frost damage. Understanding the nuances of your garden’s microclimate helps tailor the planting schedule for optimal results.
Soil Conditions and Preparation
Healthy soil is foundational to successful bleeding heart growth, so proper soil preparation influences when and how you plant. Bleeding hearts prefer soil that is rich in organic matter and drains well. Heavy clay soils tend to retain too much moisture, which can cause root rot, while sandy soils may dry out too quickly, stressing the roots. Before planting, incorporate generous amounts of compost or aged leaf mold to improve texture and fertility.
It is important to ensure that the soil temperature is warm enough—generally above 50°F (10°C)—before planting, as cooler soil slows root growth and establishment. Preparing the soil weeks before planting by loosening it deeply helps encourage healthy root expansion and water absorption, setting the stage for vigorous growth.
Source and Type of Plant Material
The form of bleeding hearts you intend to plant affects the timing and method of planting. Nursery transplants are usually more mature plants with developed root systems, allowing them to be planted outdoors as soon as the soil thaws and frost risk diminishes in early spring. These plants often adapt quickly and bloom sooner.
Divisions, which involve splitting established plants, are best handled in early spring or early fall. These cooler periods reduce stress on the plants and promote quicker recovery and root development.
Starting from seed requires a different approach. Seeds generally need to be sown indoors well ahead of outdoor planting, usually 8 to 10 weeks before the last frost date. This gives seedlings time to grow strong enough for transplanting. Alternatively, seeds can be sown directly outside in fall, where natural cold stratification occurs over winter, allowing seedlings to emerge in spring. This method is slower but often more natural and successful in appropriate climates.
Preparing Your Garden for Bleeding Heart Planting
Selecting the Location
Choosing the right location is a crucial first step to ensure healthy growth and vibrant blooms for your bleeding hearts. These plants thrive best in partial to full shade, especially in regions with hot summers where intense sunlight can damage their delicate foliage and flowers. Ideally, select a spot that receives gentle morning sun and is shaded during the hotter afternoon hours. This balance helps prevent leaf scorch and prolongs the lifespan of the blossoms.
Additionally, the planting site should have well-draining soil to prevent water from pooling around the roots, which can lead to root rot—a common problem for bleeding hearts. Avoid low-lying areas prone to standing water or heavy shade spots where the soil remains overly wet. Proper air circulation in the planting area also helps reduce the risk of fungal diseases.
Soil Testing and Amendment
Testing your garden soil before planting bleeding hearts is highly recommended to ensure it meets their preferred conditions. These plants grow best in soil that is slightly acidic to neutral, with a pH range between 6.0 and 7.0. Soil that is too acidic or alkaline can hinder nutrient availability and stunt plant development.
If your soil test reveals an imbalance, adjust accordingly by adding lime to raise pH or sulfur to lower it. To improve soil fertility and structure, incorporate organic matter such as well-aged compost or rotted manure. This not only enriches the soil with essential nutrients but also improves moisture retention and drainage.
It is important to avoid over-fertilizing bleeding hearts, particularly with high-nitrogen fertilizers, as this can encourage excessive leafy growth at the expense of flowering. Aim for a balanced fertilizer with moderate nutrient levels, and apply it sparingly to support healthy blooms without promoting undue foliage.
Preparing the Planting Bed
Proper preparation of the planting bed lays the foundation for successful establishment and growth of bleeding hearts. Begin by loosening the soil to a depth of 12 to 15 inches to facilitate deep root penetration and vigorous development. This aeration improves water infiltration and nutrient uptake, helping young plants establish quickly.
During this process, remove any stones, weeds, roots, or debris that might obstruct root growth or compete for nutrients. For gardens with heavy clay soil, consider creating raised beds to enhance drainage and prevent waterlogging. Raised beds also warm up faster in spring, which benefits root activity and early growth.
Adding a layer of organic mulch after planting can help maintain consistent soil moisture, regulate temperature fluctuations, and suppress weed growth. Ensure mulch is kept a few inches away from the plant crowns to prevent rot and pest issues.
Planting Bleeding Hearts: Step-by-Step
Planting Nursery Transplants or Divisions
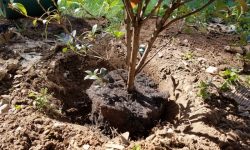
When planting nursery-grown bleeding hearts or divisions, start by digging holes that are roughly twice as wide as the root ball but avoid digging deeper than the root ball’s height. This allows roots to spread out comfortably without being buried too deep, which can cause crown rot or delayed growth. Position the plant so that the crown—the point where the roots meet the stem—sits just above the soil surface. This placement encourages healthy root development and reduces the risk of fungal diseases.
After placing the plant, backfill the hole gently with soil, pressing down lightly to eliminate any air pockets that can dry out roots or reduce soil contact. Once planted, water the area thoroughly to settle the soil and provide moisture essential for root establishment.
To help maintain soil moisture and protect the roots from temperature fluctuations, apply a 2-3 inch layer of organic mulch such as shredded bark, compost, or straw around the base of the plant. However, be careful to keep mulch several inches away from the crown to avoid moisture buildup that can lead to rot or pest problems.
Planting Seedlings
If you’re starting bleeding hearts from seedlings raised indoors, it’s important to harden them off before transplanting to reduce shock. Begin by placing seedlings outdoors in a shaded, sheltered spot for a few hours daily over 7 to 10 days, gradually increasing their exposure to direct sunlight, wind, and fluctuating temperatures. This acclimatization strengthens the plants and prepares them for outdoor conditions.
Transplant seedlings only when the soil temperature has warmed to at least 60°F (15°C), which ensures the roots can actively grow and absorb nutrients. When planting, space seedlings about 12 to 18 inches apart. This spacing provides adequate airflow around each plant, reducing the risk of fungal disease and allowing room for mature growth and air circulation.
After planting seedlings, water well and continue regular watering during dry periods until plants are established. Applying a light mulch layer can help retain moisture but again avoid covering the crown directly.
Caring for Bleeding Hearts After Planting
Proper care after planting is essential for vigorous growth and abundant blooms. Understanding their needs throughout the seasons will help you maintain healthy plants.
Watering Requirements
Bleeding hearts thrive best in consistently moist soil, especially during their active growth and flowering phase in spring. It’s important to water deeply once or twice a week, adjusting frequency based on rainfall and ambient temperature. Deep watering encourages roots to grow downward, promoting stronger, healthier plants. Avoid allowing the soil to dry out completely, as this can stress the plant and reduce bloom quality. Conversely, overwatering or poorly drained soil can lead to soggy conditions, increasing the risk of root rot and fungal diseases. Monitoring soil moisture regularly and watering at the base rather than overhead helps maintain plant health.
As bleeding hearts enter their summer dormancy, usually by mid to late summer, they naturally die back above ground and require significantly less water. During this period, reduce watering to avoid encouraging new growth that may be vulnerable to heat stress or pests.
Fertilizing for Best Blooms
Applying the right fertilizer at the right time boosts the vigor and flowering potential of bleeding hearts. In early spring, use a balanced, slow-release fertilizer that provides essential macronutrients like nitrogen, phosphorus, and potassium, supporting strong foliage development and robust flower production. Avoid high-nitrogen fertilizers that promote excessive leaf growth at the expense of flowers, as this can lead to lush but bloom-poor plants.
If your soil is less fertile or has been depleted, supplement feeding with a liquid fertilizer every 4 to 6 weeks throughout the growing season. This timely nourishment helps sustain plant health and encourages continuous blooming. Always follow label instructions to avoid overfertilizing, which can cause nutrient imbalances or burn roots.
Mulching Benefits
Applying a 2-3 inch layer of organic mulch, such as shredded bark, compost, or leaf mold, provides multiple benefits for bleeding hearts. Mulch helps retain soil moisture by reducing evaporation, which is critical during dry spells. It also regulates soil temperature, keeping roots cooler during hot weather and warmer during cool nights, creating a more stable growing environment.
Mulching suppresses weeds, minimizing competition for water and nutrients. Refresh the mulch layer annually, preferably in early spring after new growth begins or in late fall after the plants go dormant. When applying mulch, keep it a few inches away from the plant crown to prevent moisture buildup that can encourage rot or pest infestation.
Pruning and Deadheading
Timely pruning and deadheading are essential to maximize bloom longevity and overall plant health. Remove spent flower stalks promptly after blooming ends to redirect the plant’s energy from seed production back into root and foliage growth. This practice encourages stronger plants and may promote additional flowering in some cases.
Allow the foliage to continue growing and gathering sunlight until it naturally yellows and dies back, usually by midsummer. This natural senescence replenishes the plant’s energy reserves stored in the roots, supporting healthy growth and blooms in the following season. Once the foliage has yellowed, cut back the plant to ground level to tidy the garden and prepare the bleeding hearts for their summer dormancy.
Seasonal Care Tips for Bleeding Hearts
Spring: Growth and Bloom Time
Spring marks the most active growth period for bleeding hearts, as they emerge from dormancy and begin producing lush foliage and delicate flowers. During this time, it is crucial to monitor soil moisture carefully, ensuring the soil remains consistently moist but not waterlogged. Regular watering supports healthy root development and vibrant blooms.
Applying a balanced fertilizer in early spring helps provide the necessary nutrients to fuel robust growth and maximize flower production. Keep an eye out for late frosts, which can damage tender shoots and flower buds. If frost is forecast, protect emerging plants with row covers or cloches, especially in colder zones or during unpredictable weather swings. Pruning away any winter damage and removing weeds will further help young plants thrive.
Summer: Dormancy and Maintenance
By early to mid-summer, bleeding hearts naturally enter dormancy. The foliage gradually yellows and dies back as the plant conserves energy underground. During this period, reduce watering to avoid soggy soil conditions that may lead to root rot, as the plants require less moisture while dormant.
Avoid disturbing the root zone during dormancy to allow the plant to rest fully. This is an excellent time to plant summer-loving companions such as hostas or ferns, which enjoy the shade and fill in the space left by bleeding hearts. Keep the garden tidy by removing any diseased or dead foliage to minimize pest and disease problems.
Fall: Preparing for Winter
As temperatures cool in fall, prepare your bleeding hearts for the coming winter months. Clear away dead or decaying foliage to reduce the risk of fungal diseases and pests overwintering near the plants. Apply a fresh layer of organic mulch around the base to insulate the roots against temperature swings and frost.
In colder climates, consider adding extra winter protection such as straw, shredded leaves, or a pile of garden debris over the root zone. This additional insulation helps prevent soil freeze-thaw cycles that can damage roots. Proper fall care sets the stage for healthy growth and abundant blooms in the following spring, ensuring your bleeding hearts continue to grace your garden year after year.
Common Problems and How to Avoid Them
Pest Problems
Although bleeding hearts are generally resilient to pests, they can sometimes attract aphids, slugs, and snails, especially in humid or shaded garden areas. Aphids cluster on new growth and flower buds, sucking sap and potentially spreading diseases. To control aphids naturally, encourage beneficial insects such as ladybugs and lacewings, which prey on these pests. For slugs and snails, use organic deterrents like crushed eggshells or diatomaceous earth around the base of plants. Handpicking slugs during evening hours when they are most active is also effective. Regularly inspecting your bleeding hearts for signs of pest damage helps catch infestations early before they cause serious harm.
Disease Issues
Bleeding hearts can be susceptible to fungal diseases like powdery mildew and leaf spot, especially when grown in areas with poor air circulation or excessive moisture. Powdery mildew appears as a white, powdery coating on leaves, while leaf spot causes discolored or necrotic patches. To reduce disease risk, space plants adequately to improve airflow and avoid crowding. Water at the soil level using drip irrigation or a soaker hose rather than overhead sprinklers to keep foliage dry. Promptly remove and discard any infected leaves to limit the spread of fungal spores. In severe cases, fungicidal sprays formulated for ornamental plants may be necessary, but prevention through good cultural practices is the best strategy.
Environmental Stress
Environmental factors like too much direct sunlight and poorly draining soil can stress bleeding hearts and reduce their vigor. Excessive sun exposure, particularly in hot climates, can scorch the delicate fern-like foliage and fade the flowers prematurely. Providing partial to full shade, especially during the hottest parts of the day, helps prevent leaf burn and extends bloom longevity. On the other hand, soils that retain too much water lead to root rot, a serious condition that can kill the plant. To avoid this, ensure the planting site has well-draining soil, and amend heavy clay soils with organic matter to improve texture and drainage. Mulching can also help regulate soil moisture but should be applied carefully to avoid creating overly wet conditions near the crown.
Propagating Bleeding Hearts for Continuous Garden Beauty
Dividing Established Plants
Dividing mature bleeding hearts is an effective way to rejuvenate aging plants and expand your garden’s coverage. This process is best done every three to four years during early spring before new growth begins or in early fall after the blooming season has ended. To divide, carefully dig around the base of the plant to lift the root clump without damaging it. Gently separate the root mass into smaller sections, ensuring each division has several healthy shoots and a good portion of roots. Replant the divisions at the same depth as the original plant, water thoroughly, and apply mulch to retain moisture. Dividing not only promotes vigorous new growth but also helps prevent overcrowding, which can reduce flowering and increase disease susceptibility.
Growing from Seed
Growing bleeding hearts from seed offers an opportunity to introduce new varieties and keep your plant stock fresh. Seed pods mature by late summer and can be harvested once they turn brown and dry. To sow seeds indoors, start about 8 to 10 weeks before the last expected frost. Scatter seeds on moist seed-starting mix without covering them deeply, as they require light for germination. Maintain a consistent temperature around 65-70°F and keep the soil moist but not waterlogged. Harden off seedlings by gradually exposing them to outdoor conditions before transplanting after the last frost. Alternatively, direct sowing outdoors in fall allows seeds to undergo natural cold stratification over winter, breaking dormancy and promoting spring germination. This method mimics their natural life cycle but requires patience and protection from harsh weather. Growing from seed may delay blooming by one to two years but rewards gardeners with abundant and healthy plants.
Encouraging Self-Seeding and Natural Spread
Bleeding hearts are natural self-seeders, which means they can spread and multiply in your garden with minimal intervention if conditions are favorable. To encourage this natural propagation method, it’s important to allow some flower stalks to mature fully after blooming instead of cutting them back immediately. As the flowers fade, seed pods will form and gradually dry out over several weeks. Once the pods are brown and brittle, they release small seeds that can fall to the ground and germinate the following season.
Creating a loose, lightly disturbed soil surface beneath the plants can help the seeds take root more easily. Avoid using heavy mulch directly under seed-producing plants, as it may block seeds from reaching the soil or delay germination. Additionally, providing consistent moisture and partial shade during seedling establishment supports healthy growth.
Natural spread through self-seeding is a low-maintenance way to expand your bleeding heart population and create a more naturalized garden effect. However, be mindful that self-seeding can sometimes result in seedlings appearing in unintended areas, so monitor seedling growth and thin plants as needed to maintain garden design and plant health.
By promoting self-seeding, gardeners can enjoy a continuously replenished display of bleeding hearts with minimal effort, enhancing the garden’s beauty and biodiversity season after season.
FAQ: Detailed and Helpful Questions About Bleeding Hearts
What is the best time of year to plant bleeding hearts for optimal growth?
The ideal time to plant bleeding hearts is early to mid-spring, after the last frost has passed and the soil has warmed to at least 50°F (10°C). This timing allows the roots to establish during cool, moist conditions, promoting strong growth and abundant blooms. In milder climates, early fall planting is also possible, giving the plants a head start before winter dormancy.
How much sunlight do bleeding hearts need to thrive?
Bleeding hearts prefer partial to full shade, especially in warmer climates. They grow best with morning sun and afternoon shade, which protects their delicate foliage from scorching heat and prolongs bloom longevity. In cooler regions, they can tolerate more sunlight but still benefit from some afternoon shade to prevent leaf stress.
How often should I water bleeding hearts after planting?
Bleeding hearts require consistently moist soil, particularly during their active growing and blooming season in spring. Water deeply once or twice a week, adjusting based on rainfall and temperature. Avoid waterlogging the soil to prevent root rot. During summer dormancy, reduce watering significantly, as the plants naturally require less moisture.
Can bleeding hearts be propagated easily, and what methods work best?
Yes, bleeding hearts can be propagated through division and seeds. Dividing established plants every 3 to 4 years in early spring or fall rejuvenates the plant and increases garden coverage. Growing from seed involves collecting mature seed pods in late summer and sowing them indoors in late winter or directly outdoors in fall for natural cold stratification.
What common pests or diseases affect bleeding hearts?
Bleeding hearts are relatively pest-resistant but may occasionally suffer from aphids, slugs, or snails. Encourage beneficial insects like ladybugs and use organic slug deterrents. Fungal diseases such as powdery mildew or leaf spot can occur in humid, poorly ventilated conditions. Proper plant spacing, watering at soil level, and removing infected foliage promptly help prevent disease spread.
Conclusion
Knowing exactly when to plant bleeding hearts is the foundation for a flourishing spring garden filled with delicate, heart-shaped blooms. By choosing the right planting time, preparing your soil carefully, and providing attentive care throughout the seasons, you can enjoy these timeless perennials year after year. Whether you start from seeds, divisions, or nursery plants, this guide ensures you have the knowledge to make your bleeding hearts thrive and captivate your garden with their unique charm.