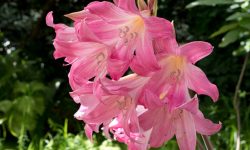
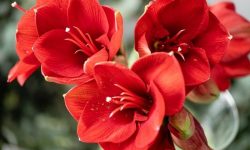
Camellias are among the most captivating flowering shrubs, admired for their glossy evergreen leaves and exquisite blooms that brighten the garden from fall through spring. Whether you dream of a hedge lined with rosy blossoms or a single statement shrub, knowing the perfect planting time is key to long-lasting success. Choosing the right moment ensures your camellia settles comfortably into the soil, develops a strong root system, and rewards you with healthy growth and abundant flowers.
Understanding when to plant camellias can transform your gardening results. Timing varies based on your climate, soil condition, and the variety you select. A well-timed planting not only supports establishment but also protects the plant from stress caused by extreme heat or cold. In this guide, you’ll discover expert insights on ideal planting seasons, soil preparation, care techniques, and climate-specific advice to help your camellias flourish year after year.
Understanding the Camellia Growth Cycle
To know when to plant camellias successfully, it’s essential to understand their natural growth rhythm. Camellias are evergreen shrubs that maintain a steady cycle throughout the year, shifting between root development, leaf production, and flower formation. Even when they appear dormant, camellias continue growing beneath the surface, extending their root systems to prepare for the next bloom. This hidden activity explains why timing is so crucial. Planting during their active growth phase helps the roots settle faster and ensures stronger establishment before harsh weather arrives.
Camellias generally bloom between late fall and early spring, depending on the species and regional climate. During summer, while many other plants rest, camellias are busy forming buds that will burst into color months later. This preparation phase is vital to the plant’s success, as the buds require stable moisture and mild temperatures to mature properly. Once flowering finishes, camellias redirect their energy to produce new leaves and roots. Understanding these transitions allows gardeners to align planting with the plant’s natural needs, promoting steady growth and preventing stress that can hinder flowering.
When planted at the right time, camellias quickly adapt to their environment and build a strong foundation for future growth. Well-established roots help them withstand temperature fluctuations, drought, and transplant shock. Over time, this early advantage translates into lush foliage, abundant blooms, and long-lasting vitality. Recognizing and respecting the natural rhythm of growth, bloom, and renewal provides the foundation for successful planting. By observing this cycle, gardeners can create thriving camellia displays that remain beautiful and resilient year after year, regardless of climate or soil type.
Best Time to Plant Camellias by Season
The best time to plant camellias depends greatly on your climate and the natural balance between soil warmth and air temperature. In most regions, the ideal season is fall. During this period, the soil is still warm from summer, encouraging deep and steady root growth, while the cooler air reduces stress on the young shrub. By planting in fall, gardeners allow camellias to establish roots before winter dormancy, leading to vigorous spring growth. When temperatures rise again, these well-rooted plants are ready to produce glossy new leaves and abundant buds with minimal effort.
In regions that experience freezing winters, early spring can be an excellent alternative for planting. Once the soil has thawed and daytime temperatures remain mild, camellias can safely go into the ground. Planting at this time allows an entire growing season for root establishment before facing another winter. Gardeners should avoid late-spring or summer planting in colder areas, as young camellias may suffer from temperature fluctuations and insufficient root anchoring. Proper timing provides stability, helping the plant focus its energy on growth rather than recovery from environmental stress.
For those living in warmer or subtropical regions, late fall and early winter are the best times to plant camellias. The soil remains consistently warm, and cooler nights prevent heat-related shock. Avoid planting during mid-summer when the intense sun can quickly dehydrate roots and cause wilting. Instead, choose mild, moist seasons to ensure steady development. Matching planting time to local seasonal conditions gives camellias the best chance to thrive, producing stronger roots, healthier foliage, and more radiant blooms year after year.
Regional Planting Guide for Camellias
Planting Camellias in Spring
Spring is a favorable planting season in colder regions where winters are long and harsh. Once the frost has melted and the soil becomes workable, camellias can be safely transplanted into the garden. The gradual warming of the soil encourages steady root growth while the moderate temperatures help minimize transplant stress. This period provides the shrub with several months of mild weather to establish roots before summer’s heat intensifies. By late summer, well-planted camellias often display new leaves and begin forming buds for the next flowering season.
However, spring planting also requires attentive care. As temperatures rise, consistent soil moisture becomes critical. Camellias dislike waterlogged roots, but they also struggle with drought, so maintaining even moisture is key. Adding a layer of organic mulch helps stabilize soil temperature and prevent rapid drying. Shading young plants during the hottest parts of the day reduces leaf burn and supports stronger establishment. When planted carefully and maintained properly, spring camellias adapt quickly, ensuring robust growth and more abundant flowering in future seasons.
Planting Camellias in Fall
Fall is considered the ideal planting season for camellias in most regions. During this time, the soil retains enough warmth to promote root expansion, while the cooler air temperatures reduce stress on new growth. By the time spring arrives, these camellias already have well-developed roots ready to fuel new shoots and buds. The natural rainfall typical of autumn helps keep the soil evenly moist, reducing the need for frequent watering and supporting steady establishment without over-saturation.
In southern and coastal regions, fall planting ensures the best long-term results. The mild temperatures allow camellias to adjust gradually to their environment, preventing the shock caused by sudden temperature shifts. As the plant focuses its energy on building deep roots rather than producing leaves, it develops greater drought tolerance and structural strength. This foundation sets the stage for prolific blooms in the following year. Gardeners who plant camellias in fall often notice earlier flowering and stronger, more resilient shrubs capable of withstanding both cold snaps and summer heat.
Planting Camellias in Winter
Winter planting works best in areas where the ground does not freeze, such as the Deep South, parts of the Pacific Coast, and some subtropical regions. In these locations, the soil remains warm enough to support gradual root growth through the cooler months. Since evaporation rates are lower in winter, the soil retains moisture more consistently, helping camellias settle without risk of dehydration. This steady but slow establishment allows the plant to build strength and adapt before the active growing season begins in spring.
However, gardeners should take care to avoid planting during heavy rain or frost events, as overly wet or frozen soil can restrict root oxygen and cause rot. Selecting a well-draining site, slightly elevated if possible, provides better protection from waterlogging. It’s also important to monitor young plants for wind exposure and use a light mulch to insulate the root zone. When properly managed, winter planting gives camellias an early advantage, resulting in robust shrubs that bloom beautifully and withstand the challenges of seasonal transitions with ease.
Soil Preparation and Planting Conditions for Camellias
Proper soil preparation is one of the most critical factors for successful camellia planting. These shrubs thrive in slightly acidic soil with a pH between 5.5 and 6.5, which allows them to absorb nutrients efficiently. The soil should be rich in organic matter, loose, and well-draining to prevent root rot. Before planting, it’s best to amend the soil with compost, leaf mold, or aged pine bark to enhance structure and fertility. Heavy clay soil can be improved by mixing in coarse sand or peat moss to increase aeration. Taking the time to prepare the soil properly ensures that the camellia’s roots have the ideal environment to spread and strengthen from the start.
Camellias prefer locations that receive morning sunlight and afternoon shade. Harsh afternoon sun can scorch their glossy leaves, while too much shade can reduce flowering. A protected area near trees or buildings that provide filtered light works perfectly. The planting hole should be twice as wide as the root ball but only as deep. Camellias dislike being buried too deeply, as it can cause poor drainage and root suffocation. Positioning the top of the root ball slightly above ground level encourages water to drain away naturally.
After planting, water thoroughly to settle the soil around the roots, then apply a layer of mulch about two inches thick. Mulch keeps the roots cool, maintains even moisture, and prevents weed competition. Avoid piling mulch directly against the stem, as this may cause rot. With proper soil preparation and thoughtful planting conditions, camellias establish more quickly and reward gardeners with lush foliage and consistent, vibrant blooms year after year.
How to Plant Camellias Step by Step
Planting camellias correctly from the beginning lays the foundation for a healthy, long-lived shrub that will reward you with spectacular blooms. Start by selecting a robust plant with deep green leaves and a compact root system. Before planting, water the camellia thoroughly so the root ball is moist and pliable. Dig a hole that is twice as wide as the pot but only as deep. This shape encourages roots to spread outward rather than downward, leading to better stability and nutrient absorption. For clay-heavy soils, mix in organic compost, pine bark, or coarse sand to improve drainage and prevent waterlogging. Proper soil preparation allows air circulation and root development, essential for strong establishment.
Gently remove the plant from its container, taking care not to damage the roots. If the roots are circling the pot, tease them slightly apart to stimulate outward growth. Position the camellia in the center of the hole, ensuring the top of the root ball sits about one to two inches above the surrounding soil. This prevents water from collecting at the base and protects the plant from rot. Refill the hole with the amended soil, pressing it down lightly to eliminate air pockets. Water deeply once the hole is filled to settle the soil and help roots connect with their new environment.
After planting, spread a layer of organic mulch, such as pine needles or shredded bark, around the base, keeping it a few inches from the stem. Mulch helps regulate soil temperature, maintain consistent moisture, and reduce weed competition. Over the following weeks, check the soil regularly to ensure it stays evenly damp but not soggy. With proper planting technique and care, camellias establish quickly and grow into lush, flowering shrubs that enhance your garden for decades.
Watering and Moisture Management for Healthy Growth
Establishing the Right Watering Routine
During the first year after planting, camellias require consistent watering to develop a deep and stable root system. Newly planted shrubs should be watered two to three times per week, depending on soil type and weather. The goal is to keep the soil evenly moist without becoming soggy. Deep watering encourages roots to grow downward, making the plant more drought-tolerant in the long run. Morning watering is best, as it allows foliage to dry during the day, preventing fungal issues. Once the roots are established, watering can be reduced to once per week or when the top few inches of soil feel dry.
In hot or windy conditions, more frequent watering may be necessary, especially for potted camellias. Containers dry out faster than garden soil, so checking moisture regularly is important. Avoid using hard water or heavily chlorinated water, as camellias prefer slightly acidic conditions. Whenever possible, use rainwater or filtered water to maintain a balanced pH. Establishing a careful routine from the start ensures your camellias remain hydrated, resilient, and capable of producing abundant blooms.
Maintaining Soil Moisture and Preventing Stress
Even mature camellias benefit from consistent soil moisture. The best way to retain this balance is through mulching and proper soil management. A two-inch layer of organic mulch such as pine bark, leaf mold, or compost helps regulate soil temperature, reduce evaporation, and suppress weeds. This mulch barrier keeps the root zone cool during summer and insulated during winter. Replenish mulch yearly to maintain its effectiveness and prevent soil compaction. Camellias planted in well-draining, mulched soil are less likely to suffer from stress or yellowing leaves caused by inconsistent watering.
During prolonged dry periods, deep watering every ten to fourteen days helps maintain root health. Use a slow, steady flow of water to penetrate the root zone rather than shallow, frequent watering, which only moistens the surface. Avoid waterlogging, as excess moisture displaces oxygen in the soil and weakens roots. For potted camellias, ensure containers have adequate drainage holes and never allow standing water in saucers. Consistent moisture control not only keeps camellias vigorous but also enhances flowering performance, resulting in glossy leaves and vibrant, long-lasting blooms.
Sunlight and Temperature Requirements for Camellias
Finding the Ideal Sunlight Exposure
Camellias thrive in filtered or dappled sunlight, ideally with bright morning sun followed by gentle afternoon shade. This exposure ensures they receive enough light for strong photosynthesis without suffering from heat damage. In cooler northern climates, camellias can tolerate more direct sun, especially during spring and autumn when temperatures are mild. However, in hotter southern or tropical regions, shielding them from harsh afternoon rays is crucial. Excessive sunlight may cause leaf burn, dry buds, and fading flower color, reducing the plant’s ornamental appeal.
When planting camellias near buildings, fences, or trees, aim for a spot that gets four to six hours of indirect light each day. Avoid areas exposed to intense reflective heat, such as metal walls or paved surfaces. Providing filtered shade through nearby trees creates the perfect microclimate for growth. Camellias in optimal light conditions will form compact, bushy shapes and produce blooms with richer color and longer life. Consistent light balance ensures a thriving plant that displays its natural elegance season after season.
Managing Temperature for Optimal Growth
Camellias prefer mild, temperate climates where daytime temperatures range from 10°C to 25°C. They can tolerate brief cool periods but may struggle in severe cold or intense heat. Prolonged frost can damage flower buds and young shoots, while high summer temperatures can lead to dehydration and stress. Gardeners in colder zones should protect outdoor camellias with frost cloths or move potted ones indoors during freezing nights. In warmer climates, partial shade and good airflow prevent overheating and promote steady development.
Soil temperature stability is equally important. Applying mulch around the base helps insulate roots and maintain consistent moisture, which protects against both cold snaps and heatwaves. Camellias also appreciate moderate humidity, which keeps their leaves supple and reduces stress. Misting leaves occasionally in dry weather restores balance, especially in urban environments with low air moisture. Indoors, avoid placing camellias near heaters or air conditioners that cause extreme temperature swings. Maintaining a stable climate ensures robust root systems, glossy leaves, and blooms that last longer. Healthy temperature management leads to more vibrant, resilient camellias year after year.
Fertilizing Camellias for Strong Roots and Abundant Blooms
Feeding camellias properly plays a crucial role in supporting strong root systems and ensuring a vibrant display of blooms each year. These plants are not heavy feeders, but they do respond well to a balanced and timely fertilization routine. The best period to begin feeding is right after the flowering season in early spring, once the last blooms have faded. At this stage, the plant starts focusing its energy on producing new growth and forming buds for the next blooming cycle. A slow-release fertilizer designed for acid-loving plants such as azaleas or rhododendrons is ideal. It provides steady nutrients while maintaining the slightly acidic soil pH camellias prefer.
When applying fertilizer, it’s essential to distribute it evenly around the drip line rather than close to the trunk. This method ensures that nutrients reach the feeder roots without burning them. After each application, water thoroughly to help nutrients soak into the root zone and prevent salt buildup. During the active growing season from spring to midsummer, camellias can be fed every six to eight weeks. However, gardeners should stop fertilizing by late summer to prevent new, tender growth that might suffer winter damage. Proper timing helps the plant harden off naturally before cold weather arrives.
For gardeners who prefer organic methods, natural fertilizers such as compost, fish emulsion, or cottonseed meal provide excellent nourishment. These amendments gradually enrich the soil, supporting microbial life and improving structure. A layer of organic mulch helps retain moisture and releases nutrients slowly as it decomposes. Combined with consistent watering and appropriate sunlight, regular feeding strengthens the roots and enhances flower production, resulting in healthier, more resilient camellias that bloom profusely year after year.
Protecting Young Camellias After Planting
Young camellias are particularly sensitive during their first year in the ground, and how they are protected at this stage determines their long-term health and flowering potential. Right after planting, the shrub’s main focus is on developing a strong root system rather than producing blooms. This makes it vulnerable to environmental stress such as temperature fluctuations, strong winds, and intense sunlight. To minimize damage, choose a planting spot that offers gentle morning sun and shelter from the afternoon heat. Temporary shading, like garden fabric or mesh screens, can protect young leaves from sunburn while allowing enough light for photosynthesis. In colder areas, a light layer of mulch or frost cloth over the soil helps insulate the roots from freezing temperatures and prevents frost heaving.
Wind protection is equally important, especially in open or exposed gardens. Installing a low windbreak using garden stakes and burlap helps reduce the drying effect of cold or strong winds. Newly planted camellias should also be watered regularly but moderately to maintain consistent soil moisture. Avoid letting the soil dry out completely, as this can cause leaves to drop prematurely. Applying a layer of organic mulch two to three inches thick helps regulate soil temperature and keeps moisture around the roots longer. It also prevents weeds from competing with the young shrub for nutrients.
During the establishment phase, monitor your camellia closely for signs of stress such as yellowing leaves or wilting. These can indicate poor drainage, nutrient deficiency, or sudden temperature change. As the plant matures and roots extend deeper, it becomes much more resilient to environmental variations. By offering early protection and attentive care, gardeners ensure young camellias grow into robust shrubs that produce abundant, long-lasting blooms for years to come.
Pruning Camellias for Shape and Flower Quality
Pruning plays a vital role in maintaining the beauty, structure, and health of camellia plants. When done properly, it encourages new growth, improves air circulation, and promotes abundant flowering in the following season. The best time to prune camellias is immediately after they finish blooming, usually in late winter or early spring, depending on the variety. Pruning too late in the year can remove developing buds and reduce next season’s display. Begin by inspecting the shrub for dead, diseased, or damaged branches and cutting them back to healthy wood. This not only enhances the plant’s appearance but also helps prevent pest infestations and fungal problems.
Once damaged wood has been removed, shape the camellia to create a balanced form. Trim back long, uneven stems to encourage bushier growth and a more compact structure. Use sharp, clean pruning shears to make precise cuts just above a leaf node or outward-facing bud. Avoid heavy pruning, as camellias grow slowly and may take time to recover. Instead, aim for light, regular trimming each year to maintain the plant’s natural shape. If your camellia has become leggy over time, rejuvenation pruning—cutting back older stems gradually over two to three years—can help restore density and vigor without shocking the plant.
Pruning also affects flower quality. By thinning crowded branches, you allow sunlight and air to reach the inner canopy, leading to healthier growth and larger blooms. After pruning, apply a layer of mulch and give the plant a deep watering to support recovery. Consistent, careful pruning ensures camellias remain elegant, well-shaped shrubs that reward you with glossy foliage and stunning flowers season after season.
Preventing Pests and Diseases in Camellias
Healthy camellias begin with prevention rather than treatment. While these shrubs are known for their resilience, they can still fall victim to common pests such as aphids, spider mites, and tea scale. These small insects feed on plant sap, leading to yellowing leaves, distorted buds, and a general decline in vigor. Regularly inspecting your camellias—especially the undersides of leaves—helps detect early signs of infestation. For minor problems, wiping affected areas with a damp cloth or spraying insecticidal soap is usually enough. In cases of larger outbreaks, applying horticultural oil in early spring can eliminate overwintering pests without harming beneficial insects. Consistent observation and timely action are essential to keeping infestations under control.
Fungal diseases are another frequent challenge, particularly in damp or humid environments. Camellia petal blight, leaf spot, and root rot often develop when air circulation is poor or the soil remains too wet. The best preventive strategy is to provide well-draining soil and avoid overhead watering that leaves moisture on the foliage. Space plants far enough apart to encourage airflow, and promptly remove fallen petals or leaves from the soil surface to reduce fungal spore buildup. When necessary, a targeted fungicide can be used, but improving cultural practices remains the most effective way to maintain plant health naturally.
Strong, well-nourished camellias are naturally more resistant to pests and diseases. Balanced fertilization, moderate watering, and proper pruning help strengthen plant defenses and support healthy growth. A layer of mulch around the base prevents soil splashing during rain and limits disease spread. By maintaining a clean, balanced growing environment and responding quickly to early warning signs, gardeners can keep camellias thriving with glossy leaves and flawless blooms year after year.
Common Mistakes to Avoid
Planting Too Deep or Overwatering
Many gardeners unintentionally weaken their camellias by planting them too deeply or watering them too often. Camellias have shallow root systems that require oxygen to thrive. When the root ball is buried below the soil surface, air circulation is restricted, leading to slow growth and potential root rot. The top of the root ball should always sit slightly above ground level to encourage proper drainage. Poorly drained soil also traps excess moisture, suffocating the roots and promoting fungal diseases. The result is yellowing leaves, drooping branches, and poor overall vigor.
Overwatering can be just as harmful as underwatering. Camellias prefer evenly moist soil, not constant saturation. Before adding water, check the top few inches of soil—if it still feels damp, wait a day or two. Planting in raised beds or amending heavy clay with compost or pine bark can improve drainage and prevent waterlogging. During hot months, deep watering once or twice a week is sufficient, allowing roots to grow downward and become more resilient. When soil moisture and planting depth are properly balanced, camellias establish strong roots and reward gardeners with lush foliage and abundant flowers.
Pruning and Fertilizing at the Wrong Time
Pruning and fertilizing mistakes are among the most common causes of poor flowering in camellias. Many gardeners prune late in the year—often in late summer or fall—without realizing that next season’s buds have already formed. Cutting back at this stage removes the developing flower buds, resulting in a disappointing bloom cycle. The best time to prune camellias is right after the flowering season in early spring, allowing enough time for new growth and bud formation. Light, regular pruning helps maintain shape and health without shocking the plant.
Fertilizing too heavily or at the wrong time can also reduce bloom quality. Camellias thrive on a gentle feeding schedule using fertilizers made for acid-loving plants. Overfertilizing leads to salt buildup and encourages leafy growth instead of blossoms. Start feeding in early spring after pruning and stop by midsummer to allow the plant to harden before winter. Using organic fertilizers such as compost or cottonseed meal also improves soil structure and sustains long-term plant health. Proper timing ensures camellias stay balanced, strong, and full of vibrant blooms each year.
FAQ About When to Plant Camellias
When is the best time to plant camellias?
The best time to plant camellias is in early spring or fall when the weather is mild and the soil stays evenly moist. These conditions help roots settle and strengthen before extreme temperatures arrive. In warmer climates, fall planting gives roots time to develop through winter, while in cooler regions, early spring planting ensures steady growth.
How much sunlight do camellias need?
Camellias thrive in bright, indirect sunlight or light morning sun followed by afternoon shade. Too much direct light can burn leaves and shorten bloom life, while deep shade limits flower production. The perfect spot offers dappled sunlight and protection from harsh midday rays, especially in hot climates.
How often should I water newly planted camellias?
Newly planted camellias need regular watering to keep the soil evenly moist but never waterlogged. Deep watering once or twice a week encourages strong root growth. Avoid shallow daily watering, which leads to weak roots. As plants mature, reduce watering but maintain soil moisture during dry or hot periods.
Should camellias be fertilized every year?
Yes, fertilizing camellias yearly helps maintain strong growth and abundant blooms. Feed with a slow-release fertilizer for acid-loving plants right after flowering ends in early spring. Avoid late-season fertilization, as it promotes soft new growth that may be damaged by winter cold.
How can I protect camellias from frost?
Camellias can suffer from frost damage, especially when young. To protect them, apply a thick layer of mulch to insulate the roots and retain soil warmth. Cover plants with frost cloth or burlap on freezing nights, and in very cold regions, plant camellias near walls or sheltered areas for extra protection.
Conclusion
Planting camellias at the right time and giving them proper care ensures years of breathtaking blooms and glossy evergreen beauty. By understanding their seasonal needs, soil preferences, and sunlight requirements, gardeners can create the ideal environment for healthy growth. Timely pruning, balanced fertilizing, and protection from pests further enhance their vigor and flower quality. Whether planted in spring or fall, camellias reward patience and attention with elegant blossoms that brighten gardens season after season. With thoughtful planting and consistent care, these timeless shrubs can flourish for decades as living symbols of grace and resilience.