There’s something magical about watching a clematis vine awaken with the season—first with tender green shoots, then a cascade of breathtaking blossoms climbing skyward. Whether it’s the romantic pastels of spring or the deep purples of late summer, clematis adds a poetic charm to any garden. But to witness that lush, colorful display, timing is everything. Knowing exactly when to plant clematis can be the key to unlocking its full potential.
This guide is your companion to planting clematis at the perfect moment for your climate, your variety, and your garden dreams. Whether you’re a first-time grower or a seasoned green thumb, you’ll discover how the right timing can turn a simple vine into a showstopping garden masterpiece—season after season.
Understanding Clematis and Its Growth Cycle
What Makes Clematis a Garden Favorite
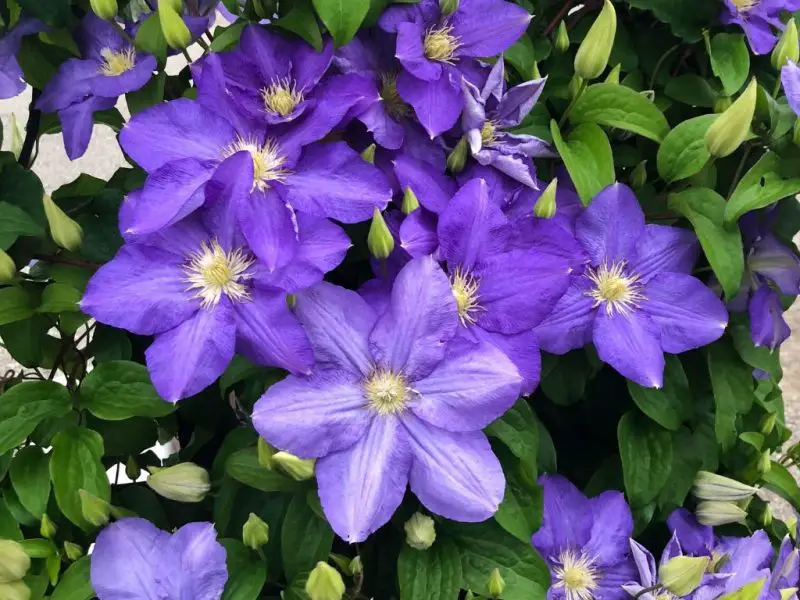
Clematis is more than just a flowering vine—it’s a symbol of elegance, resilience, and seasonal transformation. With over 300 species and countless hybrids, clematis offers something for every gardener. Its blossoms range from delicate bell shapes to large, star-like flowers in shades of violet, white, pink, and even deep burgundy. Some varieties bloom early and fade before summer heat sets in, while others save their grand performance for late summer or early fall. This diversity in appearance and timing makes clematis a beloved choice for adding vertical beauty to garden structures like trellises, fences, and arches.
Beyond its visual appeal, clematis is also admired for its adaptability. It can thrive in both formal landscapes and wild cottage gardens, provided it has the right conditions and support. Though often viewed as a “fussy” plant, clematis is surprisingly hardy when properly planted and cared for, rewarding patience with spectacular results.
How Clematis Grows Throughout the Year
To plant clematis successfully, it’s essential to understand how its life cycle aligns with the seasons. The year begins with dormancy in winter, when clematis rests beneath the soil, conserving energy for the growing months ahead. As spring temperatures rise, clematis awakens—new shoots emerge from the crown, followed by vigorous leaf and stem growth.
Flowering typically begins in late spring or early summer, depending on the variety. Some clematis bloom on old wood from the previous year, while others bloom on new wood grown during the current season. After flowering, the plant may continue to grow or enter a second blooming phase in late summer, especially in reblooming types.
By fall, growth slows as the vine begins to prepare for dormancy. Energy is redirected from the leaves and stems back to the roots. When planted at the right time, clematis follows this cycle naturally, allowing it to establish strong roots, produce healthy foliage, and ultimately reward the gardener with abundant blooms year after year.
The Best Time to Plant Clematis by Season
Why Spring Planting Is Ideal
Spring is widely considered the best time to plant clematis, especially in regions with cold winters. Planting in early to mid-spring allows the vine to settle in while the soil is warming and moisture is still relatively abundant. During this period, roots can develop deeply and strongly before the heat of summer arrives.
Spring planting also aligns well with the clematis’s natural growth cycle. As the plant breaks dormancy and begins to grow, it can simultaneously adapt to its new environment, making for a smooth transition and healthy development throughout the growing season.
Planting in Fall for Certain Varieties and Climates
Fall is another excellent time to plant clematis, especially in regions with mild winters. The soil remains warm even as the air cools, which supports root development. Planting clematis in early fall gives the roots time to become established before winter dormancy sets in.
Fall planting is particularly beneficial for large-rooted, woody varieties that may take longer to adjust. These plants often bloom stronger in the following spring, having had several months to develop underground.
Summer and Winter Planting: What to Consider
While spring and fall are preferred, planting in summer is possible with careful attention to watering and shading. Summer-planted clematis needs consistent moisture and may benefit from mulch or a temporary shade cover to protect it from intense heat. Avoid transplanting during the hottest weeks of summer if possible.
Winter planting is generally discouraged unless you live in a frost-free climate. Frozen ground and low soil activity hinder root establishment and can damage young plants. If winter is your only option, consider planting in containers and transplanting outdoors in early spring.
Choosing Clematis Varieties Based on Planting Time
Matching Bloom Time with Planting Season
One of the most important considerations when deciding when to plant clematis is the type of clematis you’re growing. Different varieties have different blooming schedules and root development needs, which makes planting time especially critical for long-term success. Understanding your clematis’s bloom group—early, mid-season, or late—can guide you toward the best planting window to ensure healthy establishment and vibrant flowering.
Early bloomers, which tend to flower on old wood, often benefit from fall planting in warmer climates where winter temperatures don’t drop too low. This allows them to settle in and take root before producing their first flush of spring flowers. In contrast, late bloomers that flower on new growth generally do better when planted in spring, giving them the full season to establish and grow before blooming later in the year.
Group Classifications and Their Role in Timing
Clematis varieties are commonly grouped into three pruning groups, and these also help determine ideal planting times. Group 1 varieties, which bloom early in the season, respond well to fall planting and minimal pruning. Group 2 clematis, which bloom in spring and again in late summer, can be planted in either spring or fall, though early spring gives them a stronger start. Group 3 clematis, the late bloomers, prefer spring planting and a hard prune in early spring to encourage lush, new growth.
Choosing the right variety for your climate and aligning it with the proper planting season will not only improve your clematis’s health and bloom quality but also reduce the risk of transplant shock and delayed flowering. By matching your planting schedule to your chosen variety’s growth habits, you create the best possible conditions for clematis to flourish from its very first year.
Regional Planting Considerations for Clematis
Cold Climates (Zones 3–6)
In regions with harsh winters and short growing seasons, plant clematis in early to mid-spring, after the last frost. Fall planting is risky due to freeze-thaw cycles that can damage young roots. Use mulch to insulate the base and choose hardy varieties suited to cold tolerance.
Mild Climates (Zones 7–9)
Gardeners in temperate zones can plant clematis in early spring or early fall. Fall planting works well here, as the soil stays warm enough for root development. Ensure good drainage during rainy months to prevent root rot.
Hot and Arid Climates (Zones 9–11)
In dry, hot regions, early spring is the safest planting time to avoid summer stress. Provide afternoon shade, mulch heavily, and water consistently during the establishment period. Avoid planting in peak summer heat.
By aligning planting time with your local climate, you’ll give clematis the best conditions to root deeply, grow vigorously, and bloom reliably.
Soil and Site Preparation Before Planting
To help clematis thrive, start by preparing loose, well-draining soil enriched with organic matter. Clematis roots need both air and moisture, so if your soil is clay-heavy, mix in compost, leaf mold, or aged manure to improve drainage and texture. Sandy soils should be amended to better retain moisture. The ideal soil pH is between 6.5 and 7.0—close to neutral. A simple soil test can reveal if you need to adjust pH with lime or sulfur before planting.
Even moisture is crucial, especially during the first growing season. Water deeply after planting and apply a 2- to 3-inch layer of mulch to keep the soil cool and reduce evaporation. Make sure the mulch doesn’t touch the main stem to prevent rot.
Clematis prefers “sunny tops and shady feet.” Choose a location that receives at least six hours of sunlight daily, but shade the base with mulch, flat stones, or low-growing plants. This balance encourages strong vine growth and abundant blooms.
Lastly, clematis is a natural climber. Install a trellis, fence, or arbor before planting so the vine can begin training upward immediately. A well-prepared soil bed and thoughtful site selection create the conditions clematis needs to establish quickly and grow into a stunning vertical centerpiece.
How to Plant Clematis for Best Results
Begin by selecting a well-drained, sunny location where your clematis can receive at least six hours of direct sunlight daily. While the vine loves sun, its roots prefer cool, shaded conditions—so plan to mulch the base or surround it with low-growing plants to protect the root zone from heat stress.
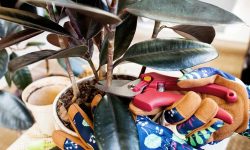
Prepare the planting hole by digging twice as wide and slightly deeper than the pot. Mix compost or aged manure into the soil to improve drainage and fertility. Remove the plant from its container carefully, keeping the root ball intact. Gently loosen the roots if they are circling tightly, but avoid disturbing them too much.
Position the clematis in the hole so that the crown—the point where the stem meets the roots—is buried 5 to 8 centimeters below the soil surface. This helps prevent clematis wilt and encourages the development of additional shoots from below ground.
Backfill with soil, firm gently, and water deeply to eliminate air pockets. Install a trellis or support structure immediately to avoid damaging young stems later. As the vine begins to grow, loosely tie new shoots to the support to encourage upward growth and proper structure.
By giving attention to placement, soil preparation, depth, and early support, you provide your clematis with the ideal foundation for vigorous, healthy growth and a long-lasting display of beautiful blooms.
How to Transition Nursery Clematis to Your Garden
Acclimating Clematis to Outdoor Conditions
When purchasing clematis from a nursery or garden center, the plant has likely been grown in a controlled environment with filtered sunlight, stable temperatures, and consistent moisture. Before planting it directly into the garden, it’s essential to “harden off” the plant. Start by placing the clematis outdoors in a sheltered, shady spot for a few hours each day, gradually increasing sun exposure and outdoor time over the course of 7 to 10 days. This process prevents transplant shock and leaf scorch, especially if the plant has been kept indoors or in a greenhouse.
Handling the Root Ball with Care
Clematis roots are delicate and dislike disturbance. When removing the plant from its container, gently squeeze the sides of the pot and tilt it out carefully, keeping the root ball intact. Avoid pulling the stem, and do not break apart or overly loosen the roots unless they are tightly root-bound. If the roots are circling the bottom, lightly tease them outward without damaging the structure.
Timing and Planting Tips
Choose a cool, overcast day or plant in the early morning or late afternoon to reduce transplant stress. Dig a hole large enough to accommodate the entire root ball with room to amend the surrounding soil. As with all clematis, bury the crown of the plant 5 to 8 cm (2 to 3 inches) below soil level to promote new shoots and protect against clematis wilt.
Water thoroughly after planting, and maintain even soil moisture over the next few weeks. Keep the base mulched and shaded while ensuring the top of the vine receives full sun. With careful handling and gradual acclimation, your nursery clematis will adapt smoothly to its new garden home and thrive for years to come.
Common Mistakes to Avoid When Planting Clematis
Planting Too Shallow
One of the most common mistakes is planting clematis at the same depth as in the nursery pot. This leaves the crown exposed and vulnerable to clematis wilt. Always plant 5 to 8 cm (2 to 3 inches) deeper than the original soil line to protect the crown and encourage new shoots.
Poor Location Choice
Clematis needs at least six hours of sunlight but prefers its roots cool and shaded. Planting in deep shade or full exposure without ground-level protection leads to weak vines and poor flowering. Choose a sunny spot with root-zone shade or mulch.
Inadequate Support
Delaying the installation of a trellis or climbing structure forces the vine to sprawl or tangle. Always provide support at planting time to guide upward growth and prevent damage to delicate stems.
Overwatering or Poor Drainage
Soggy soil suffocates roots and leads to rot. Avoid planting in low spots or heavy clay without amending the soil. Clematis prefers moist, not wet, soil—water deeply but infrequently.
Skipping Early Pruning
Failing to prune after planting can lead to a tall, leggy vine with few shoots. Cutting the plant back to about 30 cm (12 inches) in the first year encourages branching, fuller growth, and better long-term structure.
Avoiding these common errors gives clematis the best chance to establish quickly and bloom abundantly for years to come.
Tips to Help Clematis Thrive After Planting
Keep the Roots Cool and Moist
Clematis loves sunlight on its vines but dislikes hot roots. After planting, apply a generous layer of organic mulch around the base, or plant low-growing companion plants like hostas or marigolds to shade the root zone. This helps maintain steady moisture and temperature.
Train Early, Support Strongly
As new shoots emerge, gently guide them toward your trellis or support structure. Tie stems loosely with soft garden ties to avoid breakage. Training early prevents tangles and encourages upward growth that supports better flowering.
Feed Wisely
Once established, begin feeding with a balanced, slow-release fertilizer in early spring, followed by monthly applications of diluted liquid fertilizer during the growing season. This supports strong vine development and abundant blooms.
Prune According to Type
Proper pruning ensures better shape, airflow, and bloom performance. Learn your clematis group—some bloom on old wood, others on new. Prune lightly after planting to encourage branching, then follow specific guidelines in subsequent seasons.
Monitor for Stress Signs
Wilting, yellowing leaves, or stunted growth may indicate watering issues, transplant shock, or clematis wilt. Act quickly—adjust watering, provide shade, and remove infected parts if needed. Healthy clematis bounce back fast with the right care.
With consistent attention in the first season—shade, structure, nutrients, and gentle training—your clematis will reward you with lush vines and radiant blooms for years to come.
Frequently Asked Questions About Planting Clematis
When is the absolute best time to plant clematis?
The best time to plant clematis is in early spring or early fall, depending on your climate. Spring planting gives the vine a full season to establish before winter, especially in colder regions. In warmer zones, early fall planting takes advantage of lingering soil warmth, allowing roots to settle before dormancy.
Can I grow clematis in a container, or does it need to be in the ground?
Yes, clematis can grow beautifully in large containers—just make sure the pot is deep (at least 18 inches), has excellent drainage, and is filled with rich, loamy soil. Container-grown clematis may need more frequent watering and seasonal feeding, but with the right care, it will thrive and bloom just as spectacularly as in-ground vines.
How long will it take for my newly planted clematis to bloom?
Most clematis will take one full growing season to establish and begin blooming in their second year. Some vigorous varieties may offer light blooms in the first season, but the real floral show often begins in year two or three as roots deepen and shoots multiply.
Should I prune my clematis right after planting?
In most cases, yes—especially if you want to encourage multiple stems and a fuller vine. After planting, trim the top growth back to about 12 inches to stimulate new shoots from the base. This light pruning in the first year sets the stage for a stronger, more shapely plant in the future.
How do I protect my clematis from wilting or sudden dieback?
Clematis wilt can be sudden, causing entire stems to collapse. To prevent it, plant your clematis slightly deeper than its original pot, keep the base shaded, ensure good air circulation, and avoid overhead watering. If wilt does occur, cut the affected stem back to healthy tissue—your plant may bounce back quickly if the roots are well established.
Conclusion
Knowing when to plant clematis can make the difference between struggling vines and a garden filled with lush, vibrant flowers. By aligning planting time with your region’s climate, soil conditions, and clematis variety, you’ll give your vine the best start possible. Whether you plant in spring for a full growing season or take advantage of fall’s lingering warmth, the key is careful timing, thoughtful site preparation, and early-season care. With these strategies, your clematis will thrive and reward you with spectacular vertical displays year after year.