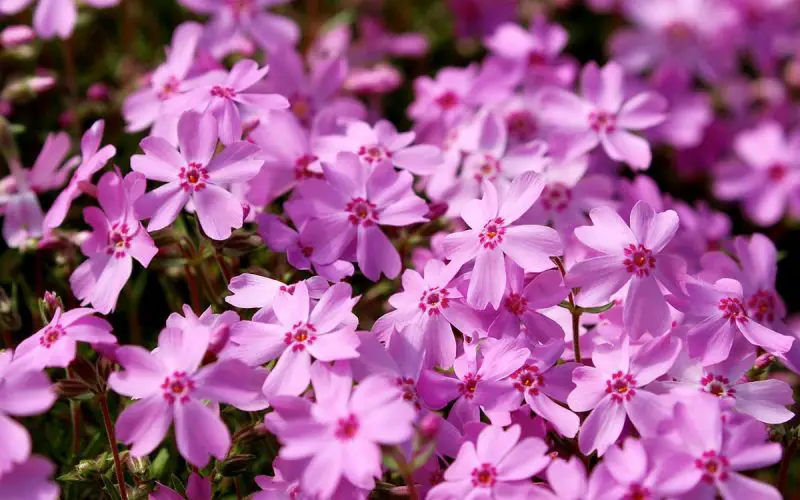
Creeping phlox (Phlox subulata) is a beloved perennial ground cover known for its vibrant, low-growing blooms and carpet-like spread. Native to the eastern and central United States, it thrives in rock gardens, along borders, and across slopes. With its ability to form dense mats of color in early spring, creeping phlox is often used to add seasonal interest and curb appeal to gardens. Its popularity stems not only from its beauty but also from its resilience, low maintenance, and effectiveness in erosion control.
Understanding the best time to plant creeping phlox is essential for establishing a healthy, long-lasting display. Timing affects root development, flowering performance, and the plant’s ability to withstand temperature fluctuations. This comprehensive guide explores the ideal planting windows by region and season, soil and climate considerations, and expert tips to ensure lush, continuous ground cover.
Understanding Creeping Phlox Growth Habits
Creeping phlox (Phlox subulata) is a low-growing perennial beloved for its dense, spreading habit and abundant spring blooms. This plant typically grows to a height of 4 to 6 inches but can spread outward up to 2 feet or more. It forms a mat-like carpet over time, with trailing stems that root at the nodes when they touch soil. This characteristic allows it to expand quickly and fill in gaps between rocks, along garden borders, or over slopes.
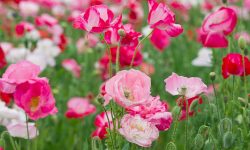
Each stem is covered in needle-like evergreen foliage that provides year-round texture, even after the blooms have faded. In early to mid-spring, creeping phlox transforms into a vivid floral tapestry, blanketing the ground with masses of pink, purple, blue, or white flowers depending on the variety. The flowers attract pollinators like bees and butterflies, making it not only a visually appealing plant but also a beneficial one for supporting biodiversity.
Because of its low profile and spreading habit, creeping phlox is excellent for erosion control and weed suppression. It performs best when given space to spread horizontally, which means proper spacing during planting is essential to take full advantage of its natural growth form. Understanding its behavior helps gardeners plan for long-term ground coverage and ensures it thrives without becoming overcrowded.
Best Time to Plant Creeping Phlox by Season
Planting in Spring
Spring is often considered the best time to plant creeping phlox, particularly in colder regions. As soil begins to warm, it encourages root development before the flowering phase. Planting in early to mid-spring allows the roots to take hold before the hot summer temperatures arrive. This timing is ideal for those who want to see some flowers during the same growing season.
Newly planted creeping phlox may produce fewer flowers during its first spring, focusing energy on root establishment. However, by the following season, you can expect a fuller, more vibrant display.
Planting in Fall
Fall is another excellent time to plant creeping phlox, especially in warmer climates. As temperatures cool and rainfall increases, plants experience less transplant shock and have ample time to develop a strong root system before winter dormancy. Aim to plant at least six weeks before the first expected frost to give the plants time to settle in.
In zones with mild winters, fall planting can offer a head start on spring blooming and reduce the need for watering. It also minimizes weed competition and allows gardeners to focus on other spring chores without worrying about new plantings.
Avoiding Summer Planting
Summer is generally not recommended for planting creeping phlox due to high temperatures and increased risk of transplant shock. The intense heat and potential drought conditions can stress young plants before roots are well established. If summer planting is unavoidable, extra care must be taken to keep the soil consistently moist and to provide some temporary shade during the hottest parts of the day. Early morning or late evening planting is preferable to reduce heat stress, and mulching around the base of the plants can help retain soil moisture and regulate temperature. It’s also helpful to monitor the plants daily for signs of wilting or sunscald.
Winter Considerations
In most regions, planting during winter is not advisable due to frozen ground and low biological activity in the soil. However, gardeners in USDA zones 8 and above, where winters are mild, may still be able to plant creeping phlox during warm spells, provided the soil is workable and not saturated. Winter planting requires close attention to weather forecasts to avoid sudden cold snaps after planting. Using frost cloths or cold frames can offer protection for newly planted creeping phlox. It’s also important to ensure that winter soil drainage is excellent to prevent root rot, which is more likely when plants sit in cold, wet soil for extended periods.
Regional Planting Guidelines for Creeping Phlox
Northern Climates (Zones 3–5)
In cooler northern regions, spring planting is the most reliable option. Wait until the soil has thawed and is workable, typically from April to early May. This gives the plants ample time to establish roots before summer. Fall planting can be risky if an early frost hits, as creeping phlox may not have enough time to settle in. Additionally, gardeners should ensure the planting site receives full sun exposure and is well-drained, as cold, wet soil can increase the risk of root rot. Applying a layer of mulch after planting can also help moderate soil temperatures and retain moisture during unexpected cold snaps.
Central Climates (Zones 6–7)
Gardeners in these zones enjoy more flexibility. Both spring and fall are suitable planting times, with fall having the advantage of cooler weather and increased rainfall. Planting from late September through October allows roots to develop before the ground freezes. In spring, aim to plant in March or early April to avoid late-season heat. Since creeping phlox thrives in slightly acidic to neutral soil, testing and adjusting soil pH can further enhance growth. Using compost during planting improves soil structure and nutrient availability, giving young plants a stronger start.
Southern Climates (Zones 8–10)
In warmer regions, fall planting is ideal, as it avoids the intense summer heat. Plant from October to early December, allowing the creeping phlox to become established over the mild winter. Spring planting is still possible, but it should be done as early as possible, typically in February or March, before temperatures rise significantly. In these zones, it’s crucial to monitor soil moisture and avoid letting it dry out too quickly. Providing morning sun with some afternoon shade can also help protect the plants from heat stress. Mulching with organic material will help keep the root zone cooler and reduce evaporation, which is particularly important during hot spells. Regular irrigation may be necessary during dry winters or early spring.
Soil Preparation and Site Selection
Creeping phlox thrives in well-drained, moderately fertile soil with a pH between 6.0 and 7.0. Choose a sunny spot that receives at least six hours of direct sunlight daily. While it can tolerate some shade, full sun promotes denser foliage and more vibrant blooms.
To prepare the site, clear away weeds, rocks, and debris. Loosen the soil to a depth of 6 to 8 inches using a shovel or garden fork. Mix in organic matter like compost, aged manure, or peat moss to enhance soil texture, drainage, and nutrient content.
If you have heavy clay soil, add coarse sand or small gravel to improve drainage and prevent root rot. For sandy soils, additional compost will help retain moisture. Creeping phlox also adapts well to raised beds, rock gardens, and slopes where water drains naturally.
Avoid planting in low-lying areas with poor drainage, as waterlogged soil leads to disease. Good soil preparation and proper site selection are key to healthy root growth, strong plants, and abundant flowering.
How to Plant Creeping Phlox for Best Results
To achieve the most vigorous growth and eye-catching blooms, it’s important to plant creeping phlox with care and precision. Begin by choosing healthy nursery plants or divisions with well-developed roots. Space each plant 12 to 18 inches apart, allowing room for the low-growing stems to spread and form a dense carpet over time.
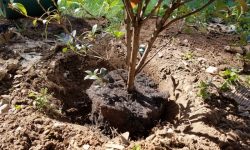
Dig a hole twice as wide and slightly deeper than the root ball. Loosen the roots gently if they’re pot-bound to encourage better root expansion into the surrounding soil. Position the plant so that the crown—the area where the stems meet the roots—is level with or just slightly above the soil line to prevent rot.
Backfill the hole with a mix of native soil and compost, firming it gently to eliminate air pockets. Water thoroughly after planting to help the soil settle and to ensure immediate root-to-soil contact. Continue to water regularly for the first few weeks, especially during dry spells, until the plants are well established.
To suppress weeds and retain moisture, apply a light layer of mulch around the base of the plants. However, keep mulch away from the crown to avoid fungal problems. In mass plantings or on slopes, stagger plants in a zigzag pattern for better ground coverage and a more natural look.
Planting in the early morning or late afternoon helps reduce transplant stress, especially during warmer weather. With the right planting technique, creeping phlox will quickly take root and begin forming a lush, flower-covered mat that enhances your garden year after year.
Caring for Creeping Phlox After Planting
After planting, consistent care ensures creeping phlox establishes quickly and thrives. Water deeply once or twice a week during the first month, allowing the soil to dry slightly between waterings. Once established, creeping phlox becomes drought-tolerant and only needs supplemental water during prolonged dry periods.
Keep the area weed-free, especially while the plants are young, as weeds compete for nutrients and space. Apply a thin layer of mulch to conserve moisture and prevent weed growth, but keep it clear of the plant crown to avoid rot.
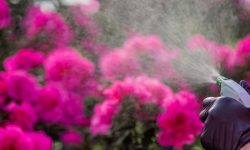
Fertilize lightly in early spring with a balanced, slow-release fertilizer to support lush growth and vibrant blooms. Avoid overfeeding, as excessive nitrogen can reduce flowering and encourage leggy growth.
If flowering slows or the center of the plant becomes woody, shear back spent blooms and trim the foliage by one-third after flowering to promote a compact shape and encourage a second flush of growth. Regular care keeps creeping phlox dense, healthy, and colorful season after season.
Troubleshooting Common Planting Challenges
Poor Blooming
When creeping phlox fails to bloom as expected, several environmental factors may be responsible. Most often, poor flowering is linked to inadequate sunlight—creeping phlox needs full sun for at least 6 hours daily to produce abundant blooms. If planted in partial shade, consider relocating to a sunnier site. Poor soil drainage can also hinder blooming by stressing the roots; overly wet soil prevents healthy development and flower production. Additionally, excessive use of nitrogen-rich fertilizers can lead to lush foliage at the expense of blooms. Use a balanced or low-nitrogen fertilizer in early spring to encourage flowering instead of leaf growth.
Yellowing Foliage
Yellowing leaves are often a sign of excess moisture or poor soil aeration. Creeping phlox prefers well-drained soil and may struggle in heavy clay or compacted areas where water collects. If drainage is an issue, amend the soil with organic matter or raise the planting bed slightly. Avoid overwatering, especially after the plant is established. Also, check that mulch is not piled against the crown of the plant, which can trap moisture and lead to rot and discoloration.
Sparse Growth
If your creeping phlox develops sparse or leggy growth, it could be due to overcrowding, poor air circulation, or lack of pruning. As the plant matures, the center may become woody and less vigorous. Rejuvenate it by trimming back stems after flowering and removing any dead or weak areas. For best long-term performance, divide older plants every 2 to 3 years in early spring or fall. This not only stimulates new growth but also helps prevent disease and encourages fuller, denser coverage across the garden bed. Regular maintenance leads to a more vibrant, compact, and resilient ground cover.
Companion Planting Ideas for Creeping Phlox
Creeping phlox is a versatile ground cover that pairs well with many garden plants to create a vibrant and layered landscape. Its dense, mat-forming habit and early spring blooms make it a perfect partner for spring-flowering bulbs like tulips, daffodils, and crocuses. As these bulbs push up through the phlox, the combination offers a colorful and eye-catching display. For continued seasonal interest, consider pairing creeping phlox with taller summer-blooming perennials such as coneflowers, black-eyed Susans, salvia, or coreopsis. These upright plants contrast nicely with the low-growing phlox and extend the bloom season into summer.
Evergreen shrubs like dwarf boxwood, creeping juniper, or compact holly varieties add year-round structure and complement the texture of phlox foliage. To create ground-level diversity, mix creeping phlox with other low-growing, spreading plants such as sedum, ajuga, or thyme. These companions can fill in gaps, improve visual variety, and support soil retention on slopes or uneven terrain.
In pollinator-friendly gardens, surrounding creeping phlox with nectar-rich plants like bee balm, lavender, catmint, or alliums helps attract bees, butterflies, and other beneficial insects. When arranged thoughtfully, these combinations not only enhance the beauty of your garden but also promote biodiversity and healthy plant growth.
Long-Term Maintenance Tips for a Thriving Ground Cover
To keep creeping phlox healthy, vibrant, and dense over the years, consistent care is essential. Start by lightly shearing the plants back after flowering. This not only tidies up the appearance but also encourages a fuller shape and may lead to a second, lighter bloom in some climates. Removing spent flowers prevents seed formation and redirects the plant’s energy into vegetative growth, which helps maintain a lush ground cover.
Every two to three years, divide and replant overcrowded sections in early fall or spring. This rejuvenates older clumps, prevents thinning at the center, and expands your garden coverage with healthy offshoots. Mulching around the plants annually with a thin layer of organic material helps retain soil moisture, suppress weeds, and improve soil quality—just be careful not to cover the crowns of the plants to avoid rot.
Inspect regularly for signs of pests, disease, or overcrowding. While creeping phlox is relatively low-maintenance, dense growth can sometimes lead to mildew or root rot in overly damp or shaded areas. Ensure good air circulation and drainage by thinning out plants when needed and avoiding overwatering. Fertilizing lightly in early spring with a balanced, slow-release fertilizer can promote robust growth, but avoid excessive feeding, which may reduce blooming.
With thoughtful upkeep, your creeping phlox will continue to form a vibrant carpet of color and foliage that enhances your landscape year after year.
FAQ About When to Plant Creeping Phlox
When is the best time to plant creeping phlox?
The best times to plant creeping phlox are in early spring or early fall, when temperatures are cooler and rainfall is more consistent. Planting in spring allows the roots to establish before summer heat, while fall planting gives the plant time to settle in before winter. Avoid planting during extreme temperatures, such as the peak of summer or right before a hard frost.
How much sunlight does creeping phlox need to bloom well?
Creeping phlox thrives in full sun, needing at least 6 hours of direct sunlight daily to produce its signature vibrant carpet of flowers. In areas with intense summer heat, it may benefit from light afternoon shade, but too much shade will reduce flowering and cause leggy, weak growth. For maximum bloom and dense foliage, prioritize a bright, open planting site.
How often should I water creeping phlox after planting?
After planting, water creeping phlox regularly for the first few weeks to help roots establish—typically two to three times per week, depending on weather and soil type. Once established, it becomes moderately drought-tolerant and usually only needs watering during prolonged dry spells. Always water at the base and avoid soaking the foliage to prevent mildew and rot. Well-draining soil is essential to avoid soggy roots.
Can creeping phlox be grown in containers or rock gardens?
Yes, creeping phlox is an excellent choice for containers, raised beds, and rock gardens. Choose a wide, shallow container with drainage holes and use a gritty, well-draining potting mix. Place the container in a location that receives full sun. Container-grown phlox may need more frequent watering than ground-planted ones. In rock gardens, make sure the soil doesn’t retain water and avoid planting in depressions where moisture collects.
What should I do if my creeping phlox becomes sparse or stops blooming?
Sparse growth or reduced flowering can result from overcrowding, aging plants, nutrient imbalance, or lack of sunlight. To revitalize it, divide the clumps every 2 to 3 years in early spring or fall. Trim back old or leggy stems after flowering to encourage bushier growth. Feed the plants with a balanced, low-nitrogen fertilizer in early spring. Ensure the site gets full sun and that the soil drains well to avoid stress that can hinder blooming.
Conclusion: Timing Is Key to Creeping Phlox Success
Knowing when to plant creeping phlox can make the difference between a struggling patch and a breathtaking carpet of color. Whether you plant in spring or fall depends on your region, but ensuring proper soil, sunlight, and care is universally important.
With the right timing and preparation, creeping phlox will reward you with years of beauty, erosion control, and seasonal charm. Plan ahead, choose your moment wisely, and enjoy the lush ground cover that only creeping phlox can provide.