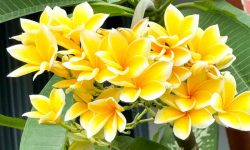
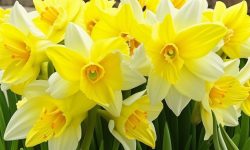
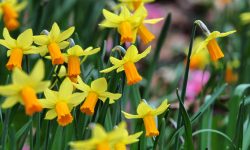
Crocosmia bulbs bring bold color and striking form to summer gardens. Known for their sword-shaped leaves and arching flower stems, these bulbs add elegance and vibrant energy. Timing plays a key role in their success. Planting too early or too late can affect sprouting and reduce flowering potential. With proper timing, these bulbs transform any garden into a vivid display of fiery orange, red, and yellow blooms.
Understanding when to plant crocosmia bulbs is essential for gardeners who want reliable growth and stunning flowers. Climate, soil warmth, and frost dates all influence the planting schedule. With the right knowledge, you can ensure your bulbs thrive and bloom at their peak. This guide provides detailed seasonal advice, practical tips, and expert insights to help you enjoy long-lasting summer color.
Understanding Crocosmia Bulbs

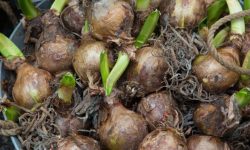
Crocosmia bulbs, also known as corms, are unique underground storage structures. Unlike traditional bulbs with layered scales, corms are solid and renew themselves yearly. Each new corm forms above the old one, creating a vertical chain underground. This natural stacking habit allows the plant to multiply, resulting in dense clusters of striking blooms over time. Understanding this cycle helps gardeners manage spacing and long-term growth.
The foliage plays a critical role in bulb health. Sword-shaped leaves gather sunlight and produce food for the corm, ensuring energy for next season’s flowers. After flowering, the leaves continue to work, even as blooms fade. Gardeners should allow foliage to die back naturally rather than cutting it prematurely. This process stores essential nutrients in the corm and strengthens future flowering. When cared for properly, crocosmia plants deliver vigorous growth and vibrant summer displays.
Crocosmia bulbs thrive in sunny locations with well-draining soil. They tolerate light shade but bloom best under full sunlight. While hardy, they dislike excessive moisture, which can cause rot. In colder regions, mulching or lifting bulbs protects them from freezing. In warmer climates, they can remain in the ground, spreading naturally each year. These bulbs are low maintenance yet rewarding, providing long-lasting color and attracting pollinators like hummingbirds and butterflies. With knowledge of their structure, needs, and resilience, gardeners can cultivate crocosmia successfully for years of beauty.
The Importance of Timing for Crocosmia Planting
Planting time has a direct impact on the success of crocosmia bulbs. These plants rely on seasonal cues to begin active growth. If placed in the ground too early, the bulbs remain dormant in cold soil. This exposes them to excessive moisture, which can trigger rotting before roots emerge. If planted too late, the shortened season reduces root growth and delays flowering. Proper timing gives bulbs the foundation they need to establish quickly and bloom strongly.
Soil warmth is the best signal for planting crocosmia. The soil should be at least 55°F for consistent sprouting. Gardeners often find this temperature in mid or late spring, once the danger of frost has passed. Waiting for this period allows bulbs to transition smoothly from dormancy into active growth. They send up foliage, strengthen corms, and prepare for summer blooms. Planting within this window ensures reliable results, especially when combined with healthy soil and steady watering.
Correct timing also influences future flowering. Bulbs that establish well in their first season build energy reserves for the following year. When planted late, shoots appear weak and blooms may be sparse. Some plants even skip flowering altogether until the next cycle. In contrast, bulbs planted at the right time grow stronger, resist disease, and expand naturally over the years. Paying attention to timing protects both the immediate display and long-term performance. With good planning, crocosmia becomes a dependable source of color each summer.
The Importance of Timing for Crocosmia Planting
Timing is one of the most critical factors in successfully growing crocosmia bulbs. Planting too early in cold, wet soil can cause the bulbs to rot before they have a chance to establish, while planting too late may shorten the growing season and reduce the chances of blooms. The bulbs need consistently warm soil and adequate daylight to encourage sprouting, making spring the most favorable time in many regions. Aligning the planting schedule with seasonal conditions ensures that the bulbs settle into the soil at just the right stage for optimal root and foliage development.
Planting crocosmia at the proper time also determines the vigor and quantity of its blooms. When bulbs are placed in the ground during their natural growth cycle, they can build enough energy reserves for tall flower spikes and vibrant colors. Late planting often results in stunted growth or fewer flowers because the bulbs do not have enough time to establish before the summer heat. In areas with harsh winters, timing also matters for survival. Planting too close to the cold season increases the risk of frost damage, which can kill tender shoots before they emerge.
Beyond survival and flowering, proper timing influences the long-term health of crocosmia clumps. When bulbs are given a full season to grow, they multiply more effectively and produce stronger corms for future years. This natural expansion leads to fuller plantings and more dramatic displays with minimal replanting required. Conversely, bulbs planted at the wrong time may remain weak and fail to naturalize. Gardeners who pay attention to seasonal cues—such as soil warmth, frost dates, and regional climate—are rewarded with healthier plants and longer-lasting floral displays year after year.
Best Soil and Location for Crocosmia
Choosing the Right Soil for Crocosmia
Soil quality directly impacts the health and flowering potential of crocosmia bulbs. These plants dislike sitting in heavy, compacted soil where moisture lingers too long. Constant wetness often leads to bulb rot, a common issue for gardeners who overlook drainage. The ideal soil type is sandy loam or loam mixed with organic matter. Compost not only enriches the soil with nutrients but also improves its texture, helping it stay loose and well-aerated. When preparing the planting bed, breaking up clumps and working in organic matter ensures bulbs have the perfect balance of fertility and structure.
Another critical factor is soil pH, as crocosmia prefers slightly acidic to neutral conditions. A pH range of 6.0 to 7.0 supports strong nutrient absorption, which translates into healthier foliage and abundant blooms. If the soil in your garden is too alkaline or clay-heavy, amending it with peat moss, compost, or sand can help restore balance. Gardeners should test soil before planting to make adjustments. By investing effort into preparing the soil correctly, you create the foundation for crocosmia bulbs to thrive year after year with bright, vibrant flowers.
Selecting the Best Location for Crocosmia
While soil plays a key role, location is equally important when planting crocosmia bulbs. These perennials thrive in full sun, needing at least six hours of direct sunlight each day to produce their signature fiery blooms. In partial shade, they may still survive, but stems often grow weak, and flowers appear less vibrant. A sunny border, raised bed, or well-lit container provides an excellent home for crocosmia. Planting in open spaces also ensures proper air circulation, reducing the risk of fungal issues that can occur in damp, shaded environments.
Gardeners should also consider microclimates when choosing a site. Areas with good drainage, such as gentle slopes or slightly elevated beds, are ideal for preventing water buildup around bulbs. In colder regions, planting near a south-facing wall or sheltered spot protects bulbs from harsh frost and extends the blooming period. Avoid locations with strong winds that may snap the tall stems or scatter blooms. When soil and site are chosen wisely, crocosmia grows into robust clumps that return each year with stronger foliage and more striking flowers, creating a dazzling garden display.
How Deep and How Far Apart to Plant Crocosmia Bulbs
Correct Planting Depth for Crocosmia Bulbs
Planting depth is one of the most important details when working with crocosmia bulbs. If planted too shallow, bulbs risk drying out, shifting in the soil, or being damaged by frost. If planted too deep, they may struggle to send up shoots in time for summer blooms. The ideal depth for crocosmia bulbs is around three to five inches below the soil surface. This depth protects bulbs from temperature swings while still allowing shoots to emerge without difficulty. Firming the soil gently after planting helps secure bulbs in place and prevents air pockets that can affect root growth.
In colder climates, gardeners may choose to plant bulbs slightly deeper, closer to six inches, to provide extra protection during the winter months. This added depth reduces the impact of frost while still allowing the plant to thrive once warmer weather arrives. In warmer regions, maintaining the recommended depth ensures bulbs stay cool and retain enough moisture during hot summer days. Adjusting depth slightly according to local conditions helps balance protection with healthy growth. Correct planting depth sets the foundation for reliable blooms each season.
Proper Spacing Between Crocosmia Bulbs
Spacing plays an equally important role in ensuring crocosmia grows vigorously and produces abundant flowers. Planting bulbs too close together leads to overcrowding, which limits air circulation and increases the risk of fungal diseases. For best results, crocosmia bulbs should be planted about six to eight inches apart. This spacing allows each bulb to develop into a strong clump while leaving enough room for airflow and light penetration. Adequate spacing also prevents competition for nutrients, ensuring each bulb has access to the resources it needs.
Another advantage of proper spacing is long-term growth. Crocosmia tends to multiply over the years, forming natural clumps. By giving each bulb enough room from the start, you reduce the need for frequent dividing and replanting. In larger garden beds, planting in clusters of three to five bulbs creates a natural, dramatic display when flowers bloom. For smaller spaces, evenly spaced rows or container planting ensures balance and visual appeal. Careful spacing not only supports the plant’s health but also enhances the overall design of your garden, creating a vibrant display that grows stronger each year.
Seasonal Guidelines for Planting Crocosmia in Different Regions
Planting Crocosmia in Cold Climates
In regions with long, harsh winters and late frosts, timing becomes especially important for crocosmia bulbs. Gardeners should wait until the soil warms consistently in late spring before planting. If bulbs are placed too early in cold, wet ground, they often rot or fail to sprout. Using raised beds or well-draining soil improves success in these climates. Covering the planting area with mulch can also help stabilize soil temperatures and protect new shoots once they emerge.
For added protection, many gardeners in colder climates choose to lift crocosmia bulbs in late autumn and store them indoors until spring. Storing bulbs in a cool, dry place prevents frost damage and ensures they remain viable for the next season. Replanting after the last frost date guarantees bulbs have a long enough growing window to bloom before the next winter sets in. With careful timing and protection, crocosmia can thrive even in challenging northern climates.
Planting Crocosmia in Mild Climates
In regions with mild winters and moderate summers, crocosmia is relatively easy to establish. Gardeners can usually plant bulbs as early as late winter or early spring without worrying about frost damage. The soil in these climates warms quickly, providing an ideal environment for early root development. With a longer growing season, crocosmia has time to settle in and produce strong foliage before flowering in mid to late summer.
Because frost is less of a concern, bulbs may also remain in the ground year-round. Over time, they multiply naturally, forming dense clumps that return each season. To encourage the healthiest growth, it’s important to ensure soil drainage remains adequate, especially during wetter months. Planting in full sun enhances the vibrancy of the blooms, making crocosmia a reliable perennial in these regions. Regular division every few years helps prevent overcrowding and maintains vigorous flowering.
Planting Crocosmia in Warm and Hot Climates
In hotter regions with long summers, soil conditions can be challenging for crocosmia bulbs. Excessive heat and dry soil may stress bulbs, reducing bloom production. To counter this, gardeners should plant bulbs in early spring, giving them time to establish before extreme summer heat arrives. Adding compost or organic mulch helps retain soil moisture, creating a cooler environment for roots. Shallow watering during dry spells also ensures steady growth.
Choosing the right planting location is essential in warm climates. While crocosmia enjoys full sun, providing partial shade during the hottest part of the day can prevent scorched leaves and premature wilting. Planting near taller plants or in areas with afternoon shade creates a balanced environment. With proper care, crocosmia still produces striking blooms, though it may require extra watering and maintenance compared to cooler regions.
Planting Crocosmia in Coastal Regions
Coastal climates often bring unique conditions for crocosmia growth, including sandy soil, high humidity, and strong winds. Gardeners should plant bulbs in spring once the soil warms, ensuring they are placed at the correct depth to avoid drying out in sandy soil. Mixing in organic matter or compost improves water retention and adds nutrients, helping bulbs establish in otherwise lean soil.
Protection from wind is equally important in coastal areas. Crocosmia’s tall flower spikes are prone to bending or breaking when exposed to strong gusts. Planting near fences, walls, or hedges offers shelter while still providing ample sunlight. The naturally humid air benefits crocosmia, as long as drainage remains sufficient to prevent rot. With soil amendments and strategic placement, crocosmia bulbs can thrive in coastal gardens, creating vibrant displays of color against the backdrop of sea breezes.
Caring for Crocosmia After Planting
Once crocosmia bulbs are planted, consistent care is essential for healthy growth and vibrant blooms. The first priority is watering, especially during the early stages of establishment. While crocosmia prefers well-drained soil, it still needs steady moisture to develop strong roots. Watering deeply once a week is usually sufficient, though frequency should increase during dry spells. Avoid overwatering, as soggy soil can quickly lead to bulb rot. Adding a layer of mulch helps retain soil moisture, regulates temperature, and reduces weed competition, giving young shoots the best chance to thrive.
Fertilizing also plays an important role in crocosmia care. Applying a balanced, slow-release fertilizer in spring provides the nutrients necessary for foliage growth and flower production. Too much nitrogen, however, may encourage excessive leaf growth at the expense of blooms. Instead, phosphorus-rich fertilizers support strong root development and abundant flowering spikes. Deadheading spent flowers not only keeps the plant tidy but also prevents energy from being wasted on seed production, allowing bulbs to store strength for the next season.
As crocosmia matures, clumps can become dense, leading to overcrowding and reduced flower output. Dividing the clumps every three to four years ensures vigorous growth and prolongs the plant’s lifespan. Simply lift the bulbs in early spring or autumn, separate the corms, and replant them in fresh soil for renewed displays. In colder climates, mulching heavily before winter or lifting bulbs for indoor storage prevents frost damage. With regular watering, feeding, and periodic division, crocosmia rewards gardeners with fiery, arching blooms year after year.
Common Mistakes to Avoid
Planting Bulbs Too Early or Too Late
One of the most common errors when growing crocosmia is failing to plant bulbs at the proper time. If placed in the soil too early, especially during periods of cold and damp weather, the bulbs are highly vulnerable to rot before they have a chance to root. Excess water combined with low temperatures creates unfavorable conditions, often leaving gardeners disappointed with little to no growth. Conversely, planting too late in the season can result in a shortened growing window. The bulbs may sprout but lack the time to establish strong foliage, which reduces flowering potential significantly.
To avoid these pitfalls, it’s crucial to track local frost dates and soil warmth. In most regions, crocosmia performs best when planted in late spring as soon as the soil temperature rises consistently above 55°F (13°C). This ensures the bulbs settle into an environment that encourages root development while avoiding the risks of cold damage. Gardeners in warmer climates should plant earlier to give bulbs a head start before the hottest months arrive. In colder zones, waiting until after the final frost is a safer option. Proper timing not only protects bulbs from damage but also maximizes their energy for tall, arching flower spikes in summer.
Ignoring Soil and Drainage Conditions
Soil quality and drainage are two of the most overlooked factors in crocosmia care. Many gardeners plant bulbs directly into heavy clay or compacted ground, assuming they will adapt. Unfortunately, crocosmia is highly sensitive to soggy conditions, and bulbs sitting in waterlogged soil quickly develop rot. Without proper aeration, roots suffocate, and the plant cannot access the nutrients needed for growth. Even with correct timing, poor soil often leads to weak plants and disappointing flowers.
The key to success is amending soil before planting. Adding organic matter such as compost, peat moss, or leaf mold improves soil texture, making it looser and more fertile. In particularly wet regions, planting crocosmia in raised beds or on slopes ensures water drains away from the bulbs. Gardeners can also perform a simple drainage test by filling a hole with water; if it doesn’t drain within a few hours, the soil needs amending. Taking time to prepare well-drained, nutrient-rich soil pays off long-term, allowing crocosmia to thrive, multiply, and deliver stunning floral displays season after season.
Overcrowding and Lack of Spacing
Another frequent mistake is planting bulbs too close together in hopes of achieving a lush display. While dense planting may look appealing initially, overcrowded bulbs soon struggle to access adequate nutrients, water, and sunlight. This competition weakens plants, reducing both the size and number of blooms. Overcrowding also limits airflow, creating a humid environment that encourages fungal diseases such as rust or leaf spot. Weak stems are another issue, as closely packed plants often grow thin and flop under the weight of flowers.
To prevent these problems, crocosmia bulbs should be spaced at least six to eight inches apart. This distance allows each bulb to form a healthy clump with room to expand naturally over the years. Periodic division every three to four seasons is equally important to prevent mature clumps from becoming congested. Lifting and replanting the corms in fresh soil reinvigorates the plants and encourages stronger blooms. Proper spacing not only improves plant health but also enhances the garden’s appearance, creating graceful, arching displays of fiery flowers that return reliably each year.
Companion Plants for Crocosmia
Pairing crocosmia with the right companion plants can enhance the beauty of your garden while supporting healthier growth. Because crocosmia produces tall, arching spikes of fiery red, orange, or yellow blooms, it works best when contrasted with plants that offer complementary colors and textures. Perennials such as echinacea, rudbeckia, and salvia provide purple, gold, or blue tones that highlight crocosmia’s vibrant hues. These companions also share similar sunlight and soil preferences, making them ideal planting partners in sunny borders or mixed beds.
Beyond color contrast, companion planting also creates a layered effect that adds depth and dimension to the garden. Crocosmia’s vertical growth pairs beautifully with shorter plants like coreopsis or sedum at the front of the bed. Meanwhile, taller backdrops such as ornamental grasses or hollyhocks help frame crocosmia and provide protection from strong winds. By combining plants of varying heights and shapes, gardeners can design borders that look full and balanced throughout the growing season. This not only highlights crocosmia but also prevents the garden from appearing flat or sparse once flowering ends.
Companion plants can also improve the ecological value of your garden. Many pollinator-friendly flowers, including lavender and monarda, bloom alongside crocosmia, attracting bees, butterflies, and hummingbirds. These visitors naturally increase pollination activity, benefiting the entire garden. Additionally, combining crocosmia with plants that thrive in similar well-drained soil reduces maintenance, as watering and fertilizing needs align. With thoughtful plant pairings, crocosmia becomes part of a larger design that is both striking and sustainable, delivering vibrant color and life year after year.
Protecting Crocosmia from Pests and Diseases
Common Pests Affecting Crocosmia
Although crocosmia is generally resilient, several garden pests can still cause problems if left unchecked. Aphids are one of the most common, feeding on the sap of young shoots and flower stems. Their presence often leads to distorted growth and sticky honeydew that attracts ants or encourages sooty mold. Spider mites may also appear in hot, dry weather, causing leaves to turn speckled or yellow. In some gardens, thrips and slugs can damage leaves and reduce the plant’s vigor, particularly when growth is just emerging in spring.
Controlling these pests begins with regular monitoring. Inspecting leaves and stems weekly allows gardeners to detect infestations early before they spread. A strong jet of water can wash away aphids, while insecticidal soap or neem oil provides organic control without harming pollinators. For slugs, hand-picking in the evening or using natural barriers like crushed eggshells around plants is effective. Encouraging beneficial insects such as ladybugs or lacewings also helps maintain balance. By practicing integrated pest management, gardeners can protect crocosmia from serious damage while supporting a healthier, more sustainable garden ecosystem.
Preventing and Managing Diseases
Crocosmia is susceptible to several fungal diseases, particularly in damp or overcrowded conditions. Rust is one of the most common problems, appearing as orange or brown pustules on the underside of leaves. This disease weakens plants by reducing photosynthesis, often leading to premature leaf drop. Leaf spot and powdery mildew may also occur, leaving unsightly marks that affect overall vigor. In waterlogged soil, bulbs are especially vulnerable to rot, which can destroy entire clumps if not addressed promptly.
Preventing these diseases relies heavily on proper cultural practices. Good air circulation is essential, so spacing plants correctly and dividing clumps every few years reduces overcrowding. Watering at the base of plants rather than overhead helps keep foliage dry, lowering the risk of fungal spread. Applying mulch around the base prevents soil splash, which can transfer spores to leaves. In cases of severe infection, removing and disposing of affected foliage prevents further spread. Gardeners in wet climates may also consider fungicidal sprays as a last resort. With preventative care and attentive management, crocosmia can remain healthy, delivering strong foliage and spectacular blooms year after year.
Overwintering Crocosmia for Year-Round Success
Preparing crocosmia for winter is an essential step in ensuring that the plants return healthy and vibrant each year. In regions with mild winters, crocosmia can often remain in the ground without issue, as long as the soil drains well and does not stay waterlogged. Applying a thick layer of mulch around the base of the plants helps insulate the bulbs, regulate soil temperature, and protect them from sudden cold snaps. This extra layer of protection is especially valuable for younger or newly planted bulbs that may not yet be fully established.
In colder climates where frost and freezing temperatures are more severe, overwintering requires a more hands-on approach. Gardeners often lift crocosmia bulbs in autumn after the foliage has died back. The bulbs should be carefully dug up, cleaned, and stored in a cool, dry, and frost-free location such as a basement or garage. Storing them in peat moss, sawdust, or paper bags helps prevent dehydration and rot. By protecting the bulbs indoors during harsh winters, gardeners ensure they are ready to be replanted in spring for another full season of blooms.
Even in regions where crocosmia can overwinter outdoors, periodic maintenance is beneficial. Cutting back dead foliage in late autumn prevents pests and diseases from overwintering in decaying material. Dividing crowded clumps every few years also strengthens the plants, allowing them to spread and flower more abundantly. With the right overwintering strategy, crocosmia bulbs survive seasonal challenges and reward gardeners with vigorous growth and stunning summer displays year after year.
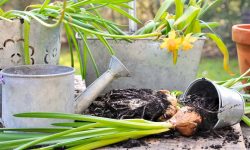
Dividing and Propagating Crocosmia for More Blooms
Dividing and propagating Crocosmia is an essential practice for gardeners who want to maintain healthy plants and enjoy increasingly vibrant displays of flowers year after year. As Crocosmia matures, its corms multiply underground, forming dense clumps. While this spread signals a thriving plant, overcrowding often reduces the size and number of blooms. Competition for nutrients becomes intense, and poor airflow around the foliage increases the risk of pests and diseases. By dividing the clumps every two to three years, you create more space for growth, encourage stronger stems, and ensure healthier foliage. Division also provides an easy and cost-free way to propagate Crocosmia, allowing you to expand your garden or share plants with friends.
The best times to divide Crocosmia are in early spring before new growth appears, or in autumn once the foliage has naturally died back. Start by gently digging around the plant with a garden fork, carefully lifting the clump to avoid damaging the corms. Remove excess soil to reveal the structure of the clump, which usually contains a mix of older corms, new corms, and smaller offsets. Select the firm, healthy corms to replant and discard any that are shriveled, soft, or diseased. This careful selection ensures that only vigorous corms will continue to thrive in the seasons ahead.
When replanting, place the corms at the same depth as before, spacing them about six inches apart to allow proper airflow and root development. Water the area thoroughly after planting to help the soil settle, and enrich the site with compost or organic matter to give the corms a strong start. With proper division and propagation, you will not only rejuvenate your Crocosmia but also enjoy a garden filled with fiery, colorful blooms year after year.
FAQ About Growing and Caring for Crocosmia
How often should I divide Crocosmia plants?
Crocosmia plants should be divided every two to three years to prevent overcrowding. Dense clumps can reduce flower production and make the plants more prone to disease. Regular division rejuvenates the plants, improves airflow, and ensures healthier growth with more vibrant blooms each season.
Can Crocosmia survive winter in cold climates?
In mild regions, Crocosmia corms can remain in the ground with a protective mulch layer. However, in colder zones with harsh frost, it’s best to dig up the corms in late autumn and store them in a cool, dry place. Proper overwintering ensures the corms survive and regrow the following spring.
What type of soil is best for Crocosmia?
Crocosmia thrives in well-drained soil that is moderately fertile. Heavy clay or waterlogged soil can cause the corms to rot, while overly sandy soil may dry out too quickly. Amending the soil with compost or organic matter creates the ideal growing environment for strong, long-lasting blooms.
Do Crocosmia plants need full sun?
Yes, Crocosmia grows best in full sun, where it produces the brightest and most abundant flowers. While it can tolerate partial shade, too little sunlight may result in weaker stems and fewer blooms. Planting in a sunny location maximizes the plant’s display of fiery colors.
How do I encourage Crocosmia to bloom more?
To encourage more blooms, ensure the plants receive full sun, divide overcrowded clumps regularly, and provide nutrient-rich soil. Removing spent flowers also helps the plant focus energy on new blooms. With consistent care, Crocosmia will reward you with striking, long-lasting flowers year after year.
Conclusion
Crocosmia is a resilient and fiery perennial that can transform any garden into a vibrant display of color when cared for properly. From planting at the right time and choosing the ideal soil, to dividing clumps for healthier growth and protecting corms through winter, each step ensures lasting success. With proper attention, these plants reward gardeners with bright, arching blooms that return year after year. By understanding their needs and applying thoughtful care, you not only extend their beauty but also multiply their presence in your garden, creating a stunning and reliable source of color every summer.