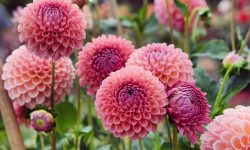
Crocus bulbs are among the first signs of spring, bringing vibrant color and life to gardens. Their delicate blooms signal the end of winter and brighten any landscape with ease and charm. Planting at the right time ensures healthy growth and spectacular flowering.
Understanding when to plant crocus bulbs is essential for a garden full of life. Proper timing, soil preparation, and care practices allow these early bloomers to thrive. With simple yet effective strategies, gardeners can enjoy a stunning display that lasts throughout the season.
Understanding Crocus Bulbs
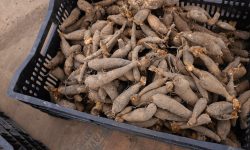
Crocus bulbs are small, corm-like structures that store energy for flowering. Each bulb contains nutrients needed for roots, leaves, and blooms. Healthy bulbs produce strong flowers and sturdy foliage, while weak bulbs may fail to bloom or produce small, short-lived flowers.
Different crocus species have varying growth habits and bloom times. Spring-blooming crocuses typically emerge as temperatures rise, while autumn varieties flower later in the year. Knowing the type of crocus helps plan planting and garden design. Some bulbs can naturalize, spreading and multiplying over time to create fuller displays.
Proper storage and handling of bulbs before planting is crucial. Bulbs should be firm, disease-free, and dry to prevent rot. Avoid soft or damaged bulbs, as they rarely survive in the soil. Selecting high-quality bulbs ensures better bloom performance. Understanding these aspects helps gardeners maximize the visual impact of crocus flowers and achieve a vibrant spring garden year after year.
Different Types of Crocus and Their Blooming Seasons
Crocuses come in a wide variety of types, each offering unique colors and blooming periods. Some of the most popular varieties include Crocus vernus, Crocus chrysanthus, and Crocus sativus. These types adapt to different climates, ranging from cold temperate regions to warmer areas. Understanding the characteristics of each variety helps gardeners plan for continuous blooms and ensures that crocuses thrive in their chosen locations.
Crocus vernus, often called the spring crocus, typically blooms in early spring. Its flowers appear in vibrant shades of purple, white, and yellow. This variety prefers cooler soils and full to partial sunlight, making it ideal for northern climates. Crocus chrysanthus, also known as snow crocus, blooms even earlier, sometimes emerging through melting snow. Its bright yellow and orange flowers bring early color to gardens, signaling the first signs of spring. Crocus sativus, famous for producing saffron, blooms later in the season. Its pale violet flowers are elegant and long-lasting, adding visual interest and value for gardeners interested in both beauty and culinary use.
By knowing the different crocus types and their blooming schedules, gardeners can plan plantings strategically. Combining early, mid, and late-blooming varieties ensures a continuous display of color throughout the season. Additionally, understanding bloom times helps with proper care, including watering, soil preparation, and fertilization. With careful planning, crocus gardens can remain vibrant for weeks, providing both aesthetic appeal and seasonal interest in any landscape.
Best Time to Plant Crocus Bulbs
Planting crocus bulbs at the right time is essential for vibrant spring blooms. For most spring-flowering crocuses, the ideal planting period is late summer to early fall. During this time, the soil is still warm, encouraging root establishment before winter. Planting too early risks bulb desiccation, while planting too late may prevent roots from developing properly. Timing also ensures that the bulbs remain dormant during the coldest months and are ready to bloom as temperatures rise.
Autumn temperatures and local climate conditions greatly influence planting schedules. In colder regions, planting should occur earlier in the fall to give bulbs ample time to establish roots. In milder areas, late fall planting is usually sufficient. Observing soil temperature and moisture levels is crucial, as overly wet or frozen soil can damage the bulbs. Well-draining soil with moderate moisture ensures successful growth. Gardeners should also consider frost dates and regional microclimates to optimize planting times.
Proper soil preparation complements correct timing. Loosen the soil, remove debris, and incorporate organic matter to improve drainage and fertility. Plant bulbs at a depth of two to three times their height, spacing them a few inches apart for best results. Mulching can help regulate soil temperature and retain moisture. By combining correct timing, careful soil preparation, and attention to local conditions, gardeners can enjoy a dazzling display of crocus blooms each spring. Timely planting maximizes flower size, longevity, and overall garden impact.
Factors Affecting Planting Time
Climate and Temperature
Climate and temperature play a crucial role in determining the best planting time for crocus bulbs. In colder regions, planting in late summer or early fall allows bulbs to establish roots before the ground freezes. This ensures a strong start for early spring blooms. In milder climates, slightly later planting may be acceptable, but early fall is still preferred to encourage proper root development.
Temperature also affects growth speed and bloom quality. Bulbs planted too late may struggle to produce vibrant flowers, while excessively warm soil can cause premature sprouting. Gardeners should consider average local frost dates and soil temperature before planting. Monitoring weather patterns helps plan a timing that maximizes both bulb survival and flower performance. Proper attention to climate and temperature ensures a reliable and colorful crocus display.
Soil Conditions and Drainage
Crocus bulbs thrive in well-draining soil. Poor drainage can cause bulbs to rot and fail to bloom. Loamy soil enriched with organic matter is ideal. Adding compost or aged manure improves fertility and structure, supporting strong roots and healthy growth. Preparing the soil before planting ensures bulbs establish quickly.
Soil pH also influences crocus development. These bulbs prefer slightly acidic to neutral soil, between 6.0 and 7.0. Testing pH helps gardeners adjust conditions with lime or sulfur. Well-prepared soil retains adequate moisture without becoming waterlogged. This balance prevents stress during dry spells or heavy rains. Consistent soil care promotes vibrant flowers and resilient plants year after year.
Crocus bulbs also benefit from aerated soil. Loosening the soil allows roots to expand easily, supporting nutrient uptake and energy storage for the next season. Mulching after planting protects soil temperature and moisture, further encouraging healthy growth. Proper soil preparation ensures a thriving, long-lasting spring display.
Sunlight Requirements
Crocus bulbs require full to partial sunlight for optimal growth. At least six hours of direct sunlight daily promotes strong stems and vibrant flowers. In regions with hot summers, morning sun with afternoon shade prevents scorching and prolongs bloom duration. Insufficient light can result in weak growth and fewer flowers.
Sunlight also affects energy storage. Adequate exposure allows bulbs to photosynthesize efficiently, storing nutrients for the next flowering season. Gardeners should consider shading from nearby trees or structures, which can limit sun exposure. Placing bulbs in sunny spots maximizes bloom potential and overall plant health.
Proper sunlight encourages longer-lasting and more colorful flowers. Sunlight intensity and duration impact both early-season blooms and the plant’s ability to thrive in subsequent years. Ensuring crocus bulbs receive sufficient light leads to a vibrant, healthy garden display that delights each spring.
Regional Planting Times for Crocus Bulbs
Planting times for crocus bulbs vary depending on climate zones. In northern regions with cold winters, bulbs should be planted in early to mid-fall. This timing allows them to establish roots before the ground freezes. Proper root development ensures strong growth and early spring blooms. Bulbs planted too late may sprout slowly or fail to flower, so careful timing is crucial.
In southern regions with milder winters, planting can occur later in fall. Soil remains warm longer, which allows bulbs to settle and begin root growth. Some gardeners even plant crocus bulbs in late fall or early winter for extended bloom times. Proper sunlight exposure and soil preparation remain important regardless of regional timing. Adjusting the schedule to local conditions ensures a vibrant, long-lasting display.
Mountainous and high-altitude areas require special attention. Soil can freeze earlier, and temperatures fluctuate more drastically. Planting crocus bulbs too early may risk frost damage. Gardeners should aim for a window when the soil is workable but before heavy freezes arrive. Mulching can help protect bulbs and moderate soil temperature. By considering local climate and elevation, gardeners can maximize crocus survival and enjoy a stunning early spring display.
Step-by-Step Planting Guide
Preparing the Soil
Choose a well-draining site with full or partial sunlight. Crocus bulbs rot easily in soggy soil. Remove weeds, rocks, and debris carefully. Loosen the soil to a depth of six to eight inches. Mixing in compost or organic matter improves fertility, drainage, and soil structure. Slightly acidic to neutral pH is ideal. Test soil and amend if necessary for optimal growth.
Good soil preparation ensures bulbs establish quickly and grow strong. Fertile, loose soil allows roots to penetrate deeply and absorb nutrients effectively. Avoid compacted areas, which can stunt growth and reduce bloom quality. Adding mulch after planting helps retain moisture and moderates soil temperature. Proper preparation also reduces the risk of bulb diseases and encourages vibrant spring blooms. Healthy soil supports long-term flowering and overall garden vitality.
Planting the Bulbs
Plant crocus bulbs with the pointed end facing upward. Dig holes two to three times the bulb’s height. Space bulbs about three inches apart to allow growth and airflow. Firm the soil gently over the bulbs to remove air pockets. Water thoroughly after planting to settle soil and encourage root development. Avoid planting in low, waterlogged areas to prevent rot.
Correct planting depth and spacing prevent overcrowding and support uniform blooms. Proper orientation promotes stronger shoots and faster emergence. Moderate watering keeps bulbs healthy without causing rot. Attention to planting detail maximizes bloom quantity and quality. Following these steps ensures your crocuses grow vigorously and produce a colorful spring display. Healthy planting practices set the foundation for long-lasting, vibrant flowers.
Initial Care After Planting
Keep soil evenly moist until the ground freezes. Avoid overwatering, which can lead to bulb rot. Apply a light layer of mulch to protect bulbs from frost and temperature swings. Check for pests or small rodents that may disturb planted bulbs. Remove debris that could harbor disease or insects.
During winter, minimal maintenance is needed. In early spring, gradually remove mulch to allow sunlight to reach emerging shoots. Maintain slightly moist soil to support growth. Early care maximizes bloom potential and promotes strong, healthy crocus flowers. Providing consistent attention ensures plants develop properly and produces vibrant blooms that can thrive for multiple seasons.
Watering and Care Practices
Initial Watering After Planting
After planting crocus bulbs, give them a thorough initial watering to settle the soil. Ensure the water penetrates deeply to reach the root zone but avoid waterlogging, which can cause rot. Moist soil encourages root establishment and reduces transplant shock. Overwatering during this phase increases the risk of fungal infections, so check soil moisture regularly. Lightly compact the soil around bulbs after watering to remove air pockets.
Monitor weather conditions closely, especially in regions prone to early frost or heavy rainfall. If rainfall is minimal, supplement with gentle watering. Mulching lightly can help retain soil moisture and provide some insulation. Consistent early care ensures bulbs develop a strong root system before dormancy sets in. Well-established roots improve nutrient uptake and set the stage for vigorous spring growth and blooming. Proper early watering is critical for long-term garden success and healthy crocus development.
Spring Watering Routine
When crocus shoots emerge in early spring, maintain moderate soil moisture to support rapid growth. Water deeply once or twice a week, adjusting for rainfall and soil type. Deep watering encourages roots to grow downward, strengthening the plant and improving resilience. Avoid frequent shallow watering, which can lead to weak roots and poor flowering.
Take care not to wet the foliage excessively, as damp leaves can promote fungal growth and mold. Mulching around plants helps retain moisture while keeping soil temperature stable. Consistent watering at this stage ensures crocuses bloom at their peak and sustain vibrant, healthy flowers. Well-timed watering improves soil structure, supports nutrient uptake, and enhances the overall visual appeal of the spring garden. Healthy, hydrated plants are better equipped to withstand temperature fluctuations and potential stress during the flowering season.
Fertilization and Nutrient Care
Early Spring Feeding
At the first sign of crocus shoots, apply a balanced, slow-release fertilizer evenly around the plants. This provides essential nutrients for healthy leaf development and prepares the bulbs for strong flowering. Use a light application to avoid over-fertilization, which can burn bulbs and damage roots. Organic alternatives, such as compost or well-rotted manure, supply nutrients naturally while enhancing soil structure and drainage.
Incorporating organic matter also helps retain moisture and supports beneficial microorganisms. Apply fertilizer gently to prevent disturbing emerging shoots. Water the area lightly after application to help nutrients reach the root zone. Early spring feeding ensures crocuses grow robustly and develop vibrant, long-lasting blooms. Healthy early growth strengthens plants and improves resilience against stress, disease, and temperature fluctuations. Regular nutrient care sets the foundation for a successful flowering season.
Nutrient Support
As blooms begin to appear, provide a light second round of fertilization to sustain energy for flower production. Nutrient-rich soil promotes fuller flowers and prolongs the flowering period. Avoid excessive nitrogen, which encourages leafy growth at the expense of blossoms. Combining proper fertilization with consistent watering helps crocuses thrive and resist environmental stress.
Ensure the fertilizer reaches the root zone without wetting flowers or foliage. Maintaining balanced soil nutrition supports strong roots and vibrant blooms while enhancing soil health. Ongoing nutrient care contributes to a more resilient garden, ensuring crocuses continue to flower beautifully year after year. Healthy plants with proper feeding are better prepared to handle pest pressures and seasonal challenges, creating a visually stunning spring display that lasts longer.
Ongoing Care and Maintenance
After sprouting, crocuses benefit from continued care to maximize flowering. Remove weeds regularly to prevent competition for nutrients and water. Deadhead spent flowers to redirect energy back into the bulb for next season’s growth.
Fertilizing with a low-nitrogen, high-phosphorus fertilizer after blooming encourages bulb development. Avoid cutting foliage too early; the leaves provide essential energy for the bulbs through photosynthesis. Proper ongoing maintenance ensures crocus bulbs remain healthy, producing strong, colorful flowers.
Caring for crocuses extends beyond flowering. Protect bulbs from pests such as rodents, which may dig up and eat them. Applying a light layer of mulch can deter pests and provide insulation during cold snaps. Rotate planting locations every few years if possible to prevent soil-borne diseases. By combining pest management, proper fertilization, and careful leaf maintenance, gardeners can enjoy flourishing crocus displays year after year.
Pest and Disease Management
Common Pests and Their Control
Crocuses can attract pests such as aphids, slugs, and bulb flies. These insects feed on leaves, flowers, and bulbs, causing damage and reducing bloom quality. Early detection is essential to prevent infestations from spreading. Inspect plants regularly, especially under leaves and around bulbs, to catch problems early.
Natural predators like ladybugs and ground beetles help control aphid populations. Slug barriers or traps reduce damage to emerging shoots. In severe infestations, horticultural oils or insecticidal soaps can be applied carefully. Avoid excessive chemical use to protect beneficial insects. Healthy crocuses are more resistant to pests, so combine monitoring, proper watering, and good soil practices to maintain plant vigor and encourage vibrant flowering.
Managing Diseases
Fungal diseases such as gray mold, botrytis, and bulb rot can affect crocuses. These diseases thrive in damp, poorly ventilated conditions. Ensure proper spacing for air circulation and avoid overhead watering to keep foliage dry. Remove and dispose of infected plant material promptly to limit spread.
Selecting disease-resistant varieties helps prevent common problems. Fungicidal treatments may be necessary for severe infections, but always follow label instructions carefully. Consistent monitoring, combined with cultural practices like mulching and proper soil drainage, keeps crocuses healthy. Well-cared-for plants resist pathogens better, supporting strong growth and extended flowering throughout the season.
Deadheading and Post-Bloom Care
Deadheading for Continuous Blooms
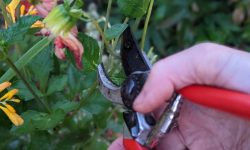
Removing spent crocus flowers helps redirect the plant’s energy toward producing new blooms instead of seeds. Regular deadheading encourages longer flowering periods and stronger, more vibrant flowers. Snip faded flowers carefully at the base, avoiding damage to surrounding leaves. This keeps your garden neat while promoting continuous growth.
Deadheading also reduces the risk of disease by preventing decaying flowers from becoming breeding grounds for fungi and pests. By consistently removing spent blooms, the bulb focuses nutrients on leaf and root development. This practice ensures crocuses remain healthy, resilient, and able to deliver abundant, colorful blooms year after year. Gardeners who deadhead regularly enjoy a fuller, more dynamic display, extending the visual impact of their spring garden.
Post-Bloom Care
After crocuses finish flowering, allow the leaves to naturally yellow and die back. These leaves store energy in the bulb for next year’s growth, so cutting them too early weakens future blooms. Leave foliage undisturbed until fully dried.
Once the foliage fades, clear any debris to prevent pest infestations or fungal growth. Apply a thin layer of mulch to protect bulbs during dormancy and help retain soil moisture. Proper post-bloom care strengthens bulbs, ensuring healthy, vibrant flowers in the next season. Regular attention during this period maintains garden health, reduces stress on plants, and encourages long-term success. Healthy bulbs produce stronger roots, more leaves, and an overall more abundant display for the following spring.
Extending the Blooming Season of Crocus
Gardeners can enjoy a longer display by planting a mix of early, mid, and late-blooming crocus varieties. Early bloomers, such as Crocus chrysanthus, emerge in late winter, while mid-season types flower in early spring. Late varieties extend the display into mid-spring, creating continuous color.
Staggered planting is another effective strategy. Sow bulbs at slightly different depths or intervals to encourage sequential flowering. This method allows blooms to appear gradually rather than all at once, ensuring a prolonged visual impact. It is particularly useful in larger garden beds where continuous color is desired.
Combining varieties with different flower colors also enhances the aesthetic appeal. Early bloomers in shades of purple or yellow can transition to later bloomers in white or striped patterns. This creates a layered, dynamic display throughout the spring months. With careful planning and a mix of species, gardeners can maximize the beauty and longevity of crocus blooms, transforming their garden into a vibrant and captivating springtime showcase.
Common Challenges and Solutions
Short Bloom Periods
Crocus flowers sometimes have a brief blooming window due to heat, stress, or uneven watering. Early exposure to high temperatures can cause petals to fade quickly, shortening the display period. Selecting varieties with slightly staggered bloom times helps extend visual appeal across the season.
Providing partial shade during the hottest parts of the day and maintaining consistent soil moisture can help flowers last longer. Mulching around bulbs preserves moisture and keeps roots cool. Gardeners who manage these factors can enjoy a more extended period of vibrant blossoms, creating a garden that remains visually appealing for weeks rather than days.
Lack of Blooms Despite Healthy Growth
Occasionally, crocuses grow healthy leaves but fail to flower. Excess nitrogen fertilization encourages lush foliage at the expense of blooms. Inadequate sunlight or overcrowding also limits flower production. Ensuring bulbs receive full sun and sufficient spacing promotes proper flowering.
Dividing crowded bulbs every few years can restore bloom vigor. Reducing nitrogen levels while providing phosphorus and potassium encourages flower development. Addressing these factors helps ensure crocuses not only grow well but also produce abundant, colorful blooms each season. Careful monitoring of sunlight, nutrients, and spacing is essential for consistent flowering success.
Pest and Disease Damage
Crocuses may be affected by pests like slugs, aphids, or rodents, which can damage buds and emerging flowers. Fungal diseases such as mold or leaf spot can also harm the plant, particularly in damp conditions. Early detection is crucial to minimize damage.
Using natural remedies, like neem oil for insects or barriers for rodents, helps protect the plants safely. Removing infected leaves prevents fungal spread, and maintaining proper spacing improves air circulation. Consistent monitoring combined with proactive care ensures crocuses remain healthy, resilient, and capable of producing strong, long-lasting blooms.
Design Tips for Crocus in Gardens
Crocuses add vibrant color and early spring interest to gardens. Planting them in clusters or drifts creates natural, eye-catching displays. Mixing colors and varieties enhances visual appeal and ensures staggered bloom times. Consider planting near pathways, borders, or rock gardens for easy viewing. Grouping bulbs in masses gives a fuller, more abundant look than single, scattered plantings.
Combining crocuses with other early bloomers like daffodils, tulips, or snowdrops provides layered color effects. Their low height allows taller plants to grow behind without overshadowing blooms. Adding evergreen groundcovers can provide contrast and maintain garden interest even before flowers emerge. Think about textures and foliage color to complement the vibrant petals.
Crocuses also thrive in containers, raised beds, or naturalized lawns. In lawns, plant bulbs in clusters to avoid interference with mowing. Containers allow control over soil quality and drainage, ensuring healthy growth. Consider repeating colors throughout the garden for harmony and rhythm. Proper spacing, soil preparation, and sunlight ensure crocuses remain healthy and bloom consistently. Thoughtful placement and pairing create a garden full of charm and early-season cheer.
FAQ About When to Plant Crocus Bulbs
How do I know the best time to plant crocus bulbs?
The best time to plant crocus bulbs is usually in early fall, around six to eight weeks before the first frost. Planting during this period allows roots to develop before winter dormancy. This timing ensures healthy growth and abundant spring blooms while avoiding frost damage to newly planted bulbs.
Can crocus bulbs be planted in containers?
Yes, crocus bulbs grow well in containers with well-draining soil. Choose a pot at least six inches deep to accommodate root growth. Place the pot in a sunny location outdoors, water moderately, and protect it from harsh winter winds. Container planting is ideal for patios, balconies, or small garden spaces.
How deep should crocus bulbs be planted?
Crocus bulbs should be planted about three inches deep with the pointed end facing upward. Cover with soil and lightly firm it to prevent shifting. Proper planting depth ensures bulbs establish strong roots, protects them from frost, and allows shoots to reach the surface effectively for timely blooming.
What soil type is best for crocus bulbs?
Crocuses thrive in well-draining, loamy or sandy soil enriched with organic matter. Avoid heavy clay soils that retain water, as they can cause bulb rot. Amending soil with compost or sand improves drainage and fertility, supporting strong root development and vibrant, long-lasting blooms in the spring garden.
How can I extend the blooming period of crocuses?
To extend crocus blooms, plant a mix of early and late-blooming varieties and stagger planting times. Provide consistent moisture without waterlogging the soil, and remove faded flowers to prevent seed formation. Healthy soil, adequate sunlight, and proper care encourage longer flowering and vibrant displays throughout the season.
Conclusion
Timing is everything when planting crocus bulbs. By following the right seasonal tips, gardeners can enjoy a vibrant display each spring. Proper soil preparation, watering, and feeding encourage strong growth and long-lasting blooms. Overcoming common challenges ensures healthy, resilient plants year after year. Thoughtful placement and design enhance any garden space with color and charm. With careful planning and attention, crocuses transform outdoor areas into lively, cheerful landscapes. Embrace these strategies to maximize your garden’s beauty and delight for seasons to come.