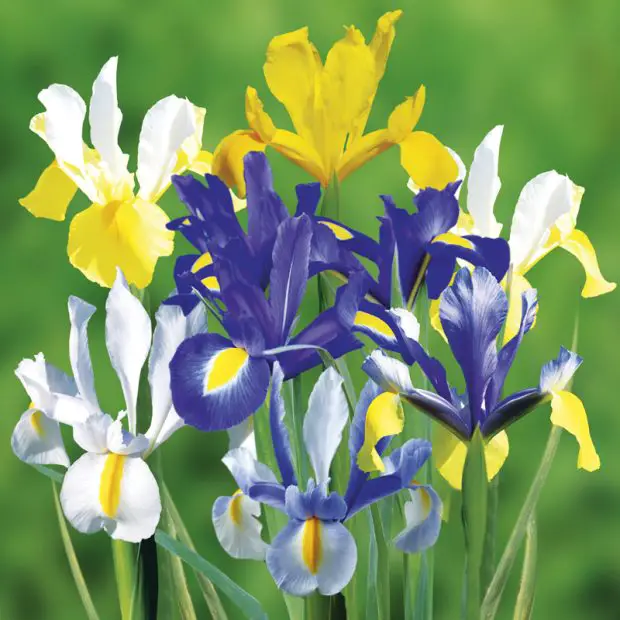
Iris flowers bring a timeless charm to any garden. Their graceful petals and captivating colors—ranging from deep purples to soft yellows and pristine whites—create a striking visual display that never goes out of style. From formal borders to wild cottage gardens, irises add elegance and boldness in equal measure.
Whether you’re growing Dutch, bearded, or Siberian irises, timing is everything. Knowing when to plant iris bulbs—either in fall or spring—can determine whether you enjoy vibrant blooms or face a season of missed potential. Success begins with understanding your climate, the specific iris variety, and how seasonal soil conditions affect root development.
Understanding Iris Bulbs and Rhizomes
Although many gardeners refer to all irises as “bulb plants,” not all irises grow from true bulbs. It’s important to distinguish between bulbous irises and rhizomatous irises, as each type requires different planting and care techniques.
True iris bulbs, such as those found in Dutch irises, resemble small, layered, onion-like structures covered in a papery skin. These bulbs store nutrients and moisture, allowing the plant to survive dormancy and bloom with little early intervention. Dutch irises are often treated like other spring-flowering bulbs and are best planted in fall, particularly in climates with cold winters. Their compact bulbs make them suitable for borders, rock gardens, and cut flower production.
In contrast, most other popular irises—including bearded, Siberian, and Louisiana varieties—grow from rhizomes. Rhizomes are thick, fleshy, horizontal stems that spread across or just below the soil surface. They store energy and develop roots and shoots from multiple points along their structure. Rhizomatous irises require shallow planting, with the top of the rhizome exposed or just barely covered with soil. Burying them too deeply can lead to poor growth or rot.
Knowing whether you’re planting bulbs or rhizomes is essential to timing, soil preparation, and depth placement. This distinction also impacts how irises respond to seasonal changes and how well they naturalize in the garden.
Benefits of Fall Planting for Iris Bulbs
Fall planting offers significant advantages for most iris varieties, particularly in regions where winters are mild to moderately cold. When iris bulbs or rhizomes are planted in the fall, they benefit from the lingering warmth of the soil, which encourages early root development before dormancy sets in. This early rooting is crucial for establishing a strong foundation, helping the plant absorb nutrients and moisture more efficiently once spring growth begins.
In the case of rhizomatous irises, such as bearded and Siberian types, fall planting aligns with their natural growth cycle. After a summer dormancy period, these irises resume root activity in the cooler months, making fall the most biologically favorable time for transplanting and division. The plants experience minimal transplant shock in fall because top growth is reduced, allowing them to focus energy on underground establishment.
Fall planting also positions the irises to take full advantage of spring rains and warming temperatures. Because the roots are already established, the plants can direct energy into foliage and bud production earlier than those planted in spring. This often results in earlier blooms, stronger flower stalks, and larger, more vibrant blossoms.
Another key benefit is reduced competition from weeds and pests. Cooler temperatures in fall slow down weed growth, and many common iris pests—such as iris borers—are less active, which decreases stress on newly planted irises. Additionally, fall-planted irises generally require less supplemental watering, as autumn rains and reduced evaporation maintain consistent soil moisture without the extremes of summer heat.
In summary, fall planting not only supports healthy root establishment and synchronized seasonal growth but also improves bloom quality and overall plant resilience. It sets the stage for a flourishing spring display with minimal maintenance required through the winter months.
Best Fall Planting Time by Climate Zone
Choosing the best time to plant iris bulbs in fall depends heavily on your local USDA hardiness zone. Because irises require time to establish roots before winter dormancy, planting too early can lead to premature top growth, while planting too late may not allow sufficient rooting before the ground freezes. Timing is especially critical for rhizomatous irises, which rely on fall root development to bloom successfully in spring.
Zones 3 to 5: Early Fall Timing Is Essential
In colder northern climates such as zones 3 to 5, the growing season ends early, and the ground can freeze as soon as mid-October. The ideal time to plant irises here is from late August through mid-September. This window provides about six to eight weeks of mild soil temperatures, allowing roots to anchor and adjust before the first hard frost. Bearded irises, which are sensitive to excessive cold when poorly established, particularly benefit from early planting in these zones. Mulching with straw or pine needles after the first frost can also help insulate the rhizomes through winter.
Zones 6 to 7: Mid to Late Fall Planting Works Best
In more temperate regions, zones 6 and 7 enjoy a longer fall, which extends the planting window into October. In these areas, you can safely plant iris bulbs and rhizomes from mid-September through late October, depending on the local frost date. Soil temperatures remain warm enough to support active root growth, and the risk of sudden deep frost is lower. Gardeners in these zones often find that fall-planted irises bloom earlier and more robustly compared to those planted in spring.
Zones 8 to 10: Plant Later in the Season
In warm southern zones, where frosts are rare or very mild, the fall planting season can stretch into November or even early December. Zones 8 through 10 have soil that stays warm well into late fall, giving iris roots plenty of time to establish without concern for freeze damage. Bearded irises and Dutch irises thrive with this late planting, especially when paired with a well-drained bed and adequate spacing to encourage air flow and reduce humidity-related diseases. Planting too early in these zones can actually be a disadvantage, as excessive heat may delay dormancy and stress young plants.
Microclimates and Local Weather Considerations
While USDA zones offer general guidelines, local microclimates—such as urban heat islands, high elevations, or coastal influences—can shift ideal planting dates by several weeks. Pay attention to your garden’s unique conditions, such as wind exposure, sun patterns, and soil drainage, when determining the right time to plant. A good rule of thumb is to plant your irises six to eight weeks before your area’s first average hard frost, adjusting slightly based on how quickly your soil cools in autumn.
Using Soil Temperature as a Planting Guide
If you prefer precision, monitoring soil temperature can be more reliable than the calendar alone. Iris roots grow best when soil temperatures range between 50°F and 60°F (10°C to 16°C). Once the soil cools to this range in fall, it’s time to plant. Digital soil thermometers are inexpensive tools that provide accurate readings and can help ensure optimal timing, especially in regions where fall weather is unpredictable.
By aligning your planting schedule with your climate zone and observing local cues, you give your iris bulbs the best chance to establish strong roots, resist disease, and bloom beautifully come spring.
Spring Planting: When and Why It’s Done
While fall is often preferred for planting irises, spring planting remains a viable and sometimes necessary alternative—especially for gardeners in colder climates or those starting a garden later in the season. The success of spring planting largely depends on timing, soil readiness, and how well the plants are maintained through the early stages of establishment.
Ideal Timing for Spring Planting
The best time to plant iris bulbs or rhizomes in spring is once the ground has thawed and become workable, and the threat of hard frost has passed. This typically falls between late March and mid-May, depending on your USDA zone. In zones 3 to 5, planting is usually safe from late April onward. In zones 6 and above, planting can begin as early as late March, especially during mild springs.
It’s crucial not to rush spring planting, as cold, saturated soils can lead to bulb rot or poor root development. Waiting until the soil has warmed to at least 50°F (10°C) ensures that the iris roots will grow quickly and establish themselves before the heat of summer arrives.
Why Spring Planting Is Sometimes Necessary
In some cases, spring is the only practical option for planting irises. Gardeners who live in regions with long, harsh winters may not be able to plant in fall due to early frosts or frozen soil. Others may acquire iris rhizomes or bulbs late in the year through online orders, plant swaps, or nursery sales. In these situations, storing the corms or rhizomes over winter and planting in spring is the best course of action.
Spring planting is also useful for replanting irises that were divided late, transplanting existing clumps, or integrating new varieties into established beds. It provides flexibility for those redesigning their garden layout or expanding their perennial borders.
Managing Expectations for Spring-Planted Irises
While irises planted in spring can grow successfully, they often do not bloom in their first season. This delay is due to the plant’s focus on establishing roots and foliage before producing flowers. However, with proper care—including watering, soil management, and fertilizing—these irises will typically bloom the following year with full vigor.
Spring-planted irises are more susceptible to heat and drought stress as the season progresses, particularly in southern climates. Providing adequate moisture during the first few weeks after planting is essential. Applying a light mulch can help regulate soil temperature and retain moisture, but it should be kept away from the rhizome crown to prevent rot.
Choosing the Right Iris Types for Spring Planting
Some iris varieties are better suited to spring planting than others. Dutch irises, which grow from bulbs, adapt well to spring installation and may even bloom the same year if planted early enough. Rhizomatous irises—such as bearded or Siberian types—prefer fall planting but can still thrive when spring-planted under favorable conditions.
If you’re planting rhizomes in spring, look for ones with healthy, firm structure and visible buds. Avoid soft, moldy, or dried-out rhizomes, as these are less likely to survive and establish.
In summary, while spring planting may not offer the same immediate flowering results as fall planting, it remains a reliable strategy for introducing irises to your garden. With thoughtful timing, good soil preparation, and consistent aftercare, spring-planted irises can develop into strong, long-lasting plants that reward your patience with spectacular blooms in future seasons.
Considerations for Spring-Planted Iris Bulbs
Planting iris bulbs or rhizomes in spring requires extra care and attention to environmental conditions and plant health. While spring planting is often done out of necessity, it comes with unique challenges that differ from traditional fall planting.
Soil Temperature and Drainage Are Critical
In early spring, soil may still be cold and wet—conditions that increase the risk of bulb or rhizome rot. Before planting, ensure that the soil has warmed to at least 50°F (10°C) and drains freely. Raised beds or sloped planting areas can significantly improve drainage, especially for rhizomatous irises like bearded iris, which are particularly prone to rot in soggy conditions.
Amending the soil with compost or coarse sand can help improve its structure and reduce compaction, creating a healthier root environment. Avoid heavy clay soils unless amended, as they tend to hold too much moisture in early spring.
Delayed Blooming Is Normal
Gardeners should not expect spring-planted irises to bloom in their first year. This is not a sign of failure but a natural part of their growth cycle. Most irises need a dormancy period followed by a cold stratification to initiate blooming. Since spring-planted irises haven’t gone through this cycle yet, they will focus on establishing roots and foliage during the first season. Full blooming typically begins the following spring after the plant has overwintered.
Extra Watering and Mulching May Be Needed
Unlike fall-planted irises that benefit from cool, moist autumn weather, spring-planted irises must contend with rising temperatures and potential drought. These conditions can stress young roots, so consistent watering is essential in the first two months after planting. Keep the soil evenly moist but not waterlogged. Monitor rainfall closely and supplement when needed.
Applying a light layer of mulch—such as pine straw or shredded bark—can help retain soil moisture and buffer temperature fluctuations. However, avoid covering the rhizome or bulb crown directly, as this encourages rot and fungal issues.
Pest and Disease Vigilance
Spring and early summer are peak periods for common garden pests like aphids, slugs, and iris borers. New iris plantings are especially vulnerable because their developing tissues are tender and less resilient. Inspect plants weekly and take action at the first sign of pest activity. Remove dead or yellowing foliage to discourage insects and promote airflow.
Fungal diseases, including root rot and leaf spot, can also affect spring-planted irises, particularly if the soil stays damp for extended periods. Good spacing, adequate drainage, and prompt removal of infected leaves are essential preventive measures.
Fertilization Timing
When planting irises in spring, avoid adding heavy fertilizer directly at planting time. Too much nitrogen can stimulate weak, leggy growth that’s susceptible to disease. Instead, wait until the plant has developed several inches of healthy foliage, then feed with a balanced, low-nitrogen fertilizer such as 5-10-10 or 10-20-10. This supports strong root development and sets the stage for next season’s bloom.
A follow-up application of fertilizer in late summer or early fall can help build reserves for overwintering and ensure vigorous flowering the following spring.
Proper Spacing for Growth and Air Circulation
Crowding irises during spring planting can increase the risk of disease and stunted growth. Space rhizomes at least 12 to 18 inches apart to allow for air circulation and future expansion. Bulbous varieties like Dutch iris can be spaced a bit closer, but still need enough room to avoid moisture buildup around the base.
By carefully managing environmental factors, spacing, and plant nutrition, you can greatly improve the success rate of spring-planted irises. While these plants may take longer to mature, their eventual bloom performance will be just as rewarding—if not more so—than their fall-planted counterparts.
Soil Conditions for Successful Planting
Understanding and optimizing soil conditions is fundamental to successful iris growth, regardless of whether you’re planting in fall or spring. Irises, particularly rhizomatous types like bearded irises, are extremely sensitive to poor soil structure and drainage issues, which can lead to root diseases and reduced blooming potential.
Importance of Soil Texture and Structure
The ideal soil for iris bulbs or rhizomes is a loamy, well-draining substrate that allows water to flow freely while retaining enough moisture for root uptake. Loam provides a balanced mixture of sand, silt, and clay, offering both aeration and nutrient retention. Soils with excessive clay content are problematic because they compact easily and retain water, which promotes fungal pathogens such as Fusarium and Rhizoctonia.
Conversely, sandy soils, while well-draining, may lack sufficient organic matter and nutrients. These soils benefit from the addition of compost or aged leaf mold, which improves water-holding capacity and microbial activity, both critical for rhizome development and early root establishment.
pH Range and Nutrient Availability
Irises thrive in slightly acidic to neutral soil, ideally within a pH range of 6.0 to 7.0. Outside this range, nutrient availability becomes imbalanced. For example, iron and phosphorus become less accessible in alkaline soils, which can lead to chlorosis and stunted root development. If you’re unsure of your soil pH, conduct a laboratory soil test or use a reliable digital pH meter.
Correcting pH levels should be done several weeks before planting. Lime can raise soil pH if it is too acidic, while sulfur or peat moss can help lower the pH if it is too alkaline. For nutrient balance, incorporate a starter mix rich in phosphorus and potassium (e.g., bone meal or rock phosphate), which encourages root formation and early rhizome stability.
Drainage and Soil Aeration
Irises require excellent drainage to prevent the rhizome crown from rotting. The oxygenation of the root zone is critical; without it, root respiration is compromised, and pathogens thrive. If your garden soil drains poorly or shows signs of compaction, consider creating raised beds at least 6–8 inches above ground level. This approach physically elevates the planting zone, allowing excess water to run off.
To further improve drainage and aeration, work in coarse sand, perlite, or expanded shale—amendments that break up dense soils and promote air pore space. Avoid using fine-textured materials like peat alone, which may retain water and exacerbate root diseases in heavy soils.
Organic Matter and Biological Activity
High levels of organic matter not only improve texture and water dynamics but also support beneficial soil life. Microbial communities in healthy soil assist with nutrient cycling, disease suppression, and root signaling. Incorporating well-decomposed compost—not raw manure—prior to planting ensures a biologically active root zone.
Avoid planting irises in beds recently amended with high-nitrogen organic material, as this can fuel excessive foliage growth at the expense of rhizome development. Instead, aim for balanced carbon-to-nitrogen (C:N) organic inputs such as shredded bark compost or worm castings.
Pre-Planting Soil Preparation Techniques
Before planting, loosen the top 8 to 10 inches of soil using a garden fork or broadfork to relieve compaction. This physical disturbance improves aeration and ensures deeper root penetration. Rake the surface smooth, removing large stones and breaking up clods to create a fine tilth suitable for bulb or rhizome placement.
For fall planting, aim to complete soil preparation 2 to 3 weeks prior to setting bulbs, allowing soil structure to settle naturally. In spring, work the soil only when it is moist but not saturated—working wet soil leads to compaction and clumping that can last all season.
By addressing soil texture, pH balance, drainage capacity, and biological health, gardeners can provide irises with the ideal foundation for vigorous growth and long-lasting blooms. These technical aspects are often overlooked but are among the most important determinants of success when planting iris bulbs or rhizomes.
Planting Depth and Orientation
Correct planting depth and orientation are essential to the health and flowering success of iris plants. While both bulbous and rhizomatous irises belong to the same broader family, they differ significantly in how they should be planted. Misjudging depth or orientation can lead to poor establishment, rot, or failure to bloom.
Rhizomatous Irises: Surface Exposure Is Key
For rhizomatous types such as bearded, Siberian, and Louisiana irises, planting too deeply is one of the most common mistakes. These irises grow from thick horizontal stems (rhizomes) that sit at or just beneath the soil surface. The top of the rhizome should be partially exposed to sunlight or covered with no more than half an inch of soil. This exposure allows for air circulation and sunlight penetration, both of which help prevent fungal issues and encourage strong top growth.
The rhizome should be laid flat, with the roots fanned out beneath it. Each division should include at least one “fan” of leaves, which should be trimmed back to about 4 to 6 inches to reduce water loss through transpiration and to help the plant redirect energy toward root establishment.
Bulbous Irises: Deep Enough for Anchoring
In contrast, bulbous irises, such as Dutch irises or reticulated irises, should be planted much deeper than rhizomes. These true bulbs require a planting depth of approximately 3 to 4 times their own height—generally 4 to 6 inches deep, depending on soil type and bulb size. In sandy soils, a slightly deeper planting helps stabilize the bulb and retain moisture; in clay soils, slightly shallower placement can help reduce rot risk.
Bulbs must be planted with the pointed end facing upward, which ensures that emerging shoots reach the surface efficiently. Planting bulbs upside-down delays emergence, weakens sprouting energy, and may result in misshapen or stunted foliage. The base of the bulb, where roots will develop, should make firm contact with the soil to anchor the plant securely.
Spacing and Airflow
Spacing is another critical element of planting orientation. Rhizomatous irises should be spaced 12 to 18 inches apart, depending on the variety, to allow airflow between plants and reduce the spread of disease. Crowded rhizomes compete for nutrients and can quickly become entangled, making division and maintenance more difficult.
Bulbous irises can be spaced more closely—typically 4 to 6 inches apart—as they are smaller and do not spread in the same horizontal fashion. However, even bulb types benefit from some air circulation around foliage to discourage fungal pathogens after rainfall or irrigation.
Adjusting Depth by Climate
In colder regions, deeper planting of bulbs can help insulate them against freezing temperatures, especially if combined with a mulch layer. In contrast, warmer climates with heavy rainfall may require shallower planting and improved drainage to avoid bulb rot. Rhizomes in hot zones can even tolerate some light mulch for moisture retention, but this should be pulled back as temperatures rise to prevent smothering the exposed rhizome tops.
Correct planting depth and orientation not only improve emergence and flowering but also enhance the long-term health and sustainability of your iris display. Whether you’re dealing with bulbs or rhizomes, attention to these fundamentals makes all the difference in achieving a vibrant spring bloom.
Watering After Planting
Watering iris bulbs or rhizomes after planting is a critical step that influences root establishment, early growth, and disease prevention. However, irises—especially rhizomatous types like bearded irises—are sensitive to overwatering. Therefore, watering practices should be tailored carefully based on iris type, soil condition, and local climate.
First Watering to Encourage Rooting
Immediately after planting, apply a deep watering to help settle the soil around the bulbs or rhizomes. This initial watering eliminates air pockets and encourages the first stages of root development. For fall-planted irises, this step is especially important because it allows roots to establish before winter dormancy sets in.
For spring-planted Dutch irises, a thorough first watering helps awaken the bulbs and stimulates sprouting as soil temperatures begin to rise.
Watering in the Following Weeks
After the initial watering, reduce frequency to avoid waterlogging. A good rule is to water only when the top one to two inches of soil feel dry to the touch. You can check this by pressing your finger into the soil near the base of the plant—if it feels moist, hold off on watering.
Newly planted irises have small or inactive root systems and do not need frequent watering. If your region receives regular rainfall during fall or spring, you may not need to water again until you see active leaf growth.
Adjusting Watering to Soil and Climate
Watering needs should always be adapted to local environmental conditions and soil type:
Sandy Soil
Water drains quickly in sandy soil, so more frequent but moderate watering may be necessary. Still, avoid oversaturation.
Clay or Heavy Soil
These soils retain moisture longer and require less frequent watering. Overwatering in such soils can easily cause rot.
Cool or Humid Climates
During cool, damp periods, such as early fall in temperate zones, irrigation should be reduced or avoided altogether.
Dry or Windy Areas
Regions with dry air or high winds lose moisture quickly. Watering may be needed more often, but it should still be light and preferably done in the morning to allow excess moisture to evaporate during the day.
Recognizing Overwatering and Underwatering
Symptoms of overwatering include yellowing or mushy leaves, foul-smelling rhizomes, and fungal growth. On the other hand, underwatered irises may struggle to sprout, develop limp foliage, or fail to root properly. Monitoring soil moisture and plant response is the best way to fine-tune your watering routine.
Long-Term Watering Strategy
Once the plant shows signs of growth, switch to deeper but less frequent watering to promote stronger, deeper roots. Avoid wetting the foliage during late hours, as this increases the risk of mold and disease.
Proper watering after planting is a foundational practice that often determines the success of your iris blooms. With the right timing and moisture balance, your iris bulbs and rhizomes will grow into resilient, vibrant spring flowers.
Fertilizing for Stronger Blooms
Fertilizing plays a crucial role in the development of healthy foliage, robust root systems, and abundant blooms in iris plants. Whether you’re growing bulbous or rhizomatous irises, the timing, formulation, and method of fertilization can significantly influence flowering quality and plant vigor in the growing season.
Choosing the Right Type of Fertilizer
Irises prefer a balanced fertilizer with a slightly lower nitrogen content to avoid excessive leafy growth at the expense of flowers. A common recommendation is a formulation like 5-10-10, 10-10-10, or 6-10-10, where the higher phosphorus (middle number) supports root and bloom development.
Avoid high-nitrogen fertilizers (like 20-10-10), especially for rhizomatous irises, as they encourage lush foliage but often suppress flowering and make plants more prone to soft rot and fungal infections.
For organic options, well-aged compost, bone meal, and rock phosphate can provide a slow-release nutrient profile that supports both root development and long-term bloom production.
Timing Fertilization for Maximum Impact
The best time to fertilize irises is twice per year: first in early spring just as new growth begins, and again 4 to 6 weeks after blooming to help replenish nutrients and prepare the plant for next season’s growth.
In spring-planted irises, apply a light dose of fertilizer at planting, then follow with a full feeding in the following spring. Avoid fertilizing late in the growing season, particularly in colder zones, as this can stimulate new growth that may not harden off before frost.
Fall-planted irises, especially rhizomatous types, benefit from a low-nitrogen fertilizer at planting to support root establishment. Avoid overfeeding at this stage—young roots are sensitive to high salt concentrations.
How to Apply Fertilizer Properly
For rhizomes, apply granular fertilizer in a ring around the plant, about 4 to 6 inches away from the base, and gently work it into the top layer of soil. Never place fertilizer directly on top of the rhizome, as this can cause burns or rot.
For bulbs, you can incorporate fertilizer into the soil at the time of planting. Use a starter fertilizer mixed into the bottom of the planting hole, or side-dress the area with granular feed once shoots emerge in spring.
Always water thoroughly after fertilizing to help nutrients penetrate into the root zone and avoid accumulation of salts near the soil surface.
Fertilizing Based on Soil Type and Health
Soil testing is the most precise way to understand what nutrients your irises need. In alkaline or poor soils, phosphorus and micronutrient availability can be limited, making additional supplements (like iron or magnesium) beneficial for plant health and flower color.
In rich loamy soils, overfertilization is a risk, so consider lighter applications or organic feeding methods that release nutrients gradually.
Signs of Nutrient Deficiency
If your irises show signs of weak blooms, pale or streaky leaves, or reduced vigor, a lack of potassium or phosphorus may be the cause. On the other hand, very dark green leaves with few flowers often point to excess nitrogen.
Monitoring your plants’ response over time helps refine your fertilization strategy and prevent imbalances that affect bloom quality.
Choosing Between Fall and Spring Planting
Deciding whether to plant iris bulbs in fall or spring depends on a variety of factors, including your regional climate, the iris variety you’re growing, and your gardening goals. Each season offers distinct advantages and presents unique challenges that influence plant performance and bloom success.
Fall Planting for Stronger Root Development
Fall is traditionally the preferred time for planting most iris varieties, especially bearded irises and Dutch irises. When planted in early to mid-fall, irises benefit from the mild temperatures and moist conditions that help stimulate robust root development before the onset of winter dormancy. This early root establishment gives fall-planted irises a head start, allowing them to burst into strong, early growth in spring.
Fall planting also aligns with the iris’s natural growth cycle. Most irises enter dormancy after summer bloom and resume root growth as soil temperatures cool. Planting during this period synchronizes with their internal rhythms, resulting in healthier, better-adapted plants the following season.
Another key benefit is that fall planting increases the likelihood of first-year blooms, especially in warmer climates or when planting established rhizomes. By contrast, spring-planted irises may need to go through one full growth cycle before flowering.
Spring Planting for Cold Climates or Late Planning
While fall is ideal, spring planting becomes a practical alternative in areas with harsh winters, especially where the ground freezes early or drainage is poor. In USDA Zones 3 to 5, gardeners may struggle with bulb rot or frost heave when planting too late in the fall. In these regions, waiting until spring offers more control over soil conditions and minimizes winter losses.
Spring is also suitable for container-grown irises, division transplants, or gardeners who missed the fall window. When planting in spring, it’s important to accept that blooming may be delayed until the following year, as the iris focuses its energy on root establishment and leaf growth.
Additionally, spring planting is common for Dutch irises, which are true bulbs and tolerate spring planting better than rhizomatous types. These often bloom the same season if planted early enough.
Balancing Your Decision with Climate and Iris Type
To make the best choice between fall and spring planting, consider your local first frost dates, soil temperature, and drainage. In Mediterranean or temperate climates (Zones 6–9), fall planting offers the best balance of growing time and bloom potential. In contrast, cold or wet zones (Zones 3–5) may benefit from a cautious spring schedule.
The type of iris also plays a major role. Bearded irises, Louisiana irises, and Siberian irises do best with fall planting. Dutch irises and reticulata types are more flexible and can adapt to either season when handled properly.
By weighing the advantages of each season and aligning them with your growing conditions, you can make an informed choice that supports vibrant iris displays year after year. Whether you plant in fall or spring, good soil preparation and post-planting care are the keys to long-term success.
Caring for Irises After Planting
Proper post-planting care is essential to ensure that newly planted iris bulbs or rhizomes establish strong roots, resist diseases, and produce abundant blooms in their first active growing season. Although irises are known for their resilience, attention to detail during this phase can make the difference between average and exceptional performance.
Mulching: When and How to Apply It
For fall-planted irises, apply a light mulch of shredded bark, straw, or pine needles after the first hard frost to insulate the soil and prevent freeze-thaw cycles that can dislodge bulbs or rhizomes. This is particularly helpful in USDA Zones 3–6. However, avoid heavy or wet mulch, especially over rhizomes, as this can trap moisture and lead to rot.
In spring, remove the mulch gradually as temperatures warm to allow the soil to dry and warm up. For spring-planted irises, mulching can still help conserve moisture and reduce early weed competition, but always leave space around the crown to allow for airflow.
Monitoring Soil Moisture
After planting, monitor soil moisture regularly during the first 4 to 6 weeks. The soil should remain evenly moist but not soggy. Overwatering is a common cause of rot in both bulbs and rhizomes, especially if drainage is poor.
In dry fall conditions, you may need to water weekly until the ground freezes. In spring, rainfall may suffice, but during dry spells, supplemental watering will help young plants root effectively.
Protecting from Pests and Wildlife
Newly planted irises are less susceptible to pests, but vigilance helps prevent early damage. Watch for iris borers, slugs, and snails, especially in areas with heavy mulch or damp conditions.
In some regions, squirrels and voles may dig up bulbs. To prevent this, consider placing a wire mesh barrier just beneath the soil surface or applying a natural repellent.
Avoiding Fertilizer Burn
Don’t over-fertilize immediately after planting. If you amended the soil beforehand or added a bulb starter mix, that should be sufficient for early development. Wait until the iris shows active top growth before considering additional feeding.
Applying high-nitrogen fertilizer too early can result in lush foliage with little root support, increasing the risk of disease and stunted blooms in the next season.
Weed Control and Air Circulation
Keep the area around the irises weed-free, especially during the first year. Weeds not only compete for nutrients and moisture but can also crowd the young plants and reduce air circulation, leading to fungal issues.
Maintain adequate spacing and good airflow to prevent moisture buildup around the plant’s base. This is particularly important for bearded irises, which are prone to soft rot in humid or poorly ventilated environments.
First-Year Bloom Expectations
Fall-planted irises often bloom in the following spring, while spring-planted ones may delay flowering until the next year. This is normal and should not be mistaken for a planting failure. Use the first season to focus on healthy foliage, root development, and disease-free growth.
If irises don’t bloom after a full year, evaluate sunlight exposure, overcrowding, soil drainage, and fertilization practices, then adjust accordingly.
Signs of Successful Establishment
Once you’ve planted your iris bulbs or rhizomes in either fall or spring, it’s essential to recognize the signs that indicate they are taking root and preparing for a healthy growth cycle. Understanding these indicators will help you distinguish between normal development and potential problems that may require intervention.
Early Leaf Emergence and Healthy Foliage
One of the clearest signs that your irises are establishing well is the appearance of new, upright leaves. For fall-planted irises, this may occur before winter sets in or very early in spring, depending on your climate. In spring-planted irises, new foliage should emerge within four to six weeks of planting.
Look for firm, green leaves growing in a fan-like shape. These leaves should feel crisp and appear symmetrical. Wilting, yellowing, or soft foliage could be a sign of root stress, rot, or insufficient drainage.
Firm Root Anchorage in the Soil
Gently test whether the iris rhizome or bulb has anchored by pressing lightly around the base. A plant that feels solid and resists gentle movement likely has developed healthy feeder roots. If it still shifts easily weeks after planting, the roots may not be growing properly due to poor soil conditions, waterlogging, or pest issues.
Healthy iris roots should be white or light tan in color and spread outward beneath the soil to support strong top growth.
Development of New Fans or Shoots
In well-established iris plants, you may notice additional fans forming around the main crown. This indicates that the plant is not only rooting but also preparing for long-term growth. These new fans are potential bloom sites for the next season and a sign that the plant is comfortable in its location.
This is more common in fall-planted rhizomes as they benefit from an extended rooting period over winter and begin multiplying in spring.
Absence of Rot or Fungal Issues
Healthy irises will remain free from signs of rot, especially at the base of the foliage or around the rhizome. A dry, firm rhizome or bulb is a good sign. If you planted in well-drained soil and avoided overwatering, the chance of soft rot is greatly reduced.
Fungal issues such as leaf spot or crown rot tend to occur if the plants are stressed or the soil stays too damp. The absence of these symptoms confirms that the plant is adapting well to its environment.
Steady Growth Without Excessive Stretching
Irises that grow steadily with compact, upright leaves are better established than those showing signs of legginess or leaning. If your plants appear to stretch toward the light or grow weak and floppy, they may be planted in too much shade or experiencing root stress. Well-established irises remain balanced, firm, and symmetrical as they develop.
Monitoring these signs in the weeks and months after planting gives you confidence that your irises are on the right track. With time and proper care, well-established irises will reward you with vibrant, full blooms and increasingly vigorous clumps in the seasons to come.
Transplanting and Dividing Irises
Over time, iris clumps can become crowded, leading to fewer blooms and increased risk of disease. Regular transplanting and dividing every three to five years helps maintain plant vigor, improves air circulation, and encourages better flowering.
When to Divide for Best Results
The ideal time to divide irises depends on your climate, but late summer to early fall—typically four to six weeks after blooming—is considered best for most bearded and standard irises. At this point, the plant has completed its growth cycle and has time to reestablish before winter dormancy.
In warmer climates (Zones 7–10), you can divide as early as July. In colder zones, aim for August or early September to give the divisions time to root before freezing temperatures.
How to Lift and Separate Iris Clumps
To begin, use a garden fork or spade to gently lift the entire clump from the soil. Shake off excess dirt and inspect the rhizomes for signs of health or disease. Healthy rhizomes are firm, plump, and tan in color; discard any soft, shriveled, or discolored pieces.
Separate the rhizomes by hand or with a clean, sharp knife. Each division should include at least one healthy fan of leaves and a firm root section. Trim the leaves to about 6 inches in height to reduce stress and moisture loss after transplanting.
Preparing the New Site
Choose a well-drained, sunny location with neutral to slightly acidic soil. Work in compost or aged organic matter to enrich the soil. Space divisions 12 to 24 inches apart, depending on the iris type, to allow for future growth.
Plant rhizomes just below or at soil level, with the tops slightly exposed in hot climates to prevent rot. Water thoroughly after planting and monitor moisture during the first few weeks to encourage root establishment.
Signs Your Irises Need Dividing
If your irises show fewer or smaller blooms, leaf yellowing, or center die-out in clumps, these are strong indicators they’ve become overcrowded and need dividing. Other signs include rhizomes pushing out of the ground or poor drainage around the base of the plant.
By dividing and transplanting at the right time and in the right way, you’ll rejuvenate your iris bed, extend the blooming potential, and preserve plant health year after year.
Frequently Asked Questions About Planting Iris Bulbs
Can I plant iris bulbs in containers instead of in the ground?
Yes, you can plant iris bulbs in containers as long as the pot has excellent drainage and is large enough to accommodate the spreading rhizomes. Choose a container that is at least 12 inches deep and wide. Use a well-draining potting mix, preferably one designed for bulbs or perennials. Place the container in a sunny location, and be careful not to overwater, especially during dormancy periods.
What happens if I plant iris bulbs too late in the season?
Planting iris bulbs too late—whether in fall or spring—can delay bloom production or cause poor root development. For fall planting, if bulbs are planted too close to the onset of frost or freezing temperatures, they may not establish roots in time and could rot over winter. For spring planting, late planting may result in a weak growing season and few or no blooms until the following year. It’s crucial to give the rhizomes at least four to six weeks before hard frost or peak summer heat.
How deep should I plant iris bulbs?
Unlike true bulbs, iris rhizomes should be planted shallowly. The top of the rhizome should be just at or slightly below the soil surface. If buried too deep, irises may fail to bloom. In colder climates, a very light mulch layer can be used to protect them during winter, but it should be removed in early spring to prevent rot.
Should I fertilize my irises right after planting?
Irises benefit from a balanced, phosphorus-rich fertilizer when planted, especially if your soil lacks nutrients. However, avoid using high-nitrogen fertilizers, which encourage foliage growth at the expense of blooms. A light application of bone meal or a 5-10-10 fertilizer can help stimulate root growth. It’s best to fertilize again in early spring and after flowering.
Can I divide and replant irises at any time of year?
The best time to divide and replant irises is four to six weeks after they finish blooming, typically in mid to late summer. This timing allows the plant to recover and re-establish before the cold sets in. Dividing too early can stress the plant during bloom season, and dividing too late may not give new roots enough time to develop before winter dormancy.
Do irises need to be lifted for winter in cold climates?
Most iris varieties, especially bearded irises, are hardy and can remain in the ground through winter in USDA zones 3–9. In areas with harsh winters, a layer of straw or mulch can protect them from freeze-thaw cycles. For marginal or borderline hardiness zones, consider lifting and storing rhizomes in a cool, dry place if you are concerned about extreme cold or soggy soil.
How can I tell if my iris bulbs are still viable before planting?
Healthy iris rhizomes should be firm to the touch and free of soft spots, mold, or a foul smell. A slight shriveling on the surface is normal if they’ve been stored, but they should not be mushy or completely dried out. If you’re unsure, soak the rhizomes in water for a few hours before planting to rehydrate them slightly.
What should I do if my irises are not blooming?
There are several possible reasons why irises may not bloom. Overcrowding is a common cause, which can be resolved by dividing the rhizomes. Planting too deep or in too much shade also prevents flowering. Additionally, excessive nitrogen, poor drainage, or failing to remove spent flower stalks and old foliage can impact blooming. Evaluating and correcting these issues can restore flowering in the following season.
Is it better to plant irises in fall or spring?
Fall planting is generally preferred because it gives irises ample time to establish roots before the growing season. However, in regions with extremely cold winters or if you’re working with potted irises, spring planting can also be successful. Just ensure the soil is workable and not waterlogged, and understand that spring-planted irises may bloom a little later or skip the first year’s blooms.
How do I store iris bulbs if I can’t plant them right away?
If planting is delayed, store the rhizomes in a cool, dry place with good air circulation. Avoid plastic bags, which trap moisture and can lead to rot. Instead, use paper bags, cardboard boxes, or mesh containers filled with sawdust, dry peat moss, or shredded newspaper. Check occasionally for signs of mold or rot and remove any affected pieces immediately.
Conclusion
Knowing when to plant iris bulbs in fall or spring is a vital step toward creating a garden filled with elegant, show-stopping blooms. Fall planting tends to provide the strongest, earliest blooms, especially in regions with mild winters. Spring planting, though less common, can still yield beautiful results when done with care and attention to detail. By understanding your local climate, preparing your soil properly, and giving your irises the support they need, you’ll enjoy a stunning floral display that returns year after year.