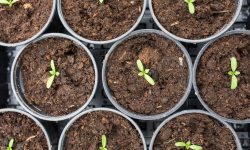
Day lillies are beloved perennials known for their vibrant blooms, hardiness, and low maintenance. These flowering plants brighten up gardens with minimal effort, making them a favorite among both novice and experienced gardeners. However, as day lillies mature, they naturally form dense clumps. Over time, these clumps can become overcrowded, leading to fewer blooms and competition for nutrients. When this happens, it’s a clear sign that your day lillies need some attention.
Dividing day lillies is a simple but vital task to rejuvenate the plants and encourage healthier growth. By lifting, separating, and replanting the clumps, you give each section more space to thrive. This not only improves flowering but also helps prevent disease and keeps your garden looking tidy. In this guide, you’ll learn exactly how to divide day lillies step by step—from timing and tools to planting techniques—so your garden continues to flourish year after year.
Why Divide Day Lillies?
Improve Flower Production
Over time, day lillies tend to multiply and form dense, tangled clumps of roots and shoots. While this natural growth habit shows the plant is thriving, it can lead to overcrowding, which limits access to nutrients, sunlight, and water. As a result, flower production slows down, and the blooms become fewer and smaller. By dividing the clumps, you give each segment more room to grow, allowing for stronger root development and healthier foliage. This rejuvenation directly translates to more abundant and vibrant flowering in the next blooming season.
Maintain Plant Health
When day lillies are left undivided for many years, the thick mats of roots can trap moisture and reduce airflow around the crown and leaves. This humid environment makes the plants more vulnerable to fungal diseases such as crown rot or leaf streak. Dividing the plants thins out the crowded growth and increases air circulation, keeping the foliage drier and reducing the risk of infection. It also helps remove old or dead roots, ensuring only healthy portions of the plant remain and continue to grow vigorously.
Propagate New Plants
Another great reason to divide day lillies is for propagation. Each division from a mature clump contains a complete crown and root system, making it capable of growing into a new, independent plant. This means you can multiply your favorite varieties easily and cost-effectively. Whether you want to fill in bare spots in your garden, experiment with new layouts, or share plants with friends and neighbors, dividing is an easy and reliable way to produce more day lillies without needing seeds or store-bought plants.
Tools and Materials You’ll Need
Basic Gardening Tools
To successfully divide day lillies, gather a few essential tools before you begin. A sharp spade or garden fork will help you lift the clumps out of the ground without damaging the roots. Pruning shears or garden scissors are useful for trimming old foliage and cutting through thick roots. Keep a bucket of water nearby to soak the roots if they dry out during the process, and wear sturdy garden gloves to protect your hands. You’ll also want to prepare some compost or well-rotted manure to enrich the soil when replanting. Adding a layer of mulch afterward is optional but helpful for retaining moisture and suppressing weeds.
Optional Aids
While not absolutely necessary, a few extra tools can make the process easier and more organized. Label stakes or tags are helpful if you’re working with different day lily varieties and want to keep track of colors or bloom times. A wheelbarrow can save time and effort when transporting large or heavy clumps across your garden. Having these items on hand can streamline the dividing process and ensure your newly planted day lillies get off to a strong start.
Step-by-Step: How to Divide Day Lillies
Step 1: Prepare the Area
Start by watering your day lillies deeply the day before you plan to divide them. This helps to soften the soil around the roots, making digging easier and reducing transplant shock. Moist soil allows you to work more gently with the roots and improves the plants’ chances of quick recovery after replanting.
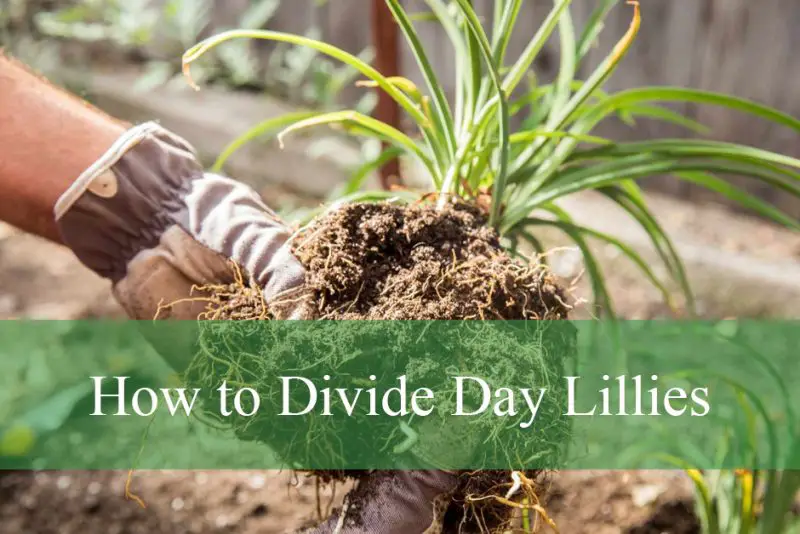
Step 2: Dig Up the Clump
Using a sharp spade or garden fork, dig around the day lilly clump at a distance of about 6 to 8 inches from the base. This ensures you don’t damage the roots too close to the crown. Carefully lift the entire clump out of the ground, keeping as much of the root system intact as possible.
Step 3: Shake and Rinse Soil
Once the clump is out, gently shake off the loose soil to expose the root structure. If the roots are very compacted or covered in heavy soil, you can rinse the clump with a gentle spray of water from a garden hose. This makes it easier to see where natural divisions occur and helps you plan clean separations.
Step 4: Separate the Fans
Day lillies grow in fans—clusters of leaves that emerge from a single crown. Each fan can develop into a new plant. Using your hands, gently pull apart the clump into smaller sections, making sure each division includes healthy roots and at least three to four leaves. If the clump is very dense, a clean garden knife or pruning shears can help you cut through tougher root masses.
Step 5: Trim the Foliage
Before replanting, trim the leaves back to about 6 to 8 inches in length. This helps reduce water loss through the leaves and lowers stress on the plant during transplanting. Keeping the foliage shorter allows the roots to focus energy on reestablishing in their new location.
How to Replant Day Lillies for Maximum Growth
Step 1: Choose a Good Site
Select a location that receives at least six hours of direct sunlight each day, as day lillies thrive in full sun. The soil should be well-drained to prevent waterlogging, which can cause root rot. Ideally, the site will have soil rich in organic matter, providing the nutrients your day lillies need to grow strong and bloom abundantly.
Step 2: Prepare the Soil
Before planting, loosen the soil to a depth of about 12 inches to encourage healthy root penetration. Work in plenty of compost or well-aged manure to improve both drainage and soil fertility. This organic matter helps retain moisture while allowing excess water to drain away, creating an ideal environment for the plants to establish.
Step 3: Plant the Divisions
Dig a hole wide and deep enough to comfortably spread the roots of each division without bending or crowding. Position the day lilly so that the crown — the point where the roots meet the leaves — sits about one inch below the soil surface. Planting at this depth protects the crown from drying out while preventing it from being buried too deeply, which can cause rot.
Step 4: Water Thoroughly
Immediately after planting, water the newly divided day lillies deeply to settle the soil around the roots and eliminate air pockets. Consistent watering is essential during the first few weeks to help the plants establish. Keep the soil moist but not soggy, adjusting watering frequency based on rainfall and weather conditions.
Step 5: Mulch and Maintain
Apply a thin layer of mulch around the base of each plant to help retain soil moisture and reduce weed growth. Be careful not to pile mulch directly against the plant stems or crowns, as this can trap moisture and lead to rot. Regularly check the plants and remove any weeds or debris to keep the area healthy and promote vigorous growth.
Aftercare and Maintenance Tips
Watering
Newly planted day lilly divisions require consistent moisture to establish strong roots. Aim to provide about 1 to 2 inches of water per week, especially during hot or dry weather. Keeping the soil evenly moist—but not waterlogged—helps reduce transplant stress and supports healthy growth. Using a soaker hose or drip irrigation can provide gentle, deep watering that benefits the roots.
Fertilizing
To encourage vibrant blooms and healthy foliage, feed your day lillies with a balanced, slow-release fertilizer twice a year: once in early spring as new growth begins and again after the plants finish blooming. Avoid fertilizers high in nitrogen, as these can cause the plants to produce excessive leafy growth at the expense of flowers. A formula with a balanced ratio of nitrogen, phosphorus, and potassium will support strong root and flower development.
Pest and Disease Monitoring
Regularly inspect your day lillies for common pests like aphids and thrips, as well as fungal diseases such as leaf streak. Early detection makes management easier. If you notice pest infestations, treat them promptly using insecticidal soap or neem oil, which are effective and environmentally friendly options. Maintaining good airflow around the plants and removing debris helps reduce disease risk.
Deadheading and Cleaning
To encourage continuous blooming, remove spent flowers by deadheading them as they fade. This prevents the plant from putting energy into seed production and redirects it toward new flower growth. In the fall, clear away dead or yellowing foliage to minimize places where pests can overwinter and to keep your garden tidy. This simple cleanup promotes healthier plants and a neater garden appearance come spring.
Troubleshooting Common Issues
Poor Blooming
If your divided day lillies are not blooming as expected, several factors could be at play. Insufficient sunlight is a common cause—day lillies need at least six hours of direct sun daily to produce vibrant flowers. Nutrient deficiencies can also limit blooming, so make sure you’re providing balanced fertilization. Additionally, overcrowding or planting the divisions too deep can stress the plants and reduce flower production. Checking and correcting these conditions often helps restore healthy blooms.
Yellowing Leaves
Yellow leaves on day lillies usually signal an underlying problem with water or nutrients. Overwatering or poor soil drainage can cause the roots to suffocate and the foliage to yellow. Make sure the planting site has well-drained soil and adjust watering habits to keep the soil moist but not soggy. Nutrient deficiencies, especially in nitrogen or iron, can also cause yellowing. If needed, supplement with appropriate fertilizers or soil amendments to correct imbalances.
Slow Growth
It’s normal for newly divided day lillies to grow slowly during their first season as they focus energy on root development rather than top growth or flowering. Proper aftercare—including regular watering, fertilizing, and weed control—will support their establishment. Patience is key; once the roots are well established, the plants will bounce back with vigorous growth and blooms in subsequent seasons.
How Often Should You Divide Day Lillies?
Most gardeners find that dividing their day lillies every three to five years helps keep the plants healthy and flowering abundantly. However, if your day lillies continue to bloom well and show no signs of overcrowding or decline, you can wait longer between divisions. The key is to monitor your plants regularly—watch for signs like dense clumps, reduced flower production, or poor growth—to decide when it’s time to divide again. Proper timing ensures your day lillies stay vigorous and your garden stays vibrant.
Can You Divide Day Lillies in the Summer?
Yes, late summer is actually a good time to divide day lillies, particularly once they have finished blooming for the season. Dividing at this time allows the plants to recover and establish new roots before cooler fall temperatures arrive. However, it’s important to avoid dividing during periods of intense heat or heat waves, as high temperatures can stress the plants and slow their recovery. If you need to divide day lillies during hot weather, be sure to provide extra water and, if possible, some afternoon shade to help reduce transplant shock and support healthy growth.
Best Varieties to Divide and Replant
Stella de Oro
Stella de Oro is a compact day lilly variety prized for its ability to bloom repeatedly throughout the growing season. Its manageable size and vigorous growth habit make it especially responsive to division. This variety works beautifully as a border plant and benefits from periodic dividing to maintain its blooming performance and shape.
Happy Returns
Happy Returns is well-loved for its bright lemon-yellow flowers and long blooming period. It divides easily, making it an excellent choice for gardeners looking to multiply their plants or refresh crowded clumps. Dividing this variety helps extend its flowering vigor and keeps it looking fresh year after year.
Pardon Me
Pardon Me is a dwarf day lilly cultivar with striking red flowers. Despite its smaller size, it thrives when divided every few years, which encourages healthier growth and more abundant blooms. This variety is perfect for smaller garden spaces or container planting, where maintaining vitality through division is especially beneficial.
Catherine Woodbury
Catherine Woodbury features soft lavender-pink blooms and a larger, more spreading growth habit. Its size and vigorous nature make it an ideal candidate for division and propagation. Dividing this variety not only controls its spread but also rejuvenates the plants, promoting strong growth and beautiful flower displays.
Can You Divide Day Lillies in Containers?
Yes! Container-grown day lillies can also be divided when they become root-bound. Simply follow the same steps: remove, divide, and replant in fresh potting soil with good drainage.
Benefits of Replanting Divided Day Lillies
Faster Growth
When day lillies are divided and replanted with adequate spacing, they establish more quickly in their new location. Giving each division enough room to grow allows roots to spread freely and access nutrients efficiently, which promotes faster and healthier growth compared to overcrowded clumps.
Garden Design Flexibility
Dividing day lillies provides you with additional plants that can be used to fill empty spots in your garden, create attractive borders, or design themed beds based on flower color or bloom time. This flexibility helps you customize your landscape and achieve a more balanced and visually appealing garden layout.
Cost Savings
Replanting divided day lillies is a budget-friendly way to expand your garden without purchasing new plants. By propagating from your existing healthy clumps, you can increase your collection or share plants with friends and neighbors, saving money while enhancing your garden’s beauty.
Mistakes to Avoid When Dividing Day Lillies
Dividing Too Early or Too Late
One common mistake is dividing day lillies during extreme weather conditions. Avoid working with them in the heat of summer or the cold of winter. The best times to divide are early spring, just as growth begins, or late summer after flowering has finished. Dividing at these times reduces transplant shock and helps plants establish more successfully.
Overcrowding in Replanting
When replanting divisions, it’s important not to crowd them. Plant each division about 18 to 24 inches apart. This spacing allows for good air circulation, reducing disease risk, and gives each plant enough room to grow vigorously without competing for nutrients and water.
Ignoring Soil Quality
Day lillies prefer rich, well-drained soil. Avoid replanting divisions in compacted or poor-quality soil, which can stunt growth and increase susceptibility to root diseases. Preparing the soil with organic matter before planting improves drainage and fertility, giving your plants the best start.
Not Trimming Foliage
Failing to trim back the leaves before replanting is another mistake. Keeping long foliage increases water loss and stresses the plant during transplanting. Cutting leaves back to about 6 to 8 inches helps reduce moisture loss and allows the roots to focus on establishing themselves in their new spot.
FAQs About Dividing Day Lillies
Do I Have to Divide Day Lillies?
While not mandatory, dividing helps maintain healthy, blooming plants.
How Long Does It Take for Divided Day Lillies to Bloom?
Most will bloom the following season, but some may take up to a year to reestablish.
Can I Divide Day Lillies in the Rain?
It’s best to avoid very wet conditions to prevent soil compaction and root rot.
Conclusion
Dividing day lillies is a simple yet powerful way to rejuvenate your garden and multiply your favorite plants. By understanding when and how to divide day lillies and replant them for maximum growth, you can ensure your perennials remain vibrant, healthy, and full of blooms year after year. Whether you’re an experienced gardener or just getting started, this rewarding process is well worth the effort.
Start planning your next division project today, and enjoy a more beautiful garden tomorrow!